
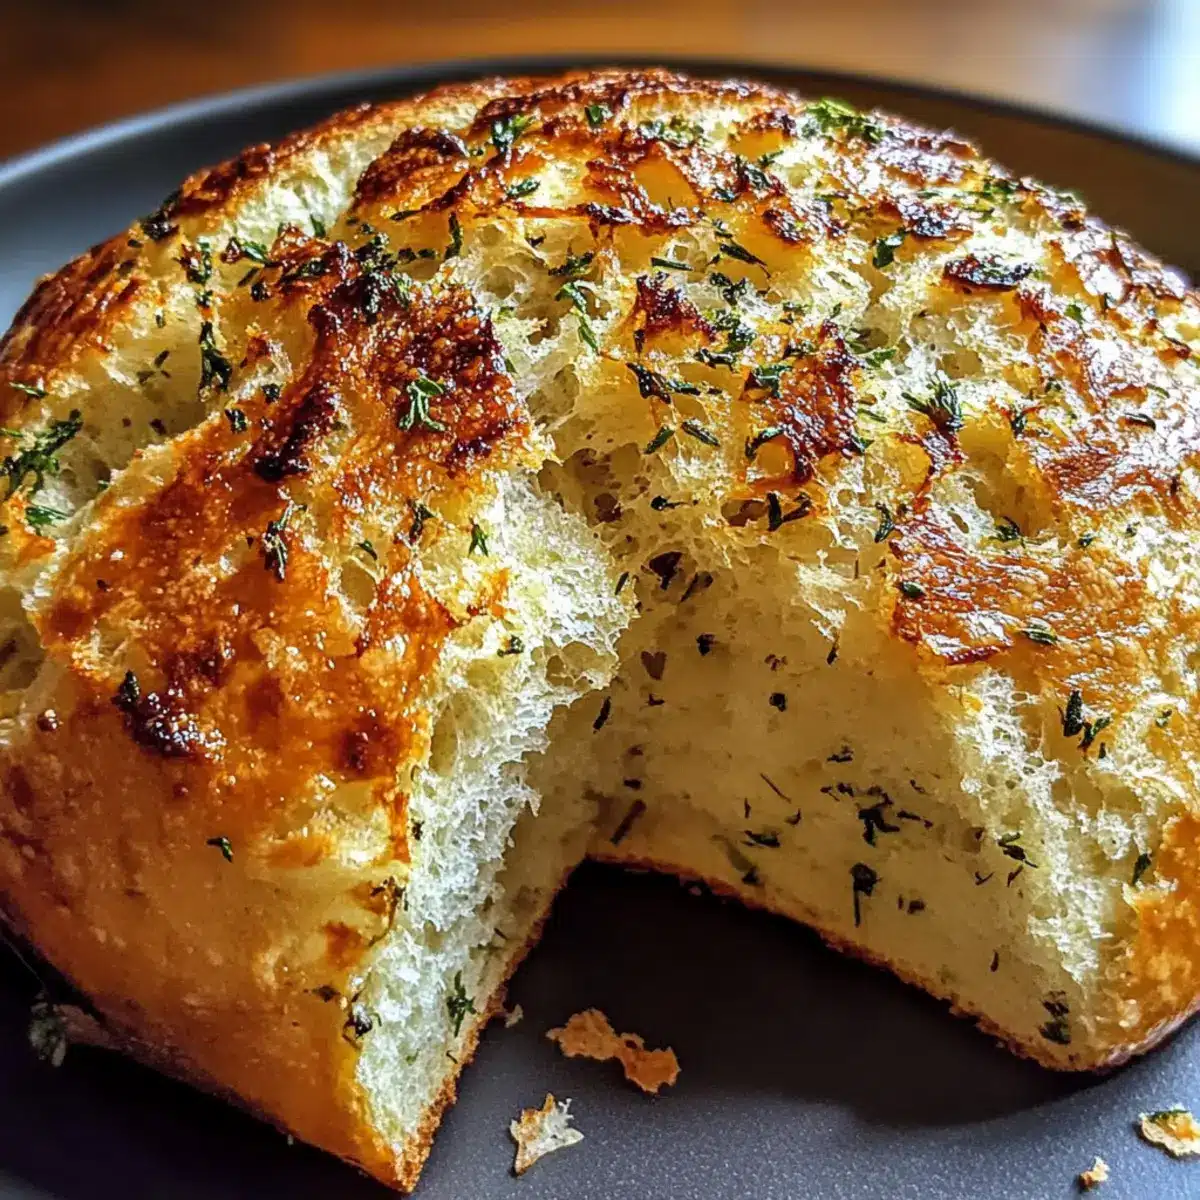
A warm, tantalizing aroma filled my kitchen as I pulled out a loaf that looked unassuming at first glance. But the moment I cracked its golden crust, the magic of my Irresistibly Soft and Crusty Garlic Herb Dutch Oven Bread was revealed. This artisan bread, with its delightful herb-infused interior, is nothing short of a culinary triumph. Not only is it easy to create with just a handful of ingredients, but it’s also a perfect addition to any meal — whether you’re savoring it alongside a hearty soup or enjoying it warm with a pat of butter. Forget about store-bought bread; this homemade gem is a game-changer. Curious to discover how you can bring that bakery-quality crust to your own table? Let’s get baking!
Why is this bread a must-try?
Heavenly Aroma: Imagine the scent of garlic and herbs wafting through your kitchen as this bread bakes. It transforms meal routines into culinary experiences!
Artisan Quality at Home: This recipe allows you to craft a bakery-style loaf without any special equipment or skills, making it accessible for everyone.
Perfect for Any Meal: Whether paired with a comforting soup or served warm as an appetizer, this bread effortlessly elevates any dish—just like the warmth of a Cheddar Garlic Herb soup.
Versatility with Ingredients: Feel free to swap in your favorite herbs or add cheese for a tantalizing twist—imagine a cheesy garlic bread that complements a classic Healthy Garlic Parmesan!
Easy, Time-Saving Process: A straightforward method that requires minimal hands-on time means you can enjoy freshly baked bread with very little fuss.
Soft and Crusty Garlic Herb Ingredients
• Here are the essential ingredients you’ll need to create your soft and crusty garlic herb masterpiece!
For the Bread
- All-Purpose Flour – Provides structure and base for the bread; bread flour can be used for extra chewiness.
- Salt – Enhances flavor and strengthens gluten structure; essential for taste, but can be left out for dietary restrictions.
- Instant Yeast – Responsible for leavening, creating a light and airy crumb; active dry yeast can be used if proofed first.
- Warm Water (110°F/43°C) – Hydrates ingredients and activates yeast; this temperature is key for optimal results.
- Olive Oil – Adds flavor and achieves a tender crust; melted butter is a great alternative for a richer taste.
For Flavor
- Garlic (minced) – Infuses the bread with savory flavor; adjust based on your garlic love!
- Fresh Rosemary – Offers warmth and aromatic notes; you can substitute with dried rosemary (1 tbsp fresh = 1 tsp dried).
- Fresh Thyme – Adds subtle herbaceousness; dried thyme can be used in the same amount.
- Dried Oregano – Complements the other herbs with its earthiness; adjust the quantity to your taste.
- Black Pepper – Provides a mild heat; optional for those who prefer less spice.
For Garnish
- Sea Salt – Sprinkled on top for flavor and presentation; optional but recommended for an extra touch!
Step‑by‑Step Instructions for Soft and Crusty Garlic Herb
Step 1: Mix Dry Ingredients
In a large mixing bowl, combine 4 cups of all-purpose flour, 2 teaspoons of salt, and 2 teaspoons of instant yeast. Use a whisk to ensure even distribution, creating a well-blended mixture. The flour should appear uniform without clumps. This mix lays the foundation for your Soft and Crusty Garlic Herb Dutch Oven Bread.
Step 2: Combine Wet Ingredients
In a separate bowl, whisk together 1¼ cups of warm water (between 110°F/43°C), ¼ cup of olive oil, and 4 cloves of minced garlic along with 1 tablespoon each of fresh rosemary, thyme, and oregano. Mixing these ingredients infuses the oil with aromatic flavors that will enhance your bread. Once smooth, pour this mixture into the dry ingredients.
Step 3: Form the Dough
Stir the wet mixture into the flour mixture using a wooden spoon or spatula until a shaggy dough forms. This should take about 1-2 minutes. The dough will be sticky, but that’s exactly what you want for a soft texture. Once combined, avoid over-mixing to maintain air pockets necessary for the perfect rise.
Step 4: Let it Rise
Cover the bowl with plastic wrap or a kitchen towel and let the dough rise at room temperature for 12-18 hours. You’ll know it’s ready when it has doubled in size and is bubbly on top. The long rising time allows the flavors to develop and creates that mouthwatering aroma associated with fresh Soft and Crusty Garlic Herb bread.
Step 5: Shape the Bread
After the rise, generously flour a clean work surface and gently turn the risen dough onto it. Shape it into a round boule by folding it inwards from the edges. Cover the shaped dough with a towel and let it rest for one hour while preparing to bake, which helps to enhance the texture of your bread.
Step 6: Preheat the Oven
Preheat your oven to 450°F (232°C) and place a Dutch oven inside to heat up. This step is crucial to achieving a crusty exterior when baking your Soft and Crusty Garlic Herb bread. The preheated pot will create steam, resulting in that perfect artisan crust.
Step 7: Prepare for Baking
Once heated, carefully remove the Dutch oven and coat the bottom with olive oil to prevent sticking. Gently place the dough inside the pot, seam-side down. It’s okay if the dough doesn’t look perfect; artisanal bread has its character! Cover it with the lid and prepare to bake.
Step 8: Bake the Bread
Put the covered Dutch oven back into the oven and bake for 30 minutes. After that, remove the lid and bake for an additional 15-20 minutes until the bread turns a beautiful golden brown. You’ll want the crust to look crackled and inviting, signaling that your Soft and Crusty Garlic Herb bread is nearing completion.
Step 9: Cool and Serve
Carefully lift the bread out of the Dutch oven and transfer it to a wire rack. Allow it to cool for at least 30 minutes before slicing. This cooling period is essential for the texture; cutting it too soon can result in a gummy crumb. Once cooled, slice, and enjoy your fresh, homemade bread!
Storage Tips for Soft and Crusty Garlic Herb Bread
Room Temperature: Store your bread in an airtight container at room temperature for up to 3 days to maintain freshness and flavor.
Freezer: For longer preservation, slice the bread and freeze in an airtight bag. It can be kept for up to 3 months; toast slices directly from frozen for the best crust.
Reheating: To enjoy leftover bread, reheat slices in a toaster or an oven at 350°F (175°C) for 5-10 minutes to revive its crispness and warm flavors.
Wrap Carefully: If not using immediately, wrap the whole loaf in foil to prevent it from drying out while still allowing the crust to retain its desirable crunch.
Make Ahead Options
These Soft and Crusty Garlic Herb Dutch Oven Breads are perfect for busy home cooks seeking to streamline their meal prep! You can prepare the dough up to 24 hours in advance by following the initial mixing and rising steps, then wrap it tightly with plastic wrap and refrigerate overnight to enhance the flavors. When you’re ready to bake, allow the dough to come to room temperature for about 30 minutes before shaping it into a round boule and letting it rest for another hour. This way, you’ll achieve just as delicious a loaf with minimal effort, making your baking experience quicker and more enjoyable.
Expert Tips for Soft and Crusty Garlic Herb Bread
-
Proper Temperature: Always ensure your warm water is around 110°F (43°C); higher temperatures may kill the yeast, preventing your dough from rising effectively.
-
Patience is Key: Allow the dough to rise for the full 12-18 hours; this extended fermentation enhances the flavor and texture of your Soft and Crusty Garlic Herb bread.
-
Use a Well-Floured Surface: When shaping the dough, flour your work surface generously to prevent sticking, ensuring a smooth transition from dough to boule.
-
Don’t Rush the Cooling Process: Resist the temptation to slice the bread immediately. Letting it cool for at least 30 minutes ensures that the crumb structure sets beautifully.
-
Experiment with Herbs: Feel free to mix and match herbs to create your unique flavor profile; just remember to maintain the balance to complement the garlic in your bread.
What to Serve with Irresistibly Soft and Crusty Garlic Herb Dutch Oven Bread
Get ready to craft a delightful meal that complements the warmth and aroma of your freshly baked loaf.
-
Creamy Tomato Soup: The acidity of the soup beautifully balances the garlic herbs, making each bite of bread utterly irresistible. Dipping your bread into the rich, creamy tomato goodness is a soul-warming experience.
-
Herbed Olive Oil Dip: Whisk together olive oil, balsamic vinegar, and fresh herbs for a zestful twist. It invites your garlic herb bread to be the star of the appetizer table, enchanting all who taste it.
-
Mixed Green Salad: Crisp greens with vinaigrette provide a refreshing contrast to the soft and crusty bread. With each crunch, you create a harmonious balance of flavors and textures.
-
Charcuterie Board: Include an array of cheeses, cured meats, and fruits. The savory bites will elevate your bread to new heights, transforming a simple loaf into a culinary sensation.
-
Savory Cheese Fondue: Dive your bread into gooey, melted cheese, creating a fun and interactive dining experience. This warm dish pairs perfectly with the soft texture of the garlic herb bread.
-
Garlic Butter Shrimp: Juicy shrimp sautéed in garlic butter harmonize beautifully with your bread’s flavors. The juicy seafood allows you to soak up every bit of that buttery sauce.
-
Chili or Stew: The heartiness of a rich, spicy chili or a comforting beef stew is ideal for a side pairing. Your bread will serve perfectly to mop up all the delicious, flavorful broth.
-
Fresh Fruit Salad: For dessert, a refreshing fruit medley can cleanse the palate. It’s a sweet contrast to the savory notes of your bread and rounds out your meal perfectly.
Soft and Crusty Garlic Herb Variations
Feel free to let your culinary instincts shine! There’s so much deliciousness waiting just beyond the classic recipe.
-
Cheesy Garlic: Mix in 1 cup of shredded cheese, like mozzarella or cheddar, for a melty surprise inside. Imagine tearing into warm, gooey cheese amidst the herb-infused goodness!
-
Herb Medley: Substitute an equal mix of fresh basil and sage for a Mediterranean twist. These herbs lend a bright, aromatic flavor that dances on the palate.
-
Spicy Kick: Add a pinch of chili flakes or cayenne pepper to the dough for an exciting heat that contrasts beautifully with the garlic. It’s the perfect way to awaken your taste buds!
-
Olive Delight: Fold in a handful of chopped olives before baking for a briny, savory burst. Think of each slice delivering a little Mediterranean sunshine to your meal.
-
Nutty Seeds: Sprinkle pumpkin or sunflower seeds on top before baking for added texture and a nutty flavor punch. The crunch will be a delightful surprise!
-
Sweet Touch: For an unexpected twist, add a tablespoon of honey into the wet ingredients, creating a subtly sweet flavor that pairs wonderfully with savory dishes, or even with a warm soup like Cheddar Garlic Herb.
-
Garlic Lovers Extra: If you’re a garlic enthusiast, increase the minced garlic to 6-8 cloves. This will intensify that flavor profile and ensure no taste bud is left behind!
-
Herbed Butter Spread: Before serving, whip up a herbed butter using softened butter, minced garlic, and your favorite fresh herbs. Spread it on warm slices for an extra touch of indulgence! It’s like a dreamy fusion of your loaves and Sticky Garlic Chicken flavors.
These variations will transform your Soft and Crusty Garlic Herb Dutch Oven Bread into a delightful showcase of creativity! Explore these twists and discover what speaks to your palate.
Soft and Crusty Garlic Herb Bread Recipe FAQs
How do I select the best garlic for this recipe?
Absolutely! When selecting garlic, look for firm, plump bulbs with smooth skins and no dark spots. Fresh garlic should feel heavy for its size with a potent aroma, which indicates high quality. Avoid any bulbs that are sprouting or show signs of mold, as these can affect the flavor of your bread.
How do I store leftover garlic herb bread?
To keep your Soft and Crusty Garlic Herb bread fresh, store it in an airtight container at room temperature for up to 3 days. If you want to extend its shelf life, it’s best to slice the bread first, then wrap it in foil or place in a resealable bag and freeze. This way, it can last for up to 3 months! To enjoy it, just toast slices directly from the freezer to revive that crusty exterior.
Can I freeze the dough before baking?
Yes, you can freeze the dough, but follow these steps for the best results: After the initial rise, shape the dough into a round boule, then wrap it tightly in plastic wrap and place it in a freezer-safe bag. It can be frozen for up to 3 months. When you’re ready to bake, allow it to thaw in the refrigerator overnight, then let it come to room temperature and rise for 1-2 hours before baking. This ensures a beautifully risen loaf!
What should I do if my bread doesn’t rise?
Very! If your bread doesn’t rise, check two main factors: First, make sure your yeast is fresh; old yeast may not be active. Secondly, check the warmth of your water. It needs to be around 110°F (43°C) to activate the yeast properly. If your dough has risen but is dense, the flour may have been overworked; in that case, mix only until combined next time for a lighter texture.
Can I make this recipe gluten-free?
Yes, you can! I recommend using a gluten-free all-purpose flour blend that contains xanthan gum—this helps mimic the elasticity of gluten. Keep in mind that gluten-free dough may have a different texture and might require slight adjustments in hydration levels. Use the same measurements, but be attentive to achieving a dough that’s sticky yet workable.
Is this bread safe for my pet?
Always consult your vet before sharing any human food with pets. Bread in moderation is generally safe for dogs, but avoid giving them anything with garlic, as it can be toxic in large quantities. If you want to share, keep it plain and ensure it’s free from any additives or spices that might upset your pet’s stomach.
Soft and Crusty Garlic Herb Bread That'll Crush Your Cravings
Ingredients
Equipment
Method
- In a large mixing bowl, combine 4 cups of all-purpose flour, 2 teaspoons of salt, and 2 teaspoons of instant yeast.
- In a separate bowl, whisk together 1¼ cups of warm water, ¼ cup of olive oil, and 4 cloves of minced garlic along with 1 tablespoon each of fresh rosemary, thyme, and oregano.
- Stir the wet mixture into the flour mixture using a wooden spoon until a shaggy dough forms.
- Cover the bowl and let the dough rise at room temperature for 12-18 hours.
- Generously flour a clean surface and gently turn the dough onto it, shaping it into a round boule.
- Preheat your oven to 450°F and place a Dutch oven inside to heat up.
- Remove the Dutch oven, coat the bottom with olive oil, and gently place the dough inside, seam-side down.
- Cover and bake for 30 minutes, then remove the lid and bake for an additional 15-20 minutes until golden brown.
- Allow the bread to cool for at least 30 minutes before slicing.
Leave a Reply