
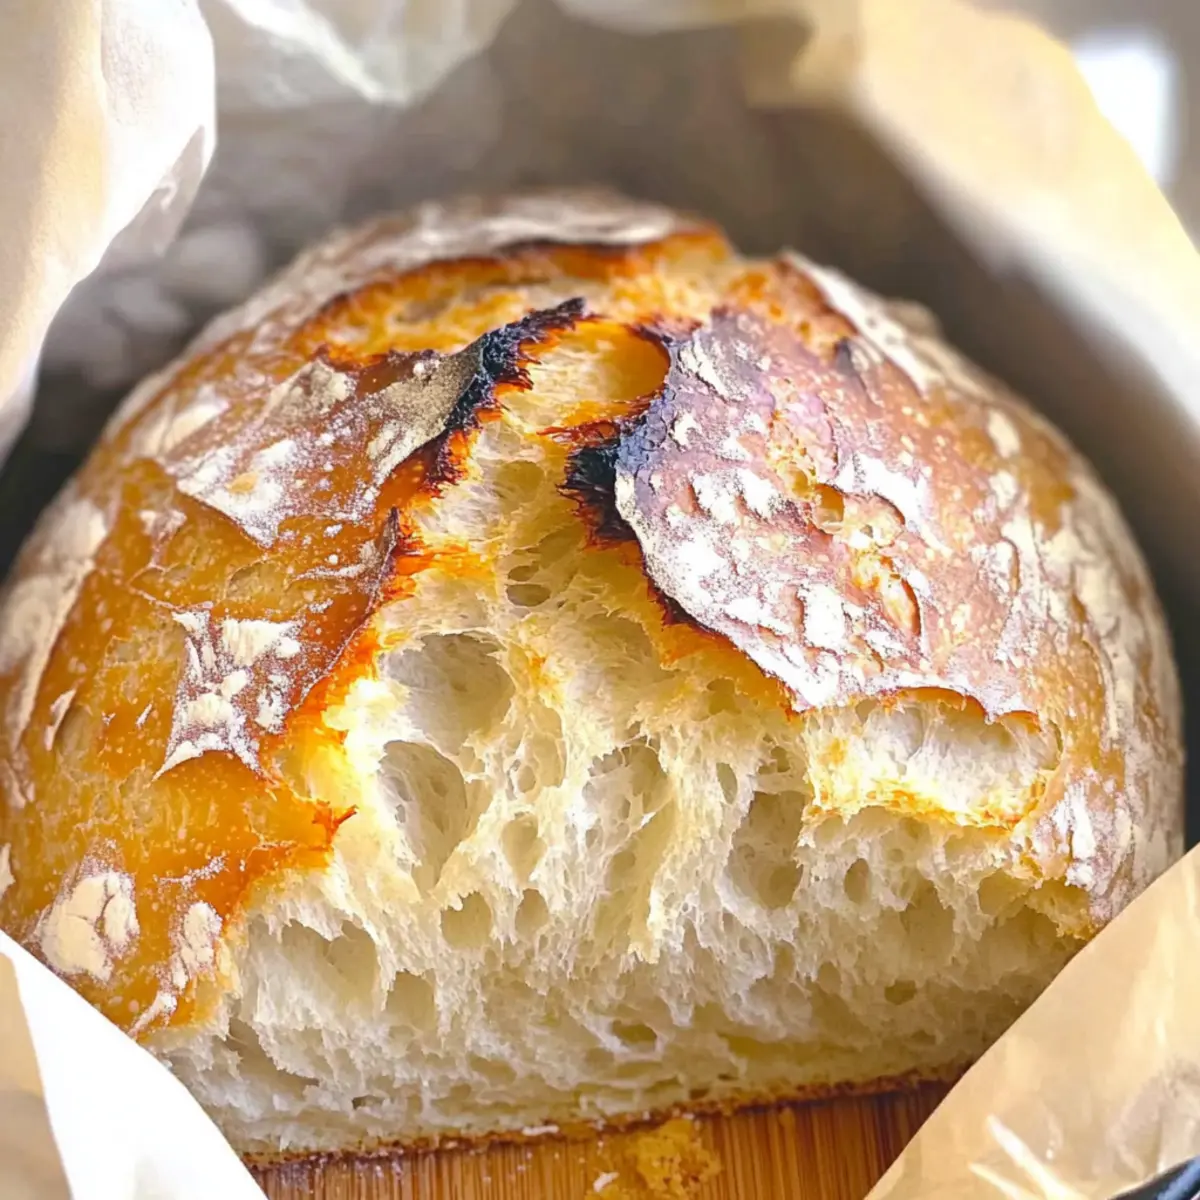
As the inviting scent of fresh bread wafts through your home, it feels like a warm embrace from the kitchen. I still remember the first time I successfully pulled off making a loaf of Easy No Knead Dutch Oven Bread. This beginner-friendly recipe is not only easy to whip up, but the reward—a gorgeous, crusty loaf with a soft, chewy interior—is undeniably satisfying. With just a handful of ingredients and minimal effort, you can create bakery-style bread that elevates any meal. Whether enjoyed alongside a hearty soup or toasted with butter for a delightful breakfast, this bread is the perfect companion for cozy dinners. Curious about how to turn your kitchen into a comforting haven with this simple recipe? Let’s dive in!
Why is This Bread So Amazing?
Effortless Baking: This no knead bread makes homemade baking accessible for everyone, even those with little experience.
Minimal Ingredients: With just four pantry staples, you’ll appreciate the simplicity of this recipe.
Artisan Appeal: The Dutch oven creates a perfectly crispy crust while keeping the inside wonderfully soft, resembling your favorite bakery bread.
Versatile Enjoyment: Pair it with soups, stews, or simply slather with butter and jam; this bread shines at any meal.
Time-Saving Magic: Letting the dough rise overnight means you can wake up to fresh bread with minimal morning effort; what could be better?
Looking for a cozy dinner idea? Serve this alongside a warm bowl of Moist Pumpkin Bread for an extra touch of comfort!
No Knead Dutch Oven Bread Ingredients
For the Dough
- Warm Water – Activates the yeast, ensuring the perfect rise; make sure it’s warm, not hot.
- All-Purpose Flour – The foundation of your bread, yielding a desirable texture; no substitutes are recommended for the best results.
- Fine Grain Salt – Enhances the flavor and controls yeast activity; essential for balancing the taste profile.
- Yeast (1 packet) – The magic leavening agent that makes your loaf rise; opt for fresh yeast for optimal results.
With these simple ingredients, you’ll be on your way to making delightful No Knead Dutch Oven Bread that surpasses any store-bought option!
Step‑by‑Step Instructions for No Knead Dutch Oven Bread
Step 1: Prepare the Dough
In a large mixing bowl, combine 1 and 1/2 cups of warm water, one packet of yeast, and 1 and 1/2 teaspoons of fine grain salt. Stir gently until dissolved. Gradually mix in 3 cups of all-purpose flour, using a wooden spoon until a sticky dough forms, free from dry flour. This dough should be moist and shaggy, setting up the perfect foundation for your No Knead Dutch Oven Bread.
Step 2: Let It Rise
Cover the bowl tightly with plastic wrap or a kitchen towel to prevent drafts. Allow the dough to rise at room temperature for 12 to 18 hours. You’re aiming for a bubbly surface and a dough that has roughly doubled in size. This slow fermentation is key, developing flavor and texture that makes your No Knead Dutch Oven Bread truly special.
Step 3: Preheat the Dutch Oven
About 30 minutes before your dough is ready, preheat your oven to 450°F (230°C) with a large Dutch oven inside, including the lid. The Dutch oven must be hot to create that perfect crust while baking. This heat ensures the steam captured during cooking contributes to a crusty exterior, vital for baking the ideal loaf of No Knead Dutch Oven Bread.
Step 4: Shape the Dough
Once your dough has risen beautifully, lightly flour a clean work surface and your hands. Gently turn the stick dough onto the floured surface, avoiding aggressive handling. Shape the dough into a round loaf, using flour to prevent sticking. This step is essential for achieving the artisan look and feel of your No Knead Dutch Oven Bread while maintaining that airy texture.
Step 5: Bake the Bread
Carefully remove the preheated Dutch oven from the oven, and place the shaped dough inside. Cover it with the lid and bake for 30 minutes. Then, remove the lid and bake for another 15 to 20 minutes, until the crust is deep golden brown. This method of baking captures steam, creating a beautiful crust—exactly what you want for a loaf of No Knead Dutch Oven Bread.
Step 6: Cool and Serve
Once baked, carefully transfer your bread to a wire rack to cool for at least 30 minutes. This cooling period lets the crumb set properly, enhancing the texture of your bread. After cooling, slice and enjoy the warm, crusty No Knead Dutch Oven Bread, whether you indulge in it straight away or save it for a delightful meal alongside your favorite dishes.
No Knead Dutch Oven Bread Variations
Feel free to personalize your bread experience with these exciting variations, transforming every loaf into something uniquely yours!
-
Herb Bread: Add dried or fresh herbs like rosemary or thyme into the dough for a fragrant twist. The earthy aromas will make your kitchen feel like a cozy Italian bistro!
-
Cheesy Bread: Incorporate shredded cheese such as cheddar or parmesan prior to the rising phase for a savory delight. Imagine biting into a warm slice, gooey cheese melting in your mouth!
-
Seeded Crust: Sprinkle sesame seeds or an everything bagel seasoning blend on top before baking for added flavor and crunch. This brings a delightful texture and taste that enhances every bite.
-
Whole Wheat: Swap a portion of the all-purpose flour for whole wheat flour for a heartier, nuttier flavor. This variation adds a nutritious boost while still maintaining that beloved crusty exterior.
-
Sweet Bread: Mix in ¼ cup of honey or sugar and add cinnamon for a delightful sweet loaf. Perfect for breakfast, it pairs beautifully with butter and jam or even cream cheese!
-
Spicy Twist: Add chopped jalapeños or crushed red pepper flakes into the dough for a zesty kick. It’s a beautiful way to elevate your breakfast or brunch experience.
-
Olive Oil: Drizzle in some olive oil while mixing for an extra depth of flavor. This adds a subtle richness that complements the crunchy crust beautifully.
-
Garlic Infusion: Toss in minced garlic or garlic powder to the dough for that comforting garlicky aroma. Serve it warm, and you’ll evoke memories of your favorite restaurant breadsticks.
Ready to explore these options? The world of homemade bread awaits you, and don’t forget to pair your creation with a comforting dish like Moist Pumpkin Bread to truly savor your baking achievement!
Make Ahead Options
These No Knead Dutch Oven Bread options are perfect for busy cooks seeking time-saving strategies! You can prepare the dough up to 24 hours in advance, letting it rise overnight in the refrigerator. This slow fermentation not only saves time but also enhances the flavor. Just make sure to cover the bowl tightly with plastic wrap to prevent drying out. When you’re ready to bake, simply take the dough out, allow it to come to room temperature for about 30 minutes, preheat your Dutch oven, shape the dough, and follow the usual baking instructions. This way, you can have warm, homemade bread with minimal effort, any day of the week!
What to Serve with No Knead Dutch Oven Bread
There’s nothing quite like a warm, crusty loaf to complete your meal, elevating every bite with its delightful texture and flavor.
- Hearty Chicken Soup: The warmth and depth of flavors in chicken soup pair beautifully with the crusty exterior and soft interior of the bread.
- Garlic Butter Roasted Vegetables: Their caramelized sweetness balances the rustic taste of the bread, creating a vibrant side that’s hard to resist.
- Colossal Caesar Salad: Crisp romaine and tangy dressing contrast with the rich, chewy texture of the bread, providing a fresh, zesty complement.
- Homemade Tomato Basil Sauce: Enjoy dipping slices into this aromatic sauce, allowing the bread to soak up the juicy flavors.
- Savory Cheese Platter: A selection of cheeses adds a delightful creaminess that pairs well with the crusty loaf, making it perfect for sharing.
- Cozy Red Wine: A bold red wine enhances the warmth of your meal, bringing a touch of indulgence and sophistication to your dining experience.
- Fresh Berry Salad: A light, refreshing salad with berries and a hint of honey balances the richness of the bread, providing a delightful contrast.
- Lemon Sorbet: A scoop of lemon sorbet offers a refreshing end to your meal, cutting through the savory notes and cleansing the palate.
Storage Tips for No Knead Dutch Oven Bread
Room Temperature: Store loosely wrapped in a cloth or paper towel for up to 2 days. This keeps the crust crispy while preventing it from becoming too stale.
Fridge: For extended freshness, place in an airtight container for up to 5 days. While it might soften the crust, it’s still delicious when toasted.
Freezer: Wrap tightly in plastic wrap and aluminum foil or place in airtight bags, freezing for up to 2 months. Thaw overnight in the fridge before reheating.
Reheating: For the best results, reheat slices in a preheated oven or toaster until warmed through, reviving that bakery-fresh texture in your No Knead Dutch Oven Bread.
Expert Tips for No Knead Dutch Oven Bread
-
Fresh Ingredients: Use fresh yeast to ensure your dough rises well. Stale yeast can lead to flat, dense bread.
-
Proper Rising Time: Letting the dough rise for the full 12 to 18 hours is crucial for developing flavor and texture; don’t rush this step.
-
Avoid Excess Flour: Resist the urge to add too much flour when shaping the dough. Over-flouring can result in a heavy, flat loaf of No Knead Dutch Oven Bread.
-
Hot Dutch Oven: Preheating your Dutch oven is key. A hot vessel creates steam, resulting in a crusty exterior while keeping the inside moist.
-
Cooling Time: Allow the bread to cool for at least 30 minutes before slicing. This helps set the crumb and prevents a gummy texture.
No Knead Dutch Oven Bread Recipe FAQs
How do I select the right flour for my No Knead Dutch Oven Bread?
Choosing the right flour is crucial! I recommend using all-purpose flour for its balanced gluten content that creates the ideal structure and texture in your bread. Avoid substitutes, as they can alter the final product drastically.
What’s the best way to store leftover bread?
Absolutely! To keep your No Knead Dutch Oven Bread fresh, wrap it loosely in a cloth or paper towel and store at room temperature for up to 2 days. For longer storage, place it in an airtight container in the fridge for up to 5 days or freeze it for up to 2 months. Just be sure to wrap it tightly in plastic wrap and aluminum foil to prevent freezer burn.
Can I freeze the dough before baking?
Very much so! To freeze your dough, follow these steps: After your dough has risen, shape it into a loaf and wrap it tightly in plastic wrap. You can freeze the shaped dough for up to 3 months. When you’re ready to bake, thaw in the fridge overnight and let it rise again on the counter for about 1-2 hours before baking as directed.
What should I do if my dough doesn’t rise properly?
If your dough isn’t rising, check the yeast! Make sure it’s fresh and properly activated by mixing it with warm water (not hot) and a bit of sugar before combining it with the flour. If the dough is rising too slowly, try moving it to a warmer spot in your kitchen. A perfect rise is essential for achieving that airy, chewy texture.
Is this recipe suitable for those with gluten allergies?
While this No Knead Dutch Oven Bread contains gluten, you can experiment with gluten-free all-purpose flour for a gluten-free version. Ensure that the flour blend contains xanthan gum, as this will help mimic the elasticity of gluten. Remember, though, that the texture might differ slightly from traditional bread.
How can I achieve a better crust on my bread?
To get that perfect crust, make sure to preheat your Dutch oven with the lid on for about 30 minutes before adding the dough. This step generates steam inside the pot during the initial bake—crucial for a beautifully crusty exterior. After the first 30 minutes, remove the lid to allow the crust to brown and crisp up further.
Effortless No Knead Dutch Oven Bread for Beginners
Ingredients
Equipment
Method
- In a large mixing bowl, combine 1.5 cups of warm water, 1 packet of yeast, and 1.5 teaspoons of fine grain salt. Stir gently until dissolved. Gradually mix in 3 cups of all-purpose flour until a sticky dough forms.
- Cover the bowl tightly with plastic wrap or a kitchen towel and let rise at room temperature for 12 to 18 hours until bubbly and doubled in size.
- Preheat your oven to 450°F (230°C) with a large Dutch oven inside, including the lid, 30 minutes before the dough is ready.
- Lightly flour a clean work surface and your hands. Turn the sticky dough onto the floured surface, shape into a round loaf.
- Carefully remove the preheated Dutch oven from the oven, place the shaped dough inside, cover with the lid, and bake for 30 minutes. Remove the lid and bake for another 15 to 20 minutes until deep golden brown.
- Transfer the bread to a wire rack to cool for at least 30 minutes before slicing and enjoying.
Leave a Reply