
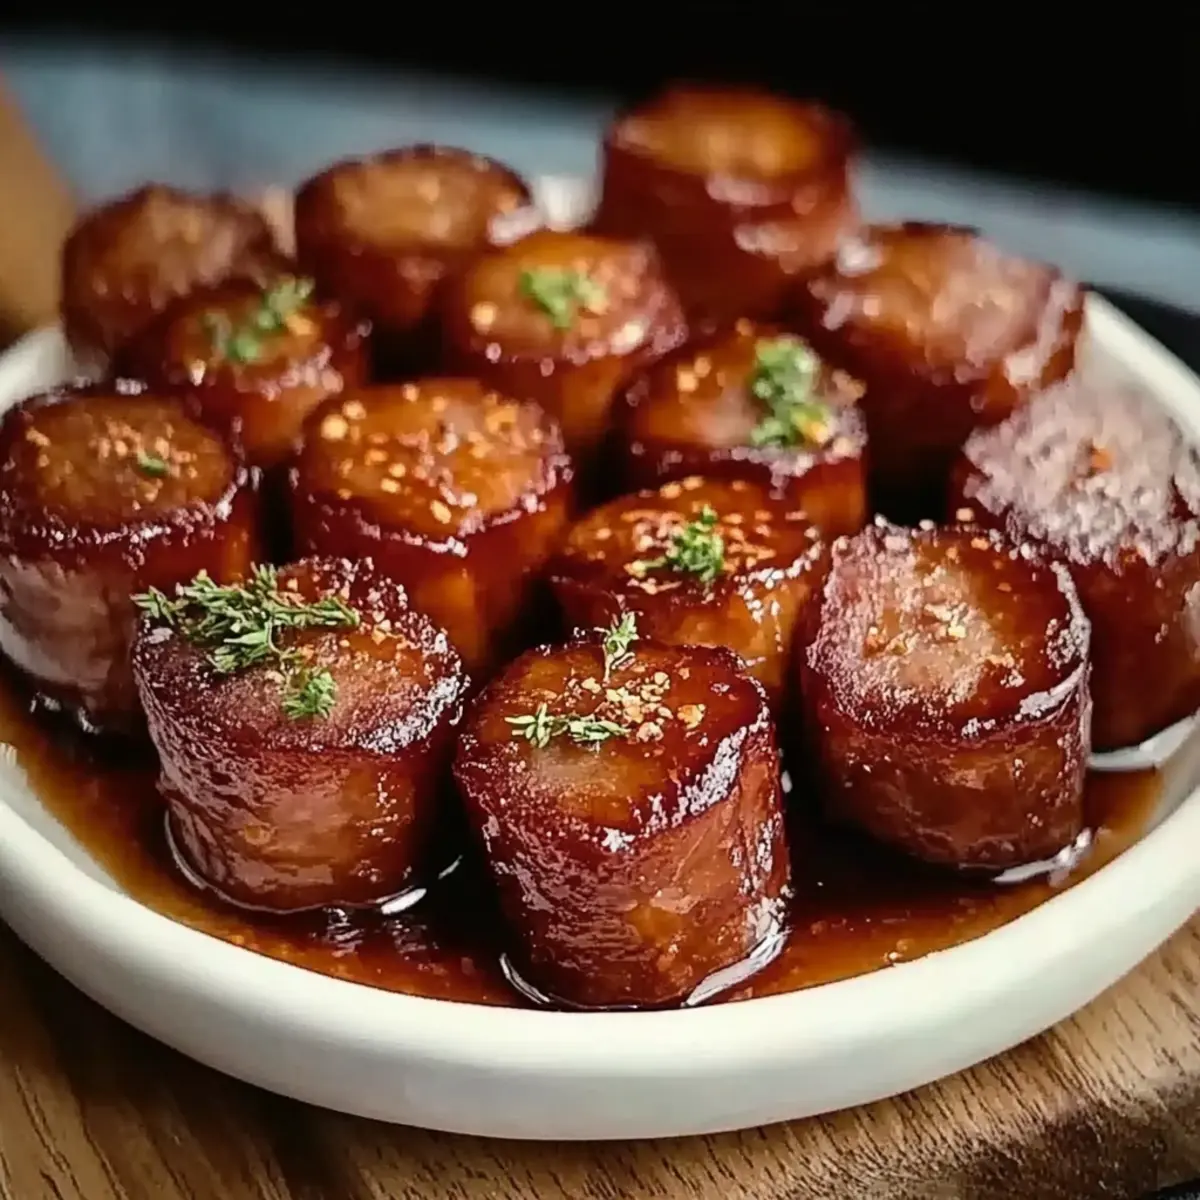
Who would have thought that kielbasa could transform into a party sensation? When I first experimented with Candied Kielbasa Bites, I was fascinated by how a simple glaze of brown sugar and barbecue sauce could elevate these bites into a sweet and savory marvel. Quick and easy to make in under 30 minutes, they’re perfect for gatherings or as an irresistible snack anytime. Picture the delighted faces of your friends and family as the caramelized aroma wafts through your kitchen! Beyond their tantalizing flavor, these bites are highly adaptable; swap in honey mustard for a zesty kick or toss in some roasted veggies for added nutrition. Curious about how you can get these delectable morsels onto your table? Let’s dive into the recipe!

Why Are Candied Kielbasa Bites So Irresistible?
Flavor Explosion: These bites bring an incredible sweet and savory flavor to your table, captivating taste buds with each bite.
Quick & Easy: Ready in just 30 minutes, even novice cooks can whip these up effortlessly, making them a go-to for last-minute gatherings.
Crowd Pleaser: Perfect for parties, these bites will disappear fast, leaving your guests raving about your culinary skills.
Versatility at Its Best: Customize them with honey mustard or add roasted veggies for nutrition, ensuring everyone can enjoy a version they love.
Make-Ahead Friendly: Prepare these bites ahead of time and store them easily—just warm them up for a delicious, hassle-free appetizer.Tortilla Pizza Rolls are another fantastic option if you’re looking to diversify your appetizer spread!
Candied Kielbasa Bites Ingredients
For the Bites
• Kielbasa Sausages – The star of the show, bringing a hearty protein element; consider turkey or chicken kielbasa as a lighter substitute.
• Brown Sugar – Creates that irresistible caramelized glaze; a little less can be used for a more balanced sweetness.
• Barbecue Sauce – Infuses the bites with tangy richness; switch it up with honey mustard for a unique twist in your Candied Kielbasa Bites.
• Dijon Mustard (optional) – Adds depth of flavor; feel free to skip if you like it milder.
• Garlic Powder – Boosts the savory profile; fresh minced garlic will enhance the flavor even further.
• Chili Flakes (optional) – Introduces a kick of heat; adjust to your preference or omit for a family-friendly version.
Step‑by‑Step Instructions for Candied Kielbasa Bites
Step 1: Prep the Kielbasa
Start by slicing the kielbasa sausages into bite-sized pieces, about 1-inch thick. This ensures that they’ll cook evenly and be easy to pop in your mouth. Use a sharp knife and a cutting board for safety, and place the cut pieces aside in a bowl, ready for cooking.
Step 2: Brown the Kielbasa
Heat a large skillet over medium heat and add the sliced kielbasa. Allow it to cook for about 5-7 minutes, stirring occasionally until the edges are slightly browned and crispy. You’ll know it’s ready when the sausages give off a mouthwatering aroma and take on a golden color, enhancing their flavor.
Step 3: Add Ingredients
Sprinkle the brown sugar evenly over the browned kielbasa in the skillet. Next, pour in the barbecue sauce and, if chosen, the Dijon mustard. Mix gently with a spatula to ensure each piece is coated in the sweet mixture. The colors will deepen as the ingredients come together, promising a flavorful candied glaze.
Step 4: Simmer
Lower the heat slightly to a simmer and let the mixture bubble away for 15-20 minutes, stirring occasionally. You’ll notice the sauce thickening and turning glossy as it clings to the kielbasa. When done, it should have a sticky consistency that glistens, enhancing the delicious candied effect.
Step 5: Serve
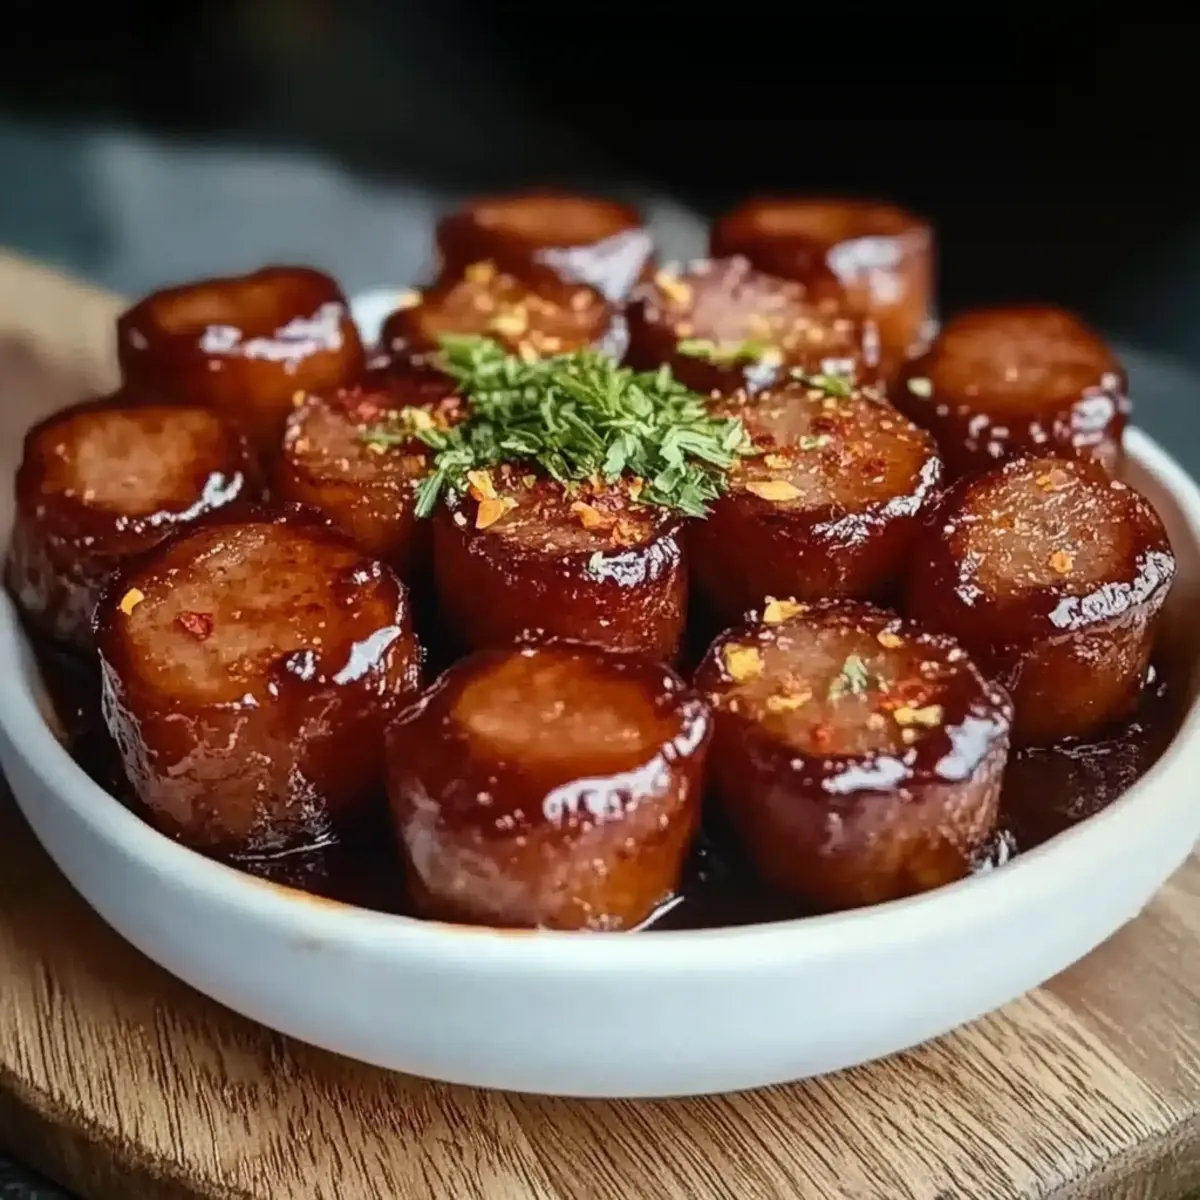
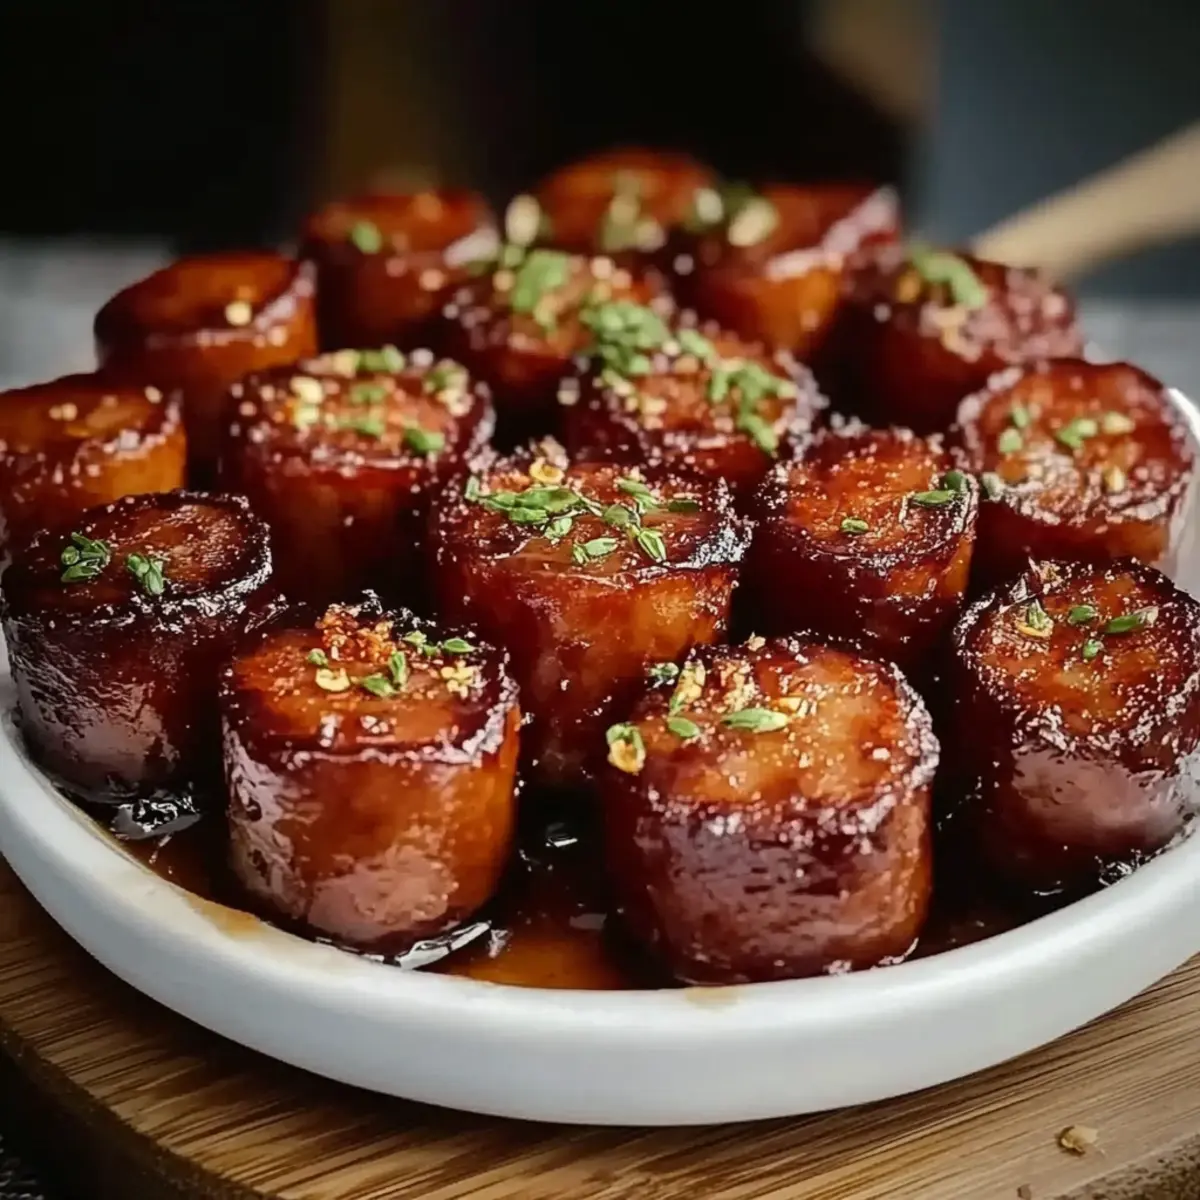
Once your Candied Kielbasa Bites are ready, taste and adjust the seasoning if necessary. Serve them warm in a large serving dish, and watch as your guests dive in—they’ll disappear quickly! Pair them with fresh veggies or crackers for a complete appetizer experience, perfect for any gathering.
Make Ahead Options
These Candied Kielbasa Bites are perfect for meal prep enthusiasts! You can slice the kielbasa and prepare the brown sugar glaze up to 24 hours in advance, storing them separately in the refrigerator to maintain their quality. When you’re ready to serve, simply brown the kielbasa and add the glaze to the pan, allowing it to simmer for 15-20 minutes until perfectly caramelized. This approach not only saves time during busy weekdays but also ensures your bites remain just as delicious with that sticky, sweet glaze everyone loves. With a little advance preparation, you’ll have a delectable appetizer ready to impress your guests in no time!
Candied Kielbasa Bites: Customize Your Dish
Feel free to tailor these bites to your taste buds for a truly personalized experience!
-
Turkey or Chicken Kielbasa: Swap the traditional kielbasa for turkey or chicken versions for a leaner, lighter option. You’ll still enjoy that delicious flavor but with fewer calories.
-
Honey Mustard Twist: Instead of barbecue sauce, use honey mustard for a tangy kick. It adds a sweet zing that elevates the flavor profile beautifully!
-
Add Crunchy Veggies: Mix in roasted bell peppers or onions for a nutritious burst of color and texture. These veggies caramelize alongside the sausage, creating a delightful harmony.
-
Lower Sugar Option: Reduce the brown sugar slightly for fewer calories while still maintaining that luscious glaze. It’s a subtle change that can make a big difference in taste!
-
Spicy Kick: Add chili flakes or diced jalapeños for heat. This will excite your palate and delight those who crave a bit of spice in their appetizers!
-
Different Sauces: Experiment with teriyaki or a sweet chili sauce for a unique twist on traditional flavors. You might just discover a new favorite!
-
Baking Method: For a hands-off approach, combine all ingredients and roast in the oven at 350°F for 25-30 minutes. This method allows for an even, caramelized finish all over.
-
Serving Suggestions: Pair these bites with fresh veggies or crackers for a festive spread worth sharing! And if you’re looking for other ideas, consider whipping up some Tortilla Pizza Rolls to complement the bites.
Tailor these Candied Kielbasa Bites to fit your gathering and your palate; they’ll be a hit no matter what!
Expert Tips for Candied Kielbasa Bites
-
Heat Control: Maintain a medium heat while cooking to prevent burning the sugar and ensure perfect caramelization for these Candied Kielbasa Bites.
-
Pan Space: Avoid overcrowding the pan; this allows each piece to brown evenly and helps achieve that delightful sticky glaze.
-
Ingredient Swaps: Feel free to experiment with sauces—try teriyaki or a homemade sweet chili sauce for varied flavor profiles.
-
Vegetable Add-Ins: Incorporating roasted veggies, like bell peppers or onions, can elevate the sweetness and nutrition of your bites.
-
Make-Ahead Magic: Prepare your Candied Kielbasa Bites in advance. Store them covered in the fridge, then reheat gently to restore their luscious glaze.
What to Serve with Sweet and Savory Candied Kielbasa Bites?
There’s nothing like creating an inviting spread to accompany your delicious appetizer, making every bite feel special.
-
Creamy Mashed Potatoes: Their buttery richness complements the sticky sweetness of the bites, creating a luxurious mouthfeel that guests will adore.
-
Crunchy Veggie Platter: A selection of crisp vegetables like carrots, cucumbers, and bell peppers adds a refreshing crunch, perfectly offsetting the sweetness.
-
Garlic Breadsticks: Soft, warm breadsticks carry a comforting garlic aroma that pairs beautifully with the savory aspect of the kielbasa.
-
Honey Mustard Dip: Elevate the flavor by serving a tangy honey mustard alongside; it provides a delightful contrast to the sweet glaze.
-
Fruit Salad: A bright fruit salad with seasonal fruits can add a refreshing twist to your appetizer table, balancing the candied bites beautifully.
-
Sparkling Lemonade: Serve bubbly lemonade or a citrus mocktail for a refreshing drink that cleanses the palate between the sweet bites.
-
Mini Pretzel Bites: Their saltiness and chewiness can contrast nicely with the sweet glaze, adding fun texture to your meal.
-
Chocolate Lava Cake: Finish off your gathering with a warm, gooey chocolate lava cake for a decadent dessert that echoes the indulgence of the kielbasa bites.
How to Store and Freeze Candied Kielbasa Bites
Fridge: Store leftover Candied Kielbasa Bites in an airtight container for up to 3 days to maintain flavor and texture.
Freezer: For longer storage, freeze the bites in a single layer on a baking sheet, then transfer to a resealable bag. They can be kept for up to 3 months.
Reheating: To reheat, place the frozen bites in a skillet over low heat, adding a splash of water to steam them back to life, or microwave gently for 1-2 minutes.
Candied Kielbasa Bites Recipe FAQs
How do I choose the perfect kielbasa for these bites?
Absolutely! When selecting kielbasa, look for sausages that are firm to the touch, with a slightly glossy skin. Any dark spots or excessive blemishes can indicate age or spoilage. If you prefer a leaner option, turkey or chicken kielbasa is a fantastic substitute that still delivers on flavor.
How should I store leftover Candied Kielbasa Bites?
Leftover Candied Kielbasa Bites can be stored in an airtight container in the fridge for up to 3 days. Just ensure that they are completely cooled down before sealing. When you’re ready to enjoy them again, a gentle reheat in the microwave or skillet will help restore their delicious glaze and juicy texture.
Can I freeze Candied Kielbasa Bites?
Very! To freeze, lay the cooked Candied Kielbasa Bites in a single layer on a baking sheet and pop them in the freezer until solid. After that, transfer them to a resealable freezer bag or airtight container. They can sit pretty in your freezer for up to 3 months! When ready to eat, just reheat them from frozen in a skillet with a splash of water to keep them moist.
What should I do if my glaze isn’t thickening?
If you find that the glaze isn’t thickening as expected, don’t fret! It might mean that your heat is too low; gently increase the heat and allow it to simmer for a few more minutes. Be sure to stir occasionally, so nothing sticks or burns. If it still seems thin, you can mix a bit of cornstarch with water to form a slurry and add that to the sauce, cooking until combined and thickened.
Are there any dietary considerations for these Candied Kielbasa Bites?
Certainly! If you’re cooking for someone with dietary restrictions, it’s important to check labels. Some kielbasa might contain gluten or dairy, so look for gluten-free options if needed. Also, the brown sugar can be substituted with coconut sugar or a sugar substitute for those monitoring their sugar intake. Always ensure your sauces are free from allergens specific to your guests.
Can I prepare Candied Kielbasa Bites in advance?
Absolutely! You can prepare the Candied Kielbasa Bites ahead of time. Once cooked, let them cool and store them in the fridge. When it’s time to serve, simply reheat them gently in a skillet over low heat or in the microwave for 1-2 minutes until warmed through. It’s a great way to simplify your party prep!
Irresistible Candied Kielbasa Bites for Your Next Party
Ingredients
Equipment
Method
- Step 1: Prep the Kielbasa - Slice the kielbasa sausages into bite-sized pieces, about 1-inch thick.
- Step 2: Brown the Kielbasa - Heat a large skillet over medium heat and add the sliced kielbasa. Cook for 5-7 minutes until browned.
- Step 3: Add Ingredients - Sprinkle the brown sugar over the kielbasa, then pour in the barbecue sauce and Dijon mustard if using.
- Step 4: Simmer - Lower the heat to a simmer and let it bubble for 15-20 minutes, stirring occasionally.
- Step 5: Serve - Taste and adjust seasoning if necessary, serve warm.
Leave a Reply