
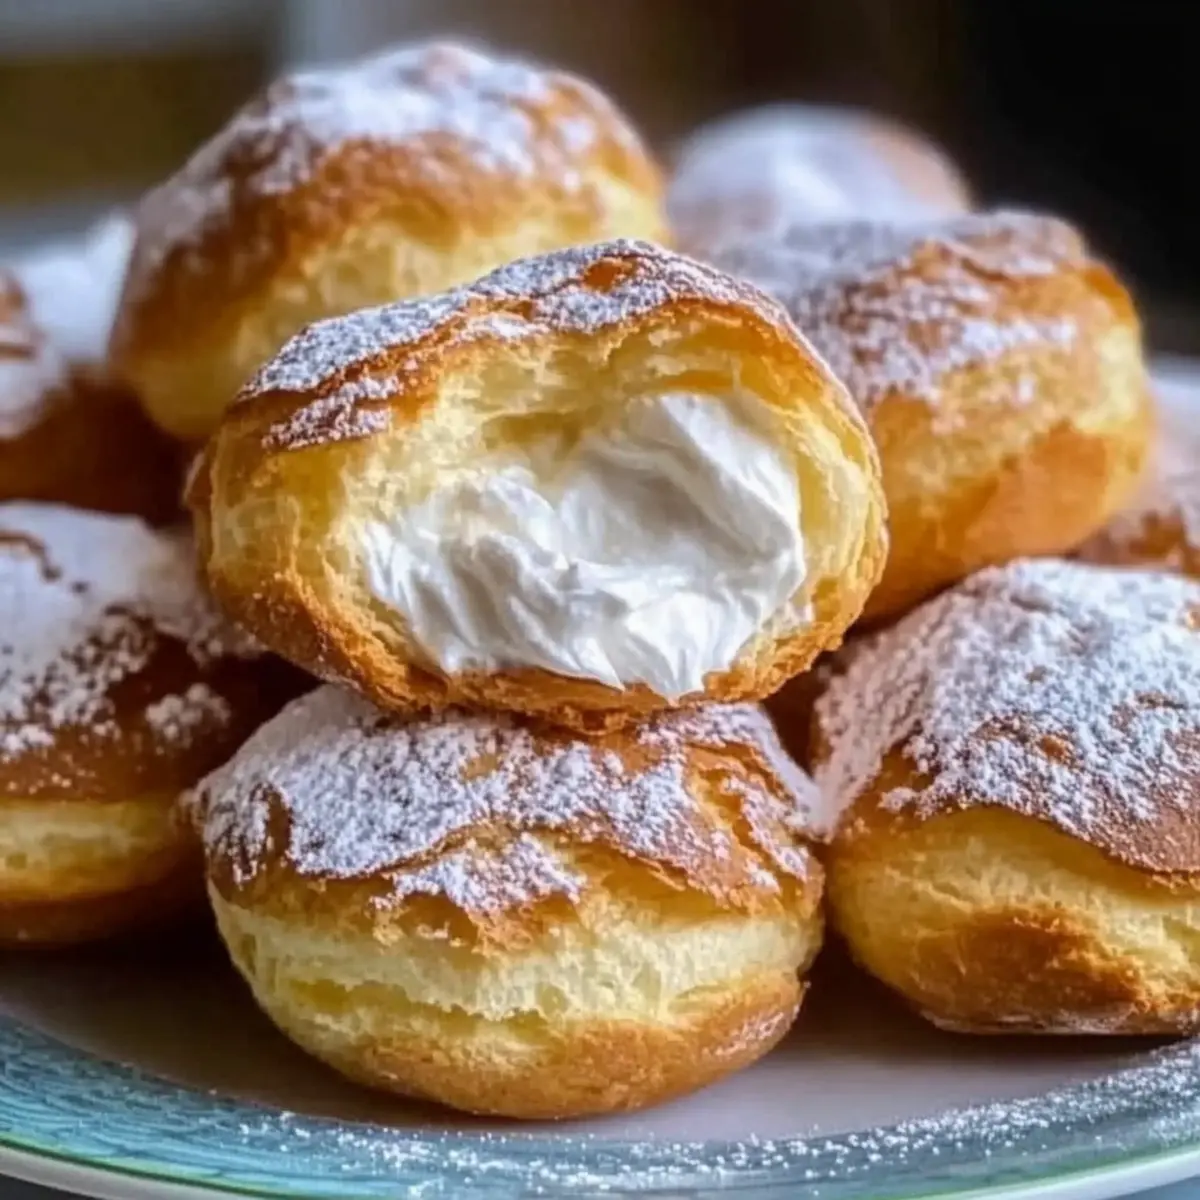
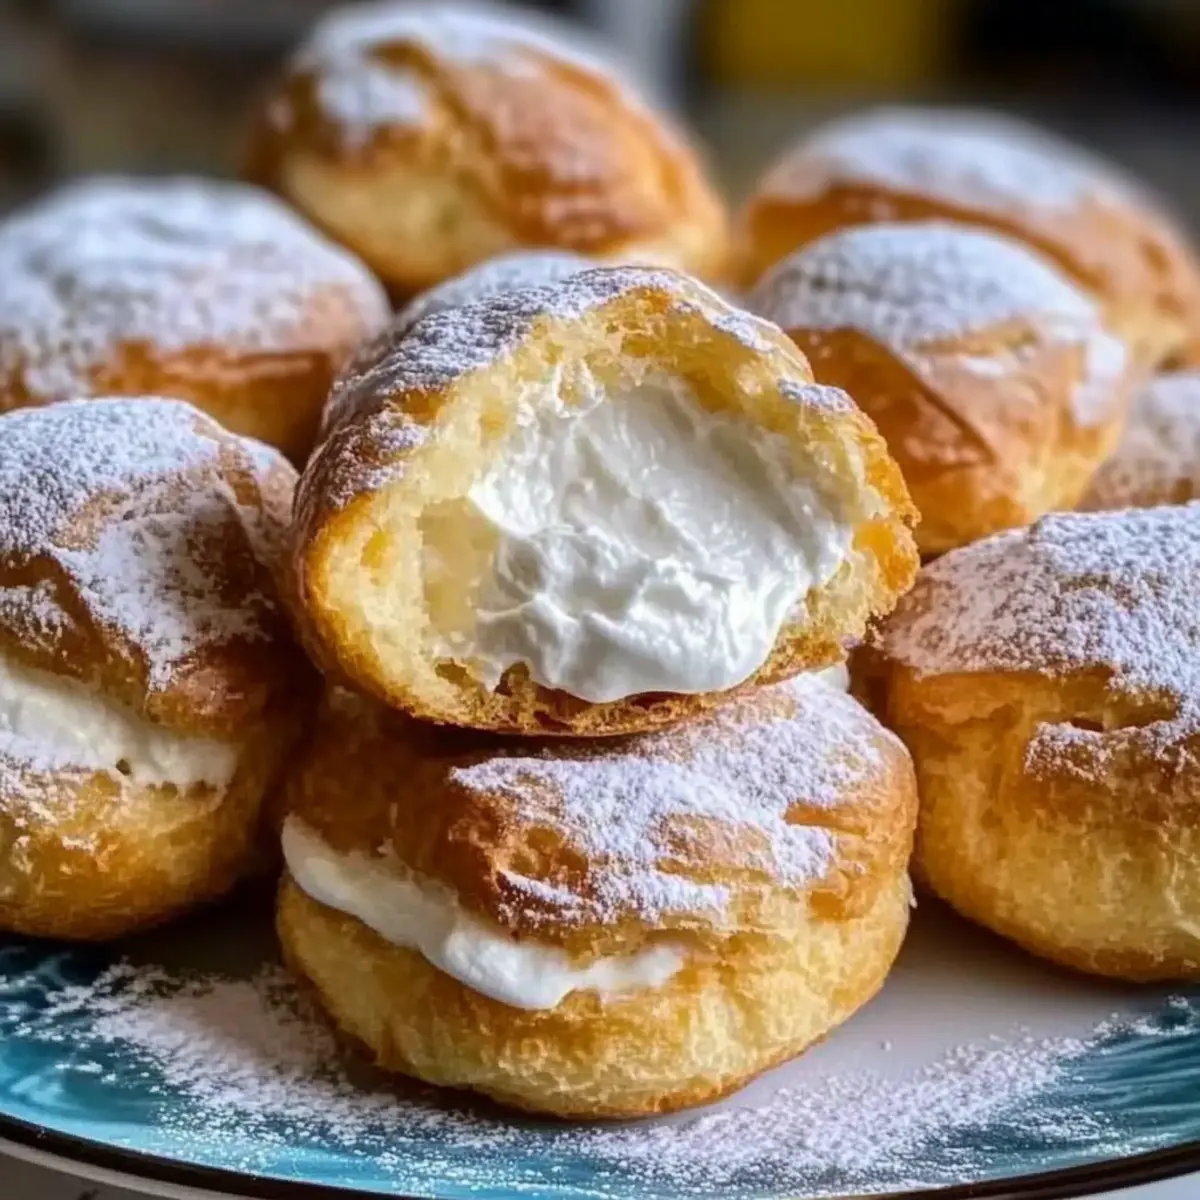
As I stood in my kitchen one sunny afternoon, the scent of vanilla danced through the air, instantly transporting me to a world of sweet nostalgia. Today, I’m thrilled to share my recipe for Vanilla Cream Puffs, a classic dessert that promises to elevate any occasion. These airy delights come together effortlessly, making them perfect for both beginner bakers and seasoned chefs. With a light, golden exterior and a luscious cream filling that melts in your mouth, they’re bound to impress your family and friends. Plus, they allow for creativity, inviting you to experiment with flavors and fillings. Curious about how to create these delightful treats? Let’s dive in!

Why are Vanilla Cream Puffs Irresistible?
Light and Airy: These vanilla cream puffs are crafted to be so light, you might feel like you’re indulging in a cloud!
Decadent Filling: The rich cream filling balances perfectly with the puff’s crisp exterior, creating a flavor explosion in every bite.
Easily Customizable: You can swap in other fillings like chocolate mousse or berry-flavored whipped cream for a delightful twist.
Perfect for Any Occasion: Whether it’s a special celebration or a casual dessert night, these puffs delight guests and family alike.
Time-Saving Delight: With simple steps and a short baking time, you can impress your loved ones without spending all day in the kitchen.
If you love flavorful desserts, you might also enjoy serving them alongside a refreshing Corn Cucumber Salad or pairing them with Vanilla Cinnamon Buttermilk Pancakes.
Vanilla Cream Puff Ingredients
• Create magic with these fluffy delights!
For the Dough
- Water – Provides moisture for the dough; no substitution necessary.
- Whole Milk – Adds richness; can substitute with almond or oat milk, but results may vary.
- Unsalted Butter – Enhances flavor and structure; use salted butter if necessary, adjusting added salt.
- Sugar – Balances flavors; coconut sugar can be a healthier substitute.
- Salt – Essential for flavor enhancement; do not omit.
- All-Purpose Flour – Forms dough structure; substitute with gluten-free flour for a gluten-free version.
- Eggs – Binds the dough and creates a light texture; omit at your own risk.
For the Filling
- Heavy Whipping Cream – Creates the creamy filling; can replace with coconut cream for a dairy-free version.
- Instant Vanilla Pudding – Thickens and flavors the filling; use pastry cream for a homemade option.
- Sugar (for filling) – Sweetens the cream; adjust to taste or omit for less sweetness.
For Serving
- Powdered Sugar – For dusting before serving; can be omitted but adds a lovely finish.
Step‑by‑Step Instructions for Vanilla Cream Puffs
Step 1: Preheat the Oven
Begin by preheating your oven to 350°F (180°C). This step is crucial for achieving that lovely golden-brown exterior on your vanilla cream puffs. While the oven warms up, prepare your baking sheet by lining it with parchment paper to prevent sticking and ensure even baking.
Step 2: Make the Dough
In a medium saucepan, combine 1 cup of water, 1/2 cup of whole milk, 1/2 cup of unsalted butter, 1 tablespoon of sugar, and a pinch of salt. Heat the mixture over medium heat until it reaches a rolling boil, stirring occasionally. Once boiling, quickly add 1 cup of all-purpose flour, mixing vigorously with a wooden spoon until the dough forms a ball and pulls away from the sides of the pan, about 2-3 minutes.
Step 3: Cool and Add Eggs
Remove the pan from heat and let the dough cool for about 5 minutes. Once cooled slightly, transfer the dough to a mixing bowl. Add 4 large eggs, one at a time, mixing well after each addition until the dough is smooth, shiny, and elastic. This step is vital for providing the light texture of your vanilla cream puffs.
Step 4: Pipe the Dough
Spoon the choux pastry dough into a piping bag fitted with a round tip. On your prepared baking sheet, pipe 1.5-inch circles, spacing them about 2 inches apart to allow for expansion. This part is where you can have fun, creating the perfectly shaped shells that will be filled with delightful cream later.
Step 5: Bake the Puffs
Place the baking sheet in your preheated oven and bake for 30-40 minutes. Do not open the oven door during the first 30 minutes, as this can cause the puffs to deflate. You’ll know they’re ready when they are golden brown and crisp to the touch. Keep an eye on them to prevent overbaking.
Step 6: Cool the Puffs
Once baked, remove the vanilla cream puffs from the oven and transfer them to a wire rack to cool completely. This cooling process is important to maintain their crisp texture. Ensure they are left undisturbed for at least 20 minutes, allowing the steam to escape.
Step 7: Prepare the Cream Filling
While the cream puffs are cooling, whip together 1 cup of heavy whipping cream, 1/2 cup of whole milk, and a pack of instant vanilla pudding mix in a mixing bowl. Beat with an electric mixer on medium speed until stiff peaks form, taking care not to overmix. This creamy filling will be the star of your vanilla cream puffs!
Step 8: Fill the Puffs
Once the puffs have cooled, use a sharp knife to make a small hole in the bottom of each puff. Transfer your whipped filling into a piping bag and gently fill each puff, taking care to avoid breaking them. This step ensures each bite is filled with luscious vanilla goodness.
Step 9: Dust and Chill
Before serving, dust the filled vanilla cream puffs lightly with powdered sugar for a beautiful finish. If you have time, chill the cream puffs in the refrigerator for at least 30 minutes. This chilling step lets the flavors set and enhances their deliciousness. Enjoy your delightful homemade treats!

Expert Tips for Vanilla Cream Puffs
-
Avoid Overbaking: Ensure puffs are golden brown but not overdone. This keeps them light and airy, enhancing the vanilla cream puffs’ texture.
-
Cooling Process: Allow the puffs to cool gradually in the oven. Rapid cooling can lead to deflation, ruining your hard work.
-
Pipe with Care: When filling the puffs, use a small hole at the bottom and fill gently. This avoids breakage and keeps the delicious cream inside.
-
Egg Consistency Matters: Achieve a smooth, elastic dough by adding eggs one at a time until the desired consistency is reached, critical for the final lift.
-
Make Ahead: Prepare the dough in advance and store it in an airtight container for up to 2 days or freeze until needed, providing flexibility for busy bakers.
Vanilla Cream Puffs: Variations & Substitutions
Feel free to unleash your creativity with these delightful treats—experimenting is half the fun!
-
Dairy-Free: Substitute heavy cream with coconut cream for a rich, dairy-free filling that still delivers on decadence.
-
Gluten-Free: Swap all-purpose flour for a gluten-free blend to keep these puffs delightful for gluten-sensitive friends and family.
-
Chocolate Lovers: Replace the vanilla pudding with chocolate mousse for a rich twist that will tantalize any chocolate lover’s taste buds.
-
Berry Bliss: Use berry-flavored whipped cream instead of vanilla for a refreshing burst of fruitiness that pops in every bite.
-
Savory Surprise: For a unique twist, fill your puffs with herbed cream cheese or smoked salmon mousse for an elegant hors d’oeuvre that will shock and delight.
-
Extra Sweet: Drizzle with a homemade vanilla glaze made from powdered sugar and vanilla extract to elevate the sweetness.
-
Nutty Flavor: Stir in some almond or hazelnut extract into your cream filling for an aromatic twist that will enchant your palate.
-
Textural Twist: Add a sprinkle of crushed nuts or coconut flakes on top of the cream filling before dusting with powdered sugar for a delightful crunch.
For further delightful recipes, if you’re in the mood for something savory, try the delicious Korean BBQ Steak Rice Bowl with Spicy Cream Sauce for a complete meal or pair your lovely puffs with a refreshing Corn Cucumber Salad as a perfect summer side!
Make Ahead Options
These delightful Vanilla Cream Puffs are perfect for meal prep enthusiasts! You can prepare the choux pastry dough up to 2 days in advance; simply store it in an airtight container in the refrigerator. For even longer storage, freeze the dough for up to 3 months. When you’re ready to bake, just thaw in the fridge overnight and pipe onto your baking sheet before baking. Additionally, the whipped cream filling can be made 24 hours ahead; store it in the fridge and fill the cream puffs right before serving. This way, you’ll enjoy restaurant-quality treats with minimal effort on busy weeknights, and they will taste just as delicious!
How to Store and Freeze Vanilla Cream Puffs
Fridge: Store leftover vanilla cream puffs in an airtight container for up to 2 days. This helps maintain their light texture and flavor, though they are best enjoyed fresh.
Freezer: For longer storage, freeze unbaked choux pastry dough wrapped tightly in plastic wrap. It can be frozen for up to 2 months. When ready to use, bake from frozen without thawing.
Reheating: If you’ve frozen baked puffs, reheat them in a preheated oven at 350°F (180°C) for about 10 minutes before serving. This restores their crispiness.
Short-Term Storage: If you have filled cream puffs, they can be kept in the fridge for up to 2 days but may soften over time. Consider filling them just before serving for the best texture.
What to Serve with Vanilla Cream Puffs
Imagine indulging in these delightful bites alongside complementary flavors that elevate your dessert experience!
-
Fresh Berries: Vibrant strawberries or raspberries add a tart contrast, refreshing your palate between the creamy bites. These bright colors also enhance the presentation, creating a feast for the eyes.
-
Chocolate Sauce: A drizzle of rich chocolate sauce brings a decadent touch that pairs beautifully with the sweet cream filling, adding depth and an elegant finish.
-
Vanilla Ice Cream: A scoop of velvety vanilla ice cream echoes the creamy filling and creates a delightful temperature contrast for a truly indulgent dessert.
-
Coffee or Espresso: The robust flavors of a freshly brewed coffee or espresso counterbalance the sweetness of vanilla cream puffs, making each bite even more delightful.
-
Pistachio Crumble: Adding a sprinkle of nutty pistachios not only enhances flavor but also provides a satisfying crunch, elevating the texture experience of each puff.
-
Creamy Lemon Curd: A side of zesty lemon curd brightens the overall flavor and adds another layer of richness, perfectly complementing the creamy vanilla filling within the puffs.
-
Whipped Cream: A dollop of freshly whipped cream can elevate the cream puff experience, providing an extra silky texture that amplifies the airiness of these treats.
-
Homemade Caramel Sauce: For those who love a sweet contrast, caramel sauce drizzled over the puffs introduces a mellow sweetness that melds beautifully with the vanilla notes.
Vanilla Cream Puffs Recipe FAQs
What should I look for when selecting ingredients?
When choosing ingredients for your vanilla cream puffs, freshness is key! Look for whole milk that is not nearing its expiration date and eggs that are firm with no cracks. If opting for fresh milk alternatives like almond or oat milk, check for a creamy texture to enhance richness. For the butter, ensure it’s unsalted and fresh to bring out the best flavors in your dough.
How should I store leftover vanilla cream puffs?
Store your leftover vanilla cream puffs in an airtight container in the fridge for up to 2 days. To keep them tasting fresh, avoid stacking them, as this can cause them to lose their delightful crispiness. Remember, they’re best enjoyed on the day they’re made, so try to eat them soon after!
Can I freeze vanilla cream puffs?
Absolutely! You can freeze unbaked choux pastry dough to save time. Simply wrap it tightly in plastic wrap and store it in the freezer for up to 2 months. When ready to use, bake it straight from frozen without thawing. If you have baked and filled puffs, they can be frozen too, but they don’t maintain their quality as well. For the best experience, freeze unfilled puffs, and fill them once thawed.
What if my cream puffs turn out flat?
If your cream puffs don’t rise as expected, it could be due to a couple of common issues. Make sure you’re using enough eggs; they’re essential for lift. Also, avoid opening the oven door during the first 30 minutes of baking, as this might cause them to deflate. Lastly, ensure your dough reaches the right consistency by following the egg mixing step closely—all eggs should be incorporated thoroughly.
Are these vanilla cream puffs suitable for special diets?
While traditional vanilla cream puffs contain gluten and dairy, they can be modified for dietary needs. To make them gluten-free, substitute all-purpose flour with a gluten-free blend, and for a dairy-free option, replace heavy whipping cream with coconut cream. However, be aware that some substitutions might slightly alter the texture and flavor of the puffs.
Can pets eat vanilla cream puffs?
It’s best to keep vanilla cream puffs away from pets. Ingredients like sugar and whipped cream aren’t suitable for animals. If you wish to treat your furry friends, consider making dog-friendly treats without harmful ingredients like chocolate or high sugar levels. Always check with your vet before introducing new foods to your pet’s diet.
Melt-in-Your-Mouth Vanilla Cream Puffs You’ll Adore
Ingredients
Equipment
Method
- Preheat your oven to 350°F (180°C) and line a baking sheet with parchment paper.
- In a medium saucepan, combine water, whole milk, unsalted butter, sugar, and salt. Heat until it reaches a rolling boil. Quickly add all-purpose flour and mix until the dough forms a ball.
- Let the dough cool for 5 minutes, then transfer to a mixing bowl. Add eggs one at a time, mixing well after each addition until smooth and elastic.
- Spoon the dough into a piping bag and pipe 1.5-inch circles on the baking sheet, allowing space for expansion.
- Bake for 30-40 minutes without opening the oven door until golden brown and crisp.
- Remove from the oven and cool on a wire rack for at least 20 minutes.
- Whip together heavy cream, whole milk, and instant vanilla pudding mix until stiff peaks form.
- Make a small hole in the bottom of each puff and fill with whipped cream.
- Dust with powdered sugar before serving and chill in the refrigerator for at least 30 minutes to enhance flavors.
Leave a Reply