
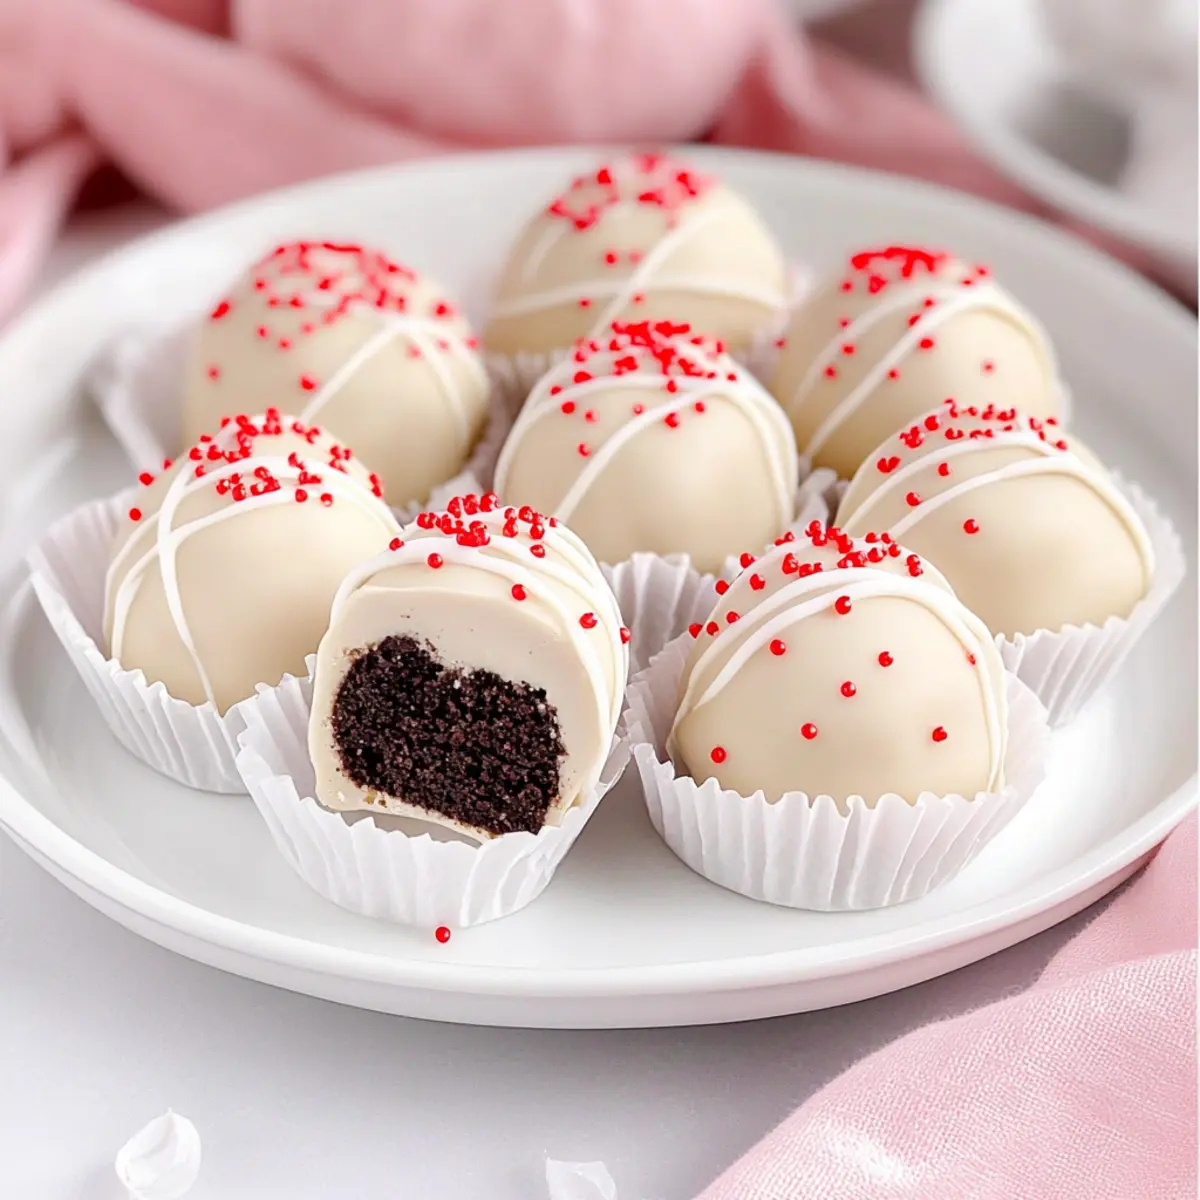
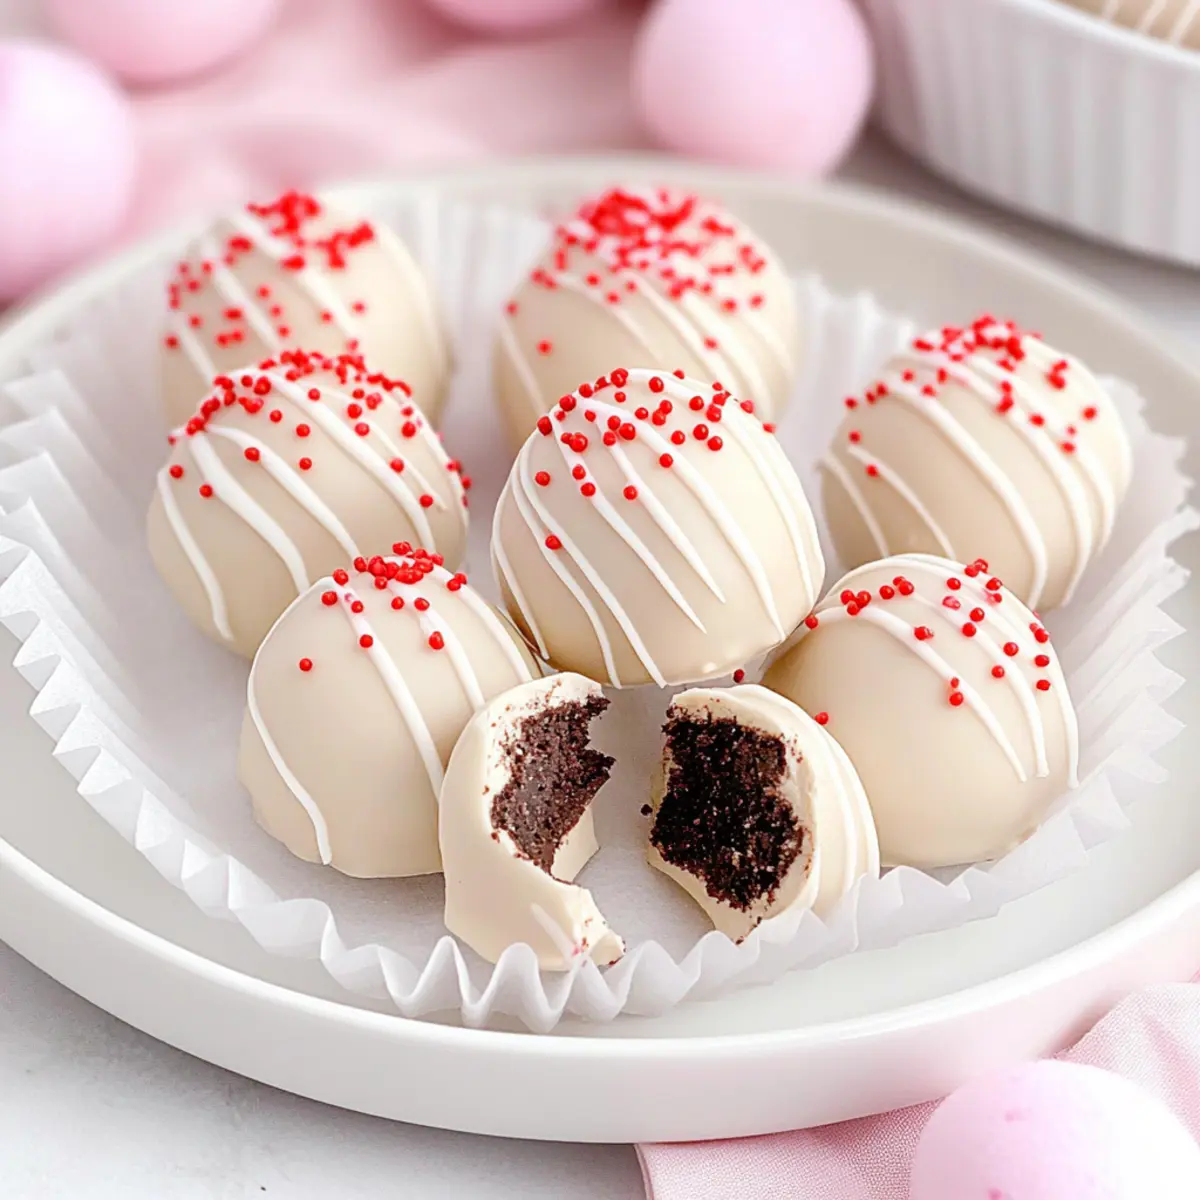
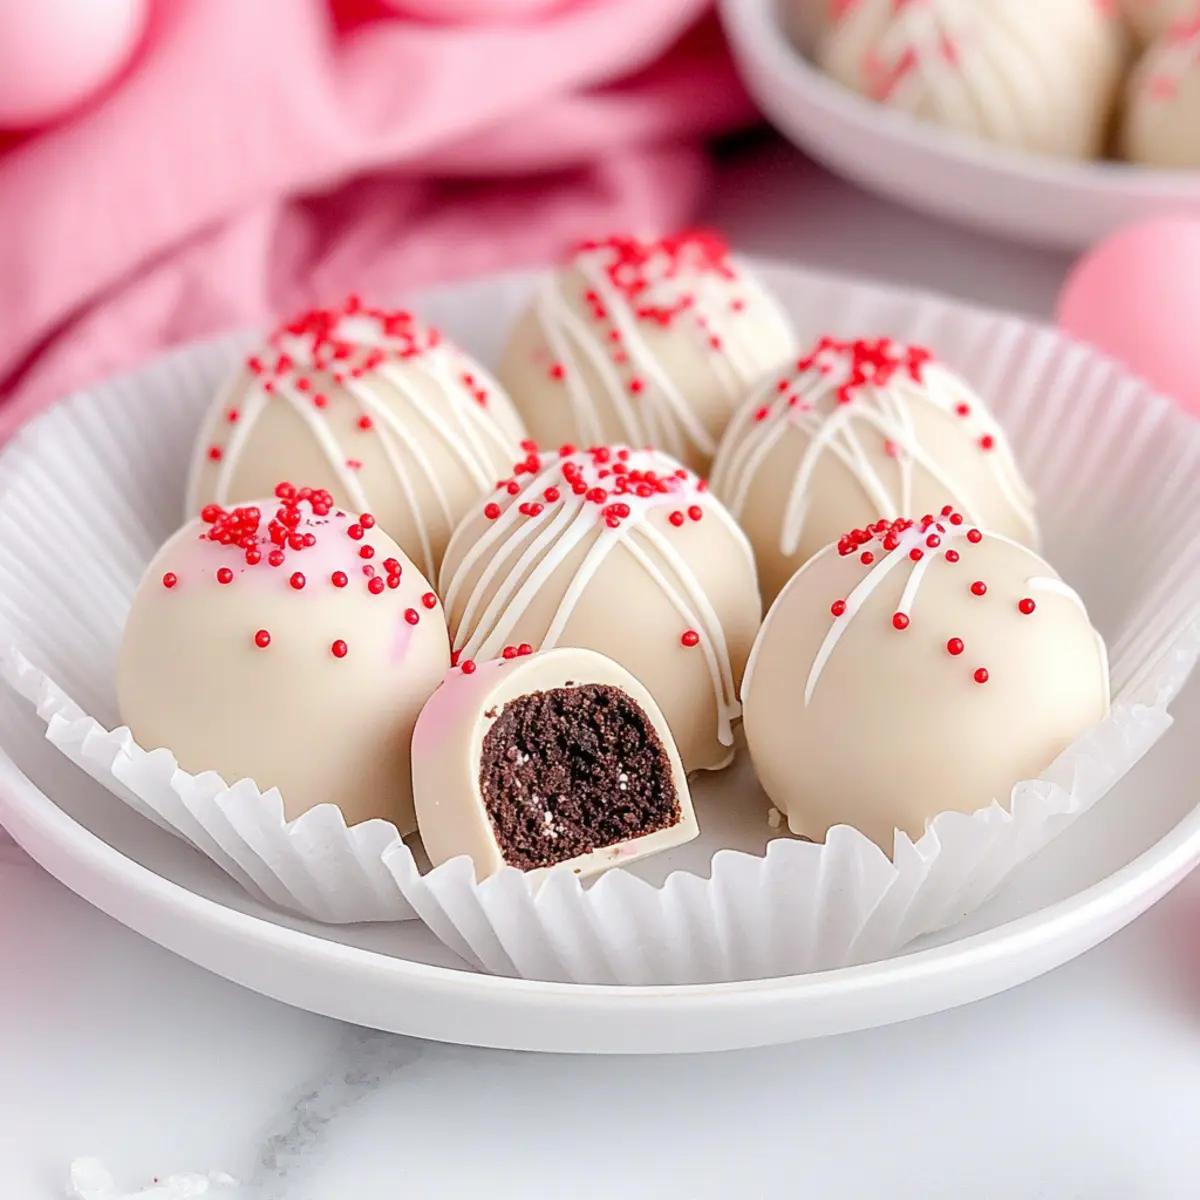
As I dipped yet another truffle into the warm, melted white chocolate, I couldn’t help but smile at how magical these Valentine’s Day Truffles were turning out. Filled with a creamy Oreo cheesecake center, they offer an irresistible blend of flavors that feels special yet is incredibly easy to whip up! This no-bake recipe not only saves time in the kitchen but also serves as a delightful crowd-pleaser for any occasion—ideal for both romantic evenings and festive gatherings. Plus, they’re visually stunning with their glossy finish and playful sprinkles, making them perfect for gifting or simply indulging yourself. Ready to impress someone special or elevate your dessert game this year? Let’s dive into the making of these scrumptious treats!
Why are These Truffles So Irresistible?
No-Bake Simplicity: You can whip these truffles up without turning on the oven, making them a breeze for any home cook.
Creamy Delight: The combination of smooth cream cheese and Oreo creates a rich, velvety mousse-like center that melts in your mouth.
Visually Stunning: With a glossy white chocolate coating and optional festive sprinkles, these truffles are not just treats; they’re showstoppers for any gathering.
Versatile Flavor: Feel free to swap in your favorite Oreo flavors or use dark chocolate for a more intense taste. For something different, try infusing with your choice of extracts!
Crowd-Pleaser: Whether it’s a romantic dinner or a lively party, these truffles are an instant hit. They’re perfect for gifting, making everyone feel cherished.
Make Ahead: You can prepare them in advance and store in the fridge, ensuring that you’re ready for any spontaneous celebration or craving! If you love easy desserts, check out these delicious Lemon Truffles Zesty for another quick homemade treat!
Valentine’s Day Truffles Ingredients
• The perfect combination for your delightful treats awaits!
For the Truffle Filling
- Vanilla Oreos – Essential for the core flavor; feel free to try any Oreo variety for fun twists!
- Cream Cheese – A must for a rich, creamy filling; remember to soften it before mixing for the best texture.
For the Chocolate Coating
- White Chocolate Melts – Gives your truffles that sweet, glossy finish that everyone loves; melt gently to avoid any clumps.
- Red Oil-Based Food Coloring (optional) – Ideal for adding a festive touch to your chocolate; powdered food coloring can be used as an alternative.
For the Finishing Touches
- Sprinkles (optional) – Sprinkle on top while the chocolate is still wet for a fun, decorative flair; it adds a cheerful pop to each truffle!
There you have it! With these Valentine’s Day Truffles ingredients, you’re all set to create sweet, heartwarming treats that are perfect for any special occasion or just because!
Step‑by‑Step Instructions for Valentine’s Day Truffles
Step 1: Prepare the Baking Sheet
Line a baking sheet with parchment paper, ensuring it’s ready for the truffles to chill. This will prevent sticking and allow for easy cleanup later. Set it aside while you prepare the delicious filling for your Valentine’s Day Truffles.
Step 2: Crush the Oreos
Using a food processor, pulse the Vanilla Oreos until they turn into fine crumbs; this usually takes about 30 seconds. If you don’t have a processor, you can place the Oreos in a zip-top bag and crush them with a rolling pin. The finer the crumbs, the smoother your truffle filling will be!
Step 3: Mix the Filling
In a mixing bowl, combine the Oreo crumbs with softened cream cheese, using your hands for the best results. Mix until the mixture is well combined and forms a cohesive, thick dough, approximately 2-3 minutes of mixing. This creamy filling is what makes your truffles so irresistible!
Step 4: Form the Truffles
Scoop about 1.5 tablespoons of the mixture using a cookie scoop or your hands, and roll them into smooth balls. Place each truffle on the prepared baking sheet, spacing them out to avoid sticking. Once you’ve shaped all the truffles, chill them in the freezer for 30 minutes or refrigerate for at least 1 hour to firm up.
Step 5: Melt the Chocolate
In a microwave-safe bowl, melt white chocolate melts in 20-second intervals, stirring well after each until completely smooth. Alternatively, you can use a double boiler on low heat, being cautious not to scorch the chocolate. The melted chocolate should be glossy and pourable for an even coating on your Valentine’s Day Truffles.
Step 6: Optional Coloring
If desired, add a few drops of red oil-based food coloring to the melted chocolate and stir until evenly mixed. This step is perfect for achieving a festive look for your truffles, making them even more special for Valentine’s Day or any celebration.
Step 7: Dip the Truffles
Using a fork, dip each truffle into the melted chocolate, ensuring it’s fully coated. Allow excess chocolate to drip back into the bowl before placing the truffles back on the baking sheet. This dipping process gives your Valentine’s Day Truffles their beautiful, glossy finish.
Step 8: Add Finishing Touches
If you wish to add sprinkles, do so while the chocolate coating is still wet; this will help them adhere. Alternatively, you can drizzle additional melted chocolate over the top for a stylish effect. Allow the truffles to chill for about 10 minutes before letting them set at room temperature for 2 hours until fully hardened.
What to Serve with Valentine’s Day Truffles
Even the richest, most delightful truffles deserve a lovely companion to create the perfect sweet spread!
-
Fresh Strawberries: Their vibrant, tart flavor complements the sweetness of the truffles, adding a refreshing note that cuts through the creaminess.
-
Whipped Cream: A dollop of airy whipped cream enhances the decadent experience, lending a lightness to each luscious bite you take.
-
Coffee or Espresso: A cup of rich coffee balances the sweetness of your Valentine’s Day Truffles and enhances the chocolatey flavors, creating a lovely pairing everyone will appreciate.
-
Sparkling Wine: The bubbles and crispness of sparkling wine elevate the dessert experience, adding a festive flair that feels indulgent and celebratory.
-
Chocolate-Covered Pretzels: The saltiness of pretzels and the sweetness of the chocolate create a magical sweet-and-salty experience that contrasts beautifully with the truffles.
-
Mini Cheesecakes: Offering a slightly different texture and flavor, these tangy treats align perfectly with the creamy centers of the truffles, making for a delightful dessert platter.
-
Assorted Nuts: A handful of roasted almonds or cashews adds a satisfying crunch, providing a flavor contrast that enhances the overall dessert table.
-
Vanilla Ice Cream: A scoop of creamy vanilla ice cream pairs beautifully with the rich truffles, creating a classic combination that truly satisfies.
-
Fruit Sorbet: For a refreshing twist, serve a scoop of fruit sorbet alongside your truffles, adding a burst of fruity flavor that brightens the palate.
How to Store and Freeze Valentine’s Day Truffles
Fridge: Store your Valentine’s Day Truffles in an airtight container for up to 1 week. This keeps them fresh while maintaining their creamy texture.
Freezer: For longer storage, freeze the truffles in a single layer on a baking sheet until solid, then transfer to a freezer-safe container. They will keep for up to 2 months.
Reheating: Thaw truffles in the fridge overnight before serving. Avoid microwaving, as this can cause them to lose their charm and texture.
Wrapping: If storing in the freezer, wrap truffles individually in plastic wrap to prevent freezer burn and maintain optimal flavor.
Expert Tips for Valentine’s Day Truffles
-
Softened Cream Cheese: Make sure your cream cheese is completely softened to ensure a smooth filling that combines well with the Oreo crumbs.
-
Gentle Melting: Always melt the white chocolate on low heat or in small intervals to prevent it from seizing. This ensures a smooth coating for your Valentine’s Day Truffles.
-
Chunky Oreo Crumbs: For a textured filling, pulse your Oreos to a slightly coarser crumb instead of fine. This enhances the overall mouthfeel and richness.
-
Batch Dipping: Work in small batches when dipping the truffles in chocolate. This keeps the melted chocolate fluid, allowing for an even coat without clumping.
-
Chill Times Matter: Don’t rush the chilling process! Properly chilling the truffle balls helps maintain their shape when dipping in chocolate, preventing messy drips.
-
Creative Decorations: Experiment with different colored food sprays, edible glitter, or themed sprinkles to elevate your Valentine’s Day Truffles and impress your loved ones!
Make Ahead Options
These Valentine’s Day Truffles are perfect for meal prep, allowing you to get a head start on your sweet treats! You can prepare the truffle filling and form the balls up to 24 hours in advance; simply place them on the prepared baking sheet and refrigerate. For longer storage, you can freeze the shaped truffles for up to 3 months. When ready to enjoy, simply melt the chocolate and dip the truffles as directed; this ensures they remain just as delicious and fresh. Remember to allow the truffles to set at room temperature for at least 2 hours before serving, ensuring a captivating glossy finish that will impress everyone!
Valentine’s Day Truffles Variations & Substitutions
Feel free to get creative and put your own spin on these delightful truffles!
-
Gluten-Free Oreos: Use gluten-free Oreos for a version that everyone can enjoy without compromising taste. They still bring that classic flavor!
-
Chocolate Variety: Swap white chocolate for dark or milk chocolate for a different flavor twist. Each option offers a unique sweetness balancing the creamy center.
-
Flavored Cream Cheese: Experiment with flavored cream cheese, like strawberry or pumpkin spice, to add a delicious layer of complexity to your truffles. Your taste buds will be in for a treat!
-
Add Crunch: Throw in some chopped nuts or crispy rice cereal to the filling for extra crunch and texture, giving these truffles an exciting contrast.
-
Creative Toppings: Instead of sprinkles, try drizzling with caramel or melted chocolate, or press on edible glitter for extra glam. It’s all about making them visually stunning!
-
Peppermint Twist: Add a dash of peppermint extract to the filling for a refreshing minty kick that’s perfect for the holiday season. A fun twist to an already fantastic treat!
-
Fruit Zest: Mix in some zest from an orange or lemon to brighten the flavor profile. This small touch can elevate the overall taste and add a refreshing balance.
-
Make It Vegan: Use dairy-free cream cheese and dark chocolate for a vegan-friendly version, allowing everyone to enjoy these delectable treats.
These variations will keep your truffle-making journey exciting, and if you’re looking for more delicious treats, don’t miss out on these scrumptious Lemon Truffles Zesty or explore how to make the perfect Lemon Truffles Bake! Enjoy blending flavors while making these sweet bites your own!
Valentine’s Day Truffles Recipe FAQs
How do I select the best Oreos for these truffles?
Absolutely! While Vanilla Oreos are the star for this recipe, you can swap them for any flavor you adore, such as chocolate or mint, to create a unique twist. Just make sure the cookies are fresh without any dark spots, indicating they’re past their prime.
What’s the best way to store leftover truffles?
I recommend placing your Valentine’s Day Truffles in an airtight container in the refrigerator. They’ll stay nice and fresh for up to one week. Just be sure to keep them separated with parchment paper to avoid sticking!
Can I freeze Valentine’s Day Truffles?
Yes! To freeze, place your truffles in a single layer on a baking sheet and freeze until firm, about 1-2 hours. Then transfer them to a freezer-safe container or zip-top bag. They can be stored for up to 3 months. When you’re ready to enjoy, simply thaw them in the fridge overnight.
What should I do if my melted chocolate is seizing?
Very good question! If your melted chocolate starts to seize and become grainy, it may have been overheated or come into contact with moisture. To rescue it, try adding a teaspoon of vegetable oil or solid shortening to the chocolate and gently reheating it on a low setting until it returns to a smooth consistency.
Are these truffles safe for those with allergies?
Definitely! However, keep in mind that they contain cream cheese and may not be suitable for those with dairy allergies. If someone has gluten allergies, ensure to use gluten-free Oreos. As always, it’s best to check ingredient labels to confirm there are no hidden allergens.
How can I make my truffles look extra festive?
For a touch of flair, after dipping each truffle in melted chocolate, sprinkle with colorful sprinkles or edible glitter while the chocolate is still wet. Alternatively, you can use a contrasting chocolate drizzle after the coating sets for a beautiful finish!

Decadent Valentine’s Day Truffles with Creamy Center
Ingredients
Equipment
Method
- Line a baking sheet with parchment paper and set aside.
- Crush the Vanilla Oreos into fine crumbs using a food processor or a rolling pin.
- Mix the Oreo crumbs with softened cream cheese until well combined.
- Scoop about 1.5 tablespoons of the mixture and roll into balls, then chill for 30 minutes.
- Melt white chocolate melts in a microwave-safe bowl in 20-second intervals until smooth.
- If desired, add red oil-based food coloring to the melted chocolate and stir until mixed.
- Dip each truffle into the melted chocolate, allowing excess to drip off.
- If adding sprinkles, do so while the chocolate coating is still wet, then chill for 10 minutes before setting.
Leave a Reply