
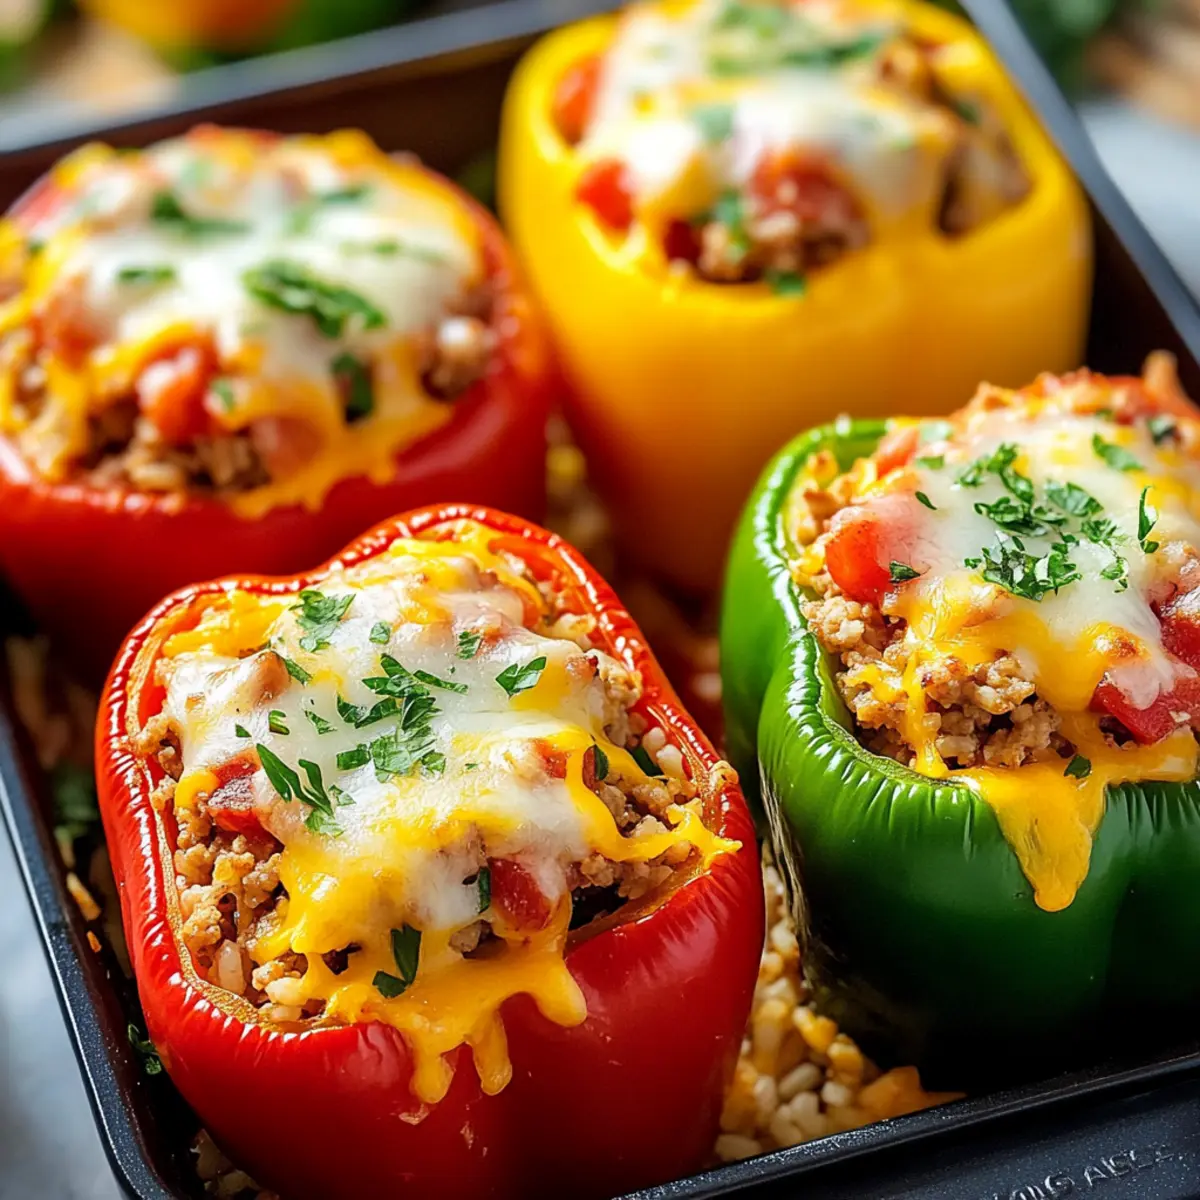
As I stood in my kitchen, the tantalizing aroma of sautéing garlic and onions wafted through the air, taking me back to family dinners filled with laughter and love. That cozy memory inspired my take on these vibrant Stuffed Peppers, a healthy and customizable dish that effortlessly adapts to your tastes. Whether you’re looking for a hearty meal prep option or a comforting dinner for your loved ones, these peppers deliver on nutrition and flavor. With simple prep steps and the flexibility to incorporate ground beef, turkey, or a medley of colorful veggies, it’s a recipe that invites creativity and joy into the cooking process. What filling combination will spark your culinary adventure today?
Why You’ll Crave These Stuffed Peppers?
Wholesome and Healthy: Each stuffed pepper is packed with nourishing ingredients, ensuring you get a balanced meal without sacrificing flavor.
Versatile Filling Options: You can easily swap ground beef for turkey or even experiment with plant-based proteins, making it a hit for various dietary needs.
Colors that Pop: Choosing vibrant bell peppers not only makes for a stunning presentation but also enhances the overall taste. The visual appeal can entice even the pickiest eaters to dig in!
Make-Ahead Magic: Perfect for meal prep, these peppers can be prepped in advance and stored in the freezer, just like you might do with Seafood Stuffed Shells.
Crowd-Pleaser: They are perfect for family dinners, cozy gatherings, or even a casual get-together with friends. The delightful aroma and hearty filling are sure to impress!
Stuffed Peppers Ingredients
For the Peppers
- Bell Peppers – Choose colorful varieties like red, yellow, or green for an eye-catching dish.
For the Filling
- Ground Beef or Turkey – Offers a rich source of protein; feel free to substitute with chicken or plant-based ground options for a lighter meal.
- Rice – Serves as a base; you can use white, brown, or even cauliflower rice for a healthier twist.
- Olive Oil – Ideal for sautéing; any neutral oil works as a substitute if preferred.
- Onion – Adds sweetness to the filling; shallots can be a milder option for an alternative flavor.
- Garlic – Enhances savory notes; use minced fresh garlic for a robust flavor, or substitute with garlic powder in a pinch.
- Diced Tomatoes – Brings moisture to the filling; canned or fresh options work wonderfully, with puree for a smoother texture.
- Tomato Sauce – Binds the filling together; marinara sauce can bring a new flavor profile if you’re feeling adventurous.
- Italian Seasoning – Provides a rich flavor; consider fresh herbs like basil or oregano for a fresh twist.
- Shredded Cheese – Melts on top for added richness; mozzarella, cheddar, or even vegan cheese can satisfy any palate.
Feel free to embark on your flavorful journey with these Stuffed Peppers—the perfect blend of health and delight wrapped in a colorful package!
Step‑by‑Step Instructions for Stuffed Peppers
Step 1: Preheat the Oven
Begin by preheating your oven to 400°F (200°C). This ensures that when your stuffed peppers are ready, they will bake evenly, resulting in a delicious, tender texture. A shiny, pre-heated oven will help the cheese melt beautifully, creating that irresistible golden-brown topping everyone loves.
Step 2: Cook the Rice
Cook your rice according to package instructions until it’s fluffy and tender, about 15-20 minutes for white rice. Once cooked, set it aside to cool slightly. Using rice as a base in your Stuffed Peppers adds heartiness and helps bind the filling, enhancing the overall texture of this satisfying dish.
Step 3: Prepare the Peppers
While the rice is cooking, prepare your bell peppers. Carefully slice off the tops of the peppers and remove the seeds and membranes. This step not only creates a vessel for your filling but also adds a vibrant splash of color to your platter. Set the cleaned peppers upright in a baking dish, ready to be filled.
Step 4: Sauté the Onions
In a large skillet, heat two tablespoons of olive oil over medium heat. Add diced onions and sauté for about 2-3 minutes until they become translucent and fragrant. Stirring frequently, this step builds a flavorful base for the filling, making your Stuffed Peppers exceptionally tasty.
Step 5: Brown the Meat
Add the ground beef or turkey to the skillet with the sautéed onions. Cook for 5-7 minutes until the meat is nicely browned, breaking it into crumbles as it cooks. Once browned, drain any excess fat from the skillet to keep the filling from becoming soggy, ensuring a perfect texture in your stuffed peppers.
Step 6: Add Flavorful Ingredients
Stir in minced garlic, diced tomatoes, tomato sauce, and Italian seasoning to the meat mixture. Allow it to simmer for 5 minutes, blending the flavors together. This will create a rich, savory filling for your Stuffed Peppers, filling your kitchen with mouthwatering aromas.
Step 7: Mix in Cooked Rice and Cheese
Remove the skillet from heat and mix in the cooked rice and half of the shredded cheese until fully combined. This mixture should be hearty and cohesive, providing the main filling for your Stuffed Peppers. The cheese adds creaminess to the filling, contributing to its delightful flavor.
Step 8: Fill the Peppers
Carefully spoon the meat and rice mixture into each prepared pepper, pressing down gently to pack the filling. As you fill them to the brim, leave a little space at the top for the melting cheese. Place the filled peppers upright in your baking dish, showcasing all the vibrant colors.
Step 9: Bake the Stuffed Peppers
Pour ½ cup of water into the bottom of the baking dish to keep the peppers moist during baking. Cover the dish tightly with foil and bake for 30 minutes. After this time, remove the foil and sprinkle the remaining cheese on top of each pepper, then bake uncovered for an additional 5 minutes until the cheese is bubbly and golden.
Step 10: Serve Warm
Once baked, carefully remove the Stuffed Peppers from the oven. Let them cool for a few minutes before serving warm. You’ll be rewarded with tender peppers and a delightful filling that invites everyone to gather around the table for a comforting family dinner.
Stuffed Peppers Variations & Substitutions
Feel free to unleash your creativity and adapt this delicious recipe to suit your tastes and dietary needs!
- Dairy-Free: Use a dairy-free cheese alternative or omit cheese altogether for a lighter option.
- Vegetable-Packed: Incorporate diced zucchini, mushrooms, or spinach into the filling for an extra burst of nutrition.
- Quinoa Twist: Swap out rice for quinoa or couscous to boost fiber and protein in your stuffed peppers.
- Spicy Kick: Add chopped jalapeños or red pepper flakes to the meat mixture for a delightful heat that elevates the dish.
- Mediterranean Flair: Mix in feta cheese, olives, and herbs like thyme or rosemary for a refreshing Mediterranean twist.
- Sweet Addition: For a hint of sweetness, include corn or diced bell peppers in the filling; it complements the savory elements beautifully.
- Stuffed Peppers Fiesta: Experiment with taco seasoning and swap the tomato sauce for salsa for a fun twist reminiscent of Taco Night!
- Asian-Inspired: Use ground chicken, add soy sauce, ginger, and sesame oil for a unique flavor experience reminiscent of my delightful Teriyaki Pineapple Peppers.
With a world of possibilities, these variations make your stuffed peppers a delicious adventure every time. What delightful creation will you come up with next?
What to Serve with Customizable Stuffed Peppers?
As you delight in the vibrant flavors of your stuffed peppers, why not elevate the meal with complementary sides that round out the experience?
-
Garlic Bread: This classic pairing offers a crunchy, buttery side that enhances the savory notes of the stuffed peppers. The delightful aroma of freshly baked garlic bread brings a homely warmth to the table.
-
Mixed Green Salad: A refreshing salad with crisp greens and a zesty dressing adds a pleasant contrast to the hearty filling. Incorporate colorful vegetables for an extra visual appeal that invites the family to dive in.
-
Roasted Vegetables: Roasting seasonal veggies brings out their natural sweetness, providing a perfect balance to the seasonings in your stuffed peppers. The caramelization adds depth, making every bite more memorable.
-
Creamy Mashed Potatoes: Rich and buttery, these creamy potatoes offer a comforting and familiar contrast to the flavor-packed stuffed peppers. Perfect for soaking up any sauce left on the plate!
-
Quinoa or Couscous Salad: This light and nutritious side can be flavored with herbs and citrus, providing a fresh backdrop to the hearty peppers. It adds a delightful texture that complements the soft peppers well.
-
Chilled White Wine: A crisp, chilled glass of white wine, such as Sauvignon Blanc, pairs beautifully with the Mediterranean flavors, enhancing the dining experience with its refreshing touch.
-
Dessert Option: Consider serving a light fruit sorbet or a slice of cheesecake. These sweet endings will cleanse the palate and make for a delightful conclusion to a wholesome meal.
With these accompaniments, your table will be a vibrant tapestry of flavors, sure to delight family and friends alike!
Storage Tips for Stuffed Peppers
Fridge: Store cooked stuffed peppers in an airtight container for up to 4 days. Allow them to cool before sealing to maintain freshness.
Freezer: For long-term storage, wrap individual stuffed peppers tightly in plastic wrap and then in foil, keeping them safe for up to 3 months.
Reheating: When ready to enjoy leftovers, reheat in the oven at 350°F (175°C) for about 25 minutes, or microwave on high for 3-4 minutes until heated through.
Make-Ahead: Prepare stuffed peppers ahead of time, and store them in the fridge before baking; they’ll be ready to pop in the oven for an easy weeknight dinner!
Make Ahead Options
These Stuffed Peppers are a fantastic choice for meal prep enthusiasts! You can prepare the filling up to 3 days in advance by cooking the rice and browning the meat, then mixing in the remaining ingredients. Once cooled, store the filling in an airtight container in the refrigerator. On the day you plan to serve, simply stuff the prepared peppers and bake them according to the recipe instructions. If you want to prep even further ahead, you can assemble the entire dish and refrigerate it for up to 24 hours before baking, ensuring they are just as delicious when it’s time to eat. Remember to add a little extra baking time if baking straight from the fridge; nothing beats the convenience of these make-ahead stuffed peppers!
Expert Tips for Stuffed Peppers
Mind the Moisture: Drain excess fat from the meat after browning to prevent a soggy filling in your stuffed peppers.
Perfectly Packed: Pack the filling tightly into the peppers, but leave a little space at the top for the cheese to melt beautifully.
Flavor Boost: Use fresh herbs like basil or oregano instead of dried Italian seasoning for a vibrant flavor twist.
Prep Ahead: Prep your stuffed peppers in advance and store them in the fridge to save time for busy weeknights.
Freezing Friendly: These stuffed peppers are excellent for freezing. Just wrap them tightly before storing to maintain freshness for up to 3 months.
Stuffed Peppers Recipe FAQs
What type of bell peppers should I use for stuffed peppers?
Absolutely! I recommend choosing colorful varieties of bell peppers, such as red, yellow, and green, for not only their stunning presentation but also their distinct flavors. Look for peppers that are firm and free from dark spots or soft blemishes, ensuring that they are fresh and ready to be filled.
How should I store leftover stuffed peppers?
Very! Refrigerate your cooked stuffed peppers in an airtight container for up to 4 days. Be sure to allow them to cool completely before sealing, as this helps maintain their freshness and prevents sogginess. Reheating them is as simple as placing them in the oven or microwave when you’re ready for another delicious meal!
Can I freeze stuffed peppers?
Yes, you can! To freeze your stuffed peppers, wrap each one tightly with plastic wrap followed by aluminum foil, ensuring they are well-protected. This method helps prevent freezer burn and allows them to stay fresh for up to 3 months. When you’re ready to enjoy, simply reheat them in the oven at 350°F (175°C) for about 25 minutes.
What should I do if my filling is too soggy?
If you find your filling is too soggy, it’s likely due to excess moisture from the meat or vegetables. Always ensure to drain any excess fat after browning your meat, and consider lightly precooking any vegetables that might release water. Adding more rice or breadcrumbs can also help absorb some moisture, thickening up the filling.
Can I make these stuffed peppers vegetarian?
Certainly! To make vegetarian stuffed peppers, you can substitute the ground meat with a mix of lentils, quinoa, or a medley of your favorite vegetables like mushrooms, zucchini, or spinach. This not only makes a hearty and nutritious meal but also showcases the delicious flavors and textures of the filling!
Are stuffed peppers safe for pets?
When cooked simply, bell peppers are generally safe in small amounts for dogs, as long as they are free from seeds and stems. Avoid giving any toppings like cheese or seasonings to pets, and as always, consult your veterinarian if you’re unsure about including any new foods in your pet’s diet.
Irresistible Stuffed Peppers for a Cozy Family Dinner
Ingredients
Equipment
Method
- Preheat your oven to 400°F (200°C).
- Cook your rice according to package instructions until fluffy, about 15-20 minutes.
- Prepare the bell peppers by slicing off the tops and removing seeds and membranes.
- In a large skillet, heat olive oil over medium heat and sauté diced onions for 2-3 minutes until translucent.
- Add ground beef or turkey and cook for 5-7 minutes until browned; drain excess fat.
- Stir in garlic, diced tomatoes, tomato sauce, and Italian seasoning; simmer for 5 minutes.
- Mix in cooked rice and half of the shredded cheese until combined.
- Fill each pepper with the meat and rice mixture, leaving space at the top.
- Pour ½ cup of water into the baking dish, cover with foil, and bake for 30 minutes.
- Remove foil, sprinkle remaining cheese on top, and bake uncovered for 5 more minutes.
- Allow to cool for a few minutes before serving warm.
Leave a Reply