
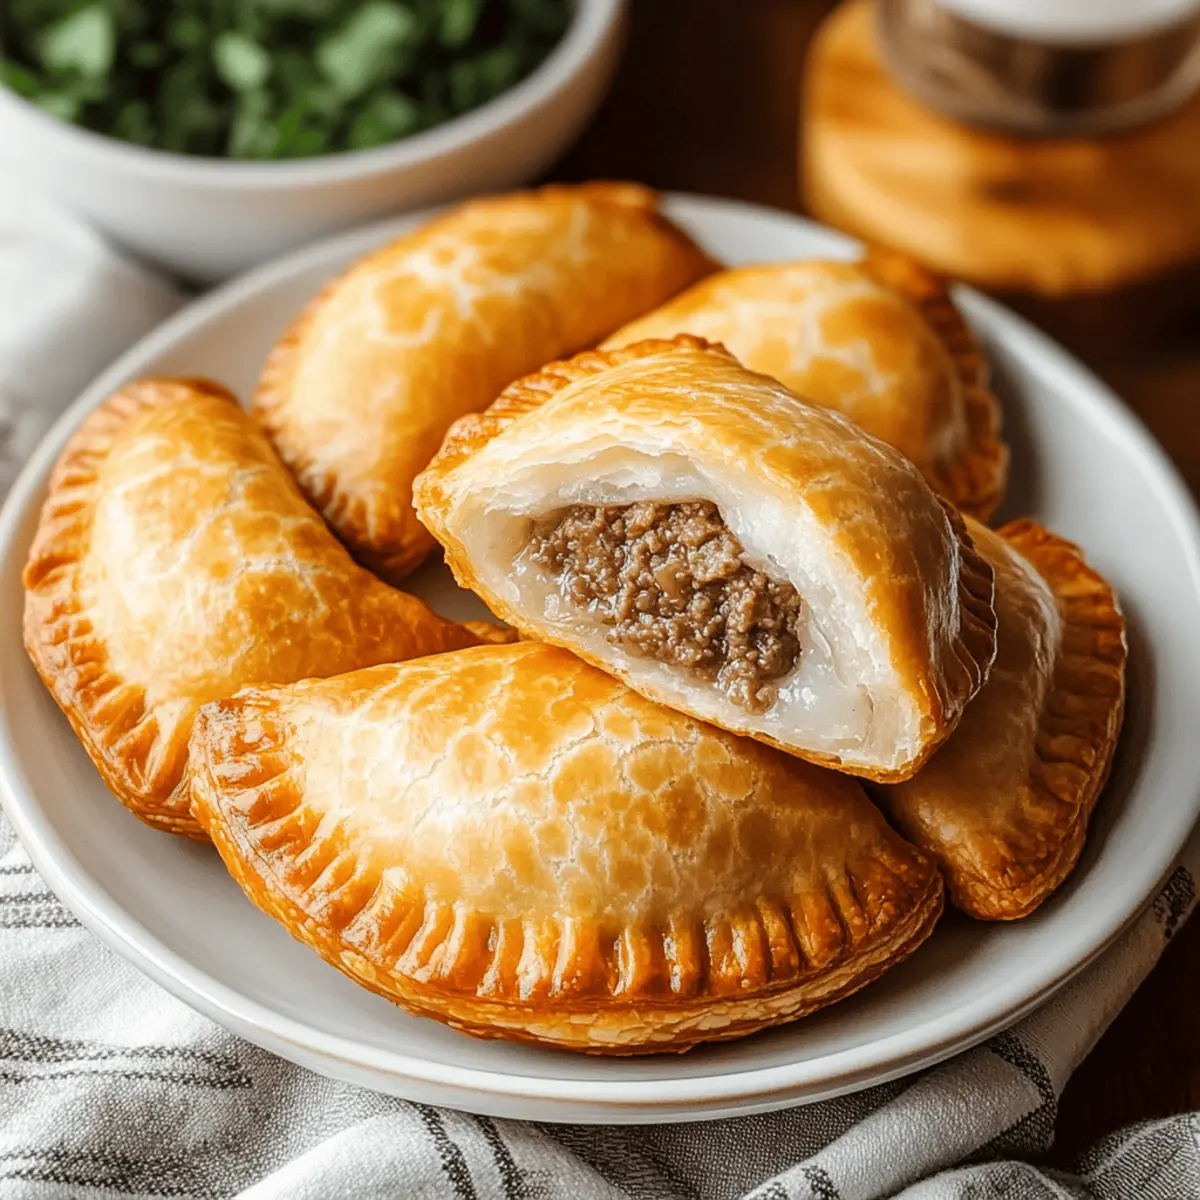
With a warm, golden hue and a crispy exterior, Russian Piroshki (Meat Hand Pies) seem to whisper secrets of cozy kitchens and hearty meals. When I first rolled out the dough, the aromatic promise of seasoned beef filled the air, instantly transforming my home into a haven of comfort food. These delightful hand pies are not only a breeze to prepare, but they can also be tailored to fit any taste—think spicy chicken or vibrant vegetables. Whether you’re serving them at family gatherings or indulging in a quiet evening at home, they offer a satisfying bite that brings everyone together. Ready to dive into a recipe that’s as versatile as it is delicious? Let’s make some memories, one savory pie at a time!
Why Are These Piroshki So Special?
Comforting and satisfying, these Russian Piroshki offer a taste of tradition that brings warmth to any meal. Customizable fillings mean you can cater to every palate—whether it’s savory beef, tender chicken, or hearty vegetables. Easy to make, the dough comes together quickly, making this dish perfect for busy nights. Perfect for sharing, they’re great as appetizers or a filling snack that everyone will love. Plus, the delightful golden crust offers a beautiful presentation that will have your guests reaching for seconds! If you’re looking for more delicious ideas, be sure to explore our variation ideas for creative twists on this classic recipe!
Russian Piroshki Ingredients
For the Dough
- All-purpose flour – Provides structure and texture; substitute with whole wheat flour for added nutrition.
- Salt – Enhances the flavor of the dough; try sea salt for a more sophisticated taste.
- Sugar – Aids in browning and balances flavors; can be omitted for a less sweet dough.
- Instant yeast – This leavening agent ensures a great rise; regular yeast works too, but must be activated first.
- Warm milk – Adds richness; for a dairy-free option, use almond milk instead.
- Warm water – Hydrates the dough and helps it come together; room temperature water is also acceptable.
- Vegetable oil – Contributes to tenderness; olive oil can be an excellent substitute for added flavor.
- Egg – Acts as a binder and adds richness; consider a flax egg for a vegan option.
For the Filling
- Ground beef (or beef and pork mix) – The star protein in this filling; replace with ground turkey or tofu for a lighter or vegetarian dish.
- Onion (finely chopped) – Provides essential flavor; shallots can bring a sweeter note if preferred.
- Mushrooms (optional) – Boosts flavor and texture; skip for a meatier filling or swap with spinach for added veggies.
- Salt and pepper – Season to taste; fresh herbs can also enhance the filling’s flavor profile.
For Cooking
- Butter (for frying) – Adds a delicious flavor and helps with browning during cooking; ghee or a non-dairy option works too.
- Egg (for egg wash) – Gives a beautiful golden sheen during baking; a milk wash can be used for a different finish.
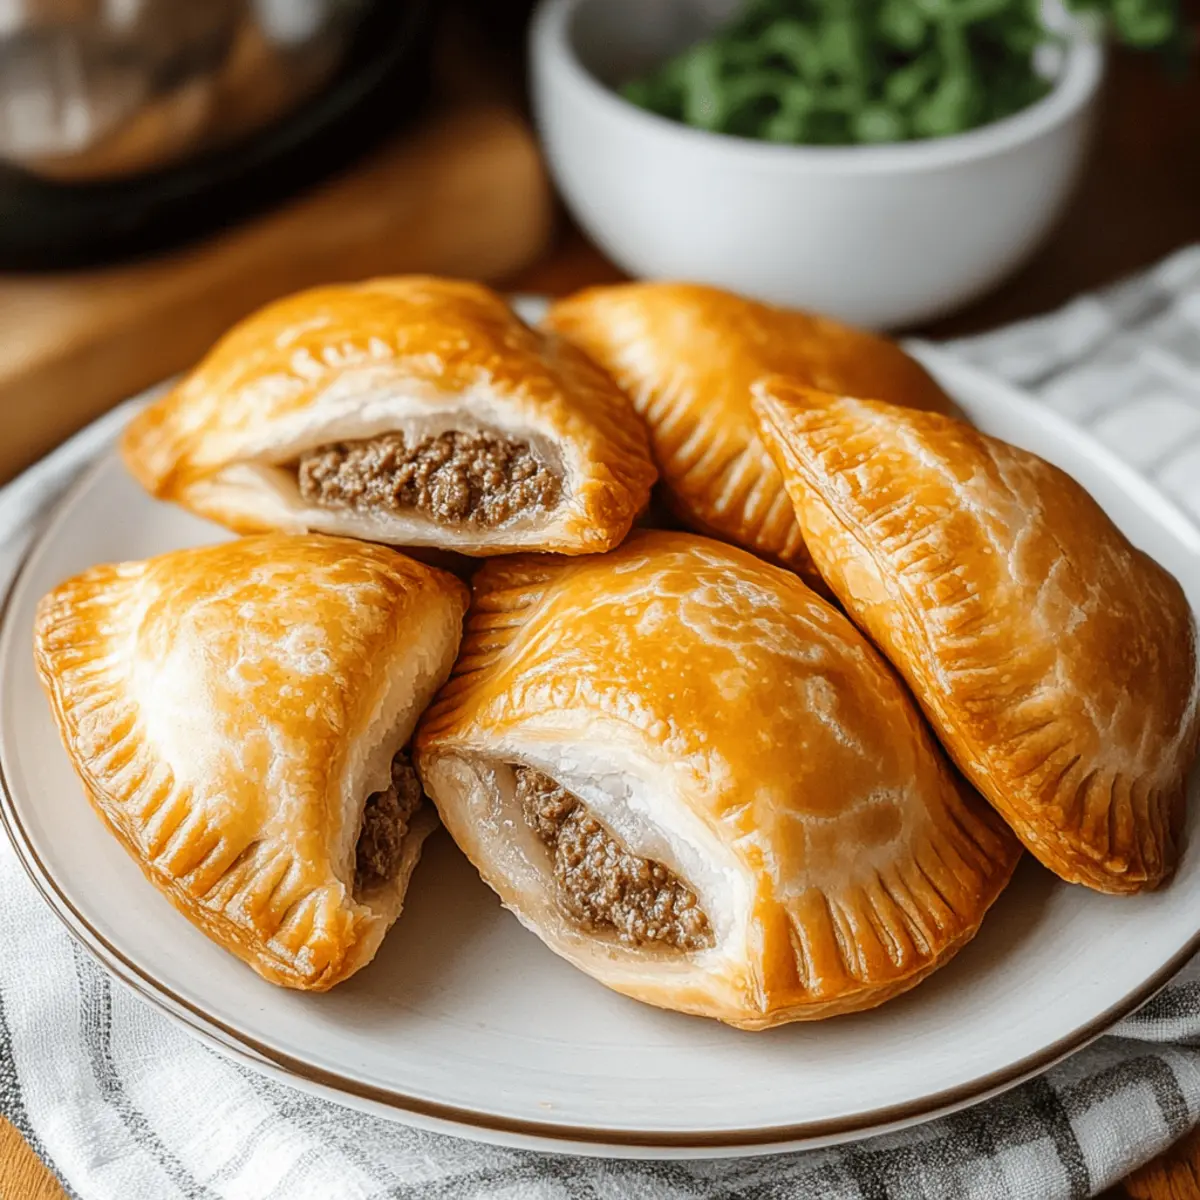
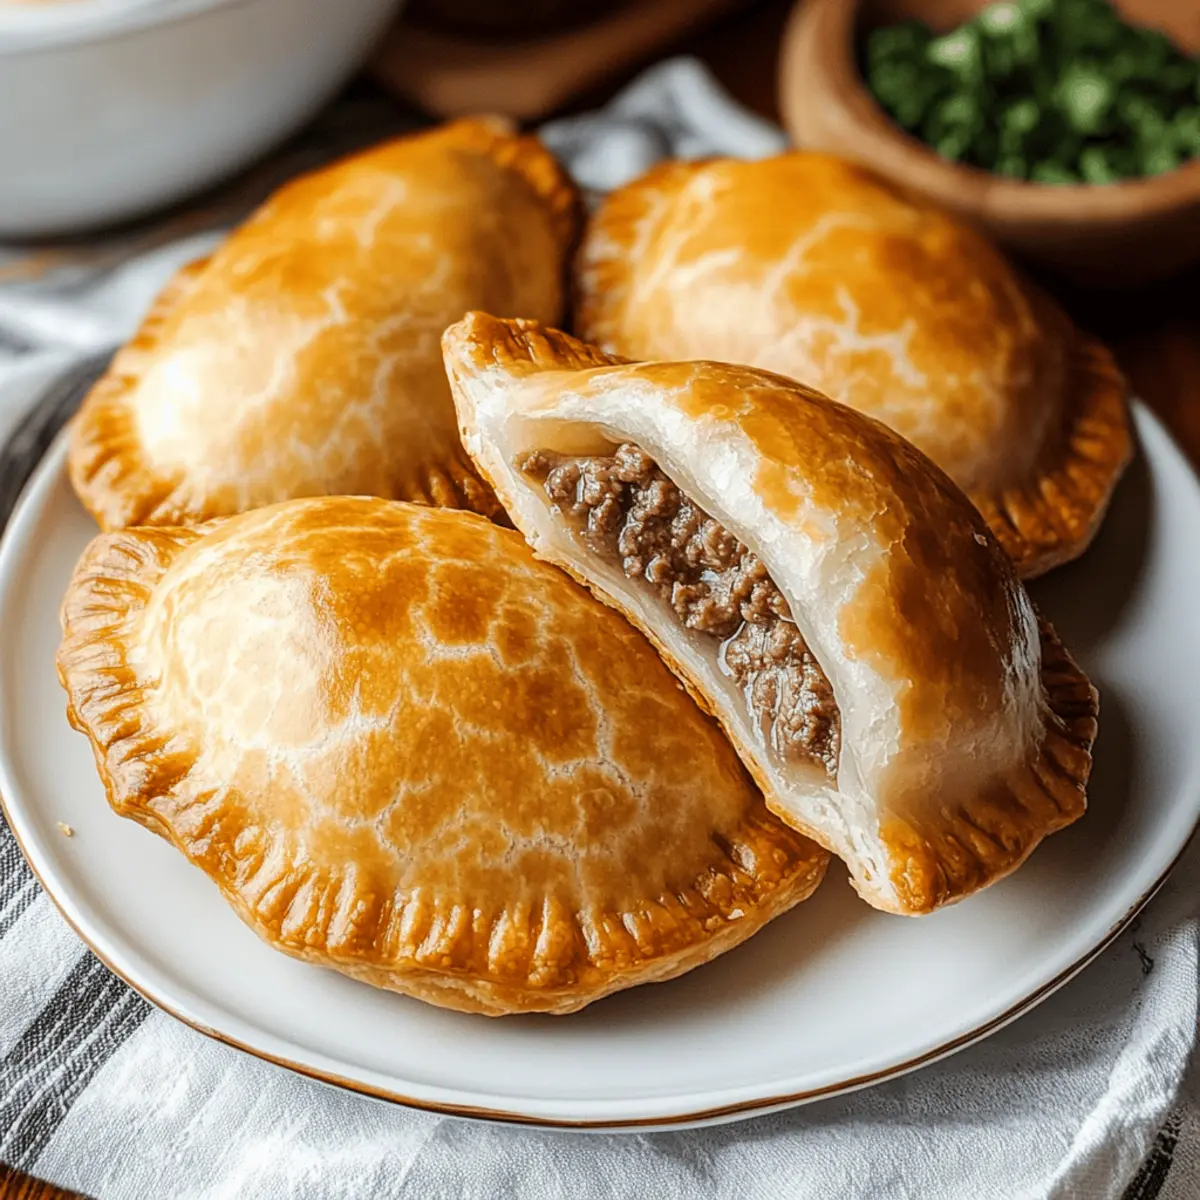
These Russian Piroshki (Meat Hand Pies) are the ultimate comfort food, easy to make and perfect for personalization!
Step‑by‑Step Instructions for Russian Piroshki (Meat Hand Pies)
Step 1: Prepare the Dough
In a large mixing bowl, combine all-purpose flour, salt, sugar, and instant yeast. Mix these dry ingredients well, ensuring an even distribution. Then, gradually add warm milk, warm water, vegetable oil, and one beaten egg. Stir until the mixture forms a shaggy dough. This should take about 3-5 minutes, creating a slightly sticky texture that indicates it’s ready for kneading.
Step 2: Knead the Dough
Turn the dough out onto a floured surface and knead it for 5-7 minutes until it’s smooth and elastic. You’ll know it’s done when it springs back slightly when pressed. After kneading, shape the dough into a ball, place it in a lightly oiled bowl, and cover it with a clean kitchen towel. Let it rise in a warm spot for about 1 hour, or until it has doubled in size.
Step 3: Prepare the Filling
While the dough rises, heat a skillet over medium heat and add butter. Once melted, sauté the finely chopped onions and optional mushrooms until they soften and become fragrant, about 3-4 minutes. Then, add the ground beef (or meat mix) and season with salt and pepper. Cook until the meat is browned and cooked through, about 6-8 minutes. Remove from heat and let it cool slightly.
Step 4: Shape the Piroshki
Once the dough has risen, punch it down gently to release the air. On a floured surface, roll it out to about ½ inch thick. Use a dough cutter or a glass to cut the dough into 12 equal circles. Place a generous spoonful of the meat filling in the center of each circle. Fold the dough over to create a half-moon shape, pinching the edges firmly to seal.
Step 5: Bake the Piroshki
Preheat your oven to 375°F (190°C). Arrange the filled piroshki on a baking sheet lined with parchment paper, ensuring they are spaced apart. Beat another egg and brush the tops of each piroshki with the egg wash for a beautiful golden finish. Bake in the preheated oven for 15-20 minutes, or until they are golden brown and puffed up, delighting your senses with their aroma.
Step 6: Serve and Enjoy
Once baked, remove the Russian Piroshki from the oven and allow them to cool slightly on a wire rack. Serve warm as a cozy snack or delightful appetizer, possibly alongside a salad or dipping sauces. The crispy exterior and savory filling create a heartwarming experience that’s perfect for any gathering or family meal.

How to Store and Freeze Russian Piroshki
Room Temperature: Store baked piroshki in an airtight container at room temperature for up to 3 days to maintain their delightful texture and flavor.
Fridge: For longer storage, refrigerate piroshki in a covered container for up to 5 days. Reheat in the oven to restore their crispy crust.
Freezer: Freeze unbaked piroshki by laying them on a baking sheet until firm, then transfer to a freezer-safe bag for up to 3 months. Bake straight from frozen, adding a few extra minutes to the cooking time.
Reheating: To reheat leftover baked piroshki, warm them in an oven at 350°F (175°C) for about 10-15 minutes for the best results. Enjoy that comforting taste of Russian Piroshki again!
Make Ahead Options
These Russian Piroshki (Meat Hand Pies) are perfect for busy home cooks looking to save time during the week! You can prepare the dough up to 24 hours in advance by following all the steps except for baking. Simply shape the piroshki and arrange them on a baking sheet; then cover tightly with plastic wrap and refrigerate. When you’re ready to enjoy them, take them out, allow them to sit at room temperature for about 30 minutes to rise slightly, brush with egg wash, and bake as directed. This way, you’ll have the same delicious, golden results without the last-minute rush!
Expert Tips for Russian Piroshki
-
Check Yeast Freshness: Always make sure your instant yeast is fresh; if the dough doesn’t rise, you’ll end up with dense piroshki.
-
Flour Your Surface: Dust your work surface generously before rolling out the dough to prevent it from sticking, ensuring smoother shaping of your Russian Piroshki.
-
Avoid Overfilling: Be careful not to overstuff each pie; an overflowing filling can cause them to burst open while baking, ruining your beautiful hand pies.
-
Let Them Rise Again: Allow shaped piroshki to rest for about 15 minutes before baking; this helps them puff up nicely for a lighter texture.
-
Experiment with Fillings: Don’t hesitate to try different fillings like mushrooms or sweet jams; this adaptability keeps the classic Russian Piroshki exciting and fresh!
What to Serve with Irresistibly Golden Russian Piroshki (Meat Hand Pies)
These delightful hand pies are just the beginning; let’s create a comforting feast that warms the heart and soul.
-
Fresh Salad: A crisp mixed greens salad with a vinaigrette balances the hearty filling, adding a refreshing contrast to each bite. The zing from the dressing brightens your meal, making every mouthful more delightful!
-
Borscht: This traditional beet soup complements the piroshki beautifully, bringing a rich, earthy flavor to the table. A swirl of sour cream on top adds creaminess that pairs perfectly with the savory meat filling.
-
Pickled Vegetables: A platter of tangy pickles or pickled cabbage provides a crunchy, acidic kick that cuts through the richness of the piroshki, enhancing the overall flavor experience.
-
Dipping Sauces: Serve with a dollop of creamy horseradish or tangy mustard for added warmth and a burst of flavor. Each bite dipped into these sauces becomes an adventure of taste!
-
Roasted Vegetables: Seasonal roasted veggies offer a delightful sweetness and a variety of textures, creating a wholesome, colorful side that complements the hearty meat pies perfectly.
-
Sparkling Water or Kompot: For beverages, refreshing sparkling water or a homemade fruit compote provides a light and fruity note, ensuring that your meal stays vibrant and energizing!
Russian Piroshki Variations & Substitutions
Bring out your inner chef and personalize these delightful hand pies with creative twists that will tantalize your taste buds!
-
Dairy-Free: Replace warm milk with almond or oat milk for a satisfying, dairy-free version. You won’t miss the creaminess!
-
Whole Grain: Try substituting all-purpose flour with whole wheat flour for a nutty flavor and added nutrients, offering heartiness to your pies.
-
Spicy Alternative: Add diced jalapeños or red pepper flakes to the meat filling for a spicy kick! This little change can create an exciting flavor adventure.
-
Vegetarian Twist: Use sautéed mushrooms, black beans, or lentils in the filling instead of meat for a deliciously hearty vegetarian option.
-
Herb-Infused: Incorporate fresh herbs like dill, parsley, or thyme into your filling to uplift the flavor profile. A herbal touch makes these piroshki feel extra special!
-
Sweet Indulgence: Mix in some jam or fruit preserves in the filling for a sweet version. Imagine biting into a golden crust filled with warm apricot or raspberry goodness!
-
Baking Option: For a lighter treat, bake your piroshki instead of frying them. Brush with olive oil for a golden and crispy finish, perfect for health-conscious indulgence.
-
Air Fryer Friendly: If you have an air fryer, use it to make these piroshki! They come out just as crispy and golden while using less oil.
For more delicious variations, dive into our tips on experimenting with fillings or discover the perfect sauces to serve alongside these delightful hand pies!
Russian Piroshki (Meat Hand Pies) Recipe FAQs
What type of meat should I use for the filling?
You can use ground beef or a mix of beef and pork for a traditional filling. If you’re looking for a leaner option, ground turkey or even crumbled tofu works beautifully for a vegetarian twist. The key is to season well to enhance the flavor of the meat.
How can I tell if my ingredients are fresh?
For your yeast, you can verify its freshness by activating it in warm water with a pinch of sugar for 5-10 minutes; if it bubbles and froths, it’s good to go! As for your meat, ensure it’s bright in color without any off-odors, and for your vegetables, look for vibrant colors with no dark spots or soft areas.
How should I store leftover piroshki?
To store leftover piroshki, place them in an airtight container and keep them in the refrigerator for up to 5 days. When you’re ready to enjoy them again, simply reheat in the oven at 350°F (175°C) for about 10-15 minutes, which will revive their glorious texture.
Can I freeze Russian Piroshki? If so, how?
Absolutely! To freeze unbaked piroshki, place them on a baking sheet lined with parchment paper and freeze until firm, about 1-2 hours. Once frozen, transfer them to a freezer-safe bag or container. They can be stored for up to 3 months. When you’re ready to bake, go straight from the freezer to the oven, adding an extra 5-10 minutes to the baking time for that perfect golden crust.
What should I do if my dough is too sticky?
If your dough is sticky, sprinkle in a little extra flour while kneading until it reaches a smooth consistency. However, be cautious not to add too much flour, or your piroshki will become dense. Aim for a soft, elastic dough that doesn’t stick to your hands.
Are these piroshki suitable for people with allergies?
For those with specific dietary needs, you can customize the ingredients—opt for gluten-free flour if necessary, use vegetable oil instead of butter, and choose a filling that fits your dietary restrictions. Always double-check labels for allergens, especially in items like yeast and pre-packaged ingredients.
Golden Russian Piroshki (Meat Hand Pies) for Cozy Nights
Ingredients
Equipment
Method
- In a large mixing bowl, combine all-purpose flour, salt, sugar, and instant yeast.
- Gradually add warm milk, warm water, vegetable oil, and beaten egg. Mix until dough forms.
- Knead on a floured surface for 5-7 minutes until smooth and elastic.
- Heat a skillet over medium heat and add butter. Sauté onions and mushrooms until softened.
- Add ground beef and season with salt and pepper. Cook until browned.
- Once dough has risen, roll it out and cut into circles.
- Place filling in the center, fold, and pinch edges to seal.
- Preheat oven to 375°F. Bake for 15-20 minutes until golden brown.
- Allow to cool slightly before serving.
Leave a Reply