
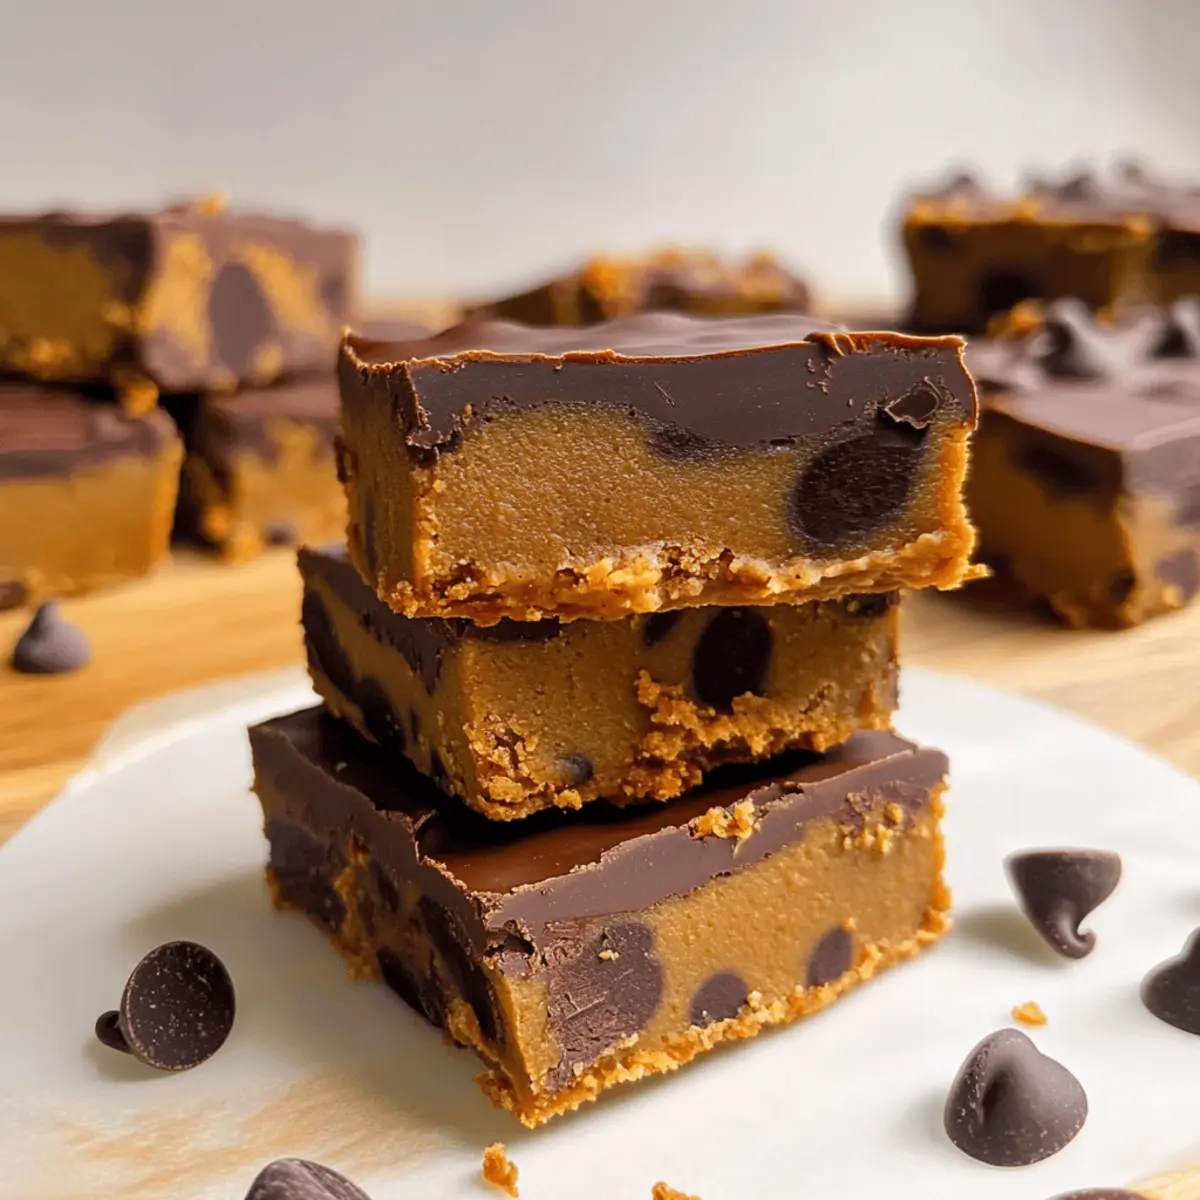
As I rummaged through my pantry, a soft orange hue caught my eye—pumpkin puree! Instantly, I remembered my craving for something sweet yet nutritious. Enter my Chewy Vegan Pumpkin Chocolate Chip Protein Bars. These delightful bars not only offer a melt-in-your-mouth experience with rich chocolatey goodness but are also packed with plant-based protein, making them a guilt-free indulgence. Perfect for that midday slump, they come together in just a few minutes—no baking required! Plus, being vegan, gluten-free, and paleo-friendly means everyone can enjoy them, from fitness enthusiasts to cozy snackers alike. Curious about how to craft these delicious bars? Let’s dive in!
Why are These Protein Bars a Must-Try?
Unmatched flavor: These Pumpkin Chocolate Chip Protein Bars blend the earthy sweetness of pumpkin with rich chocolate, creating a taste sensation you’ll crave.
Time-saving: No baking is required! Mix, chill, and enjoy these bars in no time—perfect for busy schedules.
Nutrient-packed: With wholesome ingredients like almond butter and pea protein, they offer a healthy boost for your day.
Vegan and gluten-free: Everyone can indulge without worry—it’s an inclusive treat for all dietary preferences.
Versatile and customizable: Feel free to explore flavors, swapping almond butter for sunbutter or adding your favorite spices!
These delightful bars can be your go-to snack, just like my Moist Pumpkin Bread or an indulgence similar to the Indulge Raspberry Chocolate treats!
Pumpkin Chocolate Chip Protein Bars Ingredients
For the Base
- Pumpkin Puree – Provides moisture and sweetness; can substitute with apple sauce if unavailable.
- Almond Butter – Acts as a binding agent and adds creaminess; can use other nut or seed butters for different flavors.
- Coconut Oil – Adds healthy fats and helps firm the bars when chilled; alternatives include cocoa butter or vegan butter.
- Maple Syrup – Sweetens and contributes to the texture; can substitute with agave syrup or date syrup.
- Vanilla Extract – Enhances overall flavor; optional but recommended for deeper taste.
- Pea Protein Powder – Provides protein content; substitute with another absorbent protein powder, but expect texture variations.
- Cinnamon – Adds warmth and spice; nutmeg could be used for a different flavor profile.
- Salt – Balances flavors; keep the amount minimal.
- Miniature Dark Chocolate Chips – Add chocolate flavor and texture; could substitute with vegan chocolate chunks or cacao nibs.
Our Pumpkin Chocolate Chip Protein Bars are not just tasty, but also a fantastic way to enjoy nutritious snacking without the guilt!
Step‑by‑Step Instructions for Pumpkin Chocolate Chip Protein Bars
Step 1: Prepare the Pan
Begin by lining an 8″ x 4″ loaf pan with parchment paper. Make sure the paper hangs over the edges slightly—this will help you lift out the bars later. Set the pan aside while you focus on mixing the ingredients for the Pumpkin Chocolate Chip Protein Bars.
Step 2: Mix Wet Ingredients
In a large mixing bowl, combine the pumpkin puree, almond butter, melted coconut oil, maple syrup, and vanilla extract. Use a whisk or spatula to blend everything together until the mixture is smooth and creamy, taking about 2–3 minutes. This creates a flavorful base that adds moisture and structure to your bars.
Step 3: Combine Dry Ingredients
Next, add the pea protein powder, cinnamon, and salt to the wet mixture. Stir the ingredients together until a thick dough forms, resembling playdough in consistency, which should take about another 2–3 minutes. This is the heart of your Pumpkin Chocolate Chip Protein Bars, so ensure everything is incorporated well.
Step 4: Add Chocolate Chips
Gently fold in the miniature dark chocolate chips, ensuring they are evenly distributed throughout the mixture. The chocolate chips will add a deliciously sweet touch to your bars. This folding process should only take about a minute—be careful not to overmix!
Step 5: Press the Mixture into the Pan
Transfer the thick mixture into the prepared loaf pan. Using your hands or the back of a spatula, firmly press it down to create an even layer. The mixture should be tightly packed to ensure the bars hold their shape, which may take about 2–3 minutes.
Step 6: Freeze the Base
Place the loaf pan in the freezer for at least 30 minutes. This chilling step is crucial as it helps firm up the pumpkin chocolate chip protein bars, making them easier to cut later. While waiting, feel free to prepare the chocolate topping!
Step 7: Make the Chocolate Topping
In a microwave-safe bowl, melt your dark chocolate in short bursts of 30 seconds, stirring frequently until smooth. Once melted, add a few tablespoons of almond butter and mix until fully combined. This decadent chocolate topping will be the perfect finish to your bars.
Step 8: Apply the Chocolate Topping
Retrieve the frozen bar base from the freezer and pour the smooth chocolate mixture over the top. Use a spatula to spread it evenly, ensuring all corners are covered. Once the topping is set, smooth it out nicely for an attractive finish, which should take just a few minutes.
Step 9: Chill Until Set
Return the pan to the fridge and allow it to chill for at least 1 hour, or preferably overnight. This final chilling time helps the chocolate topping set firmly and melds all the flavors together, leaving you with a rich, chewy treat.
Step 10: Cut and Serve
Once set, remove the bars from the pan by lifting the parchment paper edges. Place on a cutting board and cut into your desired size—approximately 12 bars is ideal. Now, your delicious Pumpkin Chocolate Chip Protein Bars are ready to be enjoyed as a nutritious snack or dessert!
Make Ahead Options
These Pumpkin Chocolate Chip Protein Bars are perfect for busy home cooks looking to save time while enjoying nutritious snacking! You can prepare the base mixture up to 24 hours in advance and store it tightly covered in the refrigerator. Simply follow the initial steps—mixing the wet and dry ingredients, and folding in the chocolate chips—then press the mixture into the lined loaf pan and refrigerate. For the chocolate topping, it’s best to make it right before serving for the freshest flavor, but you can prepare the melted chocolate up to 3 days ahead and store it in an airtight container in the fridge. When you’re ready to enjoy your bars, just reheat the chocolate slightly if needed, pour it over the chilled base, and let it set. With this prep, you’ll have delicious, healthy snacks ready to go with minimal effort!
Pumpkin Chocolate Chip Protein Bars Variations
Let your creativity flow as you customize these bars with delightful twists and substitutions to match your taste!
- Nut-Free: Swap almond butter for sunbutter to create a nut-free version that still packs a flavor punch. You won’t lose any creaminess, and it’ll have a unique taste!
- Spice It Up: Add a dash of ginger or nutmeg along with cinnamon for an aromatic kick that’ll warm your heart. It’s amazing how a little spice can transform the flavor profile!
- Fruit Boost: Mix in chopped dried fruits like cranberries or dates for a chewy texture and natural sweetness. Each bite will surprise you with delightful bursts of fruity flavor!
- Protein Punch: For extra protein, add a scoop of hemp or brown rice protein powder instead of pea protein. This swap can slightly change the texture but will amp up the nutrition!
- Chocolate Lovers: Increase the amount of dark chocolate chips or drizzle extra melted chocolate on top for a richer chocolate experience. A little indulgence won’t hurt, right?
- Crunch Factor: Sprinkle some crushed nuts or seeds on the chocolate topping before it sets for added crunch and texture. Everything’s better with a bit of crunch!
- Different Sweeteners: Experiment replacing maple syrup with date syrup or agave nectar for different sweetness levels. Enjoy while finding your perfect balance of sweetness!
- Cacao Lovers: Substitute dark chocolate chips with cacao nibs for a more intense chocolate flavor and a little extra crunch. They’ll add a delightful bittersweet touch that chocoholics will love!
Feel inspired? Pair these scrumptious bars with a cup of your favorite tea or a plant-based milk for a wholesome snack, just like you would with my Moist Pumpkin Bread or a blissful treat like the Indulge Raspberry Chocolate!
Storage Tips for Pumpkin Chocolate Chip Protein Bars
Fridge: Store your bars in an airtight container in the refrigerator for up to 10 days. This helps maintain their soft texture and delicious flavor.
Freezer: For longer storage, freeze the bars wrapped individually in plastic wrap, then place them in a freezer-safe container. They can last up to 3 months.
Thawing: When ready to enjoy, simply thaw in the fridge overnight or on the counter for a couple of hours. Expect a slightly firmer texture when thawed.
Reheating: If you prefer them warm, gently microwave each bar for 10-15 seconds. This will revive their soft, melt-in-your-mouth goodness while enhancing the chocolate flavor.
Expert Tips for Pumpkin Chocolate Chip Protein Bars
• Mix Thoroughly: Ensure that wet and dry ingredients are evenly blended for the best texture; clumps can lead to uneven bars.
• Chill Enough: Don’t skip the chilling step! Proper chilling is essential for cutting clean bars—patience pays off here.
• Quality Chocolate: Opt for high-quality dark chocolate for the topping; it makes a world of difference in flavor and richness.
• Watch Protein Powder: Use pea protein for optimal consistency; some powders might result in a dry texture if not chosen wisely.
• Customize Flavors: Feel free to add spices like nutmeg or ginger to elevate your Pumpkin Chocolate Chip Protein Bars experience!
What to Serve with Chewy Vegan Pumpkin Chocolate Chip Protein Bars
Indulge in a delightful dining experience that pairs perfectly with these protein-packed treats!
- Creamy Nut Butter: A dollop of almond or peanut butter adds a creamy richness that complements the chocolate and pumpkin flavors beautifully.
- Fresh Fruit Platter: Slices of apple or pear enhance the sweetness and provide a refreshing contrast to the chewy bars. It’s a wonderfully balanced snack!
- Coconut Yogurt: This dairy-free option adds a creamy and tangy note, making for a satisfying combination with the bars. Top it with a sprinkle of cinnamon for extra flavor!
- Vegan Chocolate Milk: Pair these bars with a homemade or store-bought vegan chocolate milk for an indulgent treat that satisfies both hunger and cravings.
- Herbal Tea: A warm cup of chamomile or peppermint tea rounds out the experience beautifully, offering a soothing and fragrant bouquet that enhances every bite.
- Chia Pudding: The texture of chia pudding creates an intriguing bite alongside the bars, while the slightly sweet flavors harmonize over a comforting conversation.
- Granola Parfait: Layers of granola, your favorite plant-based yogurt, and fresh berries create an elegant contrast, providing both crunch and creaminess to enjoy alongside the bars.
- Dark Chocolate Drizzle: Elevate your bars by drizzling a little extra melted dark chocolate on top, adding a touch more indulgence and depth to each bite.
Pumpkin Chocolate Chip Protein Bars Recipe FAQs
How do I choose the best pumpkin puree?
Absolutely! When selecting pumpkin puree, look for a smooth texture without any dark spots or signs of separation. Canned pumpkin is usually convenient and consistent. If using fresh pumpkin, ensure it’s ripe and sweet—opt for a variety like Sugar Pie or Small Sugar pumpkins for the best flavor.
How should I store my pumpkin chocolate chip protein bars?
To keep your bars fresh, store them in an airtight container in the refrigerator for up to 10 days. This helps maintain their soft, chewy texture and allows the flavors to meld beautifully. If you notice any dark spots or dryness, it could be time to either enjoy or dispose of them!
Can I freeze these protein bars?
Definitely! For longer storage, individually wrap each bar in plastic wrap and place them in a freezer-safe container. They can last for up to 3 months. When you’re ready to indulge, just thaw them in the fridge overnight or leave them on the counter for a couple of hours. They might be a tad firmer, but still delicious!
What should I do if my protein bars are too dry?
Don’t fret! If your bars come out drier than you expected, it may be due to the protein powder or lack of moisture. Try folding in additional almond butter or pumpkin puree to the mix before pressing them into the pan. When you make them again, be sure to measure the dry ingredients carefully.
Are there any dietary considerations I should keep in mind?
Very! If you’re making these bars for others, ensure they are aware of the ingredients to avoid allergies. They’re naturally gluten-free and vegan, but if you’re catering to nut allergies, use sunbutter as a substitute for almond butter. Always check labels for potential cross-contamination if you’re serving someone with a severe allergy.
What about serving sizes? Is there a recommended size for cutting?
I often recommend cutting the bars into 12 equal portions. This size allows for a satisfying treat without overindulging, striking the perfect balance between a snack and dessert. Adjust according to your preference—the more the merrier, after all!
Pumpkin Chocolate Chip Protein Bars That Melt in Your Mouth
Ingredients
Equipment
Method
- Prepare the Pan: Line an 8" x 4" loaf pan with parchment paper, letting it hang over the edges slightly.
- Mix Wet Ingredients: In a large mixing bowl, combine pumpkin puree, almond butter, melted coconut oil, maple syrup, and vanilla extract until smooth.
- Combine Dry Ingredients: Add pea protein powder, cinnamon, and salt to the wet mixture, stirring until a thick dough forms.
- Add Chocolate Chips: Gently fold in the miniature dark chocolate chips until evenly distributed.
- Press the Mixture into the Pan: Transfer the mixture into the prepared pan and firmly press it down.
- Freeze the Base: Place the pan in the freezer for at least 30 minutes to firm up.
- Make the Chocolate Topping: Melt dark chocolate in a microwave-safe bowl, then add almond butter and mix until combined.
- Apply the Chocolate Topping: Pour the chocolate mixture over the frozen bar base and spread it evenly.
- Chill Until Set: Return the pan to the fridge and chill for at least 1 hour, or overnight.
- Cut and Serve: Remove the bars from the pan using the parchment paper edges, place on a cutting board and cut into about 12 bars.
Leave a Reply