
As I tossed together the simple ingredients for these no-bake Protein-Packed Chickpea and Date Snack Bars, the enchanting blend of sweet dates and wholesome chickpeas filled my kitchen with warmth and nostalgia. These snack bars are not just easy to whip up; they’re also a nourishing power-up, rich in protein and fiber, making them an ideal choice for busy days or a post-workout boost. Plus, the combination of flavors is completely customizable, allowing you to add your favorite nuts or even swap out sweeteners based on your preferences. Ready to dive into a recipe that will transform your snacking game? Let’s get started on these delightful bars that you’re bound to love!
Why Choose Chickpea and Date Bars?
Nutritious and Delicious: These bars provide a perfect blend of protein and fiber, ensuring your snacking is both satisfying and healthy.
Customizable Goodness: Easily adapt this no-bake recipe with your favorite add-ins, whether it’s nuts, seeds, or dried fruits, for a unique twist every time.
Simplicity Made Fun: With no baking required, you can whip up a batch in no time, making them a fantastic choice for busy schedules or last-minute cravings.
A Sweet Treat Without Guilt: The delightful sweetness of dates paired with creamy nut butter makes for a treat that feels indulgent yet remains wholesome and guilt-free.
Family-Friendly Appeal: These Protein-Packed Chickpea and Date Snack Bars are beloved by both kids and adults, making them a hit for lunchboxes or afternoon pick-me-ups.
Elevate your snack game with these versatile bars — they’re sure to become a staple! Enjoy them with fresh berries or a dollop of yogurt for an even more satisfying experience.
Protein-Packed Chickpea and Date Snack Bar Ingredients
For the Base
• Cooked Chickpeas – Excellent source of plant-based protein; rinse canned ones well to reduce sodium.
• Pitted Dates – Sweet and serve as a binding agent; soak if dry for smooth blending.
• Oats – Provides structure and fiber; opt for certified gluten-free oats if needed.
For the Creamy Mixture
• Nut Butter (Peanut/Almond) – Adds creaminess and healthy fats; substitute sunflower seed butter for a nut-free version.
• Honey/Maple Syrup – Acts as a natural sweetener; agave syrup can be a vegan alternative.
• Vanilla Extract – Enhances flavor; you can use almond extract as a substitute if desired.
For Extra Flavor
• Cinnamon – Optional, but a pinch adds warmth to the bars; adjust based on your taste preference.
• Salt – Balances sweetness; always adjust to your preference.
For a Touch of Indulgence
• Dark Chocolate Chips (Optional) – Adds a delightful sweetness; can be swapped for carob chips or omitted entirely.
These wholesome ingredients come together to create delicious Protein-Packed Chickpea and Date Snack Bars that are sure to be a favorite!
Step‑by‑Step Instructions for Protein-Packed Chickpea and Date Snack Bar
Step 1: Blend Base
Start by placing 1 cup of cooked chickpeas and 1 cup of pitted dates into a food processor. Pulse them together until the mixture is smooth and creamy, adding warm water if your dates are dry. Aim for a consistency that is thick yet spreadable, taking about 2-3 minutes to achieve the perfect blend.
Step 2: Mix Ingredients
Next, add 1/2 cup of oats, 1/4 cup of nut butter, your choice of honey or maple syrup, 1 teaspoon of vanilla extract, a sprinkle of cinnamon, and salt to the food processor. Blend the mixture again until it becomes thick and well combined, around 1-2 minutes. It should hold together without being too sticky.
Step 3: Fold in Chocolate Chips
If you choose to include dark chocolate chips, gently fold in 1/4 cup at this stage with a spatula or spoon, ensuring they are evenly distributed throughout the mixture. This adds a delightful touch of sweetness and richness to your Protein-Packed Chickpea and Date Snack Bars, enhancing the overall flavor profile.
Step 4: Prepare Dish
Line an 8×8-inch baking dish with parchment paper, leaving some overhang for easy removal. Pour the mixture into the prepared dish and spread it evenly with a spatula, pressing down firmly to create a compact layer. Make sure the surface is smooth, which helps the snack bars hold their shape once set.
Step 5: Chill
Place the baking dish in the refrigerator and allow the mixture to chill for at least 1 hour. This step is crucial for the protein-packed chickpea and date snack bars to firm up, making them easier to slice into perfect portions. You’ll know they’re ready when the texture is firm to the touch.
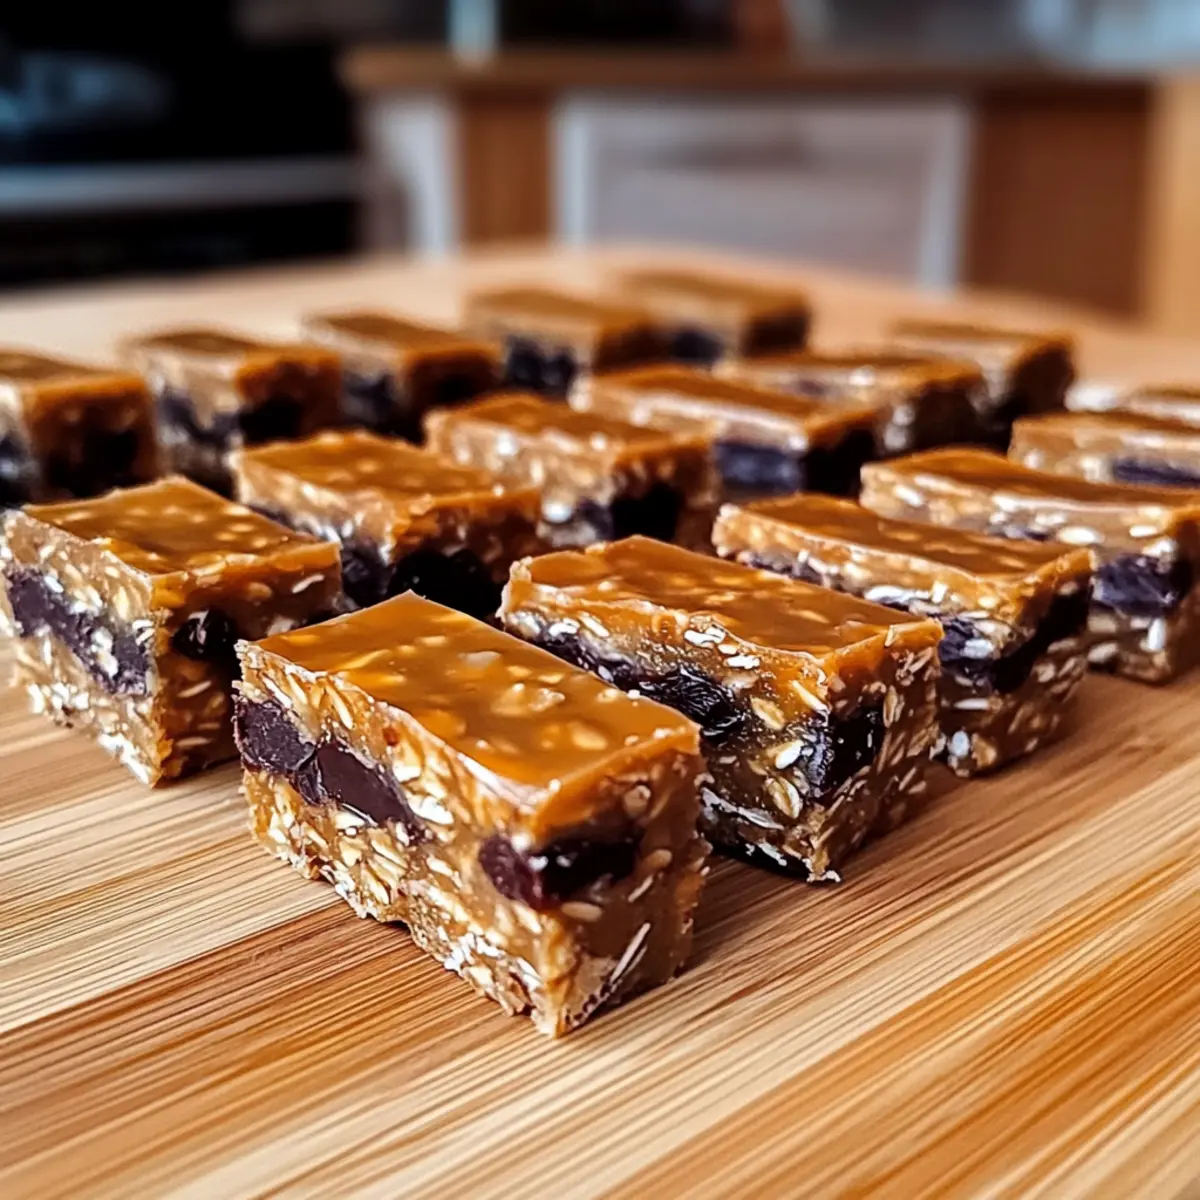
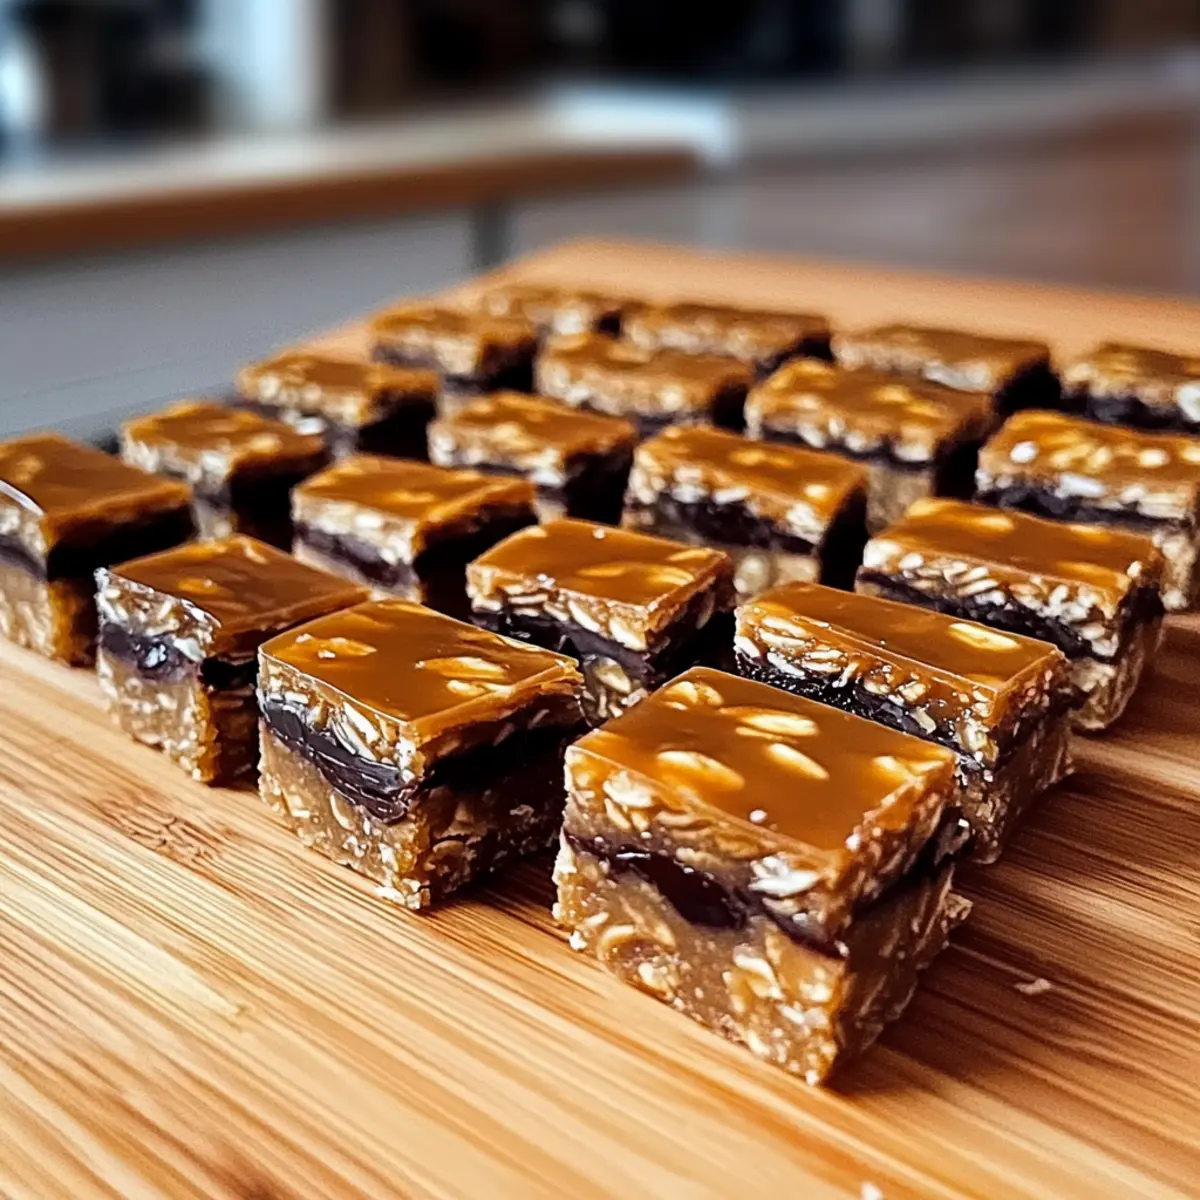
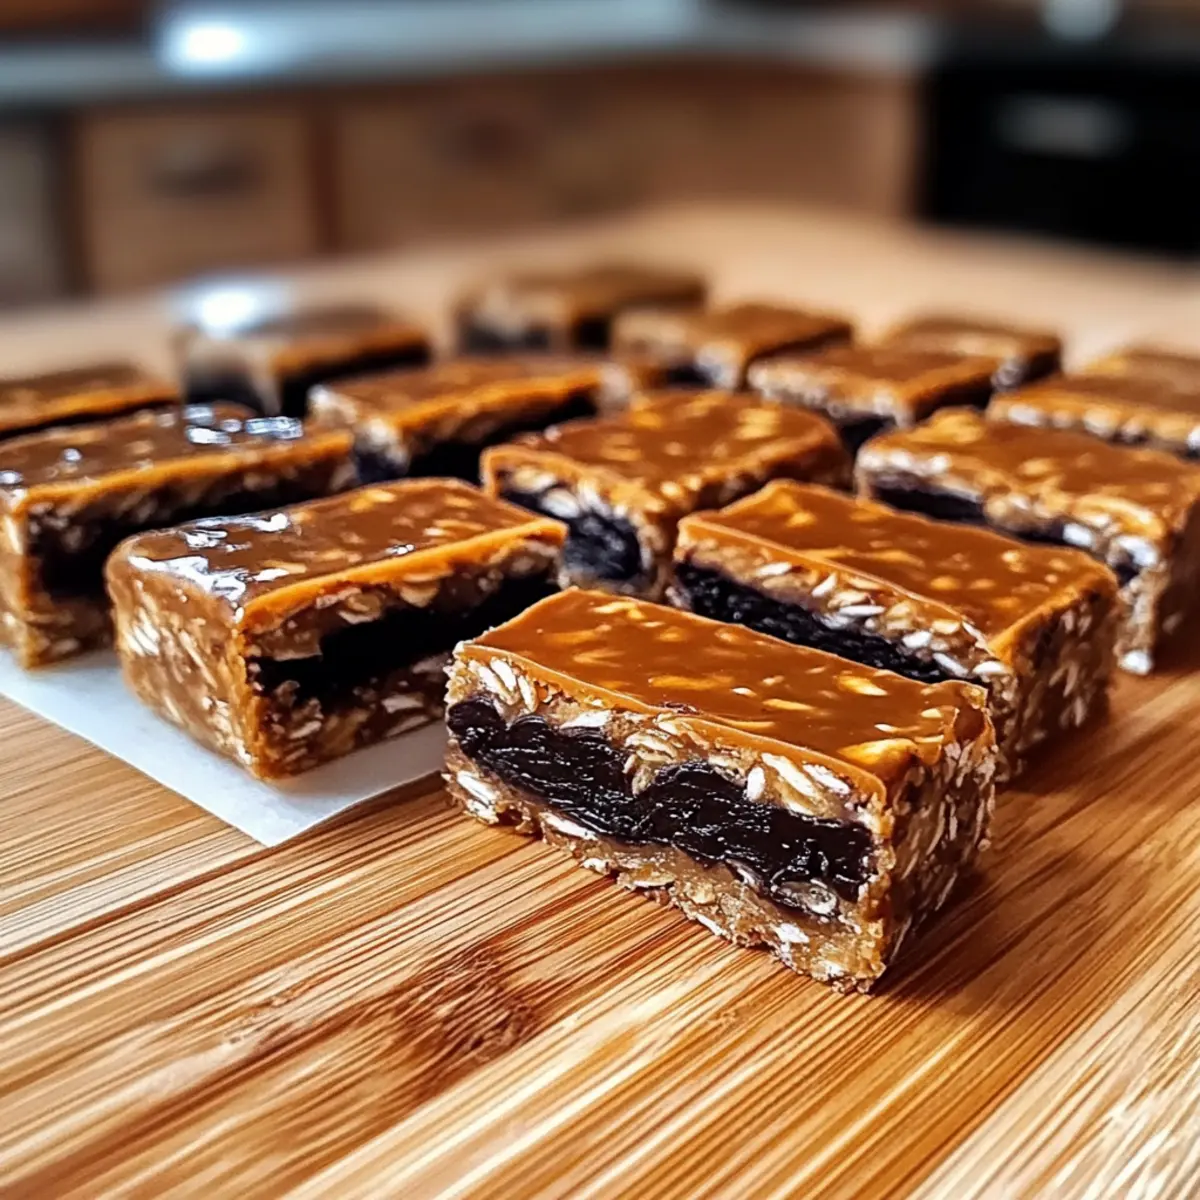
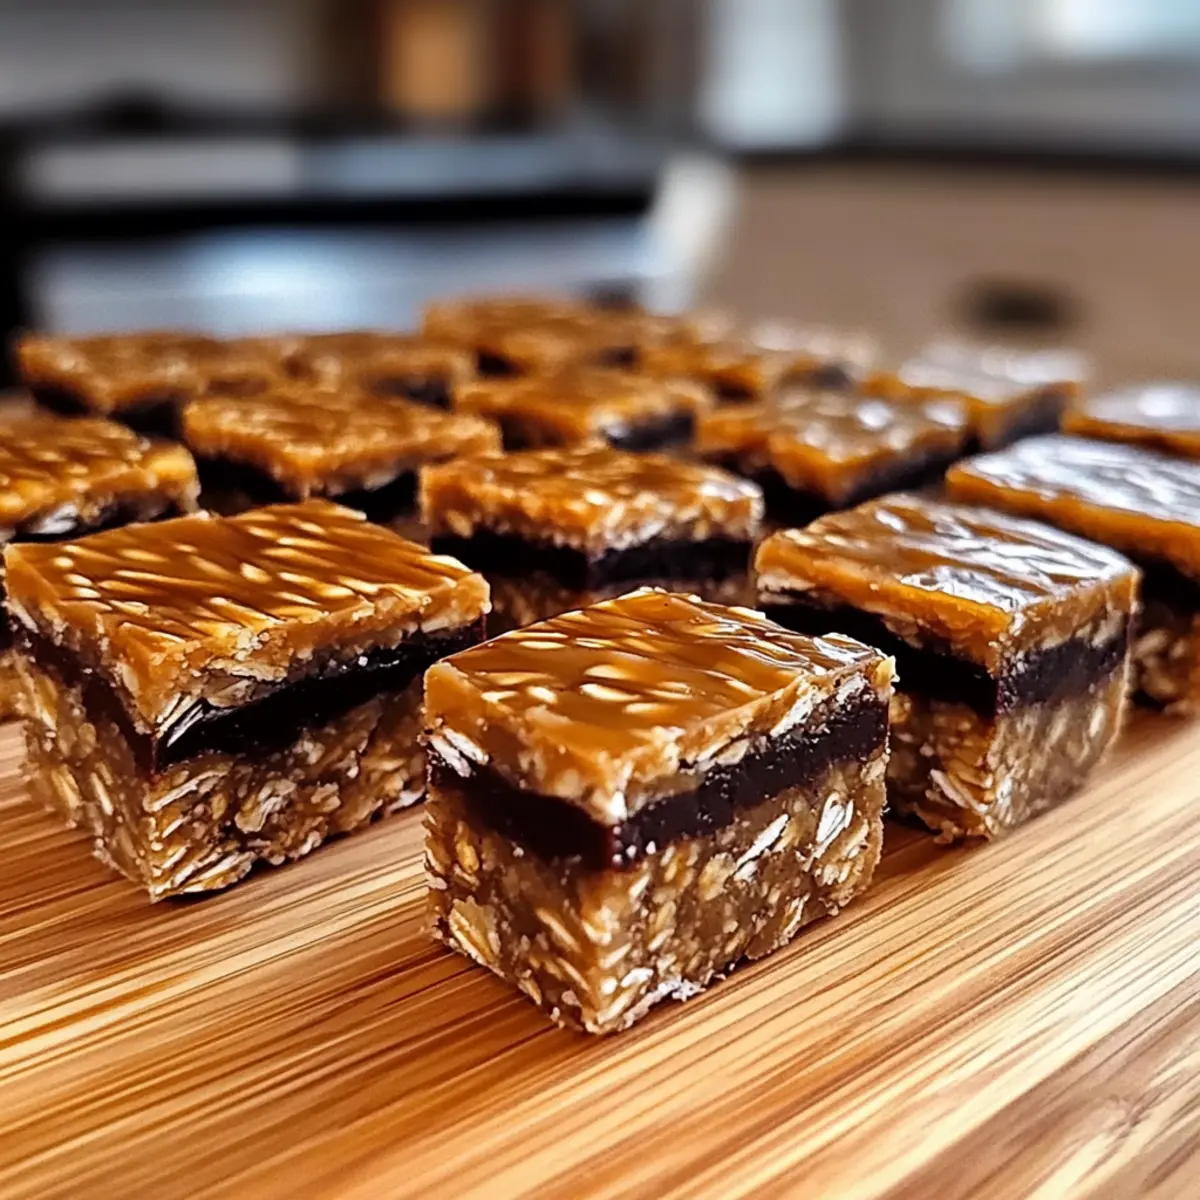
Step 6: Slice & Serve
After chilling, remove the dish from the refrigerator and lift the bars out using the parchment paper. Place on a cutting board and slice them into evenly sized bars. Your delicious Protein-Packed Chickpea and Date Snack Bars are now ready to be enjoyed as a nutritious snack!
What to Serve with Protein-Packed Chickpea and Date Snack Bars?
Elevate your snacking experience with delightful pairings that complement these wholesome bars perfectly.
-
Creamy Greek Yogurt: This adds a tangy richness, balancing the sweetness of the bars beautifully while enhancing the protein content.
-
Fresh Berries: Strawberries or blueberries provide a refreshing burst of flavor, creating a vibrant and nutritious contrast with the chewy texture of the snack bars.
-
Nut Butter Drizzle: A drizzle of almond or peanut butter amplifies the nutty flavor, making each bite irresistibly creamy and indulgent.
-
Dairy-Free Ice Cream: For a sweet treat, pair with coconut or almond milk ice cream, creating a satisfying contrast between warm and cold.
-
Chai Tea: The earthy spices in chai add warmth and comfort, making each snack time feel cozy and relaxing.
-
Sliced Banana: The natural sweetness of banana enhances the flavor profile and offers extra fiber, keeping you full longer.
-
Coconut Flakes: Sprinkle toasted coconut on top for added texture and a delightful tropical twist that complements the dates perfectly.
Enjoy experimenting with these pairings, and let your snack time shine with delightful flavors!
Make Ahead Options
These Protein-Packed Chickpea and Date Snack Bars are a fantastic choice for meal prep! You can prepare the mixture up to 24 hours in advance, ensuring that the flavors meld perfectly. Simply follow the blending and mixing steps and then transfer the mixture to an 8×8-inch baking dish, pressing it down firmly. Cover it with plastic wrap and refrigerate to keep it fresh. When you’re ready to serve, just slice the chilled bars and enjoy! For longer storage, you can freeze the bars individually wrapped for up to 3 months. They’ll be just as delicious, making them a great time-saver for your busy week!
Expert Tips for Protein-Packed Chickpea and Date Snack Bars
- Check Consistency: Ensure your mixture is thick but pliable; add more oats if it’s too wet or a splash of water if too dry.
- Chill for Best Results: Make sure to refrigerate the bars for at least an hour—this step helps them hold their shape when sliced.
- Quality Ingredients: Always select fresh, high-quality dates and rinse canned chickpeas to minimize sodium, enhancing the flavor of your snack bars.
- Easy Removal: Use parchment paper overhang for easy lifting; this simple trick takes the hassle out of serving your Protein-Packed Chickpea and Date Snack Bars.
- Customize Wisely: Feel free to mix in seeds or dried fruits, but balance flavors to keep the bars delicious and nutritious without overpowering sweetness.
How to Store and Freeze Protein-Packed Chickpea and Date Snack Bars
Fridge: Store your protein-packed chickpea and date snack bars in an airtight container in the refrigerator for up to 1 week to maintain freshness and flavor.
Freezer: For longer storage, wrap each bar individually in plastic wrap and place them in a freezer-safe bag. They can be frozen for up to 3 months without losing taste or texture.
Thawing: To enjoy, simply thaw the bars in the fridge overnight or at room temperature for about 30 minutes before serving.
Serving Suggestion: For a delightful treat, pair the bars with a side of yogurt or fresh fruit after thawing for a nourishing snack!
Protein-Packed Chickpea and Date Snack Bar Variations
Inviting you to make these delicious bars your own with some creative swaps and exciting twists—let’s dive into the possibilities!
- Nut-Free: Substitute nut butter with sunflower seed butter for a delicious alternative that’s safe for nut allergies.
- Superfood Boost: Add a tablespoon of chia seeds or flaxseeds for added fiber and omega-3 fatty acids, giving your bars a nutritious upgrade.
- Dried Fruit Twist: Toss in some chopped dried apricots or cranberries to enhance sweetness and add a burst of flavor, making every bite delightful.
- Spicy Kick: Experiment with a dash of cayenne pepper or chili powder to infuse a little heat into your bars, balancing the sweetness with a fun twist.
- Chocolate-Lover’s Delight: Replace dark chocolate chips with white chocolate or butterscotch chips for a sweeter treat—each variation can open up a new world of flavor.
- Flavor Infusion: Swap out vanilla extract for peppermint extract to create a refreshing minty version that’s perfect for a unique snacking experience.
- Gluten-Free Option: Ensure you use certified gluten-free oats to keep these bars friendly for those with gluten sensitivities.
- Custom Sweetener: For a low-calorie option, try using monk fruit sweetener instead of honey for sweetness without the extra sugar.
Explore these variations and find the perfect balance of flavors that suits your taste! While you’re at it, you might also enjoy serving these treats alongside a delicious Sweet Spicy Mango salad as a refreshing side or even pair with a cozy bowl of Louisiana Shrimp and Corn Bisque for a hearty meal!
Protein-Packed Chickpea and Date Snack Bars Recipe FAQs
What type of chickpeas should I use?
Absolutely! You can use either canned or cooked chickpeas for this recipe. If using canned chickpeas, make sure to rinse them well under cold water to reduce sodium. If you opt for dried chickpeas, cook them beforehand and let them cool to ensure they’re ready for blending.
How should I store the bars?
Keep your Protein-Packed Chickpea and Date Snack Bars in an airtight container in the refrigerator for up to 1 week. This method keeps them fresh and ready for snacking! For optimal taste, I recommend placing parchment paper between the bars to prevent sticking.
Can these bars be frozen?
Very! To freeze them, wrap each bar individually in plastic wrap and place them in a freezer-safe bag. This keeps them fresh for up to 3 months. When you’re ready to enjoy, simply thaw them in the fridge overnight or leave them at room temperature for about 30 minutes.
What if my mixture is too dry or too wet?
Great question! If your mixture feels too dry, simply add a splash of warm water gradually until it reaches a thick but spreadable consistency. Conversely, if it’s too wet, add more oats, a tablespoon at a time, until it firms up. Aim for a texture that holds together without being sticky!
Are these bars suitable for kids with nut allergies?
Yes, indeed! You can easily substitute the nut butter in the recipe with sunflower seed butter to make them nut-free. This gives you the creaminess without any nut allergens, making it safe for kids with those dietary restrictions to enjoy these delicious bars!
How do I enhance the flavor of the bars?
Want to jazz them up? Feel free to experiment! Adding a teaspoon of cinnamon will add warmth, or you could include a handful of chia seeds for added nutrition. Just make sure to balance the sweetness so that it doesn’t overpower the natural flavors of the chickpeas and dates!
Protein-Packed Chickpea and Date Snack Bar You’ll Love
Ingredients
Equipment
Method
- Blend Base: Place 1 cup of cooked chickpeas and 1 cup of pitted dates into a food processor. Pulse until smooth and creamy, adding warm water if needed. It takes about 2-3 minutes.
- Mix Ingredients: Add 1/2 cup of oats, 1/4 cup of nut butter, honey or maple syrup, 1 teaspoon of vanilla extract, a sprinkle of cinnamon, and salt. Blend again for 1-2 minutes until thick and combined.
- Fold in Chocolate Chips: If using, fold in 1/4 cup of dark chocolate chips gently with a spatula to distribute evenly.
- Prepare Dish: Line an 8x8-inch baking dish with parchment paper, pour the mixture, and press down firmly to create a compact layer.
- Chill: Refrigerate for at least 1 hour to firm up the bars.
- Slice & Serve: Remove from the refrigerator, lift out using the parchment paper, and slice into evenly sized bars.
Leave a Reply