
When I first tried making protein bars at home, I never imagined they could be this easy—and delicious! These 4-Ingredient Protein Bars have transformed my snack game, delivering a chewy texture that rivals store-bought versions without any of the chalky aftertaste. What’s more, they’re incredibly versatile to fit any dietary needs—gluten-free, vegan, or nut-free, you name it! With quick prep time and customizable flavor options, like Chocolate or Banana Bread Bars, they’re the perfect solution for a healthy snack or meal replacement. Curious to discover how to whip up these satisfying bars that might just become your new favorite treat? Let’s dive in!

Why are these protein bars a game changer?
Simplicity: With just four ingredients, these bars can be whipped up in no time—even by kitchen novices.
Customizable: Whether you crave a rich Chocolate or a fruity Banana Bread variation, the endless flavor options cater to every taste.
Diet-Friendly: Perfect for gluten-free, vegan, and nut-free diets, everyone can indulge without guilt!
Chewy Satisfaction: Enjoy a rich, satisfying texture that won’t crumble apart, making them ideal for on-the-go snacking.
Quick Prep: No baking required! Just mix, chill, and savor your delightful homemade bars.
Crowd-Pleaser: Great as a healthy snack for kids or a post-workout treat, these protein bars are sure to be a hit!
Protein Bars Ingredients
For the Batter
- Peanut Butter – Adds creaminess and protein; substitute with almond butter or sunflower seed butter for a nut-free option.
- Protein Powder – Acts as the primary protein source; use unsweetened protein powder for better taste control.
- Pure Maple Syrup – Provides natural sweetness and moisture; honey or agave syrup can be used as alternatives.
- Salt – Enhances flavor balance and richness; optional, can be omitted if desired.
Optional Topping
- Melted Chocolate Chips – Adds a decadent coating; can substitute with cocoa powder for a chocolate flavor without the chips.
Step‑by‑Step Instructions for Protein Bars
Step 1: Combine Ingredients
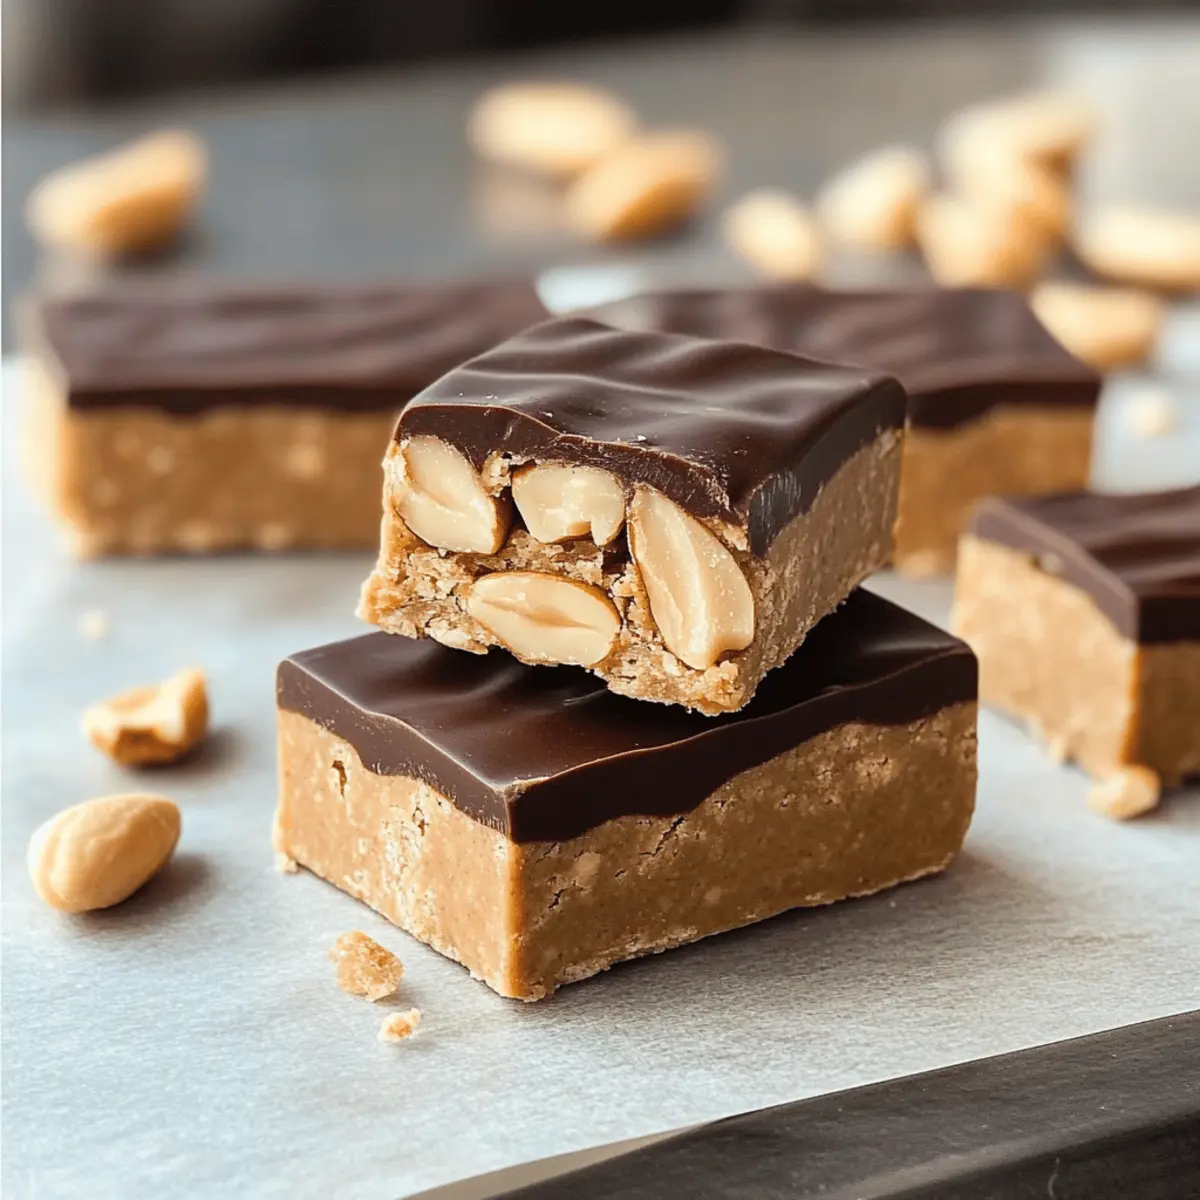
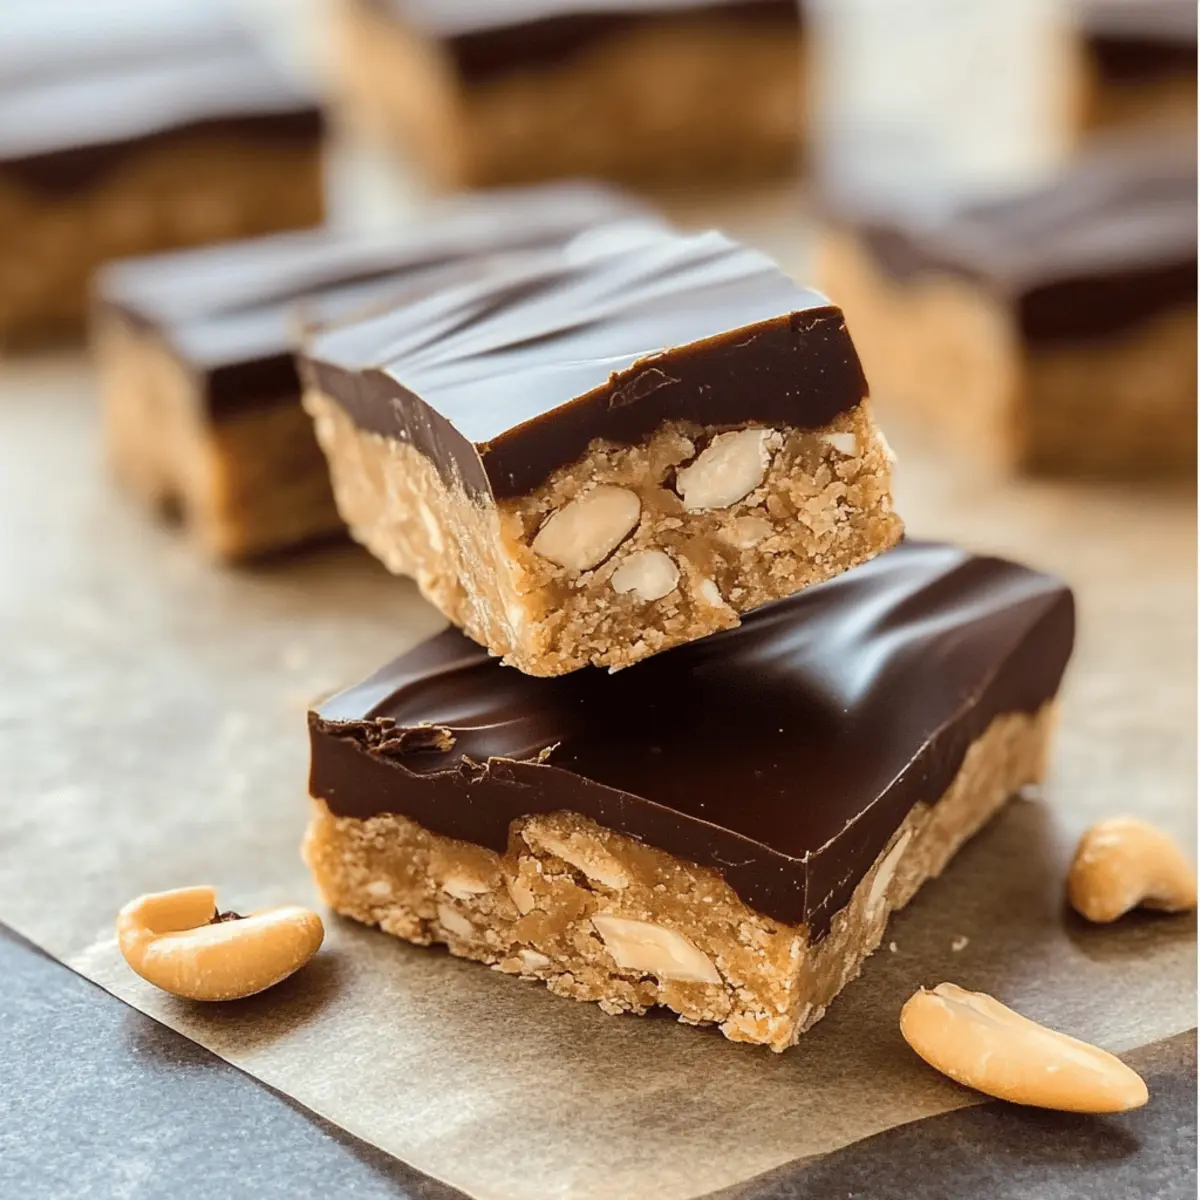
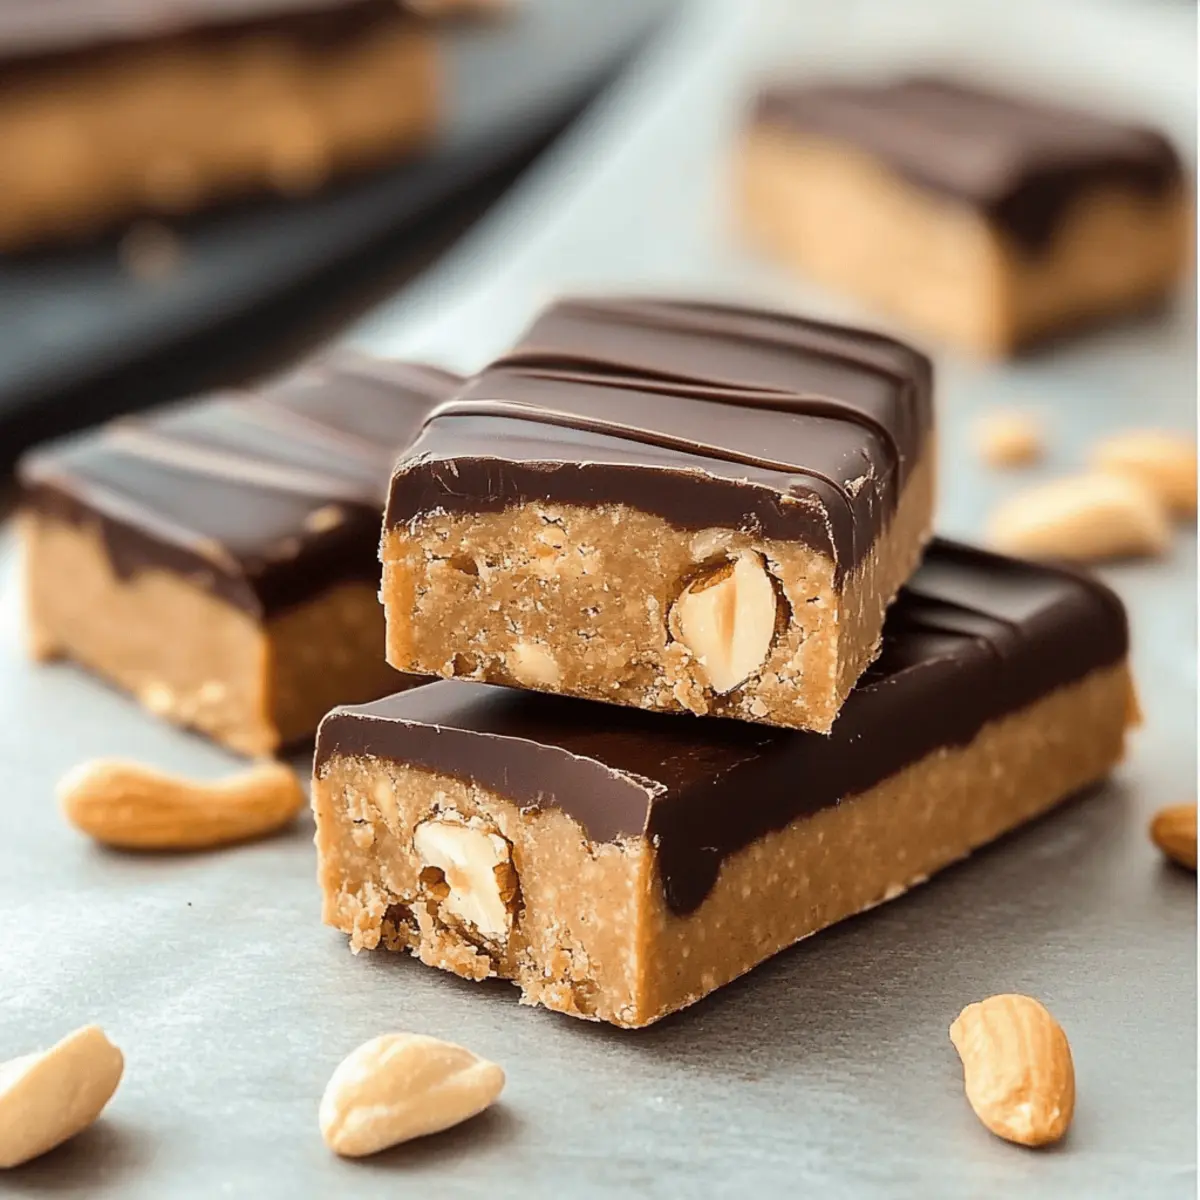
In a large mixing bowl, add 1 cup of creamy peanut butter, 1 cup of unsweetened protein powder, 1/3 cup of pure maple syrup, and a pinch of salt if desired. Using a sturdy spatula or wooden spoon, mix the ingredients together until a cohesive dough forms, which should take about 2-3 minutes. The dough will be thick yet pliable, ready for shaping.
Step 2: Shape Bars
Once the mixture is well combined, you have two options. For individual bars, generously dust your hands with a bit of protein powder and shape the dough into bars, roughly 2 inches wide. Alternatively, for uniformity, line an 8×8 inch pan with parchment paper and press the mixture evenly into the bottom. Aim for about a 1-inch thickness for the best texture.
Step 3: Chill
Place the shaped bars or the pressed mixture in the refrigerator and allow them to chill for about 30 minutes. This will help them firm up and hold their shape better. Check for firmness by gently pressing the edges; they should feel set but still slightly soft in the center.
Step 4: Add Chocolate Coating (Optional)
If you want to elevate your protein bars, prepare a chocolate coating. Melt 1/2 cup of chocolate chips in a microwave-safe bowl for about 30-40 seconds until smooth, stirring every 10 seconds to prevent burning. Carefully dip each bar into the melted chocolate or pour the chocolate over the entire surface of the pressed mixture, then return to the fridge until the chocolate is set.
Step 5: Slice
Once chilled and firm, remove the protein bars from the pan, if pressed, and slice them into your desired bar size—typically, cutting into 10-12 bars works well. The edges should be smooth and the texture chewy, creating a delicious snack that’s ready to enjoy anytime!
Make Ahead Options
These Protein Bars are a perfect choice for meal prep aficionados! You can easily prepare the mixture up to 24 hours in advance by combining the peanut butter, protein powder, maple syrup, and salt in a bowl. Once mixed, shape the bars and refrigerate until firm. If you’d like, you can also prepare them without the chocolate coating and add that step right before serving—this helps keep the bars fresh and prevents the chocolate from fading in quality. For the best results, store the prepared bars in an airtight container in the fridge, ensuring they remain just as delicious when you’re ready to enjoy a healthy snack!
Protein Bars Variations & Substitutions
Feel free to get creative and tailor these protein bars to suit your taste and dietary needs!
- Nut-Free: Replace peanut butter with sunflower seed butter for a nut-free delicious treat.
- Vegan-Friendly: Use maple syrup or agave in place of honey for a fully vegan option.
- Chocolate Lovers: Add cocoa powder instead of melted chocolate chips for a rich, fudgy flavor.
- Banana Bread Bars: Mix in mashed bananas and a dash of nutmeg instead of maple syrup for a nostalgic twist.
- Cookie Dough Bars: Fold in mini chocolate chips and vanilla extract for a delightful cookie dough flavor.
- Spiced Pumpkin Bars: Incorporate pumpkin puree and pumpkin spice for a fall-inspired delicacy.
- Berry Blast: Throw in dried cranberries or blueberries to add fruity pops of flavor and vibrancy.
- Salted Caramel: Drizzle with a homemade salted caramel for an indulgent treat that’s hard to resist!
These versatile options allow you to make the protein bars truly yours. Pair them with a side of fresh fruit for a nutritious snack or enjoy them crumbled over yogurt for extra texture. If you ever find yourself craving variety, check out our guide on making delicious no-bake treats for more inspiration!
How to Store and Freeze Protein Bars
Room Temperature: Keep protein bars in an airtight container at room temperature for up to 7 days for a quick, convenient snack.
Fridge: For longer shelf life, store bars in the refrigerator where they can last up to 2 weeks without losing their chewy texture.
Freezer: Freeze individual bars wrapped in plastic wrap or parchment paper for up to 3 months. Thaw overnight in the fridge for a ready-to-eat snack!
Reheating: If you prefer warm bars, microwave individual servings for 10-15 seconds for a freshly made taste. Enjoy!
What to Serve with 4-Ingredient High-Protein Bars
These delightful protein bars are just the beginning of a wholesome meal or snack experience waiting to unfold.
- Fresh Fruit: Pair with slices of apple or banana for a refreshing, vitamin-packed crunch that balances the chewy texture of the bars.
- Greek Yogurt: Serve with a dollop of creamy Greek yogurt, drizzling some honey on top for added sweetness—a perfect balance of protein and indulgence.
- Nutty Granola: Sprinkle over a mixture of nutty granola for extra crunch, turning your protein bar into a delightful breakfast bowl or topping for a smoothie.
- Vegetable Sticks: Enjoy alongside crunchy carrot and cucumber sticks to add a refreshing, crisp element to your snack routine, keeping it light and satisfying.
- Milk Alternative: Wash it down with a glass of almond or oat milk, adding a creamy richness that complements the flavors without overpowering them.
- Trail Mix: Crumble bars over your favorite trail mix for a sweet treat on-the-go. The combination of textures and flavors makes for an energizing snack.
- Dark Chocolate Dipped Strawberries: Treat yourself to strawberries dipped in dark chocolate as a sweet ending, aligning beautifully with the flavors of your protein bars.
- Matcha Tea: Enjoy a warm cup of matcha tea to provide a calming contrast, enhancing your snack with added health benefits and a hint of earthiness.
Expert Tips for Protein Bars
-
Protein Powder Choice: Make sure to select a protein powder you enjoy, as its flavor greatly impacts the overall taste of the protein bars.
-
Chill Time: Don’t skip the chilling step; it’s crucial for proper texture. Bars that aren’t chilled long enough may crumble instead of holding their shape.
-
Custom Sweetness: If you prefer sweeter bars, feel free to add a bit more maple syrup, especially if you opt for an unsweetened protein powder.
-
Smooth Coating: For a smoother chocolate coating, incorporate about 2 teaspoons of oil into melted chocolate to achieve a glossy finish.
-
Flavor Combinations: Don’t hesitate to experiment with different mix-ins, like dried fruits or seeds, to create unique flavor profiles for your protein bars.
-
Storage Guidelines: To maintain freshness, store your protein bars in an airtight container at room temperature for up to one week or in the fridge for longer-lasting goodness.
Protein Bars Recipe FAQs
What type of peanut butter should I use for these protein bars?
Absolutely! I recommend using creamy, natural peanut butter for the best texture and taste. If you’re looking for a nut-free version, almond butter or sunflower seed butter work wonderfully as substitutes.
How should I store my protein bars?
Store your protein bars in an airtight container at room temperature for about 7 days. If you want them to last longer, keep them in the fridge, where they can stay fresh for up to 2 weeks.
Can I freeze my protein bars?
Yes, you can! To freeze individual protein bars, wrap them tightly in plastic wrap or parchment paper and place them in a freezer-safe container. They can last for up to 3 months in the freezer. When you’re ready to enjoy one, simply thaw it in the fridge overnight.
What if my protein bars turn out too crumbly?
If your protein bars are crumbly, it’s usually due to not enough moisture in the mixture. Try adding a tablespoon of additional maple syrup or a dash of water and mix until the consistency improves. Remember, chilling them for the recommended time is key to helping them hold together better!
Is this protein bars recipe suitable for my gluten-free diet?
Absolutely! These protein bars are naturally gluten-free, provided you use gluten-free certified protein powder. They’re also customizable to meet various dietary needs, making them perfect for everyone, including those with gluten sensitivities.
Can I make these protein bars nut-free?
Definitely! Use sunflower seed butter or a seed butter of your choice instead of peanut butter. This will ensure the bars remain nut-free while still providing the creaminess you love.
Delicious No-Bake Protein Bars You Can Customize at Home
Ingredients
Equipment
Method
- In a large mixing bowl, add 1 cup of creamy peanut butter, 1 cup of unsweetened protein powder, 1/3 cup of pure maple syrup, and a pinch of salt if desired. Mix until a cohesive dough forms, about 2-3 minutes.
- Shape the dough into bars, roughly 2 inches wide, or press mixture into an 8x8 inch pan lined with parchment paper for uniformity.
- Place the shaped bars or pressed mixture in the refrigerator and chill for about 30 minutes.
- Melt 1/2 cup of chocolate chips in a microwave-safe bowl, then dip each bar into the melted chocolate or pour it over the pressed mixture, returning to the fridge until set.
- Once chilled, remove from the pan if pressed, and slice into desired sizes.
Leave a Reply