
While scrolling through my kitchen shelves one afternoon, I discovered a half-empty package of Oreos gazing up at me, calling out for something special. That’s when I decided to whip up these Easy No-Bake Oreo Protein Balls—a delightful, protein-rich treat perfect for anyone looking for a quick and satisfying snack. With just four simple ingredients, this recipe brings together the nostalgic taste of Oreos and the nutritional boost of protein powder, making it an ideal candidate for meal prep or a post-workout refresher. Not only are they incredibly simple to make, but they also offer versatility: choose between chocolate or vanilla protein powder to suit your taste! Ready to dive into these scrumptious energy bites and see how easy it is to add a touch of homemade goodness to your routine?
Why Are Oreo Protein Balls a Must-Try?
Quick and Easy: With only four ingredients, you can whip up these delicious bites in no time, perfect for busy weeks or post-workout snacks.
Endless Variations: Customize them with different protein powders or add-ins like nuts and seeds to suit your taste! Try mixing it up with Greek Turkey Meatballs with Tzatziki as a savory contrast.
Guilt-Free Indulgence: Enjoy the rich flavor of Oreos without the guilt, thanks to the added protein.
Crowd-Pleaser: A hit with both kids and adults, these protein balls are a great way to satisfy sweet cravings while staying healthy.
Perfect Storage Solution: Stash them in the fridge or freezer for a quick energy boost whenever you need it! Pair with a shake for an on-the-go breakfast or snack.
Oreo Protein Balls Ingredients
For the Mixture
• Crushed Oreos – Adds that classic cookies-and-cream flavor; feel free to experiment with different Oreo varieties!
• Cream Cheese – Provides creaminess and binds the mixture together; use a dairy-free substitute for a lighter twist.
• Protein Powder – Supplies a protein boost; choose chocolate or vanilla based on your personal preference. Adjust almond milk to achieve the right texture!
• Almond Milk – Adds moisture for a perfect dough; substitute with oat or soy milk as desired.
For the Coating
• Melted Chocolate – Enhances flavor and creates a delightful texture; opt for dark or dairy-free chocolate for a vegan version.
These Oreo Protein Balls are not just tasty; they’re a fantastic way to get a quick snack that’s both delicious and protein-packed!
Step‑by‑Step Instructions for Oreo Protein Balls
Step 1: Prepare the Workspace
Begin by lining a baking sheet with wax paper to create a non-stick surface for your finished Oreo protein balls. This step is crucial to ensure easy removal later. Gather all your ingredients and equipment, such as a large mixing bowl, a spatula for stirring, and measuring cups, to streamline the process.
Step 2: Mix the Dry Ingredients
In your large mixing bowl, combine the crushed Oreos and protein powder of your choice, whether chocolate or vanilla. Use a spatula to mix the dry ingredients thoroughly until they are evenly distributed. This step will create a sweet, flavorful base, allowing the classic cookies-and-cream taste to shine in your Oreo protein balls.
Step 3: Incorporate the Cream Cheese
Add the softened cream cheese into the dry mixture, ensuring it’s at room temperature for easier blending. Mix the ingredients with your spatula until they form a cohesive mixture. The cream cheese binds everything together, giving your protein balls that creamy texture that perfectly complements the Oreos.
Step 4: Adjust the Consistency
Gradually pour in the almond milk, starting with a small amount and adding more as needed. Continue to mix the ingredients until the dough reaches a moldable consistency that is not too sticky. This step may take a few minutes, but aim for a thick, pliable dough that holds its shape for rolling the Oreo protein balls.
Step 5: Shape the Protein Balls
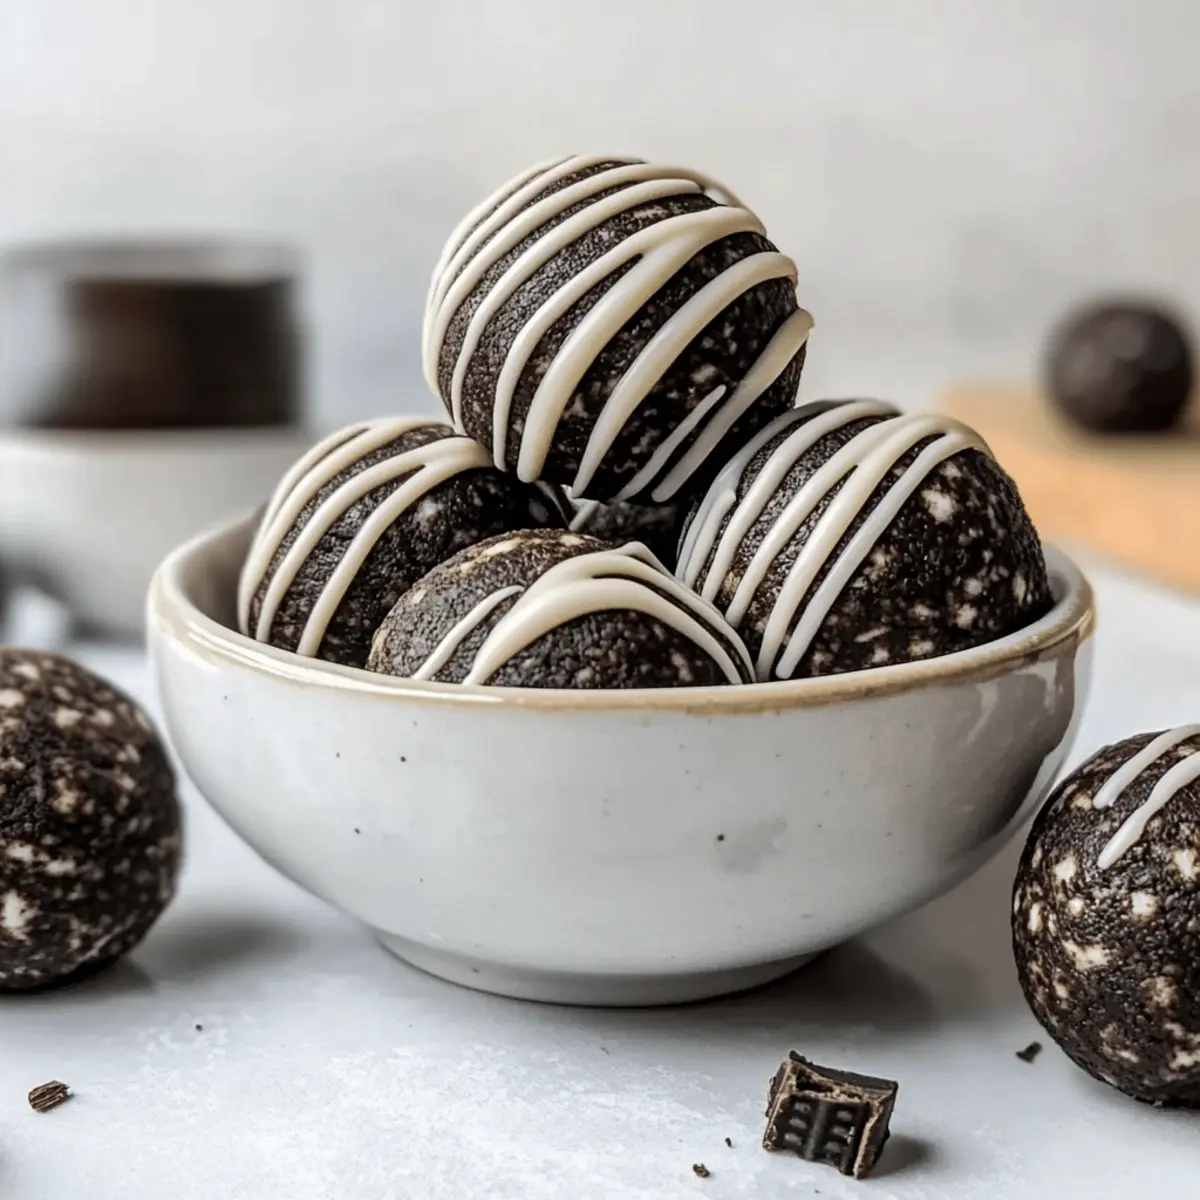
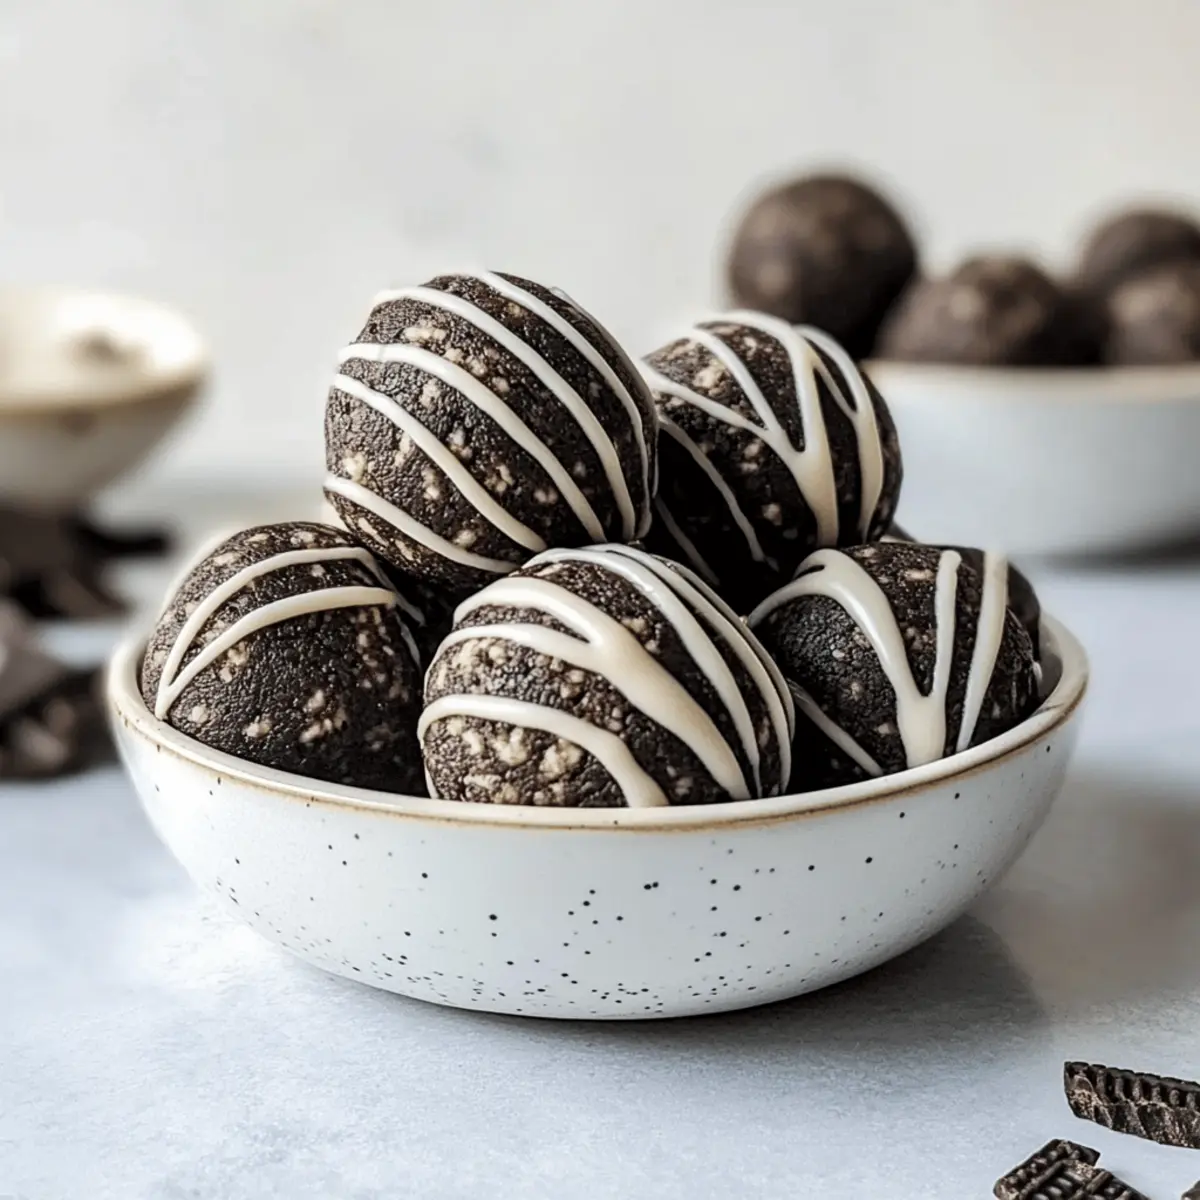
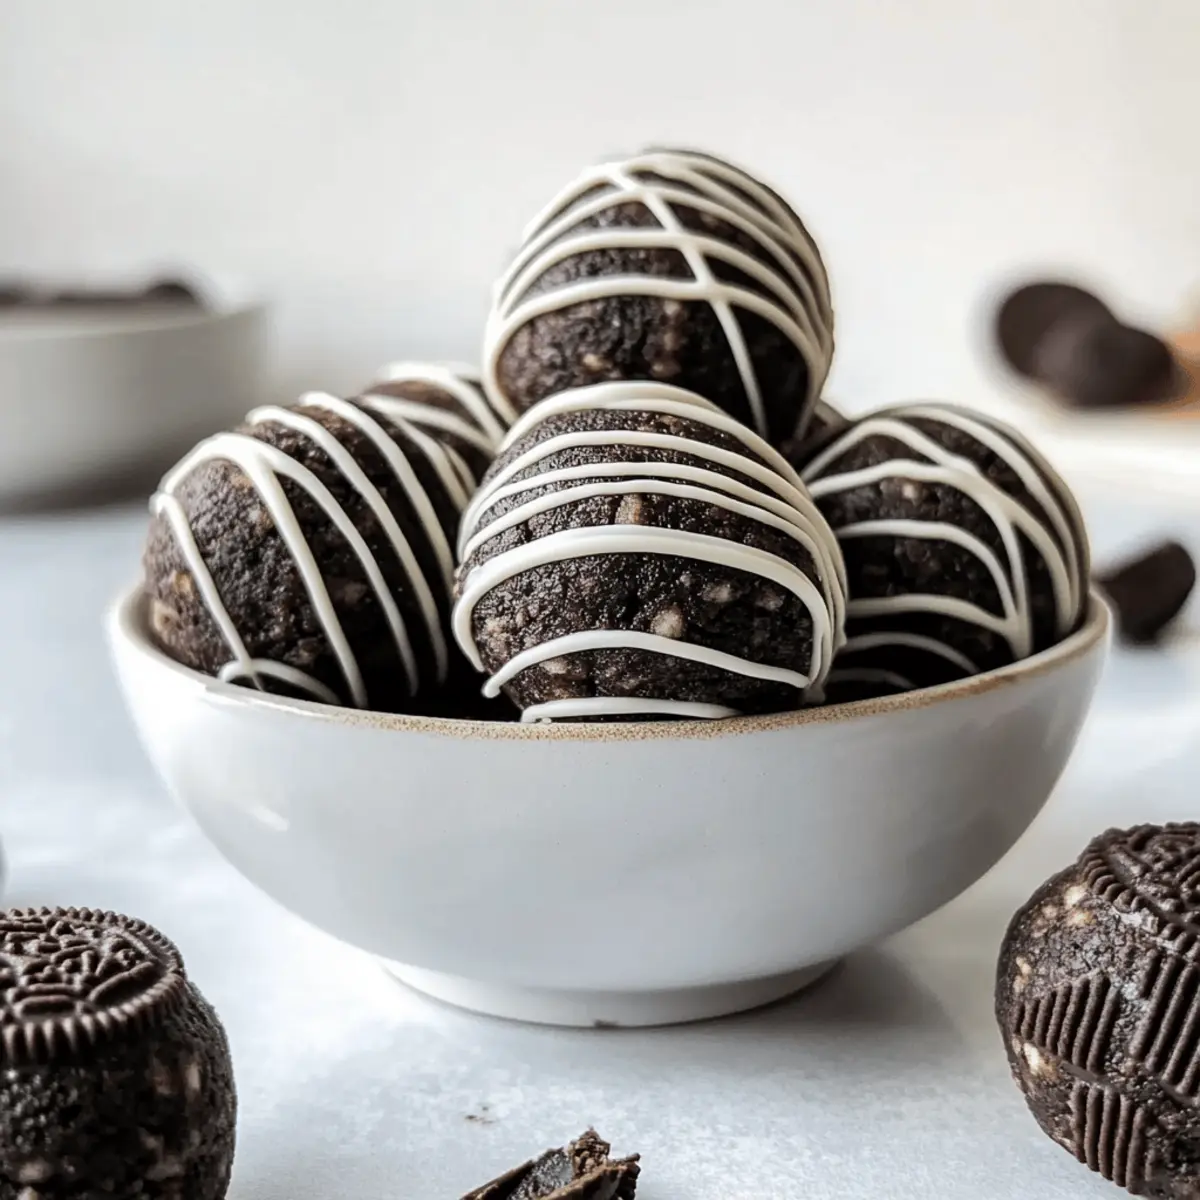
With clean hands, scoop out tablespoon-sized portions of the dough and roll them into balls. Place each ball on your prepared baking sheet, making sure to leave space between them. This process should yield about 12-15 Oreo protein balls, each filled with rich flavors and ready for a delightful chocolate coating.
Step 6: Melt the Chocolate Coating
In a microwave-safe bowl, combine your preferred chocolate and a splash of coconut oil. Heat the mixture in 30-second increments, stirring in between, until the chocolate is completely melted and smooth. This ensures a perfect drizzle over your finished Oreo protein balls that enhances both flavor and presentation.
Step 7: Coat the Protein Balls
Once the chocolate is melted, drizzle it generously over the shaped Oreo protein balls using a spoon or drizzle tool. Make sure to coat them evenly for a luxurious finish. This step adds an enticing visual appeal and a delicious chocolate layer to your delightful snacks.
Step 8: Set the Oreo Protein Balls
Transfer the baking sheet with the coated protein balls to the freezer and let them set for about 10 minutes. This will allow the chocolate to harden and the flavors to meld together. Once the time is up, check for a firm texture, and your tasty Oreo protein balls will be ready to enjoy!
Make Ahead Options
These Oreo Protein Balls are perfect for meal prep enthusiasts! You can prepare the mixture up to 24 hours in advance by combining the crushed Oreos, cream cheese, and protein powder, then storing it in an airtight container in the refrigerator. This way, you save precious time on busy days. When you’re ready to enjoy, simply roll the chilled dough into balls, drizzle with melted chocolate, and let them set in the freezer for about 10 minutes. By prepping ahead, you’ll have these delicious energy bites ready at your fingertips, just as tasty and satisfying as if you made them fresh!
Expert Tips for Making Oreo Protein Balls
-
Room Temperature Ingredients: Ensure your cream cheese is at room temperature for easier blending—this will help you achieve a smoother texture in your Oreo protein balls.
-
Chill Before Rolling: Allow the mixture to chill in the fridge for 15-20 minutes before rolling. This prevents stickiness and makes handling the dough much easier.
-
Taste Test: Always taste the mixture before rolling. Adjust the sweetness as needed, especially if using flavored protein powders to avoid overpowering sweetness.
-
Proper Portioning: Use a tablespoon measuring spoon to scoop the dough for consistency in size. This ensures even bite-sized energy snacks—no one wants an overly large protein ball!
-
Storage Savvy: Store your finished Oreo protein balls in an airtight container in the fridge for up to a week or freeze them for longer storage. Perfect for quick access when hunger strikes!
Oreo Protein Balls: Endless Variations
Why stick to one flavor when you can explore delightful twists on these yummy snacks? Customize your Oreo protein balls to your heart’s content!
- Gluten-Free: Use gluten-free sandwich cookies instead of traditional Oreos for a tasty twist that everyone can enjoy.
- Nutty Addition: Incorporate chopped almonds or walnuts for a satisfying crunch and an extra nutritional boost. The texture will be beautifully varied, enhancing each bite!
- Fruit Flavor: Mix in dried cranberries or diced apples to add a tangy sweetness. It’s like a burst of surprise with each mouthful!
- Higher Protein: Opt for a protein powder blend that includes added greens or fiber for an even healthier snack option. This will amp up the nutritional value without sacrificing flavor.
- Vegan Friendly: Swap cream cheese for a plant-based alternative and use dairy-free chocolate for a delicious vegan delight. These treats can cater to various dietary choices effortlessly.
- Syrupy Surprise: Drizzle some maple syrup or honey on top after coating with chocolate for an extra layer of sweetness. It will take your protein balls to a whole new level!
- Spicy Kick: Add a pinch of cinnamon or a dash of cayenne pepper to the mixture to create a truly unique flavor experience. The subtle heat will surprise your taste buds!
- Soft Serve Style: Serve your Oreo protein balls on a bed of Greek yogurt and fresh fruit for an indulgent but healthy dessert idea. It transforms a quick snack into a delightful dessert experience.
Remember, these protein balls can easily be customized to suit your preferences, just like you might do with the popular Greek Chicken Meatballs with Lemon Orzo. Embrace your creativity and enjoy the journey of flavor exploration!
How to Store and Freeze Oreo Protein Balls
Fridge: Keep your Oreo protein balls in an airtight container for up to 1 week. This makes it easy to grab a quick snack whenever you’re in need of a tasty energy boost.
Freezer: For longer storage, freeze the protein balls in a freezer-safe container, ensuring to place parchment paper between layers. They will last up to 3 months!
Thawing: To enjoy your frozen Oreo protein balls, simply thaw them in the fridge for 2-3 hours or let them sit at room temperature for about 30 minutes before snacking.
Reheating: These treats are best enjoyed cold or at room temperature, so there’s no need to reheat—just take them out and enjoy the deliciousness!
What to Serve with Easy No-Bake Oreo Protein Balls
Enjoy these delightful energy bites any time of year—whether sweetening your afternoon or amplifying your post-workout routine.
- Cold Almond Milk: A refreshing glass to balance the sweetness, enhancing the creamy flavor of the protein balls.
- Greek Yogurt Parfait: Layer creamy yogurt with fresh fruit and granola for added nutrition, crunch, and a beautiful presentation.
- Fruit Salad: Fresh berries or sliced bananas create a juicy contrast, bringing an invigorating freshness that complements the rich flavors.
- Protein Shake: Blend up your favorite shake for a powerful protein punch that boosts your energy—perfect for post-workout recovery!
- Dark Chocolate Dipped Strawberries: Elevate your snack experience with these chocolaty delights, pairing lush fruits with rich tastes.
- Nut Butters: Serve a dollop of almond or peanut butter on the side for added texture and flavor, enhancing your protein intake.
- Coffee or Tea: A warm cup makes for a cozy companion, balancing the sweetness of the Oreo protein balls with a comforting sip.
- Cottage Cheese: This creamy counterpart adds protein and a hint of saltiness, creating a satisfying contrast to the sweet bites.
- Trail Mix: For a fun, crunchy snack plate, combine nuts and dried fruits with your protein balls for added variety and nutrients!
- Ice Cream: As a special treat, enjoy your protein balls alongside a scoop of your favorite ice cream for an indulgent yet guilt-free dessert experience.
Oreo Protein Balls Recipe FAQs
How do I choose the right Oreos for my protein balls?
Absolutely! You can use any variety of Oreos—original, double-stuffed, or even seasonal flavors like mint or pumpkin spice—to customize the taste. Just make sure they are fresh and not expired for the best flavor.
What is the best way to store leftover Oreo protein balls?
To keep your Oreo protein balls fresh, store them in an airtight container in the fridge for up to 1 week. This ensures you have a delicious snack on hand whenever you need an energy boost!
Can I freeze Oreo protein balls, and how?
Very easily! To freeze your Oreo protein balls, layer them in a freezer-safe container with parchment paper between each layer to prevent sticking. They will stay fresh for up to 3 months. When you’re ready to enjoy them, just thaw in the fridge for 2-3 hours or leave them out at room temperature for 30 minutes.
What should I do if my mixture is too sticky?
If you find your mixture is too sticky to roll into balls, it’s likely due to excess almond milk. Add a sprinkle of protein powder until it reaches a moldable consistency. Alternatively, chilling the dough in the fridge for 15-20 minutes helps firm it up and makes handling easier!
Are Oreo protein balls suitable for everyone?
While most people can enjoy these tasty treats, keep in mind they contain dairy (from the cream cheese) if you’re making the traditional version. For a dairy-free option, simply swap the cream cheese for a vegan alternative. Always double-check ingredients if you’re accommodating allergies!
How can I change the protein powder flavor?
You can absolutely customize your Oreo protein balls! Use chocolate protein powder for a richer flavor or vanilla for a lighter taste. Adjust the almond milk according to the type of protein powder you choose, as different brands can absorb moisture differently. Enjoy experimenting with flavors!

Delicious Oreo Protein Balls for a Guilt-Free Snack Boost
Ingredients
Equipment
Method
- Prepare the workspace by lining a baking sheet with wax paper and gather all your ingredients and equipment.
- In a large mixing bowl, combine crushed Oreos and protein powder, mixing until evenly distributed.
- Add softened cream cheese into the dry mixture and mix until cohesive.
- Gradually pour in almond milk, mixing until the dough reaches a moldable consistency.
- Scoop out tablespoon-sized portions and roll them into balls, placing them on the prepared baking sheet.
- In a microwave-safe bowl, melt chocolate with a splash of coconut oil, stirring until smooth.
- Drizzle the melted chocolate over the protein balls for coating.
- Transfer to the freezer and let them set for about 10 minutes.
Leave a Reply