
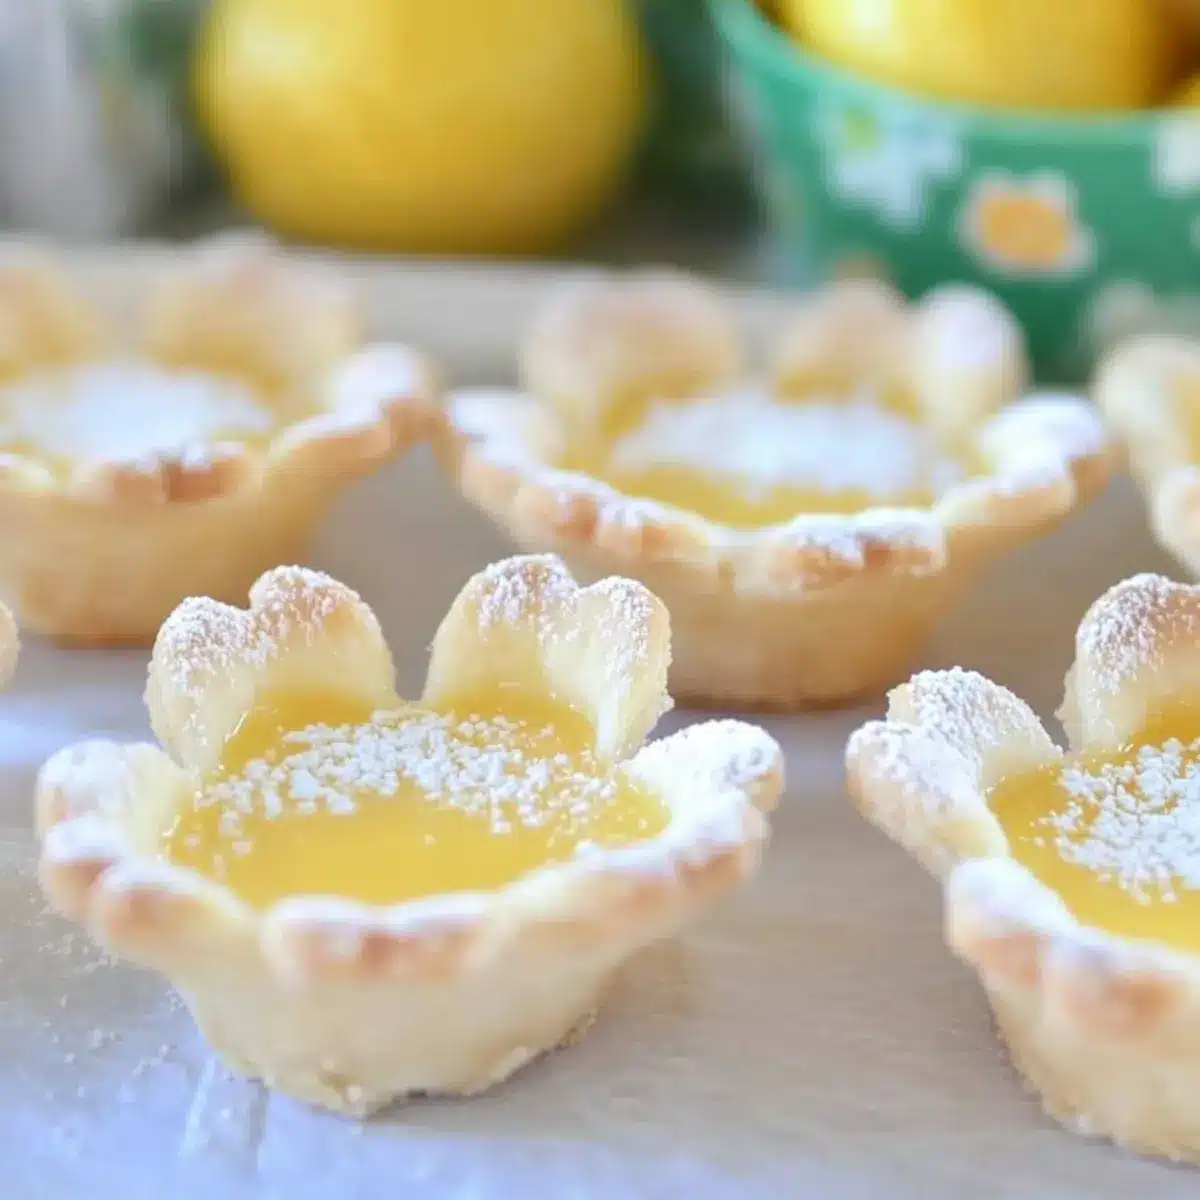
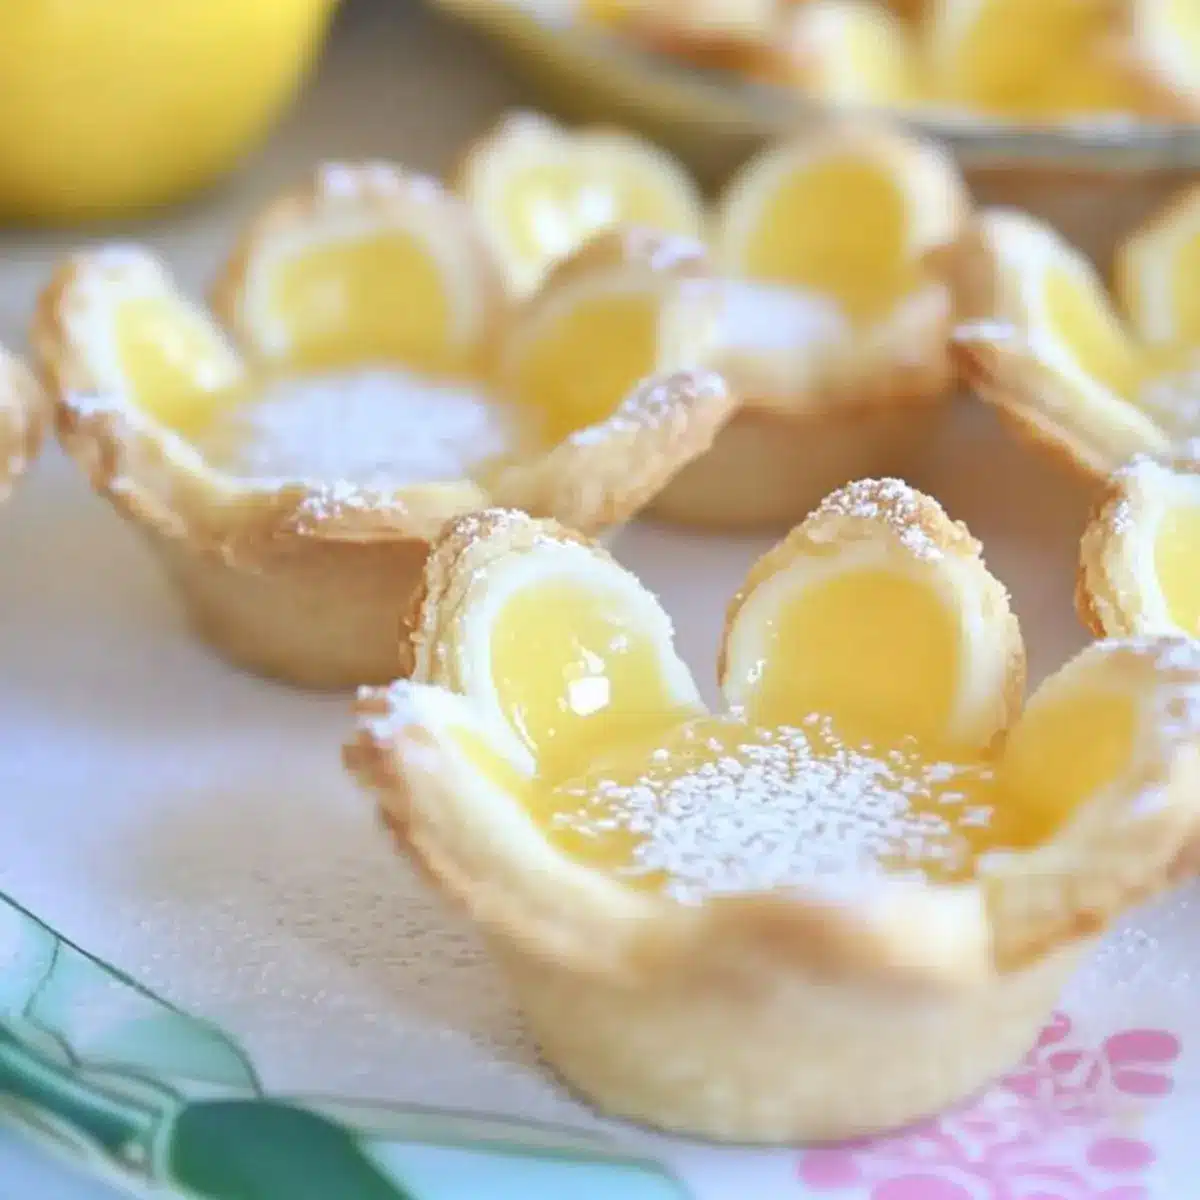
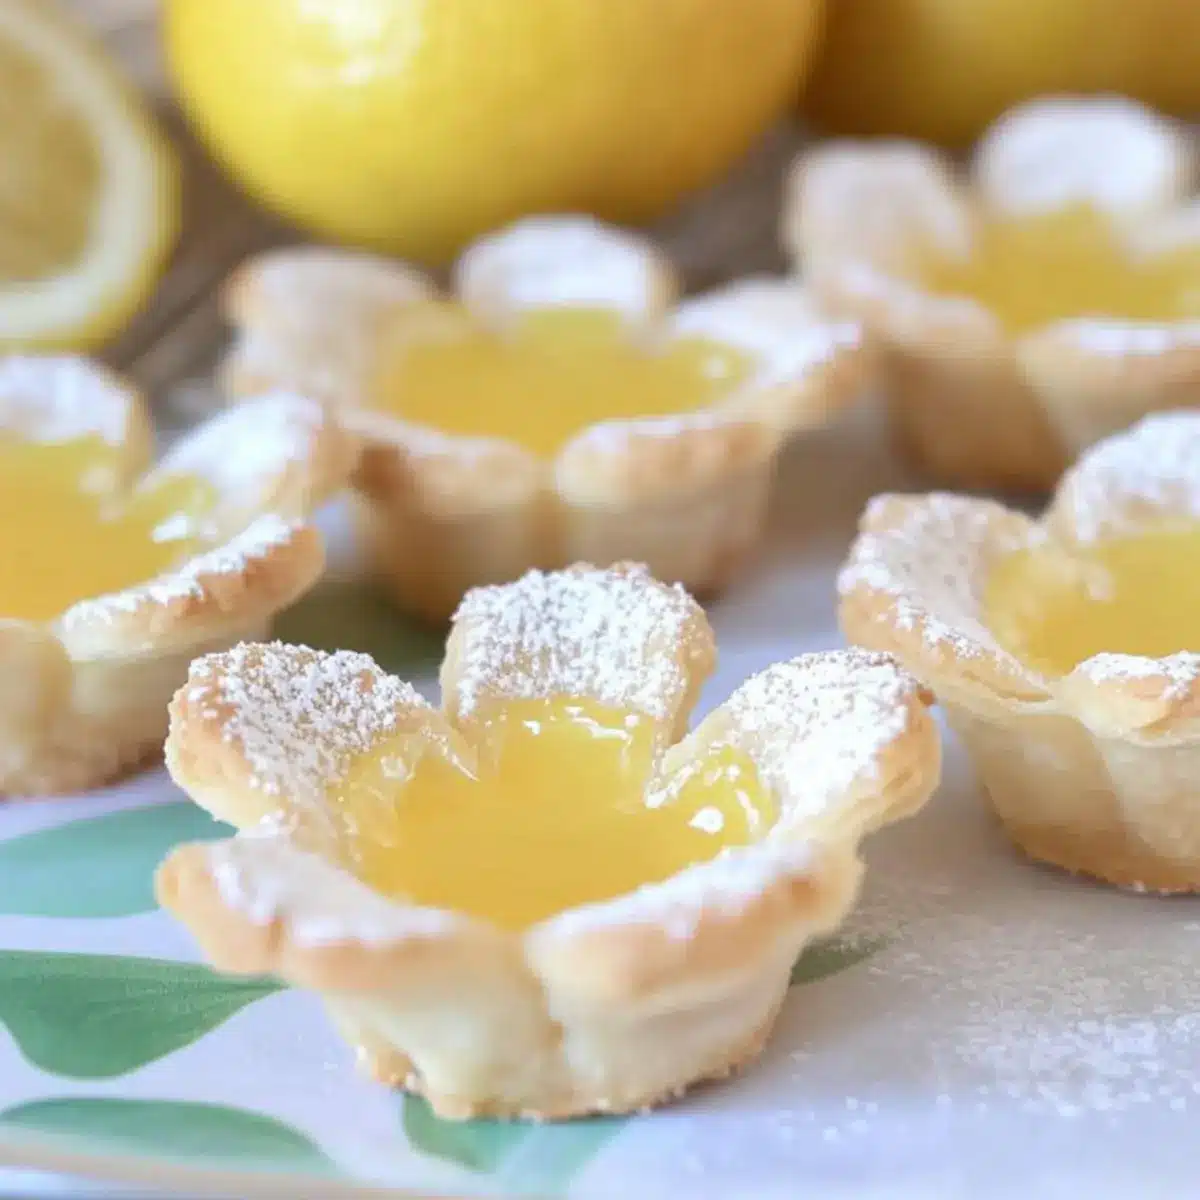
Spring has a way of making everything feel a little brighter, and what better way to celebrate than with these delightful Mini Lemon Flower Tarts? Bursting with a zesty lemon filling nestled in a crispy pastry, these two-ingredient treats are as adorable as they are delicious—sure to steal the show at any gathering, from Mother’s Day brunch to Easter festivities. Not only are they quick and easy to prepare, but their charming floral shape makes them the perfect centerpiece for your dessert table. Whether you’re hosting a spring tea party or simply want to impress friends and family with a homemade treat, these Mini Lemon Flower Tarts are bound to bring smiles all around. Ready to dive into a world of flavorful and fun baking? Let’s get started!
Why Are Mini Lemon Flower Tarts a Must-Make?
Simplicity at its finest: This recipe calls for just two main ingredients, making it easy to whip up these delightful tarts even on a busy day.
Visually Stunning: With their charming flower shapes, they add a festive flair to any table setting—perfect for Spring gatherings!
Flavor Explosion: The combination of crispy pastry and tangy lemon filling creates a refreshing taste that’s irresistible.
Versatile: Feel free to swap in lime or orange filling—make it your own for holiday variations!
Crowd-Pleaser: These tarts are sure to delight guests of all ages, making them an ideal choice for events like tea parties, bridal showers, or even casual family gatherings.
Make sure to pair these with a light beverage like herbal tea or sparkling lemonade for an unforgettable experience!
Mini Lemon Flower Tarts Ingredients
For the Crust
• Ready-to-Bake Roll-Out Pie Crusts – Perfect for achieving that flaky, tender texture; feel free to use your favorite homemade version for a personal touch.
For the Filling
• Lemon Creme – This zesty filling adds that necessary tangy flavor; you can substitute it with homemade lemon curd if you’re feeling adventurous.
For Dusting
• Powdered Sugar (optional) – A light dusting enhances the visual appeal and sweetness of the Mini Lemon Flower Tarts, making them even more tempting to guests!
Step‑by‑Step Instructions for Mini Lemon Flower Tarts
Step 1: Prepare the Ingredients
Begin by allowing the ready-to-bake roll-out pie crusts to come to room temperature, making them easier to work with. While the crust is softening, preheat your oven to 450°F (232°C). This ensures that the Mini Lemon Flower Tarts will bake perfectly, yielding a crisp and flaky texture.
Step 2: Roll Out the Dough
Once the crust is pliable, roll it out evenly on a lightly floured surface. Use a flower-shaped cookie cutter to cut out beautiful flower shapes, aiming for about seven flowers per pie crust. The vibrant shapes you create will make your tart presentation truly shine at any spring celebration.
Step 3: Shape the Flower Cups
Take each flower shape and gently place it into the compartments of a mini cupcake pan. Press down firmly, ensuring the petals fold over the edges to create a lovely flower cup. This step is crucial, as it will hold the zesty lemon filling beautifully once baked.
Step 4: Prepare for Baking
To prevent unwanted bubbling during baking, carefully poke holes in the bottom and sides of each flower cup with a fork. This simple step allows steam to escape, ensuring that your Mini Lemon Flower Tarts bake evenly and maintain their delicate shape.
Step 5: Bake the Flower Cups
Place the mini cupcake pan in your preheated oven and bake the flower cups for 5-6 minutes. Keep an eye on them, and remove when they turn lightly golden around the edges. Allow the tarts to cool on a wire rack for a few minutes while you prepare the filling.
Step 6: Fill with Lemon Creme
Using a plastic bag, spoon in the lemon creme to create an easy piping bag. Snip the tip of the bag and carefully pipe the zesty lemon filling into the center of each cooled flower cup. This step transforms your mini creations into delightful, flavorful treats, ready to dazzle your guests.
Step 7: Chill and Dust
After filling the Mini Lemon Flower Tarts, place them in the refrigerator for a few hours to allow the flavors to meld and the filling to set. Just before serving, dust the tarts lightly with powdered sugar for an added touch of sweetness and to enhance their visual appeal, making them perfect for any festive gathering.

What to Serve with Mini Lemon Flower Tarts
These delightful tarts are not just a treat on their own; they can elevate your entire spring gathering when paired with the right sides.
-
Herbal Tea: A fragrant chamomile or mint tea enhances the lemony notes, providing a soothing beverage that complements the tart’s zesty flavor.
-
Sparkling Lemonade: The effervescence of sparkling lemonade brightens every bite—its sweetness balances the tartness of the lemon filling beautifully.
-
Fresh Fruit Salad: A mix of refreshing berries and citrus not only adds a burst of color to your table but also contrasts well with the creamy texture of the tarts.
-
Creamy Vanilla Ice Cream: A scoop of classic vanilla ice cream creates a delightful contrast with the tarty flavors, making for an indulgent dessert experience.
-
Cheese Platter: Including a selection of soft cheeses, such as brie or goat cheese, can introduce a sophisticated savory element, which pairs nicely with the tarts’ sweetness.
-
Chocolate Dipped Strawberries: For a touch of luxury, these decadent treats provide a wonderful interplay of flavors, combining juicy sweetness with rich chocolate.
Pairing these will surely create a memorable and delightful spring gathering, making your Mini Lemon Flower Tarts the star of the show!
Storage Tips for Mini Lemon Flower Tarts
Fridge: Store any leftover Mini Lemon Flower Tarts in an airtight container in the refrigerator for up to 3 days. This helps maintain their freshness and flavor.
Freezer: If you wish to freeze them, wrap each tart individually in plastic wrap, then place them in a freezer-safe container. They can last up to 2 months; thaw in the fridge before serving.
Best Enjoyed Fresh: While these tarts are tasty, they are best served fresh to enjoy the crispy texture of the pastry and the creamy lemon filling.
Reheating: If desired, briefly warm the tarts in a preheated oven at 325°F (163°C) for 5-7 minutes to revive their crispness before serving.
Mini Lemon Flower Tarts Variations
Feel free to play around with these delightful tarts and make them your own!
-
Flavor Twist: Use lime or orange filling to create a citrus medley. This adds a new taste profile while keeping things refreshingly zesty!
-
Berry Toppers: Add fresh berries like strawberries or blueberries on top before serving for a touch of color and natural sweetness. These vibrant additions will make your tarts even more photogenic.
-
Lemon Curd: For a richer flavor, substitute the lemon creme with homemade lemon curd for a dense and tangy alternative. It’s a wonderful way to elevate the filling and surprise your guests.
-
Nutty Crunch: Sprinkle some toasted coconut or crushed almonds on top for an added crunch. This combination creates a delightful contrast in textures that complements the creamy filling.
-
Herb Infusion: Incorporate a hint of fresh mint or basil into the lemon creme for an aromatic twist. These herbs provide an unexpected brightness that will leave your taste buds dancing!
-
Chocolate Drizzle: For chocolate lovers, top your tarts with a dark chocolate drizzle for a decadent finish. Just melt some chocolate and drizzle it over your tarts right before serving.
-
Heat it Up: Add a dash of cayenne pepper or chili powder to your lemon filling for a spicy kick. This surprise element can tantalize your guests and ignite their taste buds!
With these variations, you can cater to different tastes or occasions. Whether you’re in the mood for a berry-filled delight or a zesty twist with lime, there’s a version for everyone. And if you’d like more lemon-inspired recipes, consider trying these Lemon Truffles Zesty or the refreshing Greek Lemon Rice. Enjoy your spring baking adventure!
Expert Tips for Mini Lemon Flower Tarts
-
Room Temperature Crust: Ensure your pie crust is at room temperature for easy rolling; cold dough is prone to cracking, which can affect your Mini Lemon Flower Tarts’ shape.
-
Watch the Oven: Every oven bakes differently, so keep an eye on the tarts. They should be lightly golden after 5-6 minutes—overbaking can lead to a dry crust.
-
Gentle Press: When shaping the flower cups, use a gentle touch. Too much pressure can distort the delicate petals, impacting both appearance and texture.
-
Piping Technique: Use a small snip on the bag for more control while filling the tarts; this ensures a neat, well-filled center that showcases the lemon creme beautifully.
-
Chill Time Matters: Don’t skip chilling the tarts after filling; it helps the creamy lemon center set properly, enhancing flavors and making them easier to serve.
Make Ahead Options
These Mini Lemon Flower Tarts are perfect for meal prep, making them an ideal choice for busy cooks looking to streamline their Spring celebrations! You can prepare the flower cups up to 24 hours in advance. Simply follow the shaping and baking steps, then cool the tarts completely before storing them in an airtight container in the refrigerator. For the lemon creme filling, prep it a day ahead (also keep it refrigerated), and when ready to serve, simply pipe it into the chilled cups. Dust with powdered sugar just before presenting your delightful tarts to maintain their freshness and visual appeal. Enjoy the ease of a stunning dessert with minimal last-minute effort!
Mini Lemon Flower Tarts Recipe FAQs
How do I choose the right pie crust for these tarts?
Absolutely! A good pie crust is crucial for Mini Lemon Flower Tarts. I recommend ready-to-bake roll-out pie crusts for their ease and flaky texture. If you’re feeling adventurous, you can certainly opt for a homemade version. Just ensure it’s rolled out to the appropriate thickness to hold the filling well.
How should I store leftover Mini Lemon Flower Tarts?
For the best flavor and freshness, store any leftover Mini Lemon Flower Tarts in an airtight container in the refrigerator. They can stay fresh for up to 3 days. However, they are best enjoyed the day they are made, as the pastry tends to lose its crispness over time.
Can I freeze Mini Lemon Flower Tarts?
Yes, you can freeze them! Wrap each tart individually in plastic wrap and then place them in a freezer-safe container. They can be stored in the freezer for up to 2 months. When you’re ready to enjoy them, thaw in the fridge overnight, and if you prefer, warm them in a preheated oven at 325°F (163°C) for about 5-7 minutes to retain their crisp texture.
What should I do if my baked tarts bubble during baking?
If your tarts bubble during baking, it means that steam is getting trapped inside! To prevent this, make sure to poke holes in the bottoms and sides of the flower cups with a fork before baking. This step is crucial to allow steam to escape and keeps the tarts flat and beautifully shaped.
Are Mini Lemon Flower Tarts safe for people with allergies?
It’s essential to check the ingredients if you or your guests have dietary restrictions. The ready-made pie crust may contain gluten, and the lemon creme might include allergens like eggs or dairy. If you need a gluten-free option, consider using a gluten-free pie crust. Always read labels carefully or make your filling and crust from scratch to accommodate allergies.
Mini Lemon Flower Tarts That Will Brighten Your Spring Gatherings
Ingredients
Equipment
Method
- Allow the pie crusts to come to room temperature and preheat the oven to 450°F (232°C).
- Roll out the crust on a floured surface and use a cookie cutter to cut flower shapes.
- Place flower shapes in a mini cupcake pan and press down to form cups.
- Poke holes in the bottom and sides of each flower cup with a fork.
- Bake for 5-6 minutes until lightly golden and cool on a wire rack.
- Fill each cup with lemon creme using a piping bag.
- Chill in the refrigerator for a few hours and dust with powdered sugar before serving.
Leave a Reply