
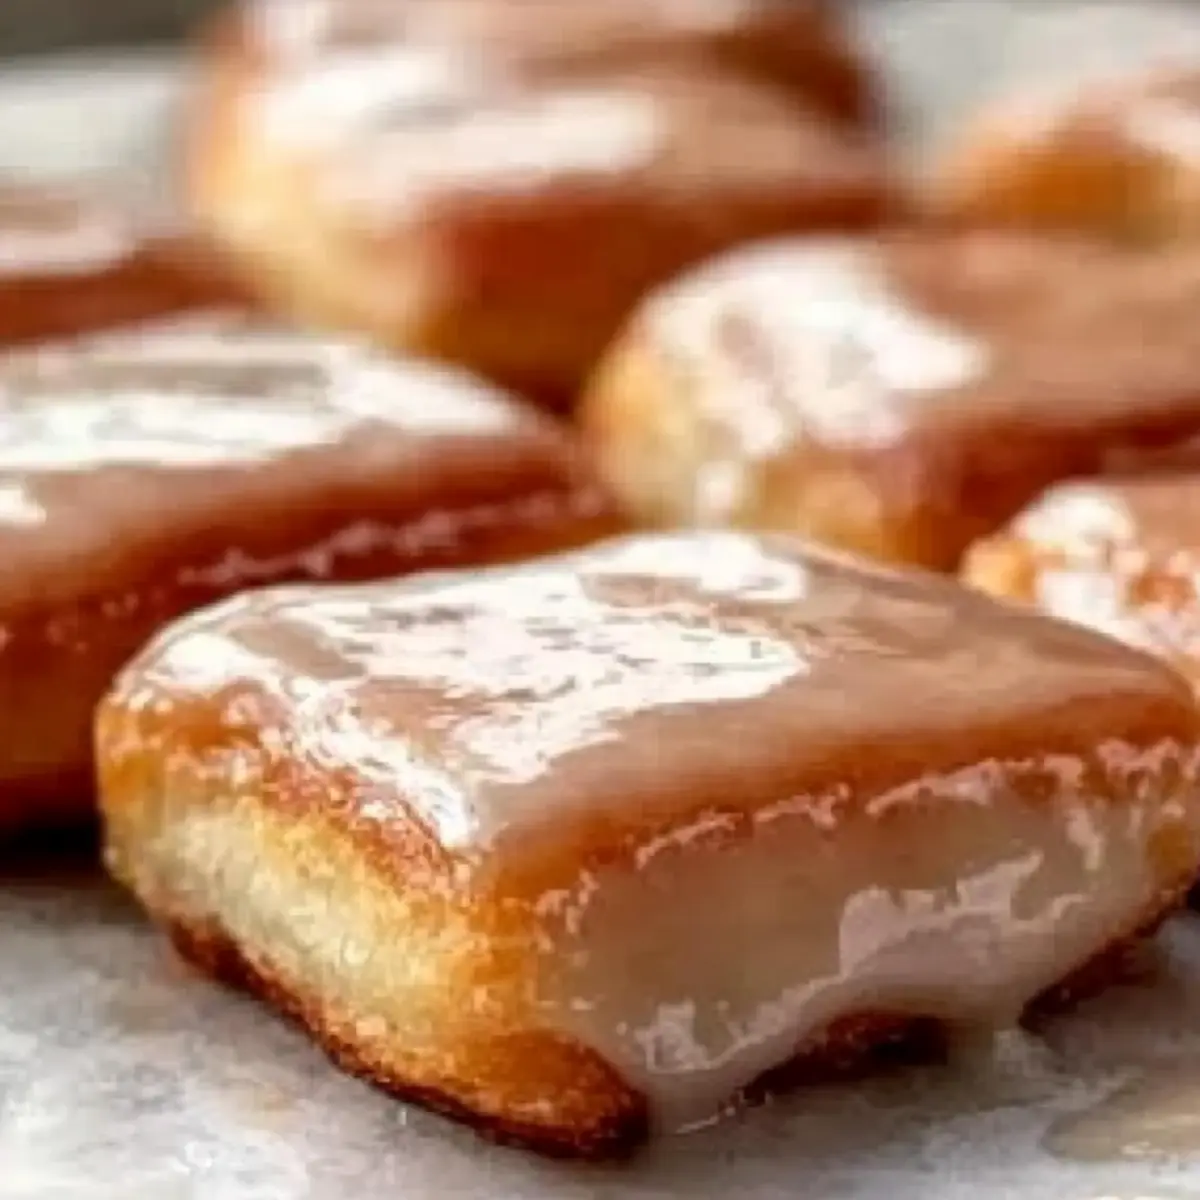
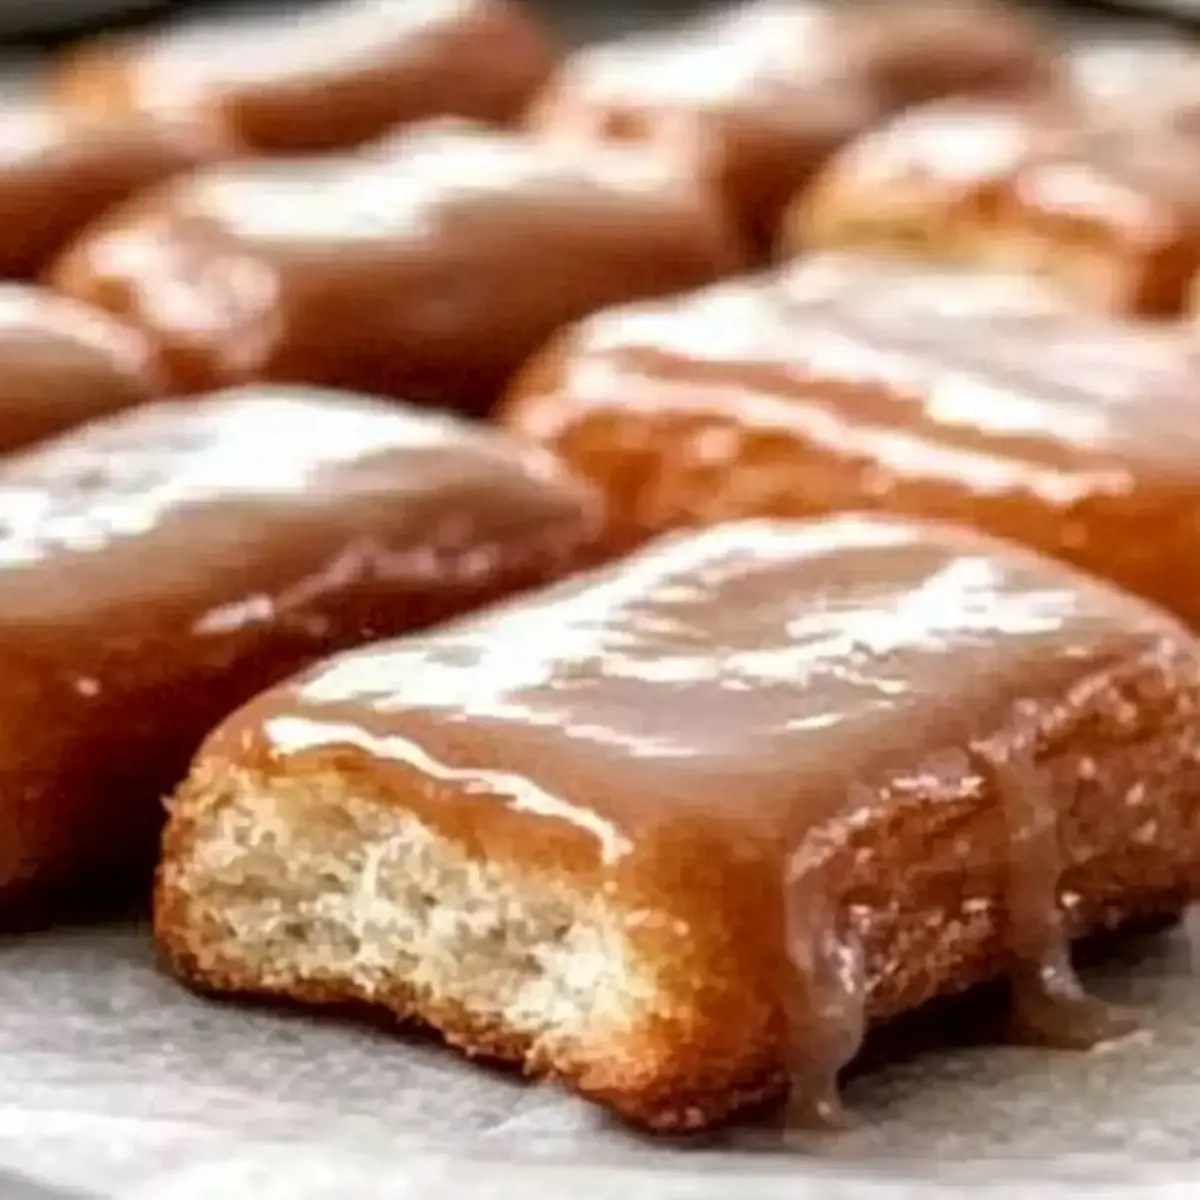
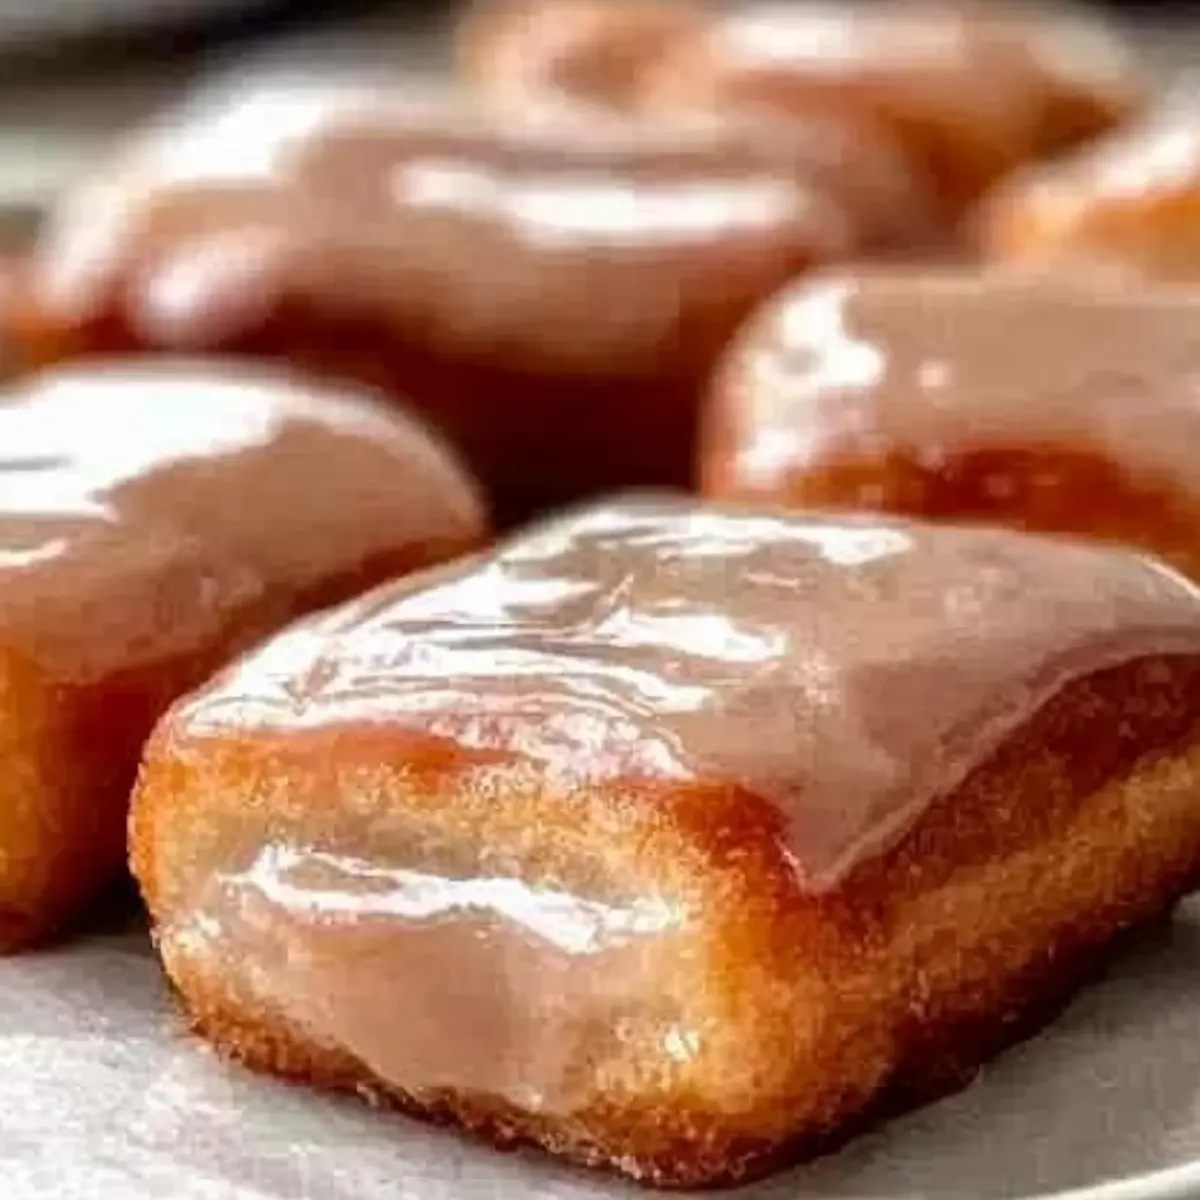
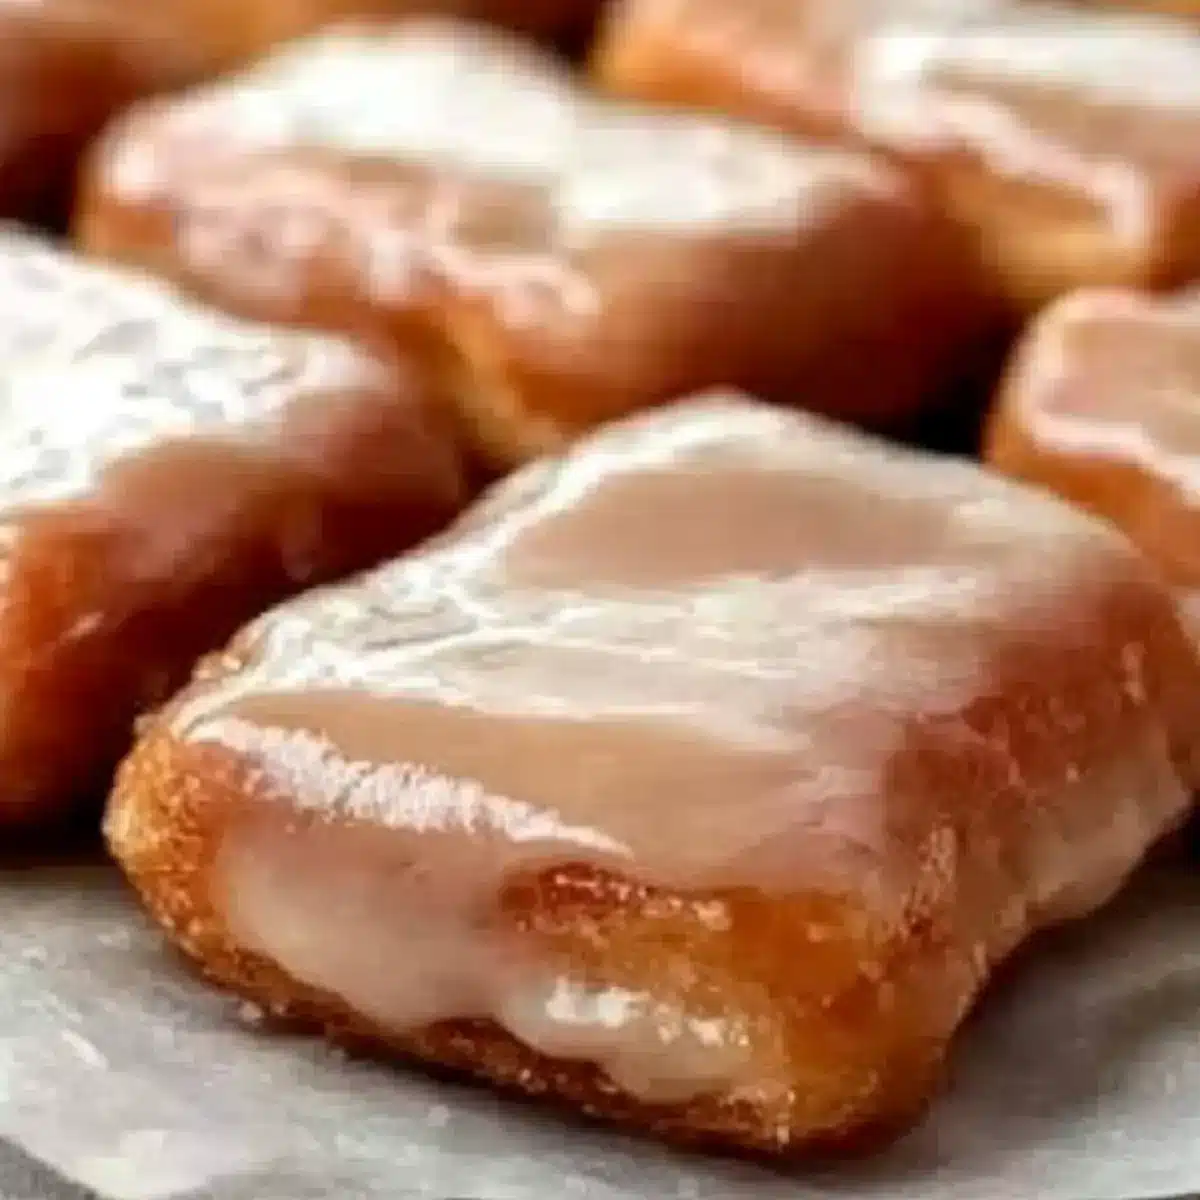
A scent wafting through the kitchen can instantly transport you back to cherished memories, and these Homemade Maple Bars do just that. With fluffy, fried dough and a glossy maple glaze, this maple bars recipe is the perfect indulgence for anyone seeking a cozy breakfast or a delightful snack to share with loved ones. Not only are these bars a total crowd-pleaser, but they also bring a touch of nostalgia that makes every bite feel special. Whether you’re enjoying them with your morning coffee or serving them at a gathering, their warm sweetness will have everyone coming back for more. Are you ready to make something that’ll sweeten your day? Let’s dive into the recipe!
Why are these Maple Bars a must-try?
Irresistible Flavor: Each bite of these maple bars delivers a delightful burst of sweet maple goodness, thanks to the luscious glaze and fluffy dough.
Nostalgic Comfort: These bars are not just a treat; they bring back memories of cozy mornings and shared moments, making them a perfect companion for your cup of coffee.
Easy to Make: With simple ingredients and straightforward instructions, you’ll be whipping up a batch in no time—perfect for anyone who loves homemade pastries!
Versatile Serving: Enjoy them warm, drizzle extra syrup, or pair with fresh fruit for added flavor—for a delightful breakfast or snack!
Crowd-Pleasing Delight: Whether at a family gathering or a cozy brunch with friends, these maple bars will have everyone raving and coming back for seconds. For more maple-inspired treats, check out these sweet suggestions: Lemon Truffles or Greek Lemon Rice.
Maple Bars Recipe Ingredients
For the Dough
• Milk – Activates yeast and contributes moisture; use whole milk for richness, but plant-based options can be used for a different flavor.
• Butter – Enhances flavor and texture, making the dough tender; can substitute with margarine or oil for a dairy-free version.
• Yeast – Provides rise and airy structure; ensure the yeast is fresh as active dry yeast works best.
• Sugar – Adds sweetness and nourishes the yeast for better rise; consider using brown sugar for a deeper flavor profile.
• Salt – Balances sweetness and enhances overall flavor; you can reduce for lower sodium if desired.
• Eggs – Enrich the dough, adding moisture and richness; for a vegan version, simply replace with flax eggs.
• Vanilla Extract – Provides depth of flavor; stick to pure vanilla for the best results, although imitation can work in a pinch.
• All-Purpose Flour – Forms the base of the dough, creating structure; gluten-free flour blends can be useful for those avoiding gluten.
For the Glaze
• Powdered Sugar – Creates a sweet glaze; using coconut sugar offers a less processed alternative.
• Maple Syrup – Adds authentic maple flavor to both dough and glaze; feel free to increase syrup in glaze if extract is not available.
• Maple Extract – Enhances the maple flavor in the glaze; omit if you don’t have it, just increase syrup instead.
Step‑by‑Step Instructions for Homemade Maple Bars: Fluffy Fried Dough with Sweet Maple Glaze
Step 1: Heat Ingredients
In a small saucepan, gently warm 1 cup of whole milk and ¼ cup of butter over low heat until the butter melts, and the mixture is warm but not hot (around 110°F). Remove it from heat and allow it to cool slightly to ensure the yeast activates without being killed.
Step 2: Activate Yeast
Sprinkle 2 ¼ teaspoons of active dry yeast over the warm milk mixture. Let it sit for about 10 minutes until it becomes foamy, indicating that the yeast is activated and ready to help create fluffy texture in your maple bars.
Step 3: Mix Dough
In a large mixing bowl, combine the foamy yeast mixture with ¼ cup of sugar, ½ teaspoon of salt, 2 large eggs, and 1 teaspoon of vanilla extract. Mix well until fully blended, then gradually add 4 cups of all-purpose flour, stirring until a slightly sticky dough forms. Knead the dough on a floured surface for about 5 minutes.
Step 4: First Rise
Transfer the kneaded dough to a greased bowl, cover it with plastic wrap, and let it rise in a warm spot until it has doubled in size, roughly 1 to 1.5 hours. This process creates a light and airy texture perfect for your homemade maple bars.
Step 5: Shape Bars
After the dough has risen, gently punch it down to release air and roll it out into a 12×8-inch rectangle on a floured surface. Cut the dough into 12 equal bars and arrange them on a floured baking sheet. Cover with a kitchen towel and let them rise for another 30 minutes.
Step 6: Fry Bars
In a deep fryer or heavy pot, heat oil to 350°F. Carefully fry the bars in batches, cooking each for 1-2 minutes on each side until golden brown. Use a slotted spoon to remove them and drain the fried bars on paper towels, ensuring they stay fluffy and delicious.
Step 7: Prepare Glaze
While the bars are frying, prepare the glaze by whisking together 2 cups of powdered sugar, ¼ cup of maple syrup, ½ teaspoon of maple extract (if using), and 1-2 tablespoons of water until smooth. The glaze should be thick yet pourable, reminiscent of a comforting sweet drizzle over your maple bars.
Step 8: Glaze Bars
Once the maple bars are slightly cooled, dip them in the warm glaze or use a brush to coat the tops generously. Allow the glaze to set for a few minutes and relish in the delightful aroma of these homemade maple bars as they transform into a sweet indulgence ready to enjoy!
Make Ahead Options
These delightful maple bars are perfect for busy home cooks looking to save time on hectic mornings! You can prepare the dough up to 24 hours in advance; simply follow the first rise and then shape the bars. Cover them tightly with plastic wrap and refrigerate until you’re ready to fry them. When the time comes, allow the shaped bars to rise for 30 minutes at room temperature before frying. For even more convenience, you can fry the maple bars a day ahead and store them in an airtight container at room temperature. To maintain their fluffy texture, glaze them just before serving, allowing for the sweetest experience without compromising on quality in your homemade maple bars recipe.
How to Store and Freeze Maple Bars
Room Temperature: Store maple bars in an airtight container at room temperature for up to 24 hours to maintain optimal texture and freshness.
Fridge: If you prefer, you can refrigerate glazed bars for up to 3 days, but this may slightly change their texture, making them less fluffy.
Freezer: Freeze unfrosted maple bars in a single layer on a baking sheet until solid, then transfer to an airtight container for up to 3 months. Thaw before glazing.
Reheating: To enjoy leftover bars, reheat in the oven at 350°F for about 5-10 minutes. This helps restore their warmth and delightful fluffiness from your maple bars recipe.
Maple Bars Recipe Variations
Feel free to make these maple bars your own by exploring wonderful variations that add unique flavors and textures!
- Dairy-Free: Substitute milk and butter with almond milk and coconut oil for a delightful dairy-free twist.
- Gluten-Free: Use a gluten-free flour blend specifically designed for frying to keep everyone included.
- Nutty Crunch: Fold in chopped walnuts or pecans into the dough to elevate the texture and add a delightful crunch.
- Chocolate Delight: Drizzle melted chocolate over the glaze for a rich, decadent touch that perfectly complements the maple flavor.
- Spiced Elixir: Add ½ teaspoon of cinnamon or nutmeg to the dough for warm spice notes that enhance the overall flavor profile.
- Orange Zest: Incorporate the zest of an orange into the glaze for a refreshing citrus twist—it’s a delightful surprise!
- Sweet Heat: For a kick, mix in a dash of cayenne pepper to the glaze for an unexpected, exciting flavor experience.
- More Maple: If you adore pure maple flavor, simply increase the amount of maple syrup in the glaze for an irresistible sweetness.
Your creativity is the secret ingredient! For more sweet inspirations, consider trying these delightful Lemon Truffles or serving up a side of Greek Lemon Rice to complete your meal!
What to Serve with Homemade Maple Bars?
Indulge your senses with a charming array of accompaniments that elevate your delightful maple bars into a full meal experience.
-
Fresh Berries: Juicy strawberries or blueberries offer a refreshing contrast, brightening the sweetness of the rich maple glaze. Their burst of flavor complements the warm bars perfectly.
-
Creamy Yogurt: A dollop of vanilla yogurt adds a creamy, tangy element, creating a delightful balance to the sugary treats. Serve it on the side for an extra touch of indulgence.
-
Strong Coffee: A bold cup of coffee provides the ideal counterpart, cutting through the sweetness while enhancing the maple flavor. It’s the perfect morning pick-me-up!
-
Whipped Cream: Light and airy whipped cream brings a luscious creaminess that pairs beautifully with the fluffy texture of the bars. Suggest a drizzle of maple syrup on top for added sweetness.
-
Banana Slices: Slices of ripe banana lend a soft texture and gentle sweetness, making for a comforting side. Together with the maple bars, they create a cozy flavor harmony.
-
Iced Tea: Refreshing iced tea, whether sweetened or unsweetened, cools the palate after rich bites and keeps you refreshed any time of day.
-
Chocolate Ganache: For chocolate lovers, a rich ganache can take your maple bars to the next level, adding a decadently sweet finish that is impossible to resist.
-
Cinnamon Sugar Dusting: Another simple yet delightful option! A sprinkle of cinnamon sugar adds a warm spice that enhances the maple flavor, making your indulgent treat even more irresistible.
Creating a delightful meal with maple bars is all about balancing contrasting flavors and textures—get ready to enhance your treat!
Expert Tips for Making Maple Bars
-
Perfect Yeast Activation: Always warm your milk mixture (around 110°F) to activate the yeast without killing it; this ensures fluffy maple bars.
-
Dough Consistency: Aim for a slightly sticky dough while kneading. Avoid adding too much flour, which can make the bars dense instead of light and airy.
-
Watch the Oil Temperature: Maintain your oil at 350°F while frying. Too hot results in burnt bars, while too cool leads to oily dough; use a thermometer for accuracy.
-
Let Them Rise Again: Don’t skip the second rise after shaping the bars. It’s crucial for achieving that pillowy texture in your maple bars recipe.
-
Customize Your Glaze: Feel free to adjust the glaze’s sweetness. If you want a richer taste, add extra maple syrup instead of using maple extract.
Maple Bars Recipe FAQs
What type of milk should I use for the dough?
I recommend using whole milk for a richer flavor, but if you’re dairy-free, plant-based options like almond or oat milk can be substituted, although they may alter the taste slightly.
How should I store leftover maple bars?
Store your maple bars in an airtight container at room temperature for up to 24 hours for the best texture. If you must refrigerate them, they can last up to 3 days, though they may become a bit less fluffy.
Can I freeze maple bars?
Absolutely! If you want to freeze maple bars, I suggest freezing them unfrosted. Place them in a single layer on a baking sheet until solid, then transfer to an airtight container or freezer bag for up to 3 months. Thaw them overnight in the fridge before glazing.
What should I do if my dough doesn’t rise properly?
If your dough doesn’t rise, it might be due to inactive yeast or the milk being too hot when combined. Make sure your milk is just warm (around 110°F) to activate the yeast. If unsure about yeast freshness, test it by letting it froth in warm water and sugar for 10 minutes before adding to the mix.
Are maple bars suitable for people with certain allergies?
These homemade maple bars contain common allergens like dairy, eggs, and gluten. If you’re looking for a vegan option, try replacing eggs with flax eggs and use dairy-free butter. For gluten-free bars, you can opt for a gluten-free flour blend specifically designed for baking.
Irresistible Maple Bars Recipe: Comfort in Every Sweet Bite
Ingredients
Equipment
Method
- In a small saucepan, gently warm 1 cup of whole milk and ¼ cup of butter over low heat until the butter melts.
- Sprinkle 2 ¼ teaspoons of active dry yeast over the warm milk mixture and let it sit for about 10 minutes until foamy.
- In a large mixing bowl, combine foamy yeast mixture with ¼ cup of sugar, ½ teaspoon of salt, 2 large eggs, and 1 teaspoon of vanilla extract. Mix well.
- Gradually add 4 cups of all-purpose flour, stirring until a slightly sticky dough forms. Knead the dough on a floured surface for about 5 minutes.
- Transfer the kneaded dough to a greased bowl, cover with plastic wrap, and let it rise in a warm spot until doubled in size (about 1 to 1.5 hours).
- Gently punch down the risen dough, roll it out into a 12x8-inch rectangle, and cut into 12 equal bars. Arrange on a floured baking sheet and let rise for another 30 minutes.
- Heat oil in a deep fryer or heavy pot to 350°F. Fry the bars in batches for 1-2 minutes on each side until golden brown.
- While frying, prepare the glaze by whisking together 2 cups of powdered sugar, ¼ cup of maple syrup, ½ teaspoon of maple extract, and 1-2 tablespoons of water until smooth.
- Once the maple bars are slightly cooled, dip them in the warm glaze or brush the tops generously. Allow the glaze to set.
Leave a Reply