
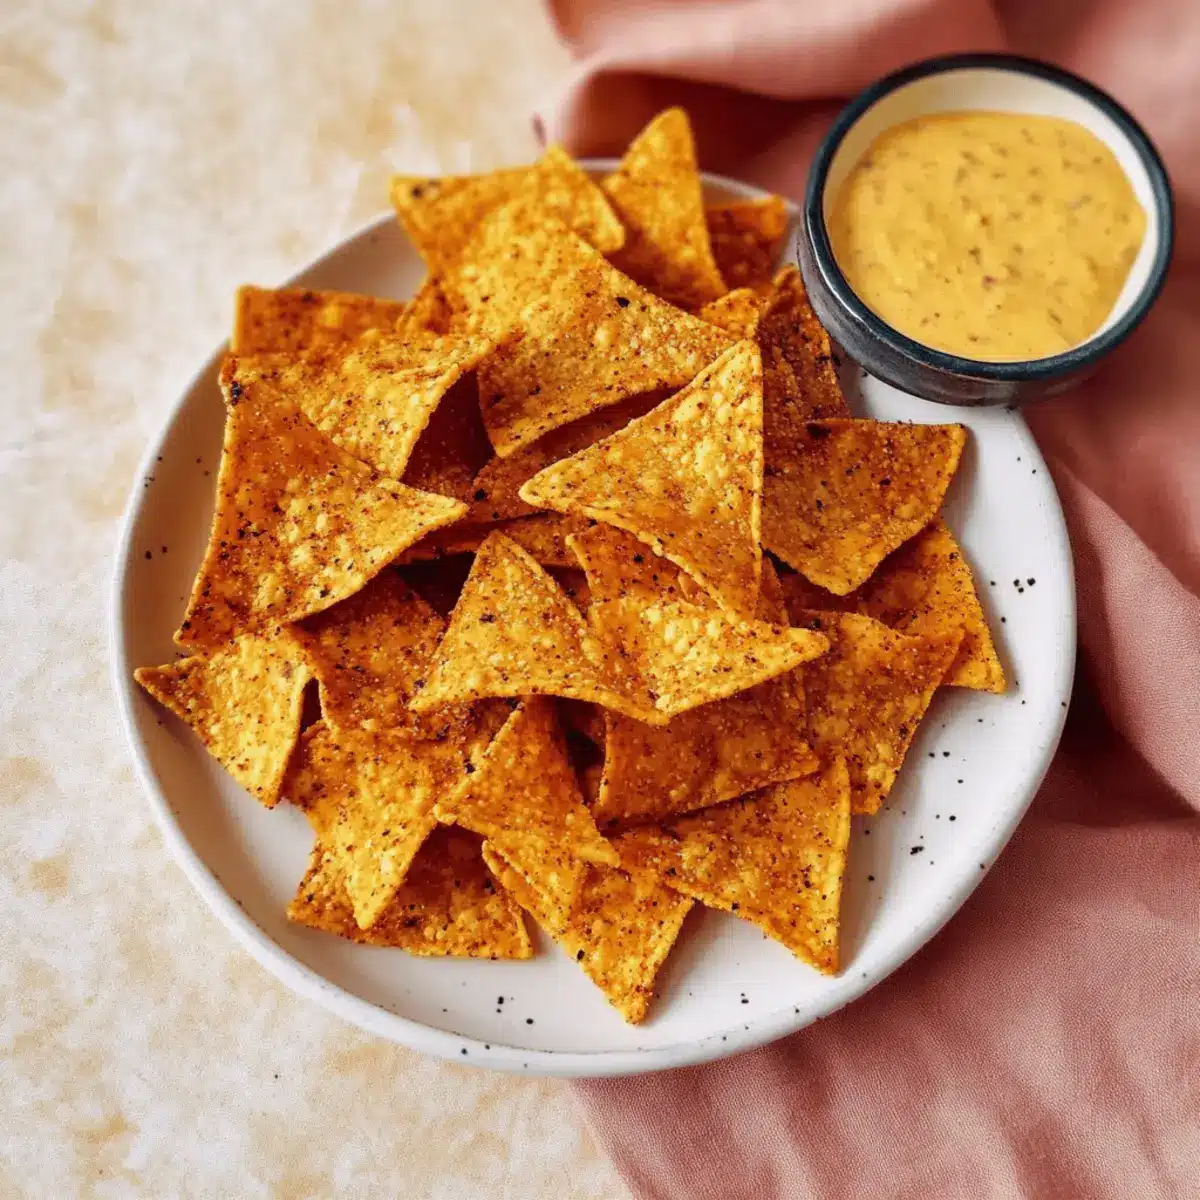
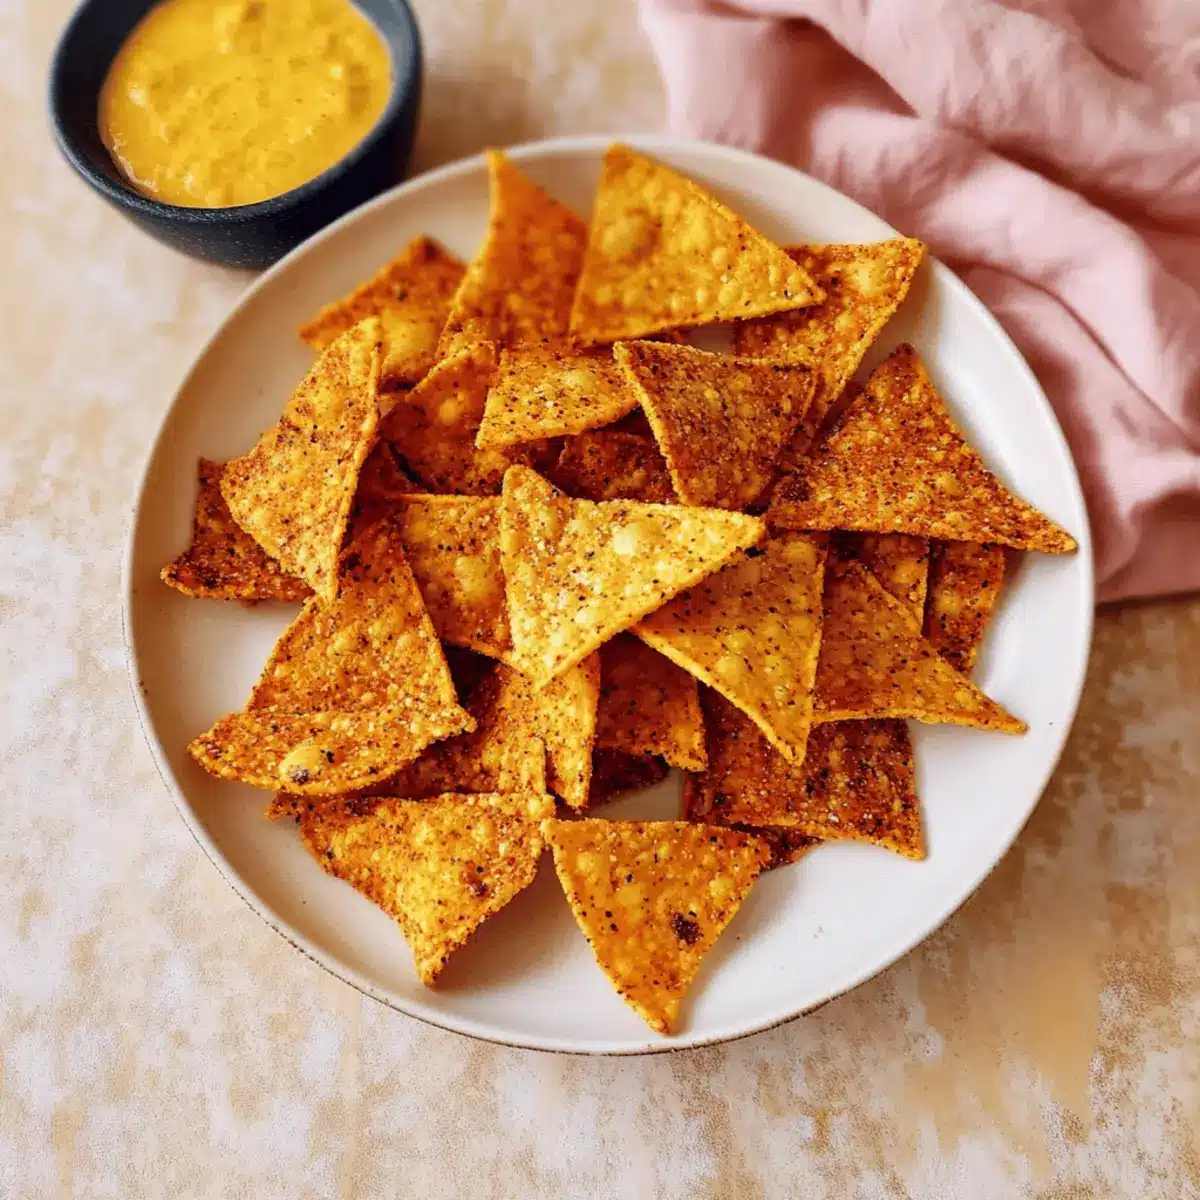
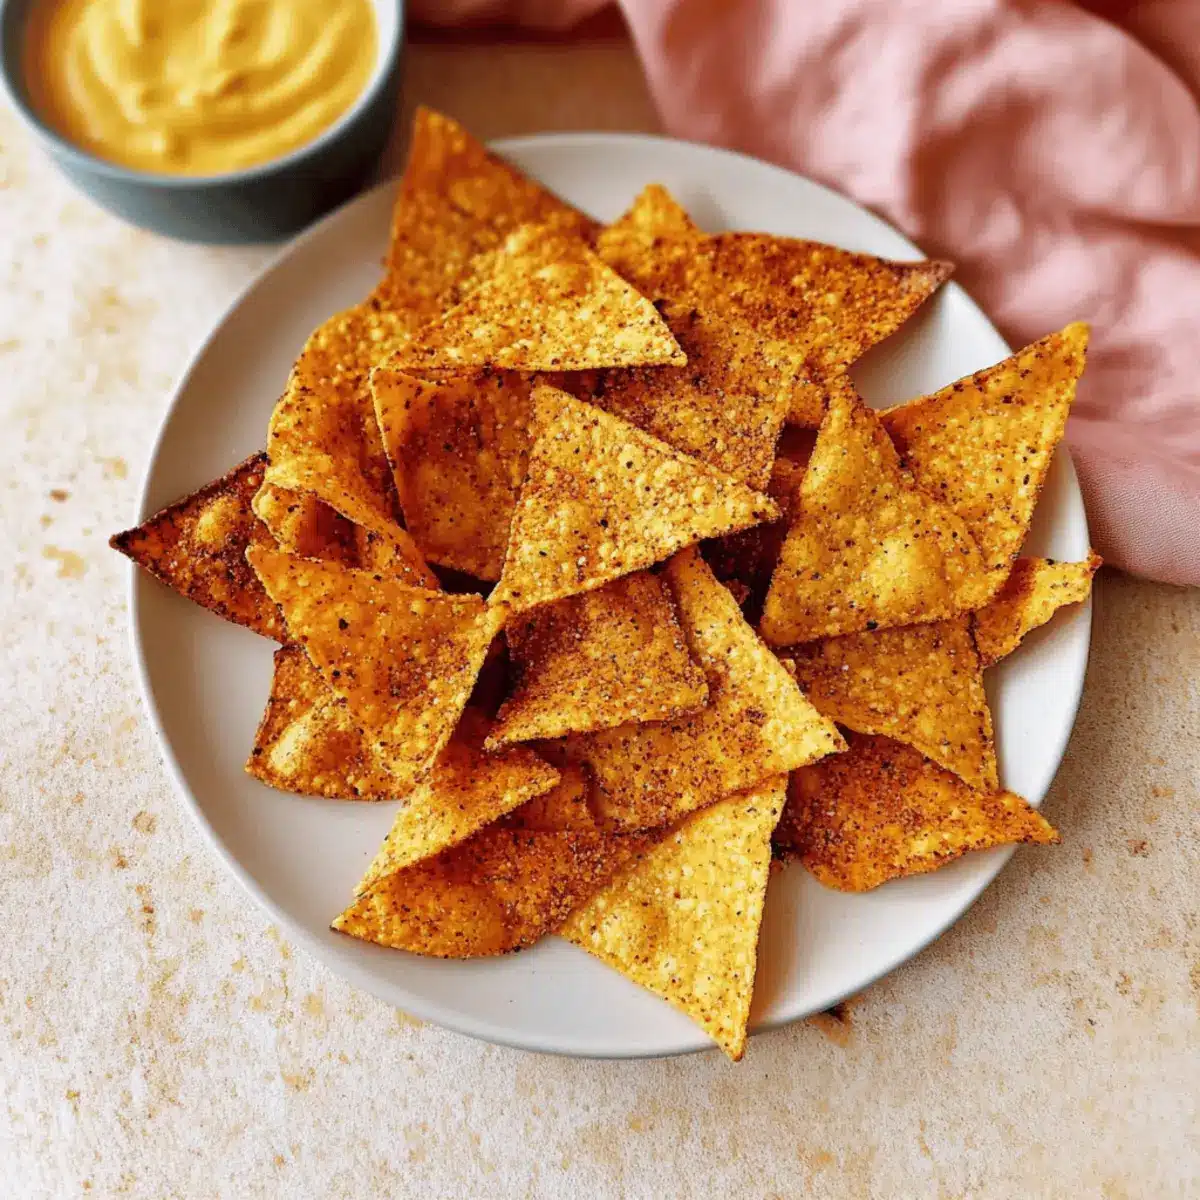
As I bit into a warm, crispy tortilla chip, a familiar crunch filled the room, transporting me to sun-soaked street fairs where delicious snacks abound. If you’re craving that vibrant taste of homemade Doritos (tortilla chips) without all the guilt, you’re in for a treat! Whipping up these healthier bites in under 25 minutes is not only a breeze but also a chance to customize flavors to your heart’s content. With a dash of chili powder and a sprinkle of smoked paprika, you’ll impress friends and family at game nights or cozy gatherings. These chips are not only vegan and gluten-free but also made from real ingredients, allowing you to enjoy every crispy bite without worry. Ready to join the homemade snack revolution and discover how you can create a mouthwatering batch? Let’s dive in!
Why Make Homemade Doritos?
Flavor Explosion: These homemade Doritos are packed with bold, savory spices like smoked paprika and chili powder, giving you a delicious crunch in every bite.
Quick and Easy: With only 25 minutes and a few ingredients, you can whip up a snack that outshines any store-bought option.
Customizable: Feel free to experiment with flavor profiles, swapping in your favorite seasonings. The possibilities are endless!
Healthier Choice: Made from real ingredients, these chips are not just vegan and gluten-free—they’re a guilt-free treat you can enjoy anytime.
Crowd-Pleaser: Whether it’s game night or a cozy gathering, sharing a bowl of these crispy delights is sure to impress everyone! Try serving them with your favorite dips for the ultimate snack experience.
Homemade Doritos Ingredients
For the Chips
- Corn Tortillas – The essential base for homemade Doritos; opt for organic whole grain for flavor and nutrition.
- Avocado Oil – Provides a perfect crispy texture; you can substitute with a 1kcal cooking spray for a lighter option.
For the Seasoning
- Chili Powder – Adds delightful warmth; adjust to your spice preference to customize your homemade Doritos.
- Smoked Paprika – Essential for that signature smoky flavor; this spice is key to mimicking classic tortilla chips.
- Garlic Powder – Introduces a lovely savory depth; onion powder can be an interesting alternative if desired.
- Salt – A must to enhance every flavor; be sure to adjust it to taste for your personal touch.
- Nutritional Yeast – Brings a cheesy essence and additional nutrients; omit for a more oil-free recipe, keeping in mind flavor alterations.
Step‑by‑Step Instructions for Homemade Doritos (Tortilla Chips)
Step 1: Preheat the Oven
Start by preheating your oven to 360°F (180°C). While the oven heats, gather your ingredients and line a baking sheet with parchment paper to prevent sticking. This will ensure your homemade Doritos bake evenly and become crispy, providing the perfect foundation for the flavor-packed tortilla chips you’re about to create.
Step 2: Prepare the Tortillas
Stack your corn tortillas and use sharp scissors or a knife to cut them into 6-8 triangle pieces. The size can vary based on your preference, but uniform pieces will ensure even baking. Once cut, arrange them on your work surface and prepare for seasoning; this step is essential for achieving that delightful crunch and satisfying texture.
Step 3: Coat with Oil
Place the tortilla pieces in a large bowl and add a drizzle of avocado oil. Using your hands or a spatula, toss the pieces gently until they are evenly coated. This thin layer of oil helps the spices adhere and promotes a beautiful golden hue as the homemade Doritos bake. Take a moment to enjoy the satisfying sound of the tortillas being coated!
Step 4: Mix the Seasonings
In a separate bowl, mix together the chili powder, smoked paprika, garlic powder, and salt. Feel free to adjust the amounts based on your heat preference! Once blended, sprinkle this seasoning mix over the tortilla pieces and rub it in gently with your fingers, ensuring each chip is generously coated. The aromatic spices will elevate your homemade Doritos to new heights.
Step 5: Bake the Chips
Spread the seasoned tortilla pieces in a single layer on the prepared baking sheet. Bake in the preheated oven for about 15 minutes, flipping halfway through to achieve an even crispness. Keep a close eye on the chips during the last few minutes, as they can burn quickly. You’re looking for a lovely golden brown color to ensure perfect homemade Doritos.
Step 6: Cool and Store
Once the chips are out of the oven, allow them to cool completely on a wire rack. This step is vital, as cooling helps them crisp up even more. Once they are fully cooled, you can store your homemade Doritos in an airtight container for up to a week. Enjoy your deliciously crispy snack with your favorite dips or on their own!
What to Serve with Homemade Doritos (Tortilla Chips)
The delightful crunch of homemade snacks opens the door to myriad pairing possibilities that elevate your culinary experience.
-
Guacamole: This creamy dip offers a rich contrast to the crispy chips, enhancing flavors and providing a smooth texture for each bite.
-
Fresh Salsa: Bright and tangy, a homemade salsa adds a burst of freshness that complements the spices of the chips beautifully. The vibrant flavors will take your snacking to the next level!
-
Cheesy Queso Dip: The gooey, melty texture of melted cheese brings indulgence to every crunch and is a crowd favorite for any gathering.
-
Black Bean Salad: A hearty black bean salad introduces protein and freshness, perfect for a balanced snack or appetizer. Combine with lime juice for an extra zing!
-
Creamy Ranch Dip: Light and flavorful, this dip pairs wonderfully with the spiciness of your homemade Doritos, adding a cool contrast that many love.
-
Chilled Wine Spritzer: Refreshing and light, the fruity notes of a white wine spritzer provide a delightful balance to the savory chips, making it a perfect pairing for gatherings.
-
Coconut Lime Sorbet: For dessert, a coconut lime sorbet delivers a tropical twist that cleanses the palate and complements the savory crunch of the tortilla chips.
Pair any of these delicious options with your homemade Doritos to create an unforgettable snacking experience filled with flavor and joy!
Expert Tips for Homemade Doritos
- Watch Closely: Always monitor your homemade Doritos after the 10-minute mark to prevent over-browning or burning.
- Cool Thoroughly: Ensure chips cool completely before storing; residual heat makes them soggy instead of crispy.
- Adjust Cooking Times: Different brands of tortillas can vary in thickness. Keep an eye on cooking times to achieve the best results.
- Season to Taste: Don’t hesitate to tweak the seasoning mix; personalized flavors make your homemade Doritos truly unique!
- Experiment Freely: Try different spices or fresh ingredients to create exciting variations that suit your taste preferences.
Storage Tips for Homemade Doritos
Room Temperature: Store your homemade Doritos in an airtight container at room temperature for up to one week to maintain their delightful crunch.
Fridge: If you prefer, you can refrigerate the chips, but they may lose their crispiness in the process. It’s best to consume them fresh!
Reviving Crispiness: To bring back the crunch, briefly re-bake the chips in the oven at 350°F (175°C) for about 5-7 minutes. This works wonders for any leftovers!
Freezer: For longer storage, freeze the chips in an airtight bag for up to three months. Just be sure to let them cool completely before freezing to avoid moisture buildup.
Homemade Doritos: Flavor Variations to Try
Customize your homemade Doritos with these delightful variations that will elevate your snacking experience to new heights!
- Ranch Twist: Mix in ranch seasoning for a creamy, zesty flavor that adds a fun twist to classic chips.
- Cheesy Delight: Replace nutritional yeast with cheese powder for an unapologetically cheesy snack that everyone will love.
- Spicy Kick: Add cayenne pepper or crushed red pepper flakes for an extra layer of heat, perfect for spice enthusiasts.
- Lime Zing: Include a sprinkle of lime zest and a dash of salt for a refreshing, tangy flavor reminiscent of summer days.
- Sweet & Spicy: Drizzle a bit of honey or maple syrup before seasoning for a sweet and savory combo; balance is key!
- Taco-Inspired: Experiment with taco seasoning for a bold flavor reminiscent of your favorite taco nights. This will definitely be a crowd favorite!
- Vegan Nacho: Sprinkle with nutritional yeast and a hint of smoked paprika for that nacho cheese flavor without any dairy!
- Herb Garden: Mix in dried herbs like oregano or thyme to create a delicious Mediterranean-inspired flavor profile your taste buds will thank you for!
Feel free to let your creativity shine! The beauty of homemade snacks is that you can experiment with various spices to find your perfect blend. Happy snacking!
Make Ahead Options
These homemade Doritos (tortilla chips) are perfect for meal prep aficionados! You can easily cut and season the corn tortillas up to 24 hours in advance, storing them in an airtight container in the fridge to maintain freshness. Just prepare your tortilla pieces as directed and coat them with oil and spices. When you’re ready to enjoy your snack, simply spread them out on a baking sheet and bake at 360°F (180°C) for about 15 minutes until crispy. Keeping an eye on them during baking is essential for perfect texture—this way, you’ll have delicious, homemade snacks ready in no time, making busy weeknights a breeze!

Homemade Doritos (Tortilla Chips) Recipe FAQs
How do I choose the best corn tortillas for homemade Doritos?
Absolutely! When selecting corn tortillas, opt for organic whole grain varieties for the best flavor and nutritional benefits. Look for tortillas that are pliable and free of dark spots or tears, as these qualities can impact the texture of your chips. Fresh tortillas will yield the crispiest results.
What’s the best way to store my homemade Doritos?
To keep your homemade Doritos crispy, store them in an airtight container at room temperature for up to one week. If you notice they are becoming a little stale, feel free to re-bake them at 350°F (175°C) for about 5-7 minutes, which will help revive that crunchy texture you love!
Can I freeze these tortilla chips?
Yes, you can! To freeze your homemade Doritos, allow them to cool completely. Once cooled, place them in an airtight bag, ensuring to squeeze out as much air as possible. Freeze for up to three months. When you’re ready to enjoy them, simply re-bake in a preheated oven at 350°F (175°C) for about 10 minutes to restore their crunch.
What should I do if my chips turn out too dark or burnt?
Very often, keeping an eye on the chips during the last few minutes is key! If you find that they have overcooked, don’t worry—next time, remember to reduce the baking time by checking at the 10-minute mark and adjust based on your oven’s performance. Different brands and thicknesses of tortillas can affect baking time, so feel free to experiment until you find the perfect cook time for your chips!
Are there any dietary considerations I should keep in mind?
These homemade Doritos are naturally vegan and gluten-free, making them a delightful snack for a variety of diets. However, if you’re serving them to pets, be sure to avoid sharing salty chips, as high sodium levels can be harmful to them. Additionally, if anyone has specific allergies to spices or nutritional yeast, simply omit those ingredients to ensure everyone can enjoy the snack!
Can I customize the flavor of my homemade Doritos?
The more the merrier! Feel free to play around with the seasoning mix to create unique flavors tailored to your tastes. Consider adding ranch seasoning, cheese powder, or even lime zest for a zesty kick. The sky’s the limit when it comes to personalizing your homemade Doritos!
Homemade Doritos: Crunchy, Healthy Tortilla Chips Made Easy
Ingredients
Equipment
Method
- Preheat your oven to 360°F (180°C) and gather your ingredients.
- Cut corn tortillas into 6-8 triangle pieces.
- Coat tortilla pieces with avocado oil.
- Mix together the chili powder, smoked paprika, garlic powder, and salt in a separate bowl.
- Spread seasoned tortilla pieces on a baking sheet and bake for about 15 minutes.
- Allow chips to cool completely on a wire rack.
Leave a Reply