
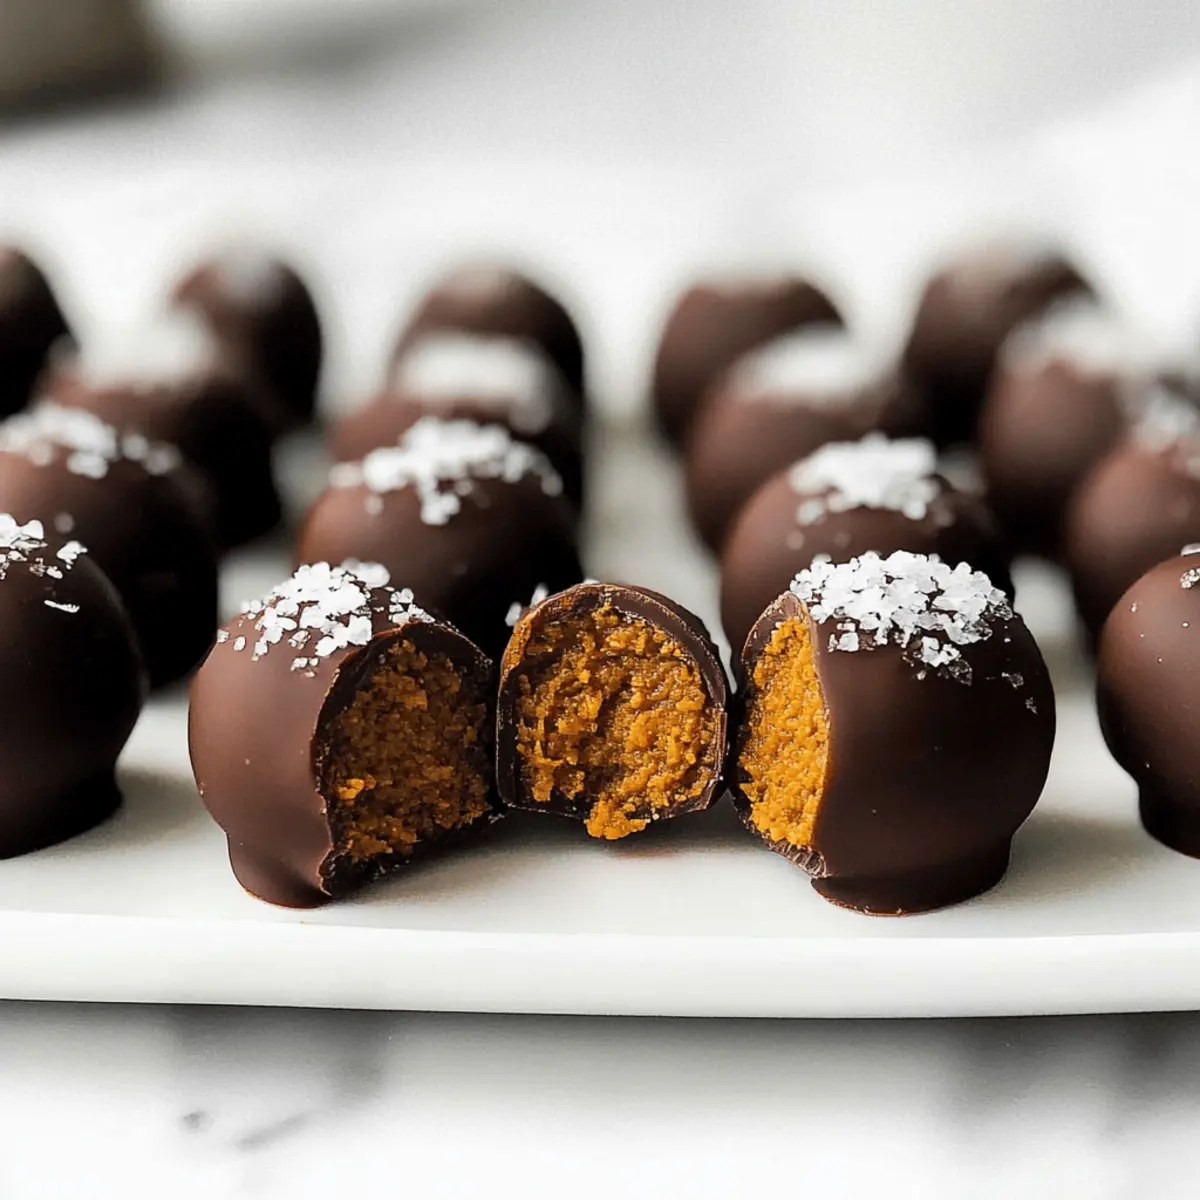
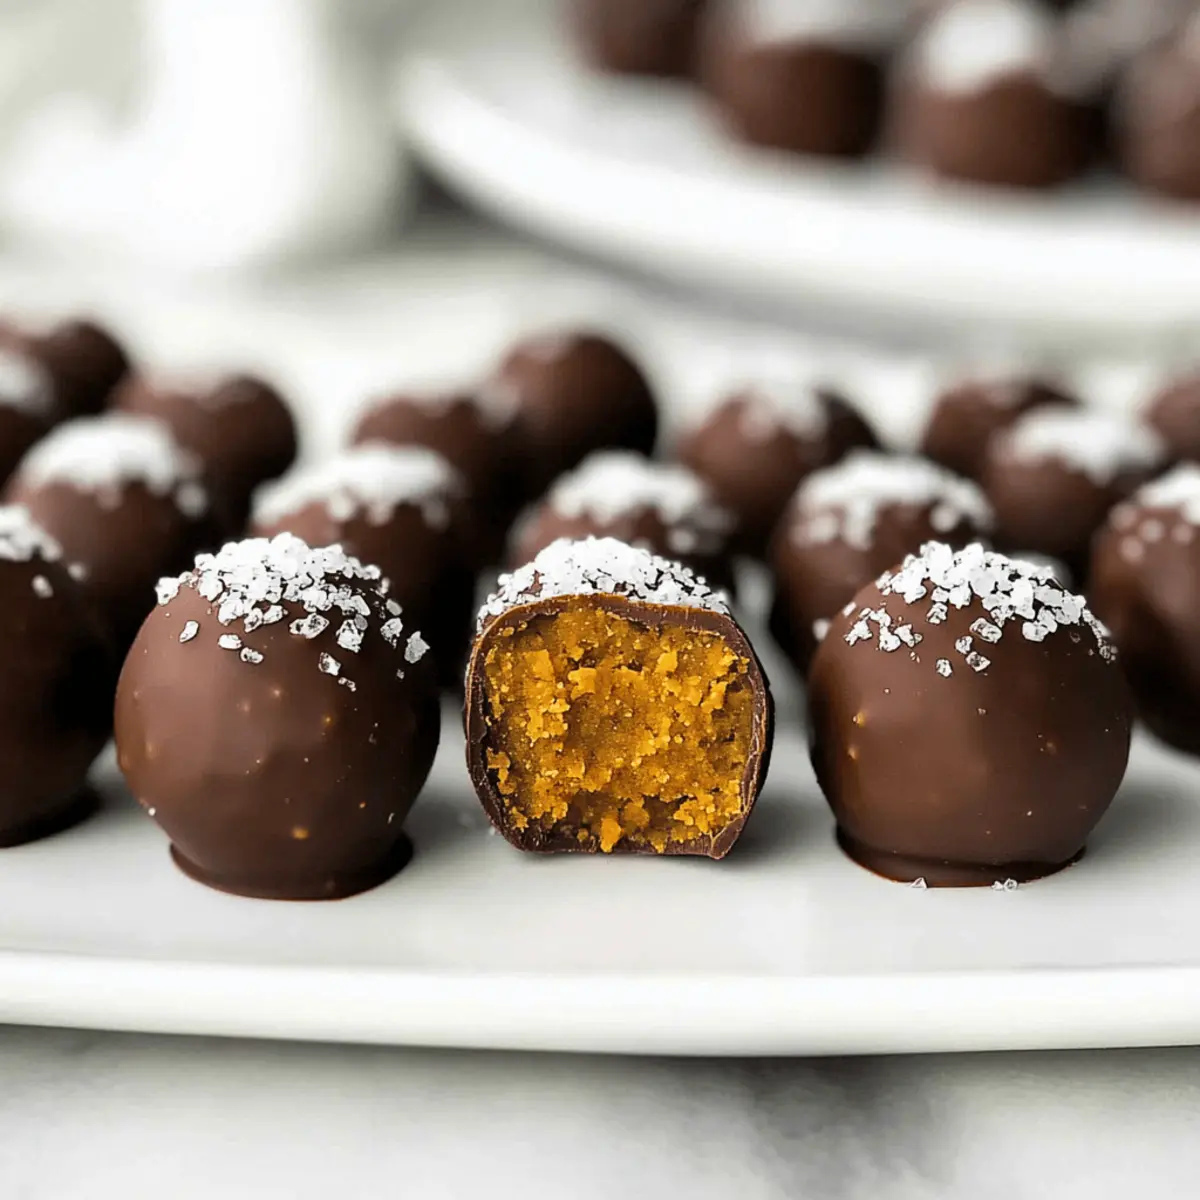
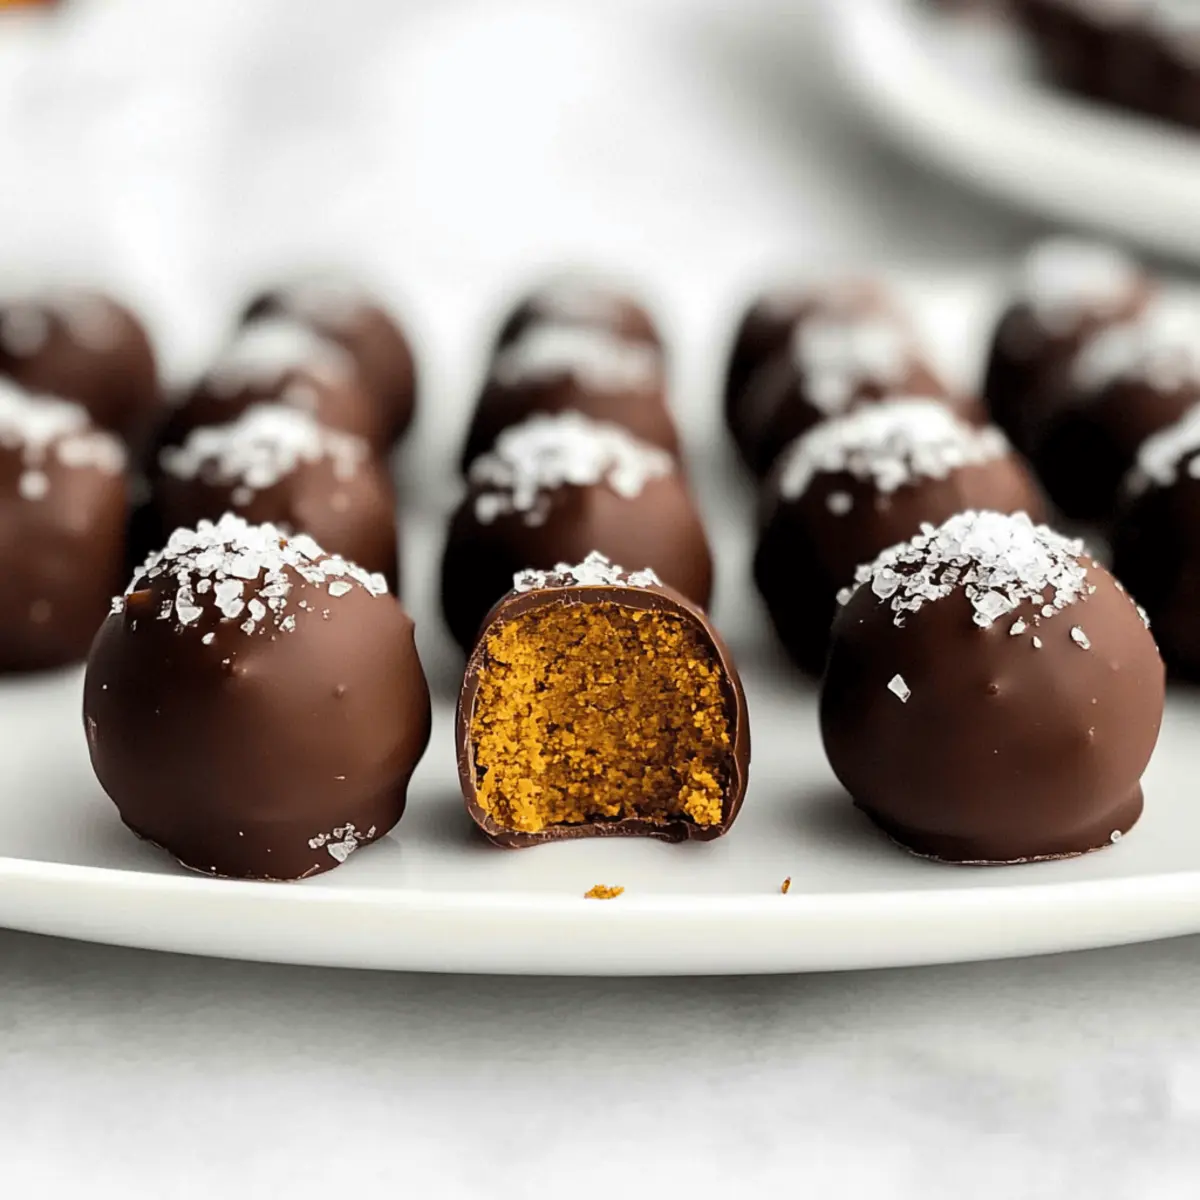
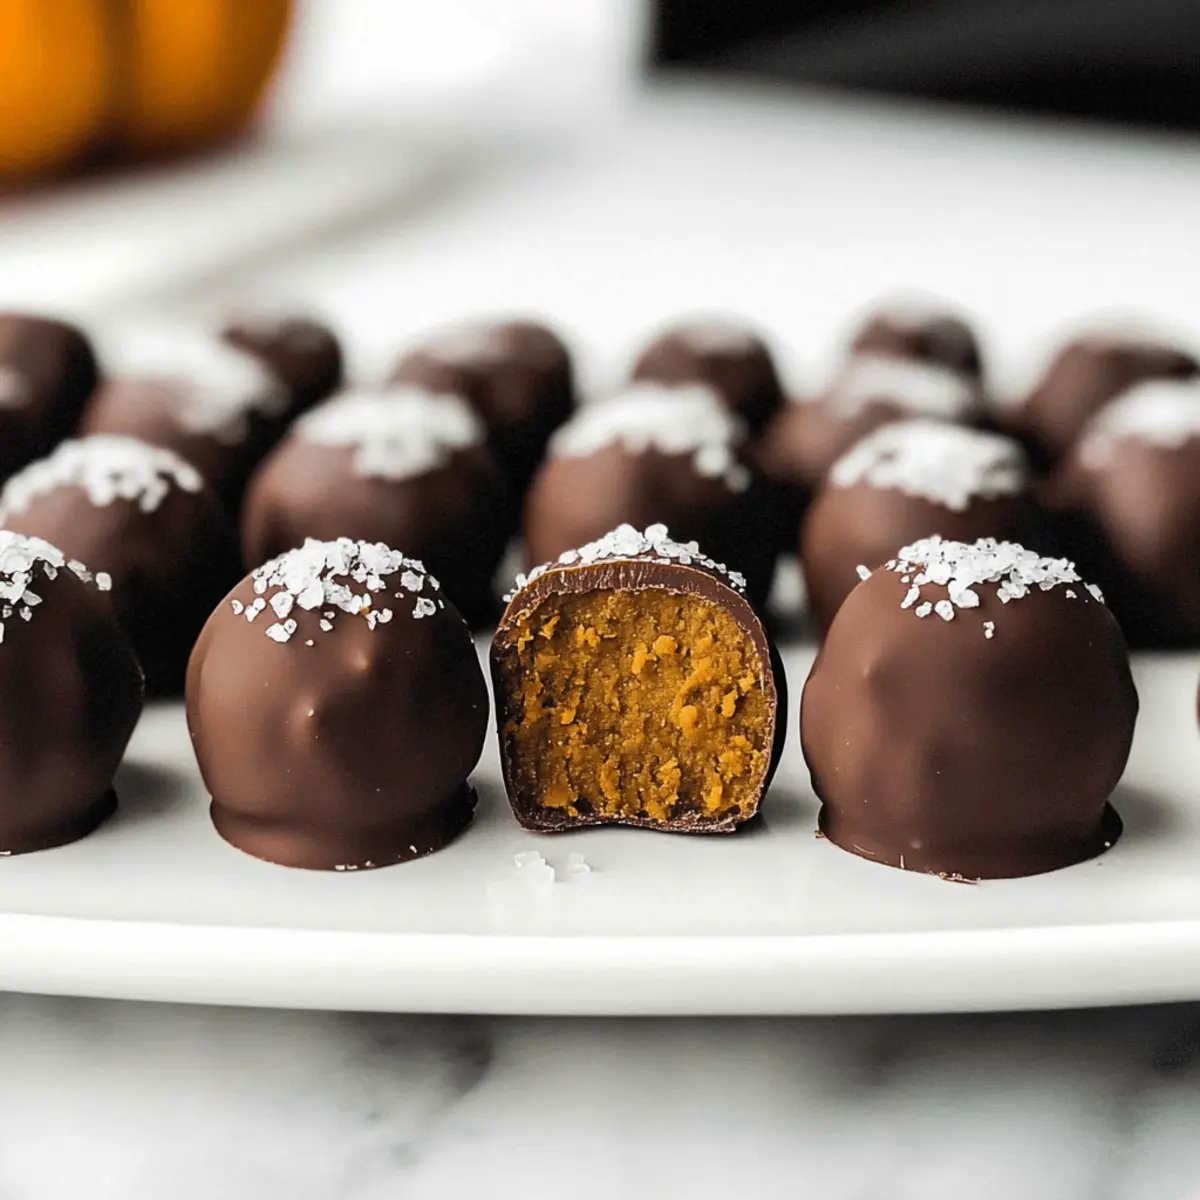
As I savored the first bite of a Healthy Pumpkin Truffle, a wave of warmth flooded my senses, transporting me to crisp autumn days filled with the rich aroma of freshly baked pumpkin pie. These no-bake treasures are a guilt-free indulgence, combining the comforting flavors of pumpkin and spices, all wrapped in a veil of dark chocolate. Each truffle is only 20 calories, making them the perfect treat for clean eaters and dessert lovers alike. With just one bowl required and minimal prep time, this recipe is ideal for anyone seeking a quick, delightful solution to their sweet cravings. Ready to discover how to craft these irresistible bites? Let’s dive into the world of Healthy Pumpkin Truffles!
Why are Healthy Pumpkin Truffles a must-try?
Decadent Flavor: Each truffle is a blissful bite of pumpkin pie, perfectly balanced with rich chocolate and spices.
No-Bake Simplicity: With a one-bowl recipe and quick prep, you’ll be enjoying these truffles in no time!
Guilt-Free Indulgence: At only 20 calories each, they satisfy your sweet tooth without the guilt.
Versatile Treat: Add nut butter or experiment with spices to personalize your truffles, keeping each batch exciting!
Perfect For Any Occasion: Serve them at gatherings, holiday parties, or as a delightful afternoon snack. You might also love pairing them with a cup of coffee, just like with these Lemon Truffles Zesty.
Healthy Pumpkin Truffles Ingredients
For the Truffles
- Pumpkin Purée – Provides moisture and flavor; use regular canned pumpkin for the best taste.
- Homemade Pumpkin Spice – Adds warmth and depth; a blend of cinnamon, allspice, nutmeg, ginger, and cloves elevates your Healthy Pumpkin Truffles.
- Salt – Enhances the flavors in the filling without overpowering the sweetness.
- Liquid Stevia – Acts as a natural zero-calorie sweetener; alternatively, ¼ cup of coconut sugar can be used.
- Oat Flour – Serves as a binding agent; any flour can substitute except for coconut flour.
- Dark Chocolate – For coating, it adds a rich finish; choose high-quality chocolate bars over chips for better meltability.
- Flaky Sea Salt – Optional finish to contrast sweetness and enhance flavor.
Step‑by‑Step Instructions for Healthy Pumpkin Truffles
Step 1: Prepare the Baking Tray
Begin by lining a baking tray with wax or parchment paper. This will prevent the Healthy Pumpkin Truffles from sticking and make cleanup a breeze. Set your tray aside as you assemble the filling, ensuring your workspace is organized and ready for the next steps.
Step 2: Mix the Filling
In a medium-sized bowl, combine the pumpkin purée, homemade pumpkin spice, salt, and liquid stevia. Stir these ingredients together until the mixture is well combined and smooth, noting the delightful aroma of pumpkin and spices. Gradually add oat flour, mixing until just incorporated to form a sticky dough that holds together well.
Step 3: Shape the Truffles
Lightly oil your hands to prevent sticking, then take small portions of the mixture and roll them into bite-sized spheres, forming approximately 24 truffles. As you shape them, admire their vibrant orange color, reminiscent of fall. Place each ball on your prepared baking tray, ensuring they have a bit of space between them.
Step 4: Melt the Chocolate
In a microwave-safe bowl, break down the dark chocolate into smaller pieces for even melting. Heat in the microwave for 20-30 seconds, stirring in between until the chocolate is smooth and completely melted. Keep the melted chocolate warm, as a thinner consistency will make coating the Healthy Pumpkin Truffles easier.
Step 5: Coat the Truffles
Using two forks, dip each truffle sphere into the warm melted chocolate, ensuring they are fully covered. Allow any excess chocolate to drip off back into the bowl, and then carefully place them back onto the lined tray. Observe the glossy chocolate coating that makes each truffle look irresistible and ready to indulge in.
Step 6: Add Sea Salt
Before the chocolate sets, sprinkle a small pinch of flaky sea salt on top of each truffle. This optional step enhances the sweet and salty contrast, elevating the overall flavor profile. Once done, admire your creations as they start to take their final form, showcasing a delightful sheen.
Step 7: Refrigerate to Set
Transfer the tray to the refrigerator and let the Healthy Pumpkin Truffles chill for about 15-20 minutes. This step is crucial as it allows the chocolate to harden. Afterward, they will be ready to serve, firming up perfectly while maintaining their creamy filling within.
Make Ahead Options
These Healthy Pumpkin Truffles are perfect for meal prep enthusiasts! You can prepare the truffle filling and shape them into spheres up to 24 hours in advance. Simply store the rolled truffles in an airtight container in the refrigerator to keep them fresh and prevent browning. When you’re ready to enjoy, melt the dark chocolate and coat the truffles as directed. If made ahead, they’ll still be just as delicious, allowing you to impress family and friends with minimal effort. Enjoy this time-saving tip to make your fall gatherings even sweeter while saving you precious time in the kitchen!
What to Serve with Healthy Pumpkin Truffles
Embrace the cozy warmth of fall with delightful pairings that elevate these creamy truffles into a full experience.
-
Warm Spiced Coffee: The aromatic spices in coffee harmonize beautifully with the pumpkin flavor, creating a inviting fall-inspired treat.
-
Chai Tea: The blend of spices in chai complements the truffles, enhancing their warm, comforting essence. Perfect for cozy afternoons!
-
Vegan Vanilla Ice Cream: A scoop of creamy ice cream adds a luscious texture contrast, providing a refreshing balance to the rich chocolate coating. Enjoy as a dessert duo!
-
Apple Slices with Cinnamon: Crisp, tart apple slices create a fresh contrast, while a sprinkle of cinnamon ties the flavors together, invoking memories of apple pie.
-
Dark Chocolate Almonds: Intensify the chocolate experience with rich dark chocolate-covered almonds, offering an extra crunch and a boost of healthy fats.
-
Pumpkin Spice Latte: This classic fall beverage mirrors the flavors in the truffles, making for a deliciously themed pairing. It’s a match made in heaven!
-
Salted Caramel Sauce: Drizzling warm salted caramel over truffles creates a decadent touch, enhancing each bite with a sweet and salty explosion.
-
Toasted Pumpkin Seeds: For a savory twist, a handful of crunchy roasted pumpkin seeds adds texture and a nutty flavor that perfectly balances the sweetness of the truffles.
How to Store and Freeze Healthy Pumpkin Truffles
Fridge: Store Healthy Pumpkin Truffles in an airtight container in the refrigerator for up to 5 days. They can either be stored uncovered or covered, allowing the flavors to meld beautifully.
Freezer: For longer storage, freeze truffles on a baking sheet until firm, then transfer to an airtight container or freezer bag. Enjoy them frozen for up to 2 months!
Reheating: If you prefer them slightly softened, let them sit at room temperature for 10-15 minutes before indulging.
Serving suggestion: Pair these truffles with a warm cup of coffee or tea for a cozy treat anytime!
Healthy Pumpkin Truffles Variations & Substitutions
Feel free to personalize these delightful truffles with these fun swaps and additions that can elevate their flavor and texture!
-
Nut Butter: Swap in your favorite nut butter like almond or cashew for a creamier filling. This not only adds richness but also a delightful nutty flavor to the mix.
-
Sweetener Alternatives: Use maple syrup or honey instead of liquid stevia for a different sweetness profile. Both options contribute a lovely depth of flavor that’s perfect for the autumn season.
-
Spice Experimentation: Try adding cardamom or a pre-mixed pumpkin pie spice for new flavor twists. Each spice will create a distinct variation, bringing unique warmth and dimension to your truffles.
-
Texture Boost: For added crunch, mix in some finely chopped nuts or seeds. A touch of pecans or walnuts can bring a satisfying bite that beautifully contrasts the creamy filling.
-
Coconut Flour: If you’re looking for a different texture, substitute oat flour with coconut flour. However, remember to reduce the amount, as coconut flour is highly absorbent and needs much less.
-
Dairy-Free Chocolate: Opt for dairy-free or vegan chocolate to ensure these truffles stay fully plant-based for anyone with dietary restrictions. Brands like Enjoy Life offer great alternatives that don’t compromise on taste.
-
Sugar-Free Option: For a completely guilt-free treat, explore sugar-free dark chocolate options. You’ll maintain the rich chocolate flavor while keeping calorie counts low.
You might also enjoy these truffles alongside a cup of Lemon Truffles Bake for a refreshing pairing or as a sweet pick-me-up with Moist Pumpkin Bread. Enjoy your culinary adventure!
Expert Tips for Making Healthy Pumpkin Truffles
- Perfect Flour Measurement: Ensure you measure oat flour accurately; too much can lead to a dry or crumbly truffle that misses the mark.
- Warm Chocolate: Keep melted chocolate warm while coating; this allows for a smoother dip and prevents clumping. Avoid chocolate chips—they don’t melt well!
- Customize Your Spices: Feel free to adjust the spice ratios in your homemade pumpkin spice blend; this can elevate the flavor and suit personal preferences perfectly.
- Oiled Hands Trick: If the truffle mixture is too wet, lightly oil your hands to help shape them more easily without sticking.
- Chill Completely: Allow enough time for the Healthy Pumpkin Truffles to chill until the chocolate is fully set. This will give you the best texture and flavor!
Healthy Pumpkin Truffles Recipe FAQs
What type of pumpkin purée should I use?
Absolutely! Use regular canned pumpkin purée for the best flavor. Avoid pumpkin pie filling, as it contains added sugars and spices that can alter the taste of your Healthy Pumpkin Truffles.
How should I store the Healthy Pumpkin Truffles?
You can store your Healthy Pumpkin Truffles in an airtight container in the refrigerator for up to 5 days. They can be left uncovered for a fresher taste or covered to keep them from drying out. Just make sure they’re well-protected to maintain their decadent flavor!
Can I freeze Healthy Pumpkin Truffles?
Yes! To freeze, first place the truffles on a baking sheet and freeze them until firm—about 1-2 hours should do the trick. Once set, transfer them to an airtight container or freezer bag. They can be enjoyed frozen for up to 2 months. When you’re ready to indulge, let them sit at room temperature for about 10-15 minutes for optimal texture.
What if my truffles are too sticky to shape?
Very relatable! If you find that the mixture is too wet or sticky, lightly oil your hands before rolling the truffles. This will prevent the mixture from sticking to your fingers and help you achieve that perfect round shape!
Are these truffles suitable for those with dietary restrictions?
Yes, absolutely! These Healthy Pumpkin Truffles are vegan, gluten-free, and low in sugar, making them a great option for various dietary needs. However, make sure to use gluten-free oat flour and check the label of your dark chocolate for any hidden allergens, especially if you’re cooking for friends with specific sensitivities.
Can I substitute the liquid stevia with another sweetener?
Certainly! If you prefer using another sweetener, try ¼ cup of coconut sugar instead. Just be aware that you may need to slightly adjust the amount of oat flour to maintain the right consistency in your Healthy Pumpkin Truffles. Enjoy experimenting with different sweeteners to find your perfect blend!
Healthy Pumpkin Truffles for Blissful Guilt-Free Indulgence
Ingredients
Equipment
Method
- Prepare the Baking Tray: Line a baking tray with wax or parchment paper.
- Mix the Filling: In a bowl, combine pumpkin purée, homemade pumpkin spice, salt, and liquid stevia. Add oat flour until a sticky dough forms.
- Shape the Truffles: Roll mixture into bite-sized spheres, creating approximately 24 truffles.
- Melt the Chocolate: Break dark chocolate into pieces and microwave in 20-30 second intervals until smooth.
- Coat the Truffles: Dip each truffle in melted chocolate, allowing excess to drip off.
- Add Sea Salt: Sprinkle flaky sea salt on top of each coated truffle before chocolate sets.
- Refrigerate to Set: Chill truffles in the refrigerator for about 15-20 minutes until chocolate hardens.
Leave a Reply