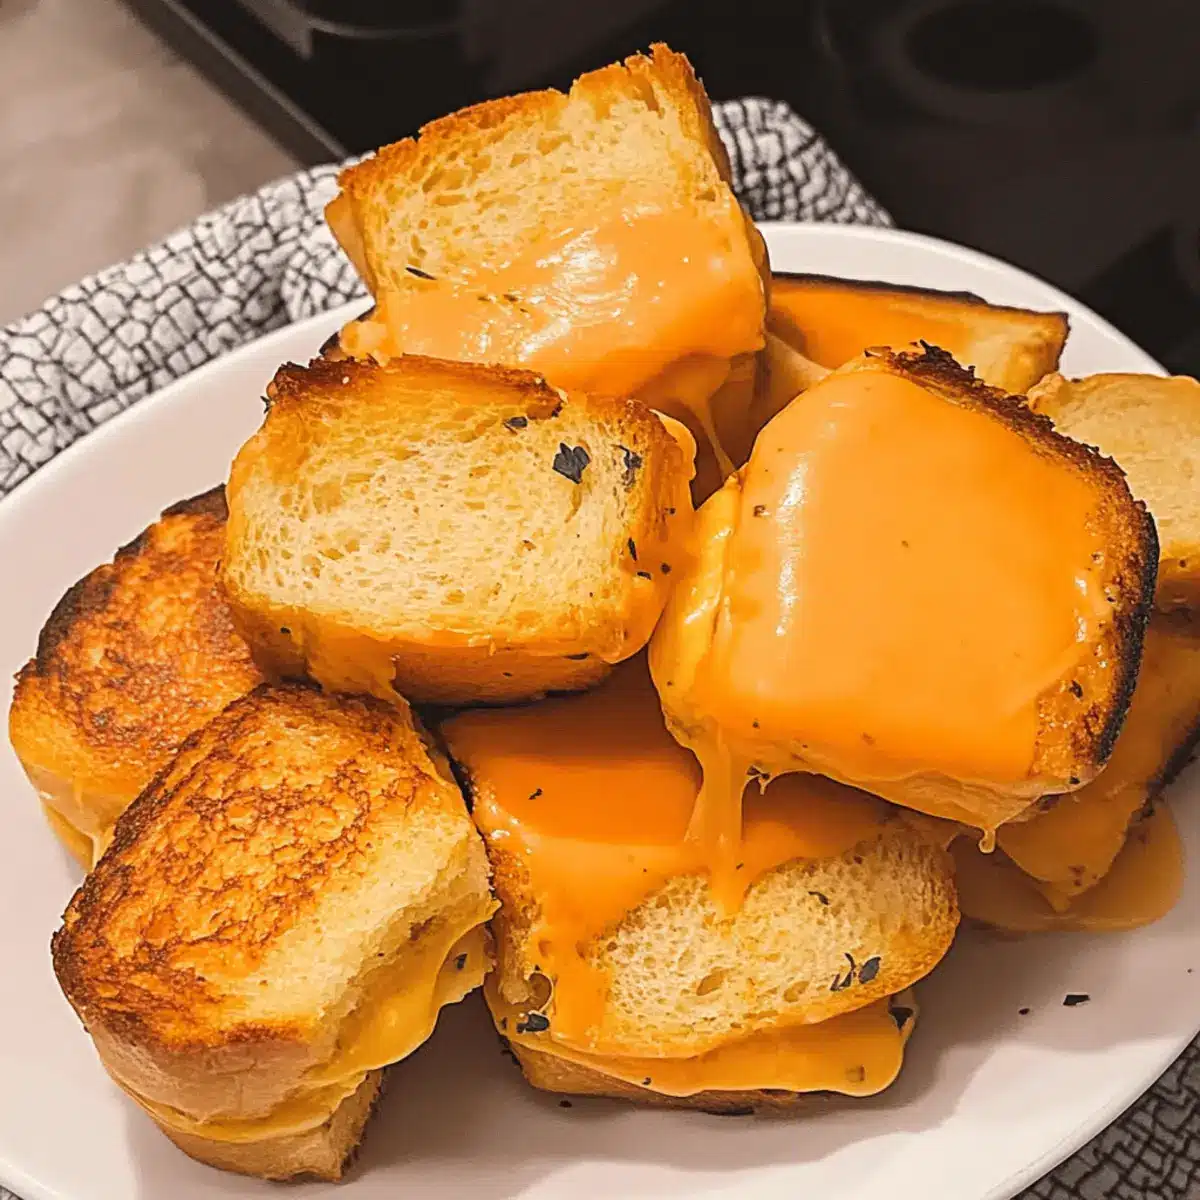
With the first whiff of garlic herb butter wafting through the kitchen, my taste buds instantly awaken! Today, I’m thrilled to share my version of Hawaiian Roll Mini Grilled Cheese sandwiches, which effortlessly combine the sweet, fluffy delight of Hawaiian rolls with gooey, melted cheese that kids and adults adore. These little bites of comfort food are perfect for a quick meal or a fun game day snack, making them so versatile. You can whip them up in no time, and they’re even freezer-friendly for those moments when you crave a cozy treat without the hassle. Curious how these delightful mini sandwiches can elevate your snack time? Let’s dive into the recipe!

Why You’ll Love These Hawaiian Roll Mini Grilled Cheese?
Deliciously Comforting: These mini sandwiches pack all the gooey goodness of a classic grilled cheese with an exciting twist from sweet Hawaiian rolls.
Kid-Friendly Appeal: Even the pickiest eaters can’t resist these bite-sized delights, making them perfect for game day or a cozy family meal.
Quick and Easy: With just a few simple steps, you can create a comforting dish that’s both fun and satisfying—perfect for busy weeknights!
Versatile Flavors: Customize your mini grilled cheese by adding tomatoes, bacon, or different cheeses to suit your taste preferences. Don’t forget to pair them with a warm bowl of tomato soup for the ultimate experience!
Hawaiian Roll Grilled Cheese Ingredients
For the Mini Sandwiches
• Hawaiian Rolls – A sweet and fluffy base that elevates the comfort of classic grilled cheese.
• Butter – Richness is key for a golden crust; margarine can be used for a dairy-free option.
• Oregano – Earthy herbal notes that complement the other flavors wonderfully; dried oregano works perfectly.
• Garlic Powder – Adds savory depth; substitute with fresh minced garlic for a bolder flavor.
• Parsley – Brightens the flavor profile, and cilantro can be a fun twist if you’re feeling adventurous.
• Cheese – Essential for that gooey goodness; use your favorite melting cheese like cheddar or mozzarella.
Optional Add-ins
• Tomato Slices – Add freshness and acidity to elevate your mini sandwiches.
• Cooked Bacon – For a savory addition, adding cooked bacon brings a delightful crunch.
• Pepper Jack Cheese – Spice things up by incorporating pepper jack for an extra kick!
Enjoy whipping up these delightful Hawaiian Roll Grilled Cheese sandwiches, which will not only satisfy hunger but will also bring smiles to all at the table!
Step‑by‑Step Instructions for Hawaiian Roll Mini Grilled Cheese
Step 1: Preheat Your Oven
Start by preheating your oven to 350°F (175°C). This temperature allows the Hawaiian Roll Mini Grilled Cheese sandwiches to bake evenly, achieving that perfect golden-brown crust. As the oven warms up, take out a baking sheet and line it with parchment paper for easy cleanup.
Step 2: Prepare the Garlic Herb Butter
In a small mixing bowl, combine softened butter with dried oregano, garlic powder, and parsley. Mix these ingredients thoroughly until well blended. This garlic herb butter will add fantastic flavor to your mini grilled cheese sandwiches. Set it aside to let the flavors meld as you move on to the next step.
Step 3: Slice the Hawaiian Rolls
Carefully slice each Hawaiian roll into thirds to create bite-sized pieces for your mini sandwiches. Make sure the rolls are cut evenly, as this will help the sandwiches hold their shape while baking. With your rolls sliced, you’re ready to spread the butter mixture generously on each piece for flavor and moisture.
Step 4: Assemble the Sandwiches
Spread the garlic herb butter on all sides of the rolled pieces. Then, stack two pieces together with a slice of cheese in between. Arrange the assembled mini sandwiches on the prepared baking sheet. You can fit them snugly together without overcrowding, allowing the cheese to melt beautifully during baking.
Step 5: Bake to Perfection
Place the baking sheet in the preheated oven and bake the Hawaiian Roll Mini Grilled Cheese sandwiches for 20-25 minutes. After about 12-15 minutes, flip each sandwich to ensure an even, crispy texture on both sides. Watch for a golden color and melted cheese as an indication that they are ready to enjoy.
Step 6: Serve and Savor
Once baked, remove the mini sandwiches from the oven and let them cool slightly. They will have a crispy exterior and gooey melted cheese inside. Serve warm, ideally alongside a bowl of tomato soup for dipping, making your Hawaiian Roll Mini Grilled Cheese sandwiches the perfect comfort food treat!

Make Ahead Options
These Hawaiian Roll Mini Grilled Cheese sandwiches are perfect for meal prep and can save you time on busy weeknights! You can prepare the garlic herb butter and assemble the sandwiches up to 24 hours in advance; simply spread the butter on the sliced rolls and stack them with cheese before covering and refrigerating. To maintain optimal flavor, make sure to keep them tightly wrapped to prevent drying out. When you’re ready to serve, just pop them in the oven for 20-25 minutes to achieve that golden, gooey delight everyone loves. This way, you’ll have a comforting snack ready with minimal effort when hunger strikes!
How to Store and Freeze Hawaiian Roll Grilled Cheese
Fridge: Store leftover Hawaiian Roll Grilled Cheese in an airtight container for up to 3-4 days. To keep them fresh, separate layers with parchment paper to prevent sticking.
Freezer: For longer storage, wrap each assembled sandwich tightly in plastic wrap, then place in a freezer-safe bag. They can last in the freezer for up to 2 months.
Reheating: To reheat, bake from frozen at 350°F (175°C) for about 15-20 minutes, or until heated through and crispy, ensuring the melty goodness is preserved.
Make-Ahead Tip: Assemble the sandwiches without baking, cover them tightly, and refrigerate overnight. Bake fresh right before serving, ensuring every bite is warm and delightful!
Expert Tips for Hawaiian Roll Grilled Cheese
• Make Ahead Magic: Prepare the garlic herb butter in advance, letting the flavors infuse for at least 30 minutes. This saves time and enhances taste when making your Hawaiian Roll Grilled Cheese.
• Avoid Soggy Sandwiches: Ensure to slice the rolls cleanly and evenly. This step is crucial for maintaining structure during baking and preventing sogginess.
• Flavor Variations: Don’t hesitate to get creative with cheese choices or add-ins like tomatoes or bacon. Each addition can transform your Hawaiian Roll Grilled Cheese into a unique treat.
• Crispy Finish: For an extra crispy exterior, broil the sandwiches for the last 2 minutes of baking. Keep a close eye to prevent burning!
• Storage Tips: If you have leftovers, store them in an airtight container in the fridge. Reheat in the oven for a few minutes to regain that delightful crunch.
What to Serve With Hawaiian Roll Mini Grilled Cheese?
Nothing complements the delightful sweetness of Hawaiian rolls quite like a few thoughtfully chosen sides or drinks that enhance your meal experience.
-
Tomato Soup: A classic pairing, the warm, tangy soup beautifully complements the gooey cheesiness, creating a comforting dip.
-
Garden Salad: A fresh salad with crunchy greens and tangy vinaigrette adds brightness, balancing the richness of the mini sandwiches.
-
Fruit Skewers: Sweet, juicy fruit skewers bring a refreshing contrast to the savory flavors, making them a fun and vibrant addition.
-
Potato Wedges: Crispy, seasoned potato wedges provide satisfying crunch and heartiness, creating a playful texture contrast with the soft sandwiches.
-
Veggie Platter: Crisp raw vegetables served with a creamy dip offer a fresh, crunchy element that enhances the comforting feel of the meal.
-
Sparkling Lemonade: A cool glass of sparkling lemonade or iced tea becomes a delightful sip that cuts through the richness and adds a pop of flavor.
Indulging in these pairings will elevate your Hawaiian Roll Mini Grilled Cheese experience, turning a simple snack into a delightful meal that’s sure to satisfy!
Hawaiian Roll Grilled Cheese Variations
Feel free to let your creativity shine and customize these mini sandwiches for an even more delightful experience!
- Dairy-Free: Swap butter with margarine and use plant-based cheese for a delicious dairy-free version.
- Spicy Kick: Incorporate pepper jack cheese for a fun heat that will tantalize your taste buds. The extra spiciness can be exciting for those who crave a little zing!
- Savory French Toast: Dip assembled sandwiches in a mixture of eggs and milk before baking for a sweet and savory twist. This method adds a rich, breakfast-like layer to the classic recipe.
- Veggie Boost: Add spinach or sliced tomatoes in between the cheese layers for a fresh, colorful addition that elevates the flavor profile.
- Herb Expansion: Enhance the garlic herb butter by adding fresh basil or thyme for a fragrant twist, making your sandwiches herbaceous and delightful.
- Bacon Lovers: Crumbled bacon brings an irresistible crunch and savory flavor to these bite-sized goodies. You could even use crispy pancetta for a gourmet touch!
- Garlic Lovers: Substitute garlic powder with roasted garlic for a sweet and mellow garlic flavor that will envelop the sandwiches in warmth.
- Cheesy Surprise: Experiment with a blend of cheeses, incorporating fontina, gouda, or even a bit of blue cheese for a unique and indulgent treat.
These variations not only elevate your Hawaiian Roll Mini Grilled Cheese but also make them an exciting option for everyone at the table. If you enjoy experimenting, check out this Pesto Grilled Cheese for another twist on a classic!

Hawaiian Roll Mini Grilled Cheese Recipe FAQs
How do I select the best Hawaiian rolls?
Absolutely! When choosing Hawaiian rolls, look for those that are soft, fluffy, and have a sweet aroma. Brands like King’s Hawaiian are popular for their signature sweetness. Make sure they are free from dark spots or any signs of spoilage for the best flavor in your mini grilled cheese sandwiches.
What is the best way to store leftover Hawaiian Roll Mini Grilled Cheese?
Very! To store your leftovers, place them in an airtight container in the fridge. They can last up to 3-4 days. For optimal freshness, you might want to separate the layers with parchment paper to prevent sticking and maintain texture.
Can I freeze Hawaiian Roll Mini Grilled Cheese sandwiches?
You sure can! To freeze, wrap each assembled sandwich tightly in plastic wrap and place them in a freezer-safe bag. They will remain fresh in the freezer for up to 2 months. When ready to enjoy, simply bake them from frozen at 350°F (175°C) for 15-20 minutes, or until heated through and crispy.
What can I do if my sandwiches turn out soggy?
Oh no—soggy sandwiches can be disappointing! To avoid this issue, ensure that the rolls are cut evenly and don’t overcrowd the baking sheet. Additionally, always allow enough space for air to circulate. If the problem persists, give broiling a try during the last couple of minutes of baking to crisp them up and add a beautiful golden finish.
Are these Hawaiian Roll Mini Grilled Cheese sandwiches vegetarian-friendly?
Absolutely! This recipe is inherently vegetarian, making it a great option for those looking for a meatless meal. If you’re catering to specific dietary needs, feel free to substitute cheese with a dairy-free option, and use margarine instead of butter for a completely vegan-friendly version.
What can I serve with Hawaiian Roll Mini Grilled Cheese?
Very good question! These mini sandwiches pair wonderfully with a warm bowl of tomato soup for dipping, or even a fresh garden salad for a more complete meal. Feel free to get creative with side options that suit your taste!

Irresistible Hawaiian Roll Grilled Cheese for Cozy Evenings
Ingredients
Equipment
Method
- Preheat your oven to 350°F (175°C) and line a baking sheet with parchment paper.
- Combine softened butter with dried oregano, garlic powder, and parsley in a small mixing bowl.
- Carefully slice each Hawaiian roll into thirds to create bite-sized pieces.
- Spread garlic herb butter on all sides of the rolled pieces, then stack two pieces together with a slice of cheese in between.
- Place the assembled mini sandwiches on the prepared baking sheet and bake for 20-25 minutes, flipping halfway through.
- Remove from the oven, let them cool slightly, then serve warm, ideally with a bowl of tomato soup.

Leave a Reply