
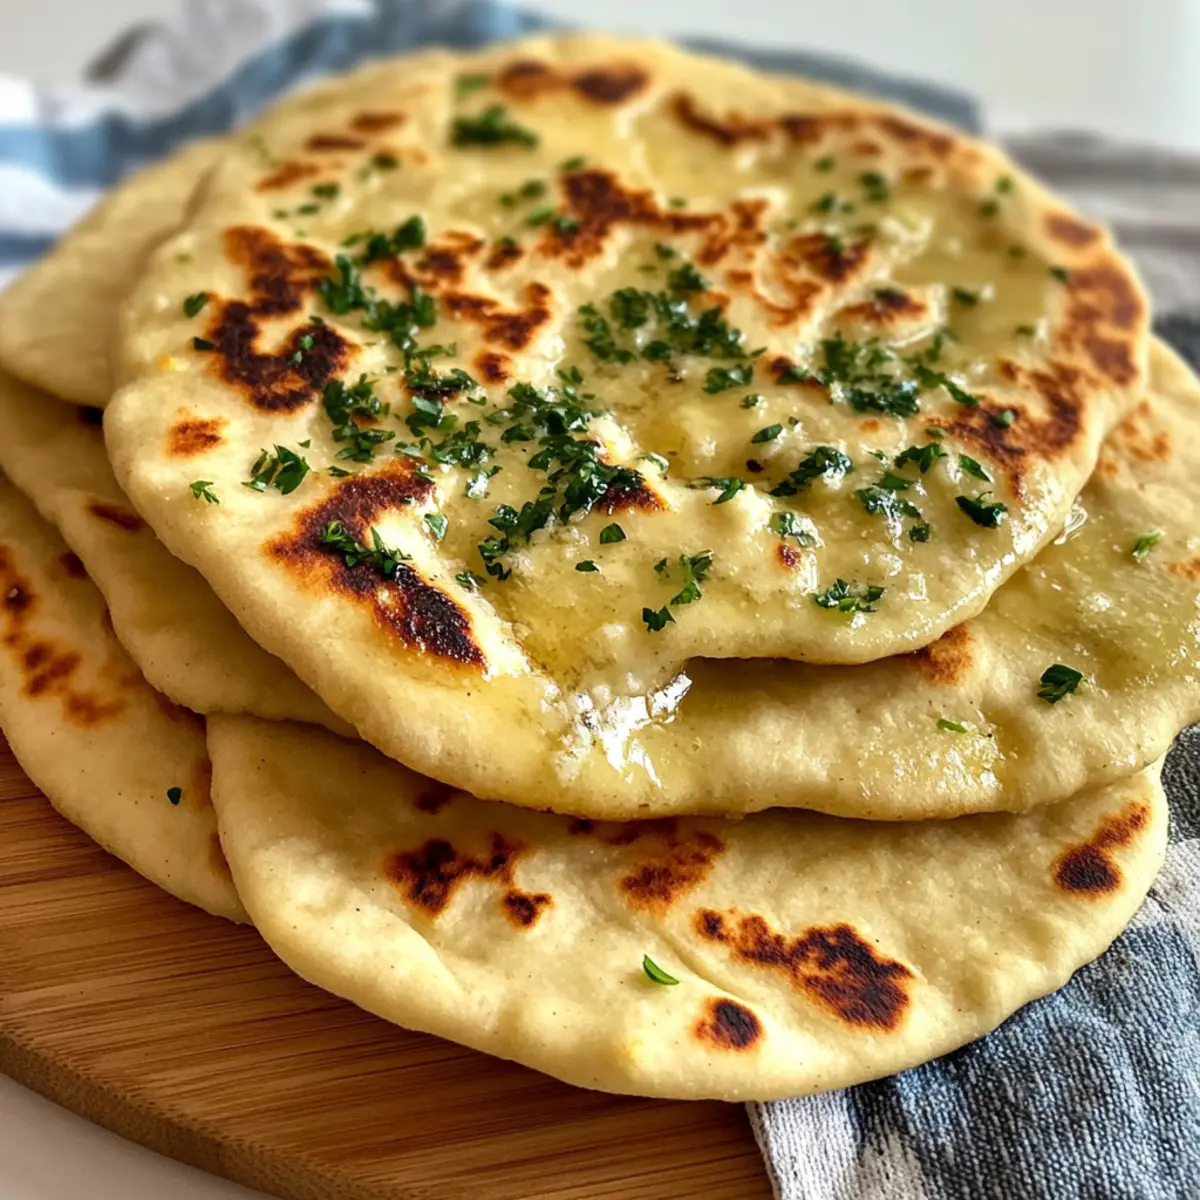
Stepping into my kitchen, the enticing aroma of garlic wafting through the air is like an instant passport to a cozy Greek taverna. This Easy Garlic Pita Bread recipe is my go-to for transforming mealtime from routine to truly memorable. With its soft, pillowy texture and a hint of aromatic herbs, it’s perfect as a sidekick to your favorite dips or as the star of a quick snack. What’s more, this delightful bread is simple to whip up and can be made gluten-free to suit any dietary preference! Imagine the joy of pulling freshly baked pitas from the oven or skillet, each one ready to cradle your delicious fillings or soak up flavorful sauces. Curious how to bring this delicious homemade goodness into your kitchen? Let’s dive into the recipe!
Why Is Homemade Garlic Pita Bread Awesome?
Simplicity at Its Best: This recipe is incredibly easy to master, making it perfect for both novice and seasoned cooks alike.
Irresistible Aroma: The blend of garlic and herbs fills your kitchen with an enticing fragrance, elevating every meal.
Versatile Use: Enjoy this garlic pita bread as a side for your favorite dips, like Healthy Garlic Parmesan, or as a wrap for delicious fillings.
Quick Preparation: With minimal ingredients and a straightforward process, you’ll have fresh, warm bread ready in no time.
Dietary Flexibility: Easily adapt this recipe for gluten-free needs by substituting with gluten-free flour, ensuring everyone at your table can indulge!
Crowd-Pleasing Snack: Whether for a quiet dinner or a lively gathering, these pitas are sure to wow your guests with their flavor and texture.
Garlic Pita Bread Ingredients
For the Dough
• All-purpose flour – Structure and base of the bread; can be replaced with gluten-free flour for a garlic pita bread that accommodates dietary needs.
• Salt – Enhances flavor and is essential for overall taste.
• Active dry yeast – A leavening agent that helps the bread rise; ensure it’s fresh for optimal results.
• Milk (warm) – Adds moisture and richness to the dough; can be substituted with water for a lighter option.
• Water (warm) – Hydrates the dough effectively; warm water helps activate yeast.
• Olive oil – Contributes moisture and richness to your pitas; butter can be used as a substitute.
For the Garlic Butter
• Butter (melted) – Adds a sumptuous flavor when brushed onto the cooked pita; margarine is a great dairy-free alternative.
• Garlic (minced) – Provides a strong garlic flavor that makes this bread irresistible; adjust the amount to your taste.
• Fresh parsley (chopped) – Adds freshness and bright color to the garlic mixture; dried parsley can be used, but fresh is recommended for the best flavor.
Step‑by‑Step Instructions for Garlic Pita Bread
Step 1: Mix Dry Ingredients
In a large bowl, combine 2 cups of all-purpose flour, 1 teaspoon of salt, and 1 packet of active dry yeast. Use a whisk to blend these dry ingredients well, ensuring there are no clumps. The mixture should feel light and powdery, ready to bring your Garlic Pita Bread to life.
Step 2: Combine Wet Ingredients
Warm 1/2 cup of milk and 1/2 cup of water until it’s just warm to the touch, not boiling. Gradually pour this mixture into the dry ingredients, stirring with a wooden spoon until a shaggy dough forms. It should look messy but will come together shortly.
Step 3: Knead Dough
Once the shaggy mass forms, add 2 tablespoons of olive oil to the bowl. Flour your countertop lightly and transfer the dough. Knead for about 5-7 minutes until the dough is smooth and elastic, becoming slightly tacky but not sticky. You want a cohesive dough to make your Garlic Pita Bread fluffy.
Step 4: Rest Dough
Shape the kneaded dough into a ball and place it back in the bowl. Cover tightly with plastic wrap and place a kitchen towel over it. Let the dough rest for about 1 hour in a warm area until it has doubled in size. This is crucial for the perfect rise in your pitas.
Step 5: Prepare Dough Balls
Once risen, punch down the dough gently to release air. On a floured surface, divide the dough into 6 equal pieces. Shape each piece into a ball, then roll each ball out into circles about 1/4 inch thick. They should feel soft and supple, ready for cooking your Garlic Pita Bread.
Step 6: Cook Pita
To cook, heat a skillet over medium heat, lightly greasing it with olive oil. Place a rolled-out pita in the skillet for about 30 seconds or until you see bubbles forming on the surface. Flip and cook for another 30 seconds until golden brown. You can also bake on a preheated sheet at 475°F for 2-4 minutes, flipping halfway through.
Step 7: Make Garlic Butter
While your pitas are cooking, melt 2 tablespoons of butter in a small bowl. Once melted, stir in 2 cloves of minced garlic and 2 tablespoons of chopped fresh parsley. This garlic butter will add a luscious flavor to your freshly cooked Garlic Pita Bread, enhancing its taste beautifully.
Step 8: Brush and Serve
Once the pitas are cooked, quickly brush each one with the prepared garlic butter while they’re still warm. The melted butter will soak into the pitas, giving them a delicious rich flavor. Stack them on a plate and cover with a clean towel to keep them warm and soft until ready to enjoy.
Storage Tips for Garlic Pita Bread
Room Temperature: Store cooked garlic pita bread in an airtight bag or container at room temperature for up to 3 days. This keeps them soft and fresh, ready for your next meal!
Fridge: If you need to store them longer, place the pitas in an airtight bag and refrigerate for up to a week. Reheat in the microwave for 10-15 seconds to restore softness.
Freezer: For longer storage, freeze cooled garlic pita bread in an airtight ziplock bag, separated by parchment paper, for up to 2 months. Reheat directly from frozen in the oven at 350°F without thawing.
Reheating: To enjoy day-old pitas, simply reheat in a toaster, microwave, or skillet for a few seconds until warm and soft. Your homemade garlic pita bread will taste fresh again!
Garlic Pita Bread Variations & Substitutions
Feel free to explore these delightful twists and substitutions to make your garlic pita bread uniquely yours!
- Gluten-Free: Substitute all-purpose flour with a high-quality gluten-free flour blend for a delicious gluten-free version.
- Dairy-Free: Replace warm milk and butter with almond milk and coconut oil for a creamy richness without dairy.
- Herb Boost: Experiment with different herbs, like oregano or thyme, in your garlic butter for a fresh flavor twist. Each herb brings its own unique aroma and taste!
- Spicy Garlic Pita: Add crushed red pepper flakes to the garlic butter mixture for an extra kick that pairs beautifully with savory dips or grilled meats.
- Whole Wheat Flour: Swap all-purpose flour with whole wheat flour for a heartier, nutty flavor and added nutrition. It’s great for those who love that rustic taste.
- Cheesy Option: Mix grated Parmesan or feta in the garlic butter before brushing it on for a cheesy flavor explosion. This twist takes it to another level of savory goodness!
- Stuffed Pita: Before cooking, stuff each rolled-out pita with your favorite fillings—think seasoned veggies or grilled chicken—before sealing and cooking to create a delightful pocket.
- Sweet Twist: For a sweeter version, drizzle honey onto the warm pita or sprinkle on cinnamon sugar after brushing with garlic butter for an unexpected treat!
These variations are a great way to keep things interesting and cater to everyone at your table. For even more delicious ideas, consider serving your garlic pita with recipes like Sticky Garlic Chicken or using it as a wrap for Chicken Shawarma Garlic. Enjoy your culinary adventure!
What to Serve with Easy Garlic Pita Bread
Nothing transforms a simple meal into a feast quite like the delightful pairing of fresh bread!
-
Creamy Hummus: This smooth, garlicky dip rich in chickpeas complements the flavors of the pita perfectly. The creaminess contrasts with the warm, soft texture, creating a heavenly taste experience.
-
Tzatziki Sauce: A refreshing yogurt-based dip filled with cucumber and mint creates a delicious balance with the aromatic garlic bread. Perfect for dipping, each bite is a burst of cooling flavor against the warmth of the pita.
-
Grilled Chicken Skewers: Juicy, spiced chicken beautifully wrapped in soft pita makes for a satisfying meal. The slightly charred outside adds depth, highlighting the comforting garlic aroma of the bread.
-
Mediterranean Salad: Crisp greens tossed with olives, tomatoes, and feta create a refreshing medley that enhances the meal’s overall flavors. The burst of fresh ingredients contrasts wonderfully with the hearty bread.
-
Roasted Vegetables: Seasonal veggies roasted to perfection bring a sweet and savory element that pairs perfectly with the pitas. These earthy flavors and textures create a balanced plate.
-
Feta Cheese Drizzle: Crumbled feta with a drizzle of olive oil adds saltiness and richness to the warm pita. A simple yet delightful combination that elevates the overall experience.
-
Olive Tapenade: This savory spread made from crushed olives and herbs offers a bold flavor punch. Spread on warm pitas, it provides an intense, briny contrast to the light, fluffy bread.
-
Red Wine: A refreshing, fruity red pairs beautifully and enhances the garlicky flavors without overwhelming the palate. Sip alongside to experience the full dynamic of your meal.
Expert Tips for Garlic Pita Bread
Fresh Yeast Needed: Ensure your active dry yeast is fresh by checking the expiration date. Using old yeast can yield dense bread that doesn’t rise well.
Prevent Sticking: When rolling out the dough, always flour your surface and rolling pin. This prevents the garlic pita bread from sticking and ensures even thickness.
Perfect Timing: Keep an eye on your pitas while they cook. They only need about 30 seconds per side on the stovetop; overcooking can lead to hard, dry bread.
Warm and Soft: Cover cooked pitas with a clean kitchen towel immediately after cooking. This keeps them warm and soft, enhancing the overall texture and flavor.
Customize Flavors: Feel free to add more herbs or spices into the garlic butter mixture. Oregano, thyme, or even a hint of chili flakes can elevate your garlic pita bread experience!
Make Ahead Options
These Garlic Pita Bread are a fantastic option for meal prep enthusiasts! You can prepare the dough up to 24 hours in advance. First, follow the initial steps to mix, knead, and let the dough rise, then cover it tightly with plastic wrap and refrigerate. When you’re ready to enjoy the bread, simply remove the dough from the fridge, let it sit for about 30 minutes to come to room temperature, and continue with shaping and cooking as instructed. For even quicker prep, you can roll out the pitas and freeze them stacked between parchment paper for up to 3 months. When it’s time to cook, just thaw directly on the counter and proceed with your usual cooking method—resulting in delicious warm Garlic Pita Bread just as fresh!
Garlic Pita Bread Recipe FAQs
How do I know when my garlic is ripe?
Absolutely! When selecting garlic for your Garlic Pita Bread, look for bulbs that are firm with dry skin. They should feel heavy for their size, and the cloves should not have dark spots or sprouting. Fresh garlic is more aromatic and will enhance the flavor of your bread significantly.
How should I store my cooked garlic pita bread?
Very good question! Store your cooked garlic pita bread in an airtight bag or container at room temperature for up to 3 days. This keeps them soft and fresh, ready to pair with your favorite dips. For a longer shelf life, refrigerate them in an airtight bag for up to a week, reheating them in the microwave for 10-15 seconds when you’re ready to enjoy.
Can I freeze garlic pita bread, and how?
Absolutely, freezing is a fantastic way to preserve your garlic pita bread! Allow the pitas to cool completely, then stack them with parchment paper in between each one. Place the stack in an airtight ziplock bag, sealing it tightly. You can freeze them for up to 2 months. When you want some, simply reheat directly from frozen in the oven at 350°F for about 10-15 minutes, and they’ll taste deliciously fresh!
What should I do if my dough doesn’t rise?
If your dough isn’t rising, there might be a few culprits. First, check the freshness of your yeast; expired yeast won’t activate properly. Ensure your liquids are warm but not hot, as boiling water can kill the yeast. Make sure to cover your dough well and keep it in a warm environment while it rises. If all else fails, you may need to start fresh with new yeast!
Can garlic pita bread be allergen-friendly?
Absolutely, garlic pita bread can easily accommodate various dietary restrictions! For a gluten-free option, use a certified gluten-free flour blend. Make sure to check labels if you have allergies, especially for items like butter or milk, and feel free to substitute margarine or plant-based milk to ensure that everyone at your table can enjoy this delightful bread.
Garlic Pita Bread You Can Whip Up in Minutes
Ingredients
Equipment
Method
- In a large bowl, combine 2 cups of all-purpose flour, 1 teaspoon of salt, and 1 packet of active dry yeast. Use a whisk to blend these dry ingredients well.
- Warm 1/2 cup of milk and 1/2 cup of water until just warm. Gradually pour this into the dry ingredients, stirring until a shaggy dough forms.
- Add 2 tablespoons of olive oil, flour your countertop lightly and transfer the dough. Knead for about 5-7 minutes until smooth and elastic.
- Shape the kneaded dough into a ball, cover with plastic wrap and let it rest for about 1 hour until doubled in size.
- Punch down the risen dough, divide into 6 pieces, and roll each piece into a circle about 1/4 inch thick.
- Heat a skillet over medium heat, grease it lightly with olive oil, and cook each pita for about 30 seconds per side until golden brown.
- Melt 2 tablespoons of butter in a bowl, stir in 2 cloves of minced garlic and 2 tablespoons of chopped parsley.
- Brush each cooked pita with the garlic butter while warm and serve stacked on a plate, covered to keep warm.
Leave a Reply