
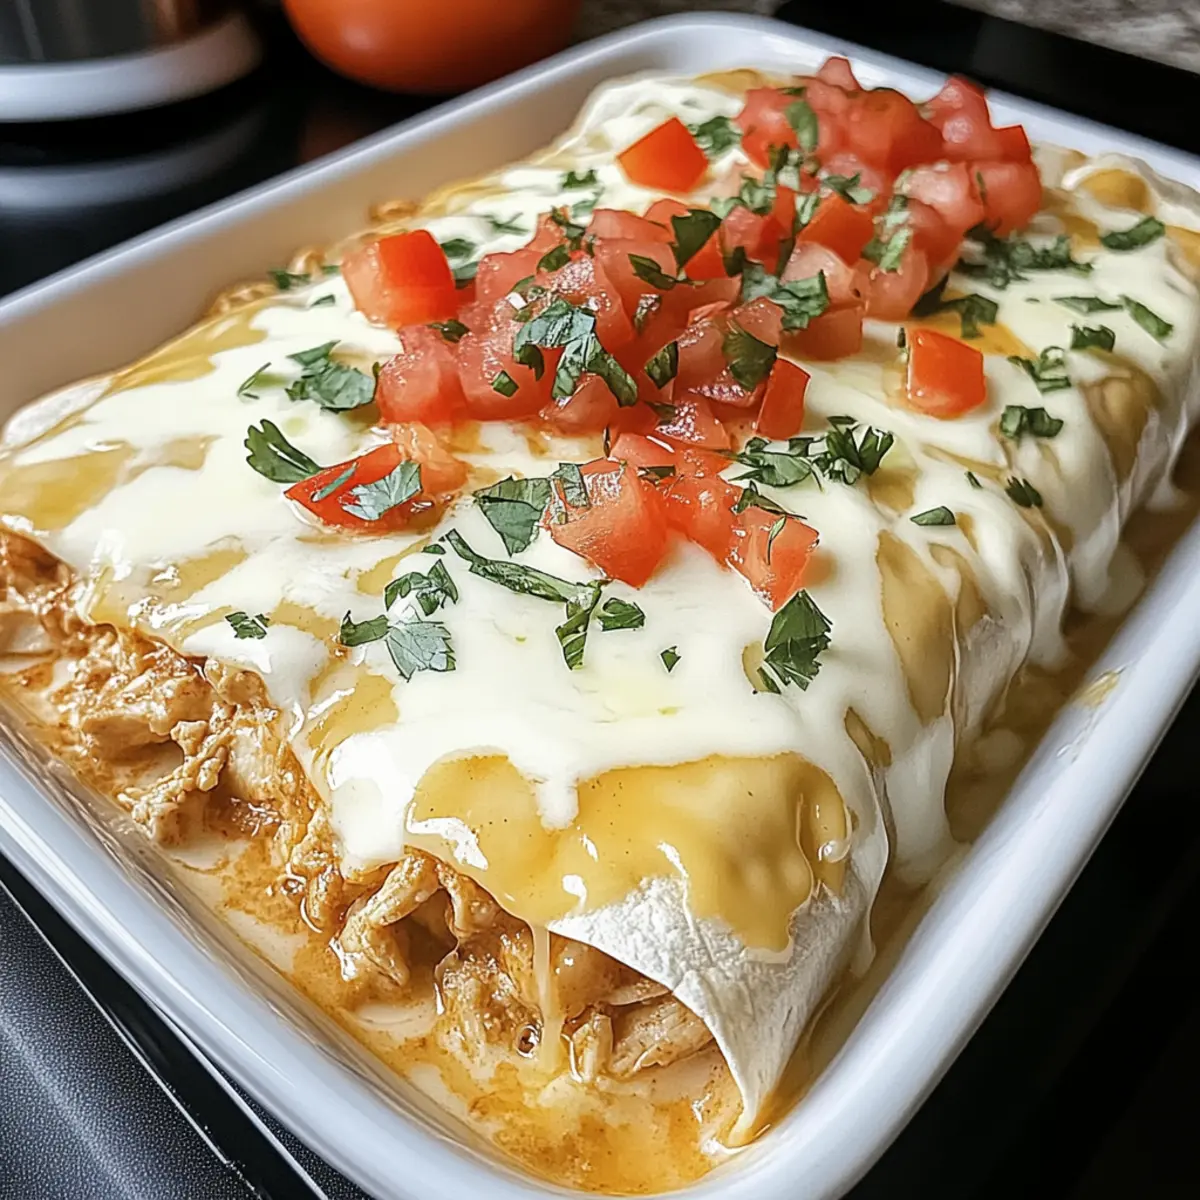
As I was layering the warm tortillas with tender chicken and sauce, a comforting scent filled my kitchen, instantly making it feel like home. These Creamy Queso Chicken Enchiladas are my go-to dinner when I crave something satisfying without the fuss. With a quick 10-minute prep time, they’re perfect for those hectic weeknights. The beauty of this recipe lies in its adaptability – whether you prefer black beans for a vegetarian spin or want to swap chicken for shredded beef, the possibilities are deliciously endless. Plus, with gluten-free options readily available, everyone can enjoy this creamy indulgence. Curious about how to elevate your next meal with these delightful enchiladas? Let’s dive in!
Why Are These Enchiladas So Irresistible?
Creamy goodness: With a rich Velveeta queso sauce, these enchiladas deliver a mouthwatering taste that keeps you coming back for more.
Quick and easy: Just ten minutes of prep allows you to whip these up even on the busiest of nights.
Customizable: Feel free to swap in shredded beef or black beans for a twist that fits your cravings or dietary needs.
Great for sharing: Perfect for family dinners or gatherings, these enchiladas will have everyone asking for seconds.
Nutritious options: Add veggies and choose gluten-free tortillas, so no one has to miss out on this comforting dish.
Pair them with a side of guacamole or a fresh salad for a complete meal that delights!
Creamy Queso Chicken Enchiladas Ingredients
Get ready to create this simple yet delicious meal with these key ingredients!
For the Filling
• Shredded Chicken – Main protein providing heartiness; consider using shredded beef or turkey for variety.
• Taco Seasoning – Adds spiced flavor; go with store-bought or make your own for a personal touch.
• Sour Cream – Contributes creaminess and tang; Greek yogurt works as a lighter alternative.
• Shredded Cheddar Cheese – Offers richness; try Monterey Jack or Pepper Jack for a spicy kick.
• Chopped Green Chilies – Adds a mild heat; use diced jalapeños if you’re craving more spice.
For the Sauce
• Velveeta Cheese – Creates that smooth, creamy sauce; cream cheese can also be used but alters taste.
• Diced Tomatoes with Green Chilies – Forms the base for the sauce; fresh tomatoes or tomato sauce can be substituted.
For Assembling
• Tortillas – Encases the filling; gluten-free tortillas are available for those avoiding gluten.
Enjoy the process, and let your kitchen fill with delightful aromas as you prepare these Creamy Queso Chicken Enchiladas!
Step‑by‑Step Instructions for Creamy Queso Chicken Enchiladas
Step 1: Preheat the Oven
Begin by preheating your oven to 350°F (175°C). This ensures your Creamy Queso Chicken Enchiladas will bake evenly and come out perfectly bubbly. As the oven warms up, take a moment to grease a 9×13 casserole dish to prevent sticking, preparing for the delicious layers you’re about to create.
Step 2: Prepare the Filling
In a large mixing bowl, combine the shredded chicken, taco seasoning, sour cream, shredded cheddar cheese, and chopped green chilies. Stir until all the ingredients are well mixed and the vibrant colors blend beautifully. This mixture will provide a creamy and flavorful filling for your enchiladas, bringing a taste of warmth and comfort to each bite.
Step 3: Create the Queso Sauce
In a medium saucepan, melt the Velveeta cheese together with the undrained diced tomatoes over medium-high heat. Stir continuously until the mixture is smooth and creamy, approximately 5-7 minutes. This luscious queso sauce will smother your rolled enchiladas, adding that signature creamy texture that makes these enchiladas so irresistible.
Step 4: Fill the Tortillas
Take one tortilla at a time and place about ½ to ¾ cup of the chicken filling down the center. Roll the tortilla tightly around the filling, then place it seam-side down in your prepared casserole dish. Repeat this process until all the tortillas are filled and in the dish, making sure they’re snug but not overcrowded to allow even cooking.
Step 5: Pour the Queso Sauce
Once all the enchiladas are in the dish, pour the warm queso sauce evenly over the top. Make sure each enchilada is generously coated to ensure that delicious creamy goodness seeps into every bite. This sauce not only adds flavor but also moisture, keeping your enchiladas tender and delightful.
Step 6: Bake to Perfection
Place the casserole dish in your preheated oven and bake for 20 to 25 minutes. You’ll know they’re ready when the edges are bubbly and the cheese on top is golden and slightly crispy. Keep an eye on them towards the end to prevent over-baking—this is the moment you’ve been waiting for!
Step 7: Serve and Savor
Remove the Creamy Queso Chicken Enchiladas from the oven and let them sit for a few minutes before serving. This helps the sauce settle a bit. Spoon out a serving and enjoy the gooey, cheesy delight with your favorite sides like guacamole or a fresh salad for a truly satisfying meal.
Storage Tips for Creamy Queso Chicken Enchiladas
Fridge: Store leftover enchiladas in an airtight container for up to 3 days. Make sure they’re covered well to retain moisture and flavor.
Freezer: You can freeze these enchiladas for up to 3 months. Wrap them tightly in foil or place them in a freezer-safe container to prevent freezer burn.
Reheating: When you’re ready to enjoy the leftovers, cover with foil and reheat in a preheated oven at 350°F for about 20 minutes, until warmed through and bubbly.
Make-Ahead Option: Assemble the Creamy Queso Chicken Enchiladas up to 24 hours in advance. Just cover with foil and refrigerate before baking!
Creamy Queso Chicken Enchiladas Variations
Feel free to get creative with this recipe, exploring new flavors and textures that tantalize your taste buds!
-
Vegetarian Option: Substitute shredded chicken with black beans or lentils for a hearty yet meat-free version. Your enchiladas will still be fulfilling and packed with flavor.
-
Beefy Twist: Swap out the chicken for shredded beef or turkey to create a rich, savory delight, perfect for those who love a meaty hug in every bite.
-
Extra Veggies: Add bell peppers, spinach, or corn for an added crunch and a pop of color. These additions not only enhance the visual appeal but also bring a nourishing element to your meal.
-
Spicy Kick: Boost the heat level by incorporating diced jalapeños or a splash of hot sauce into your filling. Your taste buds will revel in this fiery twist on a classic dish.
-
Gluten-Free: Use corn tortillas instead of flour for a gluten-free alternative. This swap also provides a traditional flair that complements the creamy filling beautifully.
-
Cheesy Goodness: Experiment with different melting cheeses, such as Gouda, Gruyère, or even a spicy Pepper Jack, to elevate the flavor profile and find your perfect cheese match.
-
Crunchy Topping: Top your enchiladas with crushed tortilla chips before baking for a delightful contrast in texture that adds an enjoyable crunch to each bite.
For more delicious chicken recipes, try my Garlic Parmesan Chicken or whip up some flavorful Chopped Chicken Caesar. You can always get creative with your toppings and fillings – let your culinary imagination run wild!
Make Ahead Options
These Creamy Queso Chicken Enchiladas are perfect for busy home cooks looking to save time during the week! You can assemble the enchiladas up to 24 hours in advance; just cover them tightly with foil in the refrigerator to retain their freshness. If you prefer, the filling can also be prepped a few days ahead and stored in an airtight container for up to 3 days. When you’re ready to enjoy, simply pour the warm queso sauce over the enchiladas and bake as directed. This method not only streamlines your cooking process but ensures that every bite is just as delicious and comforting as if you made them fresh!
Expert Tips for Creamy Queso Chicken Enchiladas
-
Prep Ahead: Prepare your enchiladas up to 24 hours in advance and store them in the fridge covered with foil. This allows for easy baking when you’re ready to serve.
-
Moisture Matters: To avoid dry enchiladas, ensure an ample amount of queso sauce is added before baking. Keep an eye on the baking time to maintain creaminess.
-
Customizable Fillings: Feel free to swap the shredded chicken for shredded beef, turkey, or even hearty black beans for a delightful vegetarian twist in your Creamy Queso Chicken Enchiladas.
-
Cheese Variations: Don’t hesitate to experiment with different melting cheeses like Gouda or Gruyère for added creaminess and flavor depth that can elevate your dish.
-
Serving Suggestions: Enhance your meal by pairing with sides like Spanish rice, a fresh salad, or guacamole, complementing the rich flavors of the enchiladas beautifully.
-
Proper Storage: Store any leftovers in an airtight container for up to 3 days. To reheat, cover with foil and warm in the oven at 350°F for about 20 minutes.
What to Serve with Creamy Queso Chicken Enchiladas
Prepare for a vibrant dining experience that perfectly complements your creamy, cheesy enchiladas!
-
Spanish Rice: The fluffy texture and mild spices of Spanish rice balance the richness of the enchiladas, making each bite feel complete and satisfying.
-
Guacamole: Creamy and fresh, guacamole adds a cool contrast to the warm enchiladas while enhancing the flavor with its zesty lime undertones.
-
Fresh Corn Salad: A crunchy corn salad dotted with tomatoes and avocados brings a burst of freshness and color to your table, brightening every forkful of your meal.
-
Black Beans: Rich and satisfying, black beans are a hearty addition that not only complements the flavors but also boosts the protein content for a well-rounded meal.
-
Crisp Green Salad: A simple green salad with a tangy vinaigrette offers lightness and freshness on the side, making it a perfect counterpoint to the creamy enchiladas.
-
Crushed Tortilla Chips: Elevate your dining experience with a side of crispy tortilla chips for added crunch; they’re perfect for scooping up any leftover sauce!
-
Margaritas: Pair your meal with a refreshing margarita for a delightful cocktail that enhances the cheerful, festive vibe of your dinner.
-
Chocolate Flan: For dessert, a smooth chocolate flan provides a sweet yet light finish, delightfully contrasting with the savory main course.
Creamy Queso Chicken Enchiladas Recipe FAQs
What type of chicken should I use?
Absolutely! Shredded rotisserie chicken is a fantastic choice for these enchiladas, offering convenience and flavor. You can also slow-cook chicken breasts with taco seasoning for a more tender and homemade touch.
How should I store leftover enchiladas?
To keep your Creamy Queso Chicken Enchiladas fresh, store them in an airtight container in the fridge for up to 3 days. Ensure they’re well-sealed to maintain their delicious taste and moisture.
Can I freeze these enchiladas?
Yes, you can! For freezing, wrap the enchiladas tightly in foil or place them in a freezer-safe container. They can be frozen for up to 3 months. When you’re ready to enjoy them, thaw in the fridge overnight and bake as usual.
What if my enchiladas turn out dry?
Very good question! To avoid dry enchiladas, ensure you use enough queso sauce before baking. If you find them dry after baking, consider adding a little extra sauce on top or serving with a side of sour cream or guacamole for added moisture.
Are these enchiladas gluten-free?
Yes, if you use gluten-free tortillas, you can enjoy these Creamy Queso Chicken Enchiladas without worry! Always check ingredient labels for any potential gluten content, especially in sauces or seasonings.
Can I customize the filling?
The more the merrier! Feel free to swap shredded chicken for shredded beef, turkey, or even black beans for a vegetarian-friendly version. You can also add sautéed vegetables like bell peppers or corn for an extra nutrition boost!
Creamy Queso Chicken Enchiladas You’ll Crave Every Weeknight
Ingredients
Equipment
Method
- Preheat your oven to 350°F (175°C) and grease a 9x13 casserole dish.
- In a large mixing bowl, combine shredded chicken, taco seasoning, sour cream, shredded cheddar cheese, and chopped green chilies until well mixed.
- In a medium saucepan, melt Velveeta cheese and undrained diced tomatoes over medium-high heat until smooth, approximately 5-7 minutes.
- Fill each tortilla with ½ to ¾ cup of filling, roll tightly, and place seam-side down in the casserole dish.
- Pour the queso sauce evenly over the enchiladas ensuring each one is coated.
- Bake in the preheated oven for 20 to 25 minutes until edges are bubbly and cheese is golden.
- Let sit for a few minutes before serving with sides like guacamole or salad.
Leave a Reply