
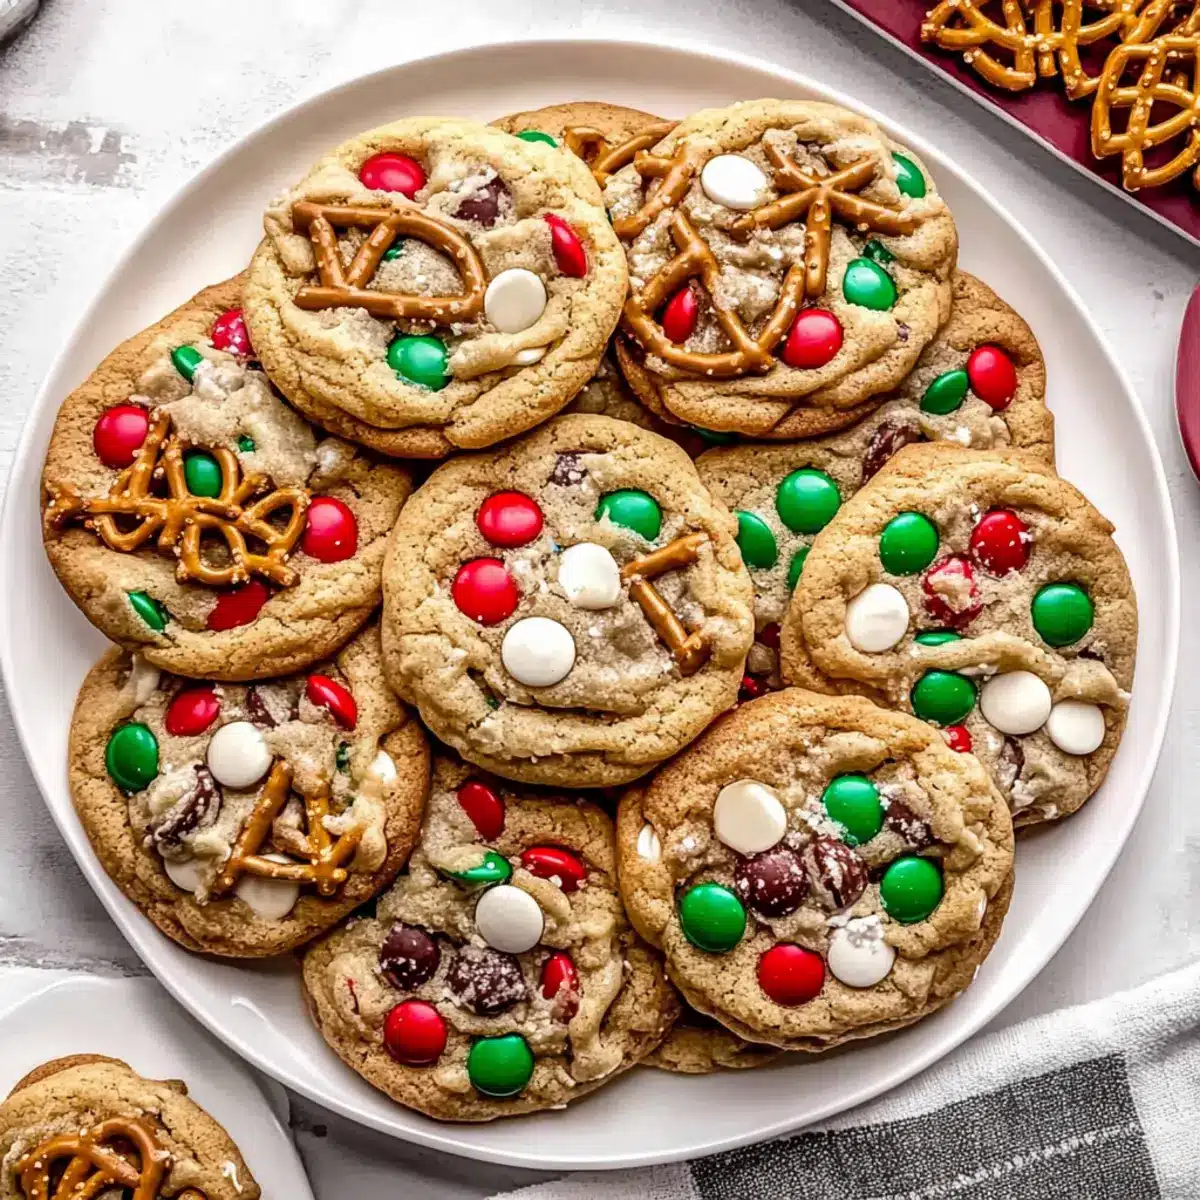
As I stood in the kitchen, the crisp scent of cinnamon and sugar filling the air, a sweet and salty surprise emerged from my oven—Christmas Kitchen Sink Cookies! These beauties come packed with everything festive: crunchy pretzels, crispy potato chips, vibrant M&M’s, and rich white chocolate chips. The best part? They whip up in just 30 minutes from prep to plate, making them the perfect holiday treat for busy bakers. Not only do these cookies bring a delightful twist to classic flavors, but they also provide the joy of kitchen creativity, inviting you to add your own personal touch. So, who’s ready to make memorable moments with a batch of these irresistible cookies that will make everyone smile?
Why Are These Cookies So Special?
Endless Creativity: With options to mix in your favorite candies and snacks, these Christmas Kitchen Sink Cookies invite you to personalize each batch! Quick & Easy: Perfect for busy holiday schedules, these delightful treats come together in just 30 minutes from start to finish. Crowd-Pleasing Flavor: The irresistible blend of sweet and salty ensures that everyone—from kids to adults—will reach for seconds. Fabulous Texture: Each bite boasts a satisfying crunch from pretzels and chips, complemented by gooey chocolate and soft cookie goodness. Perfect for Gifting: Pack these cookies in festive boxes to share with friends and family; they’ll be the highlight of any holiday gathering! Don’t forget to check out my tips for storing cookie dough or other holiday treats to keep the festive spirit alive.
Christmas Kitchen Sink Cookie Ingredients
For the Cookie Dough
- Salted Butter – Adds richness; unsalted butter can be used with added salt.
- Light Brown Sugar – Brings sweetness and chewiness; try dark brown sugar for a deeper flavor twist.
- Granulated White Sugar – Sweetens and crisps edges; reduce for a less sweet cookie.
- Egg Yolks – Provide structure; whole eggs are not a direct substitute as they change texture.
- Vanilla Bean Paste or Extract – Boosts flavor; can be swapped with almond extract for a new taste.
- All-Purpose Flour – Forms the cookie’s structure; use a gluten-free blend for gluten-sensitive folks.
- Baking Powder – Helps cookies rise slightly; baking soda is an alternative but adjust amounts.
- Baking Soda – Adds chewiness and aids browning; omit for cakier cookies.
- Salt – Balances and enhances sweetness; it’s essential for the overall flavor.
For the Mix-Ins
- Red and Green M&M’s – Adds holiday colors and festive flavors; substitute with other candies or sprinkles if desired.
- White Chocolate Chips – Sweetens and adds creaminess; use milk or dark chocolate chips for variety.
- Pretzel Pieces – Introduces a salty crunch; any variety like sticks or chips works well.
- Potato Chip Pieces – Adds another layer of salty goodness; other crispy snacks can also be used.
- Red and Green Jimmies – For a decorative touch; optional or swap with any sprinkles you love.
These Christmas Kitchen Sink Cookies will surely bring holiday cheer and flavor to your celebrations!
Step‑by‑Step Instructions for Christmas Kitchen Sink Cookies
Step 1: Preheat the Oven
Begin by preheating your oven to 350°F (175°C). While the oven warms up, line your baking sheets with parchment paper to prevent sticking and ensure even baking. This preparation is essential, as a properly preheated oven will help your Christmas Kitchen Sink Cookies achieve that perfect golden-brown color and chewy texture.
Step 2: Cream the Butters and Sugars
In a large mixing bowl, combine softened salted butter, light brown sugar, and granulated sugar. Use an electric mixer on medium speed to cream these ingredients for about 2 minutes until the mixture is light and fluffy. This process incorporates air into the dough, which will contribute to a delightful texture in your cookies.
Step 3: Incorporate the Egg Yolks and Vanilla
Next, add the egg yolks and vanilla bean paste (or extract) to the creamed mixture. Continue mixing on medium speed for about 2 minutes, until the mixture becomes pale and fluffy. This step not only enriches the dough but also adds a wonderful flavor that is characteristic of delicious Christmas Kitchen Sink Cookies.
Step 4: Combine the Dry Ingredients
Slowly add the all-purpose flour, baking powder, baking soda, and salt to the wet mixture. Mix on low speed just until you see the flour disappear; over-mixing can lead to tough cookies. Be careful here, as this step ensures your cookies will have the ideal structure and flavor, creating a lovely base for all your festive mix-ins.
Step 5: Fold in the Mix-Ins
Gently fold in the red and green M&M’s, white chocolate chips, pretzel pieces, potato chip pieces, and any desired sprinkles. Use a spatula to mix everything together until evenly combined, ensuring that each Christmas Kitchen Sink Cookie has a delightful medley of flavors and textures. Take a moment to admire the colorful explosion in your dough!
Step 6: Shape the Cookie Dough
Scoop out the cookie dough using a tablespoon or small cookie scoop, forming about 20 balls. Space the cookie dough balls 2 inches apart on the prepared baking sheets, as they will spread while baking. If you wish, add a few extra M&M’s or sprinkles on top for a festive touch that will make your cookies even more enticing.
Step 7: Bake the Cookies
Place the baking sheets in the preheated oven and bake for 10-12 minutes. Keep an eye on them—10 minutes will yield soft centers, while 12 minutes will give you crisp edges. The cookies should be golden brown around the edges, and slightly soft in the center, indicating they are perfectly baked and ready for cooling.
Step 8: Cool the Cookies
Once baked, allow the cookies to cool on the baking sheets for about 5 minutes. Then, carefully transfer them to a cooling rack to cool completely for another 10 minutes. This cooling process helps the Christmas Kitchen Sink Cookies firm up and ensures the ideal chewy texture for every delightful bite.
What to Serve with Christmas Kitchen Sink Cookies
These delightful treats create a festive atmosphere when paired with complementary flavors and textures.
- Cold Milk: A classic pairing that enhances the sweetness of the cookies, washing down each bite beautifully.
- Hot Cocoa: Cozy up with a steaming cup of hot cocoa, the rich chocolate flavor perfectly balances the salty crunch of the cookies.
- Vanilla Ice Cream: Serve these cookies a la mode for a delightful contrast of warm and cold, blending sweet and salty perfectly.
- Fruit Platter: Fresh fruits like strawberries and oranges provide a refreshing contrast, adding brightness against the rich cookie flavors.
- Nutty Trail Mix: A crunchy, salty mix of nuts complements the sweet chaos in the cookies, making for a great snack combo.
- Peppermint Bark: The minty freshness of peppermint brings a holiday twist and is a fun contrast to the cookies’ indulgent flavor.
- Spiced Tea: The warm spices in chai or spiced tea enhance the festive spirit and create a comforting beverage option.
- Caramel Sauce: Drizzle warm caramel on top of the cookies for an additional layer of sweetness that is truly indulgent.
- Holiday Punch: A fruit-forward punch brings cheer to any gathering, harmonizing well with the sweetness of your cookies.
- Chocolate Fondue: Dip the cookies into chocolate for a fun dessert experience that’s sure to delight guests of all ages.
Expert Tips for Christmas Kitchen Sink Cookies
-
Measure Flour Correctly: Use the spoon-and-level method to avoid excess flour, which can lead to dry cookies. Accurate measurements are key to achieving perfect Christmas Kitchen Sink Cookies.
-
Chill the Dough: If the dough feels too soft or you’re making it ahead of time, refrigerate it for 30 minutes. This helps the cookies maintain their shape while baking.
-
Customize Your Mix-Ins: Don’t hesitate to swap out M&M’s for your favorite candies or add nuts! This allows for seasonal creativity and personal taste in each batch of cookies.
-
Check for Doneness: Watch for golden edges while baking; cookies often appear soft in the center but will firm up as they cool.
-
Store Properly: Keep leftover cookies in an airtight container for up to three days to maintain freshness; dough can be refrigerated to bake later!
How to Store and Freeze Christmas Kitchen Sink Cookies
Room Temperature: Store leftover cookies in an airtight container at room temperature for up to 3 days to maintain their freshness and delightful texture.
Fridge: If you prefer a slightly firmer cookie, refrigerate them within an airtight container for up to a week. Allow cookies to come to room temperature before enjoying them.
Freezer: For longer storage, freeze the cookies in a single layer on a baking sheet, then transfer to airtight freezer bags for up to 3 months. Thaw overnight in the fridge before serving.
Dough Storage: You can also refrigerate the prepared cookie dough for up to 3 days or freeze it for up to 2 weeks. Bring it to room temperature before scooping and baking your delicious Christmas Kitchen Sink Cookies.
Christmas Kitchen Sink Cookies Variations
Feel free to get creative and personalize your Christmas Kitchen Sink Cookies to suit your taste and the festive spirit!
-
Nutty Surprise: Swap in chopped walnuts or pecans for a delightful crunch and earthy flavor. Nuts add a rich texture that elevates every bite!
-
Dried Fruit Delight: Mix in dried cranberries or cherries to introduce a fruity brightness that pairs beautifully with the cookies’ sweetness. This twist gives a festive flair!
-
Spicy Kick: Add a dash of cinnamon or a pinch of cayenne for a warm, spicy depth to your cookies. It’s a fun twist that adds an unexpected warmth with each bite.
-
Chocolate Lovers: Experiment with dark or semisweet chocolate chips instead of white chocolate for a deeper, richer flavor profile. Chocolate lovers will unite over this variation!
-
Holiday Flavor Burst: Swap out the pretzels for crushed candy canes for a minty holiday twist. This variation will surely bring a refreshing zing to your cookie tray!
-
Vegan Version: Replace butter with coconut oil and use flax eggs instead of egg yolks for a plant-based option that’s just as delicious. You can create holiday cheer without the animal products!
-
Gluten-Free Goodness: Use a gluten-free flour blend to make these cookies accessible for everyone. The joy of cookies can be shared with those avoiding gluten!
-
Flavorful Extract Swap: Change vanilla extract to almond extract for a different flavor twist. This substitution adds an aromatic sweetness that brings another layer of depth.
These variations not only make your cookies interesting but also help appeal to every palate at your holiday gatherings. For more delightful cookie ideas, check out my tips on storing cookie dough or explore more festive treats to bake this season!
Make Ahead Options
These Christmas Kitchen Sink Cookies are perfect for busy home cooks looking to save time during the holiday rush! You can prepare the cookie dough up to 3 days in advance by storing it in the refrigerator. Simply scoop the dough into balls and refrigerate on a baking sheet until firm before transferring to an airtight container. For longer storage, freeze the dough for up to 2 weeks; just thaw in the refrigerator overnight before baking. When you’re ready to bake, preheat your oven and place the chilled or thawed dough on baking sheets; then, bake as directed for delicious cookies just as good as freshly made!

Christmas Kitchen Sink Cookies Recipe FAQs
How do I select the right ripeness for ingredients?
Absolutely! For the best results, use room-temperature salted butter; it should be soft but not melted. When it comes to eggs, fresh eggs are ideal, as they improve the texture of your cookies. For mix-ins like M&M’s or other candies, make sure they’re fresh and vibrant, avoiding any with dark spots or discoloration.
How should I store my Christmas Kitchen Sink Cookies?
Very! Store your cookies in an airtight container at room temperature for up to 3 days. If you prefer, refrigerate them in a sealed container for up to a week. Always allow them to come to room temperature before enjoying to retain their delightful texture!
Can I freeze Christmas Kitchen Sink Cookies?
Absolutely! To freeze, layer your baked cookies on a baking sheet and place them in the freezer until firm. Once solid, transfer them to airtight freezer bags for up to 3 months. When ready to enjoy, simply thaw overnight in the fridge or leave at room temperature for a couple of hours before serving.
What if my cookie dough is too sticky?
No worries! If you find the dough overly sticky, chill it in the fridge for about 30 minutes. This allows the butter to firm up slightly, making it easier to scoop and shape. Just remember that chilling is especially helpful if you’re working in a warm kitchen!
Are these cookies suitable for anyone with allergies?
Great question! These Christmas Kitchen Sink Cookies contain gluten, dairy, and eggs, so they may not be suitable for those with allergies to these ingredients. However, you can make them gluten-free by using a gluten-free flour blend and substituting dairy with a non-dairy butter alternative.
Can I customize the mix-ins for dietary restrictions?
Absolutely! Feel free to swap M&M’s with nut-free candies or use dark chocolate instead of white if you’re avoiding certain ingredients. The beauty of these Christmas Kitchen Sink Cookies is that they can be tailored to suit a variety of dietary needs without sacrificing flavor!

Delicious Christmas Kitchen Sink Cookies for Festive Fun
Ingredients
Equipment
Method
- Preheat your oven to 350°F (175°C) and line your baking sheets with parchment paper.
- Cream together softened salted butter, light brown sugar, and granulated sugar for about 2 minutes until fluffy.
- Add the egg yolks and vanilla, mixing on medium for another 2 minutes until pale and fluffy.
- Slowly mix in the flour, baking powder, baking soda, and salt until just combined.
- Fold in the M&M's, white chocolate chips, pretzel pieces, potato chip pieces, and sprinkles.
- Scoop cookie dough into balls and place them 2 inches apart on baking sheets.
- Bake for 10-12 minutes until golden brown around edges, cool for 5 minutes on sheets.
- Transfer to a cooling rack to cool completely for about 10 minutes.
Leave a Reply