
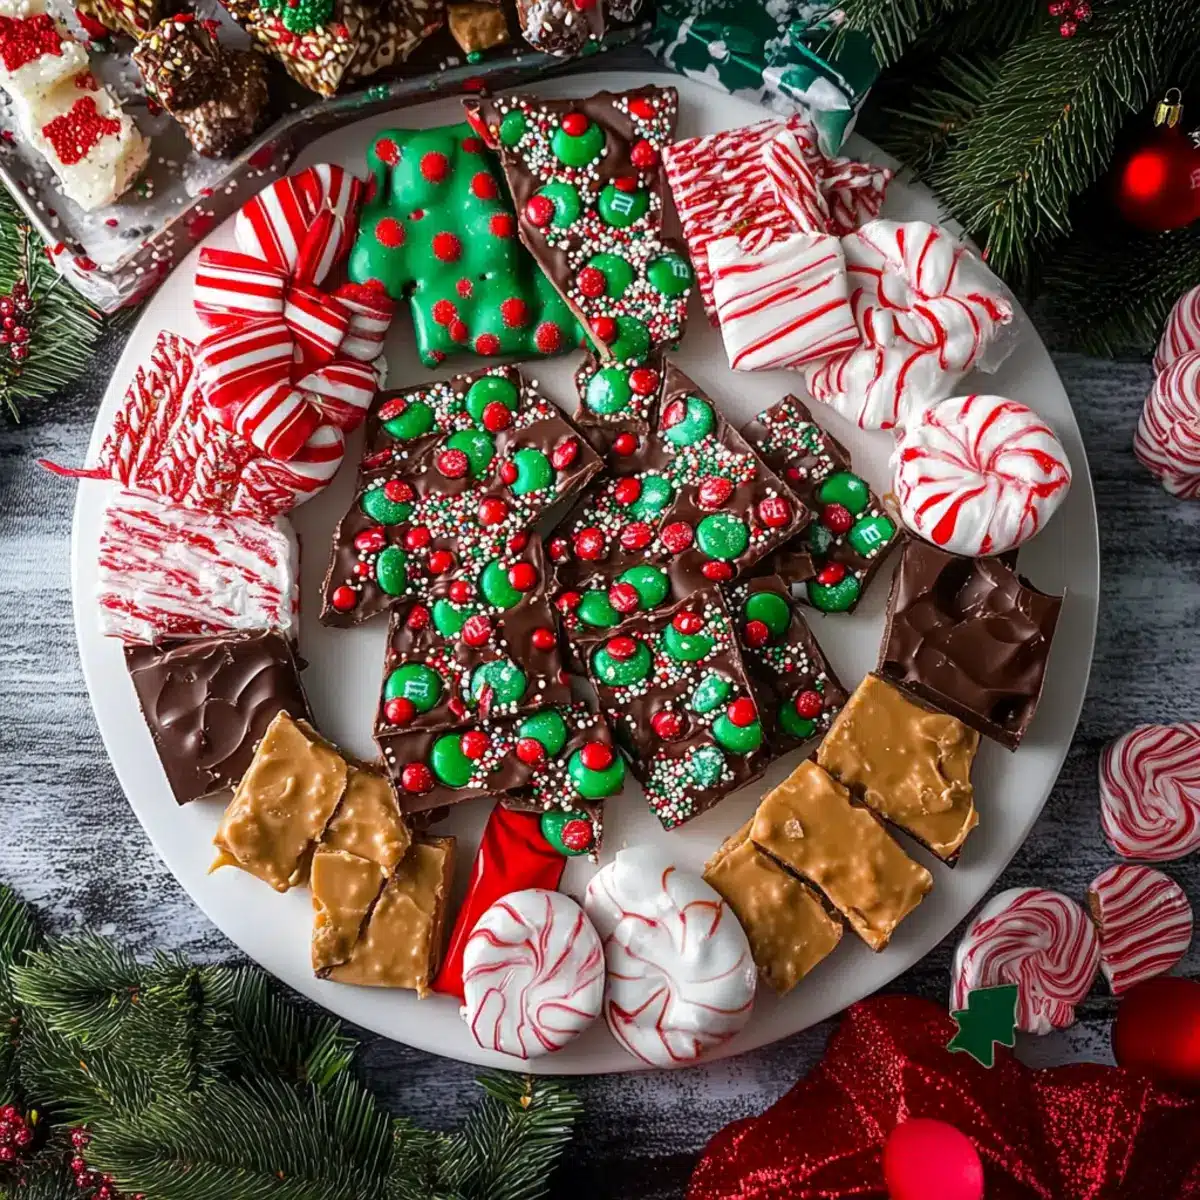
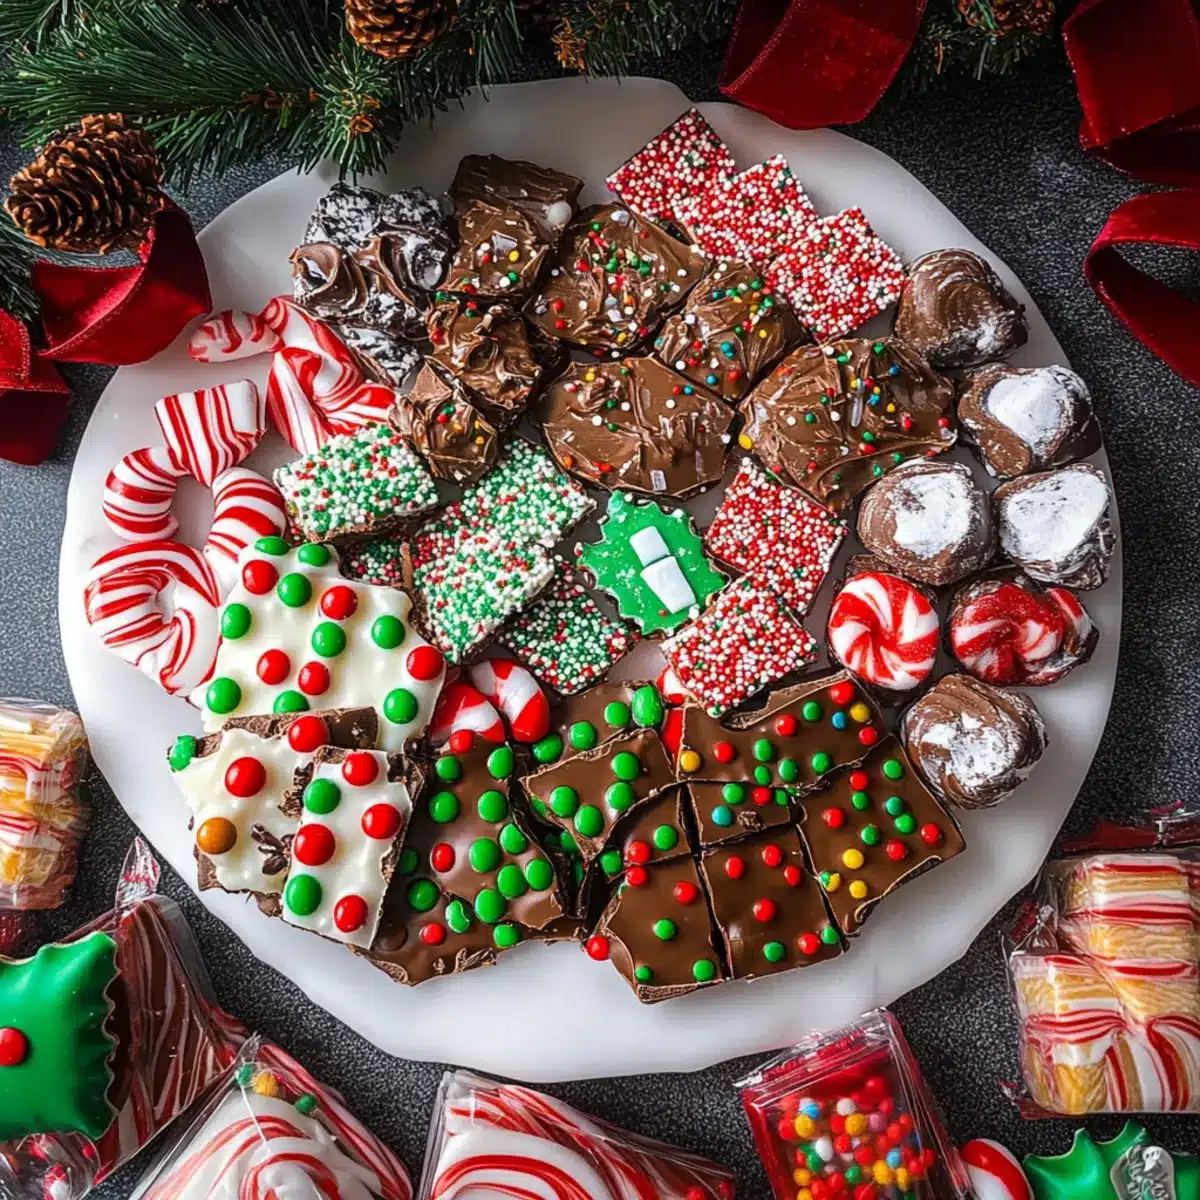
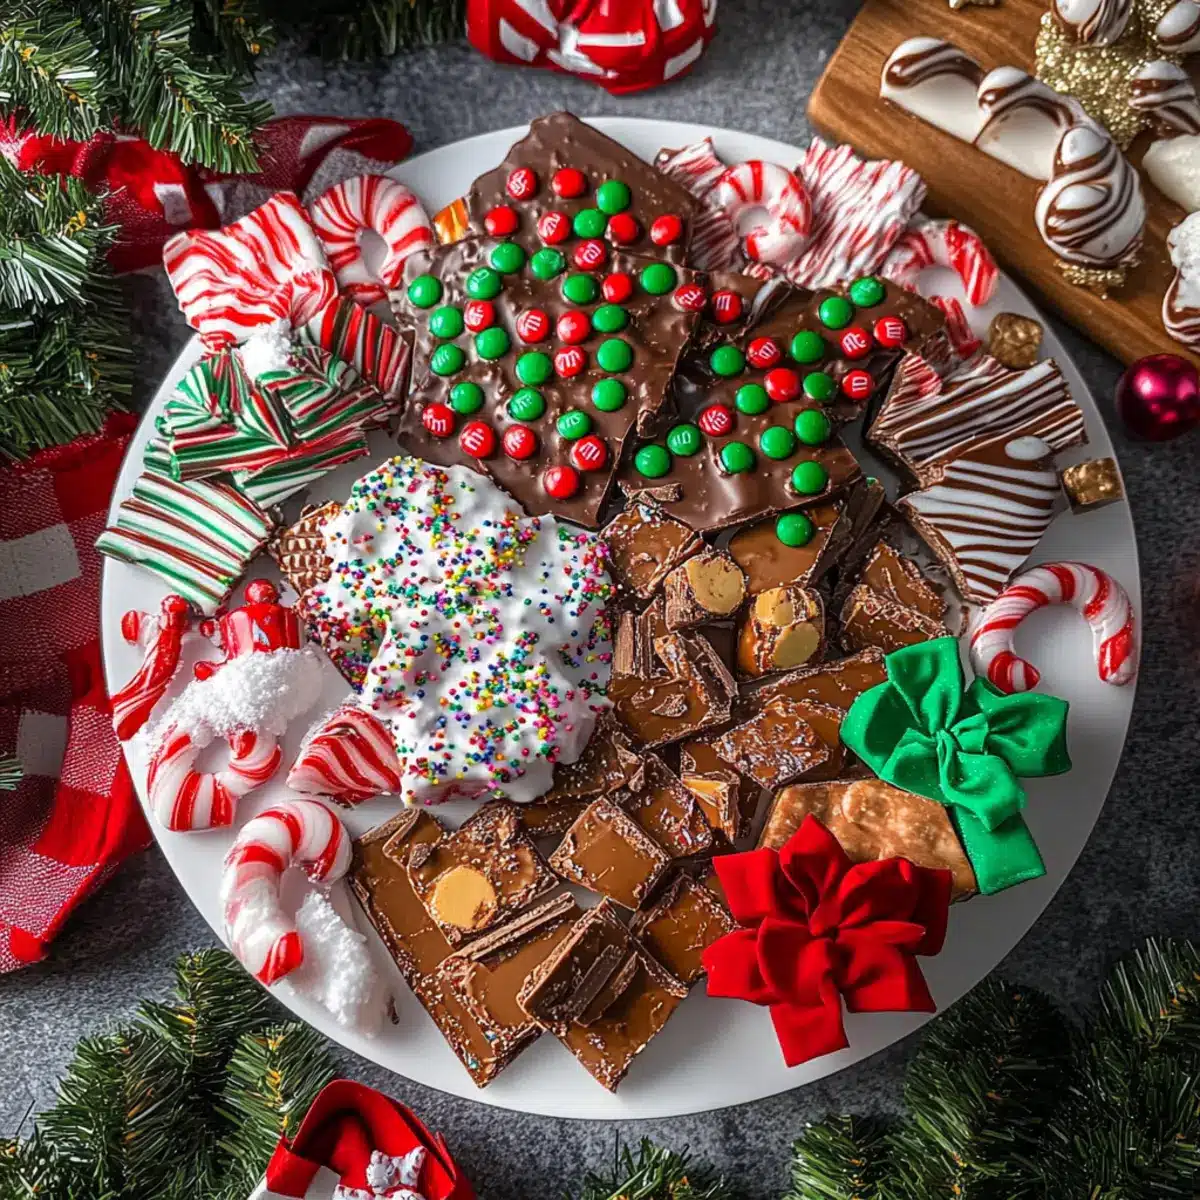
Amid the hustle and bustle of the holiday season, there’s something comforting about gathering around a beautifully arranged dessert board. This Old-Fashioned Christmas Candy Dessert Board is not just a feast for the eyes; it’s a delightful array of homemade treats that evoke nostalgia and joy. Imagine creamy fudge, crunchy peanut brittle, and airy divinity all coming together to create a festive centerpiece. The best part? Each type of Christmas candy is incredibly easy to make, allowing you to whip it up without the stress that often accompanies holiday baking. Trust me, this no-bake option is perfect for sharing and guarantees to spark delightful memories at any gathering! Are you ready to create a dazzling sweet display that will have everyone talking?

What Makes This Candy Board Special?
Nostalgic flavors transport you back to cherished holiday memories, making each bite a delightful reminder of childhood traditions. Stunning presentation turns your dessert table into a festive centerpiece, captivating guests with its colorful appeal. Easy to prepare and involves no baking, this recipe is perfect for those busy holiday weeks. Versatile options allow you to mix and match various candies, ensuring there’s something for everyone. Plus, great for sharing at gatherings, it encourages connection and joy among family and friends. If you love homemade treats, this Christmas Candy Dessert Board is a must-try!
Christmas Candy Dessert Board Ingredients
• Get ready to create a festive delight!
For the Candy Bark
- Dark Chocolate Melting Wafers – A rich chocolate base that creates a decadent layer; substitute with milk chocolate wafers for a sweeter finish.
- White Melting Wafers – Adds a creamy top layer that contrasts beautifully with dark chocolate; you can use vanilla almond bark as a tasty alternative.
For Toasted Toppings
- Christmas Colored M&M’s – Bright and festive, perfect for adding color and crunch; feel free to swap in regular M&Ms if needed.
- Christmas Sprinkles and Nonpareils – Sprinkle these magical decorations to enhance the festive spirit; any seasonal sprinkles will work just as well.
For Additional Variations
- Chopped Nuts – Provides an added crunch and rich flavor; try walnuts or pecans for a delightful twist.
- Dried Fruits – Adds a touch of chewiness and a burst of natural sweetness; consider raisins or cranberries for a colorful addition.
This Christmas Candy Dessert Board is not only a beautiful display but also a delightful way to bring the festive flavors of the season to your gatherings!
Step‑by‑Step Instructions for Christmas Candy Dessert Board
Step 1: Prepare the Pan
Start by lining an 8×8 square cake pan with parchment paper, ensuring it covers the bottom and sides for easy candy removal. This simple step prevents sticking and makes serving much easier later on. Gather your equipment—scissors for trimming the parchment and a spatula for smoothing the chocolate—and get ready to make your delectable Christmas Candy Dessert Board!
Step 2: Melt Dark Chocolate
Pour the dark chocolate melting wafers into a microwave-safe bowl. Heat in the microwave in 30-second intervals, stirring vigorously until fully melted and smooth, which should take about 1-2 minutes. Once melted, gently pour the dark chocolate into the prepared pan and use a spatula to spread it evenly across the bottom, creating a luscious base for your candy board.
Step 3: Set the Chocolate
Allow the dark chocolate to cool at room temperature for about 20-30 minutes until it becomes firm to the touch but still retains a glossy appearance. This is the perfect time to prepare your toppings while you wait! Keep an eye on the chocolate; it should not be shiny when you’re ready to add the next layer, ensuring a clean separation between the dark and white chocolate.
Step 4: Add White Chocolate Layer
Once the dark chocolate is set, melt the white melting wafers using the same method as before, heating in 30-second increments until smooth. Pour the melted white chocolate over the firm dark chocolate layer, gently spreading it to create an even top. The contrast of the two colors will create a stunning visual for your Christmas Candy Dessert Board!
Step 5: Decorate
While the white chocolate layer is still soft, it’s time to add your festive flair! Generously sprinkle Christmas colored M&Ms, followed by an assortment of sprinkles and nonpareils on top. Press them lightly into the white chocolate for better adhesion. This colorful decoration adds texture and charm that elevates your Christmas Candy Dessert Board into a true holiday masterpiece!
Step 6: Cool and Cut
Refrigerate the assembled candy board for about 1-2 hours or until completely firm. Once set, remove the candy from the pan by lifting the parchment paper. Use a sharp knife to cut it into squares or desired shapes. Enjoy the satisfying crunch and delightful blend of chocolate layers as you prepare to serve this beautiful Christmas Candy Dessert Board at your holiday gathering!
Storage Tips for Christmas Candy Dessert Board
- Room Temperature: Keep the candy board in an airtight container at room temperature for up to 2 weeks for optimal freshness, protecting it from moisture and air.
- Fridge: If you want it to last longer, refrigerate the candy board, which can extend its life to about 4 weeks, but may alter the texture slightly.
- Freezer: For longer storage, freeze the cut pieces wrapped individually in plastic wrap and placed in an airtight container for up to 3 months. Thaw in the fridge before serving.
- Reheating: No need to reheat; simply enjoy the Christmas Candy Dessert Board as is! Enjoy the delightful flavors at room temperature after storage.
Expert Tips for Christmas Candy Dessert Board
- Cool Timing: Allow each chocolate layer to set at room temperature until it’s firm but not shiny to prevent mixing layers when you add the next.
- Quality Matters: Use high-quality melting wafers to enhance both flavor and texture; brands like Ghirardelli or Merckens work beautifully for this Christmas Candy.
- Creative Storage: Store leftovers in an airtight container at room temperature for up to two weeks; refrigerate if you want them to last longer.
- Festive Presentation: To elevate your board, wrap individual pieces in wax paper; this not only looks lovely but makes sharing and gifting easy!
- Mix Textures: Feel free to add nuts or dried fruits for extra crunch and flavor, inviting everyone to discover their favorite piece on the Christmas Candy Dessert Board.
What to Serve with Old-Fashioned Christmas Candy Dessert Board
Picture a cozy gathering filled with laughter and warmth, where festive treats create a joyous atmosphere.
-
Hot Chocolate: This creamy beverage complements the sweetness beautifully, inviting a cozy, nostalgic feeling that matches the candy board’s essence.
-
Spiced Apple Cider: The warm spices in the cider highlight the rich flavors of the candy, bringing a hint of autumn to your holiday celebration.
-
Charcuterie Board: Pair your candy board with a savory selection of cheeses, meats, and nuts for a delightful contrast and an impressive spread for guests.
-
Peppermint Bark: Adding more sweetness, this classic treat echoes the festive spirit, while the mintiness contrasts perfectly with the rich chocolatiness of the board.
-
Gingerbread Cookies: Their spicy flavor and chewy texture provide a delightful textural and taste contrast to the creamy and crunchy candies.
-
Coffee or Espresso: A rich coffee enhances the chocolate flavors, adding depth while offering a perfect pick-me-up for evening gatherings.
-
Fruit Platter: Fresh fruits like strawberries or sliced oranges offer a refreshing burst of flavor that balances the sweetness of your candy board.
-
Pumpkin Pie Slices: Embrace the holiday spirit with slices of this classic dessert, adding warmth and spiced flavors that create a seasonal harmony.
Make Ahead Options
These Christmas Candy Dessert Boards are perfect for busy holiday seasons! You can prepare the chocolate layers up to 24 hours in advance; simply follow the melting and setting instructions, then refrigerate until firm. Once set, cut the candy into squares, but hold off on adding the toppings. Instead, wait until you’re ready to serve to sprinkle on the M&Ms and festive sprinkles to ensure they remain vibrant and crunchy. Storing your pre-cut chocolate layers in an airtight container will maintain their quality, ensuring they’re just as delicious when it’s time to enjoy. With these make-ahead options, you’ll save time and stress during your holiday gatherings!
Christmas Candy Dessert Board Variations
Feel free to get creative and tailor your Christmas Candy Dessert Board to suit your taste and dietary preferences!
- Milk Chocolate: Swap dark chocolate for milk chocolate for a sweeter indulgence.
- Nutty Delight: Add chopped walnuts or pecans for a satisfying crunch and warm, nutty flavor.
- Dried Fruit: Incorporate dried cranberries or cherries for a chewy texture and a burst of fruity sweetness. They pair beautifully with chocolate!
- Flavored Oils: Use peppermint or orange flavored oils in your chocolate for a festive twist.
- Brittle Option: Try creating a layer of homemade peanut brittle for that extra crunch and flavor variance.
- Pumpkin Spice: Mix in a touch of pumpkin spice to the chocolate for a seasonal flavor that guests will love.
- Spicy Heat: For a fun kick, add a sprinkle of cayenne or chili powder to the melted chocolate before pouring it into the pan.
- Candy Canes: Crush candy canes and sprinkle them on top for a delightful seasonal touch that adds both crunch and minty flavor.
Each of these variations can enhance your beautiful Christmas Candy Dessert Board, making it even more special for your holiday gathering!
Christmas Candy Dessert Board Recipe FAQs
What is the best way to select ripe ingredients?
Absolutely! When choosing dark and white chocolate melting wafers, look for a shiny, smooth surface without any cracks. Check the expiration date to ensure freshness. For sprinkles and M&Ms, opt for vibrant colors and avoid any packages that show signs of damage.
How should I store the Christmas Candy Dessert Board?
Store your beautifully crafted Christmas Candy Dessert Board in an airtight container at room temperature for up to 2 weeks. Ensure it’s in a cool, dry place away from direct sunlight, which can affect the texture and flavor. If you prefer to keep it longer, refrigerate it, and it’ll last up to 4 weeks.
Can I freeze the Christmas Candy Dessert Board?
Yes, you can freeze pieces of the candy board! First, wrap each piece individually in plastic wrap to protect against freezer burn, then place them in an airtight container or freezer bag. They’ll stay good for up to 3 months. To thaw, simply place the container in the fridge overnight before serving.
What should I do if my chocolate layers are mixing?
If your layers of chocolate are mixing, don’t fret! Ensure that the first layer is completely set and cool to the touch before adding the second layer. It’s crucial to watch for a glossy finish on the first layer—once it loses that shine and feels firm, you’re ready to add the next layer. If you find that it has mixed anyway, you can always use a spatula to smooth it out a bit more after the top layer is applied.
Are there any dietary concerns I should be aware of?
Very! Be sure to check for allergies, especially if you’re adding nuts or using store-bought candies that may contain common allergens like peanuts or dairy. If you’re accommodating dietary restrictions, consider using dairy-free chocolate wafers or gluten-free sprinkles. Always inform your guests of any known allergens in your Christmas Candy Dessert Board!
Christmas Candy Dessert Board – Sweet Nostalgia for the Holidays
Ingredients
Equipment
Method
- Line an 8x8 square cake pan with parchment paper to prevent sticking.
- Pour the dark chocolate melting wafers into a microwave-safe bowl and heat in 30-second intervals until melted.
- Spread the melted dark chocolate evenly across the bottom of the prepared pan.
- Allow the chocolate to cool for about 20-30 minutes until firm.
- Melt the white melting wafers and pour over the set dark chocolate.
- Sprinkle the Christmas colored M&Ms and sprinkles on top of the white chocolate layer.
- Refrigerate for 1-2 hours or until completely set, then cut into squares.
Leave a Reply