
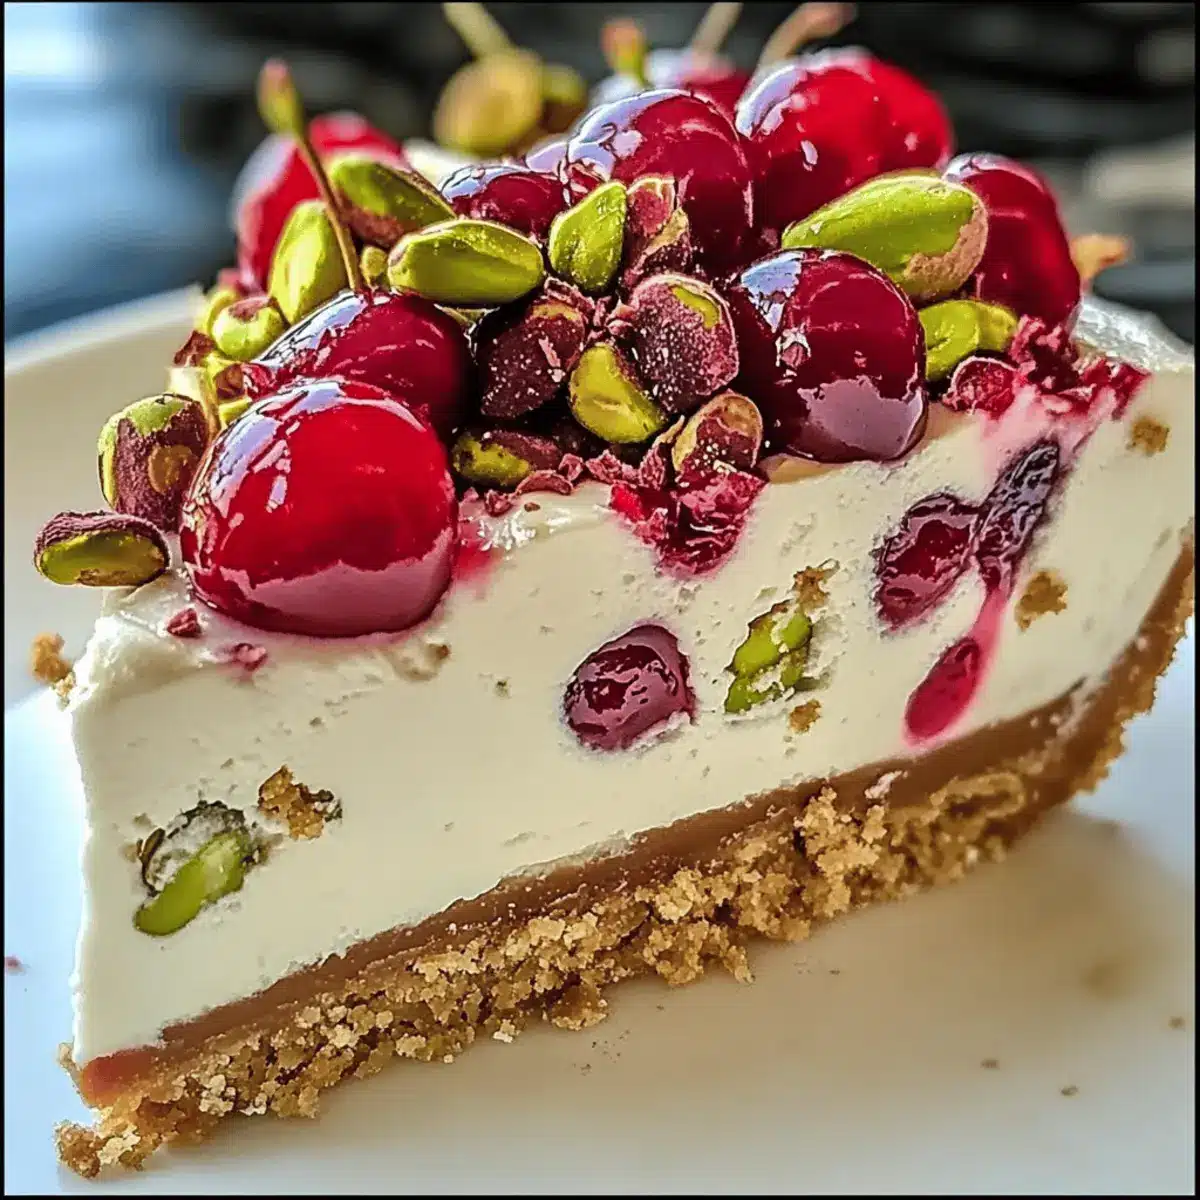
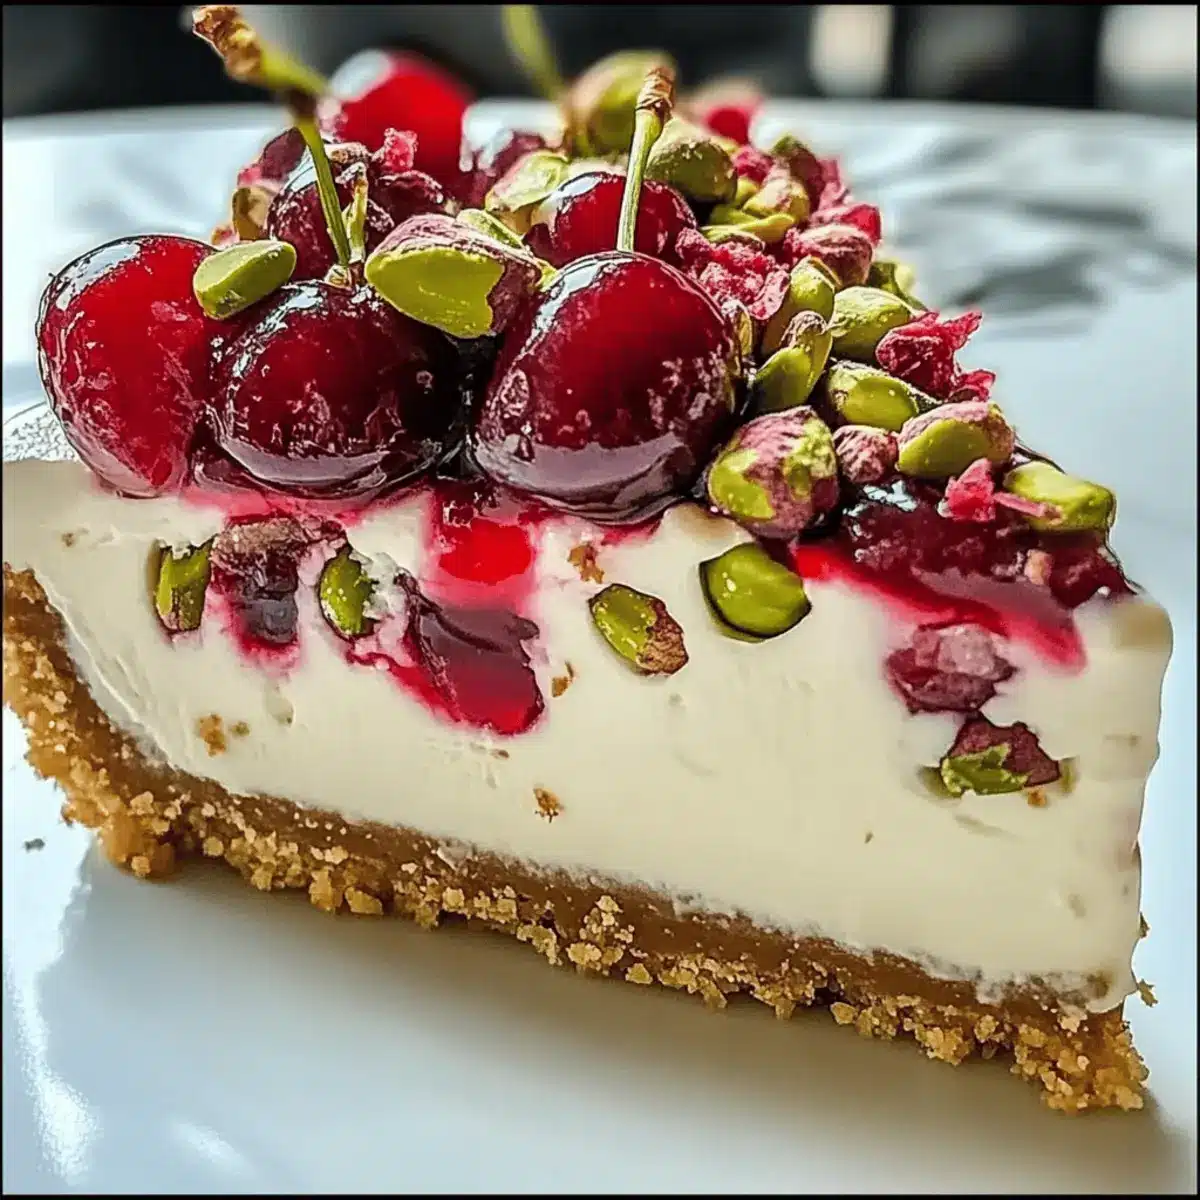
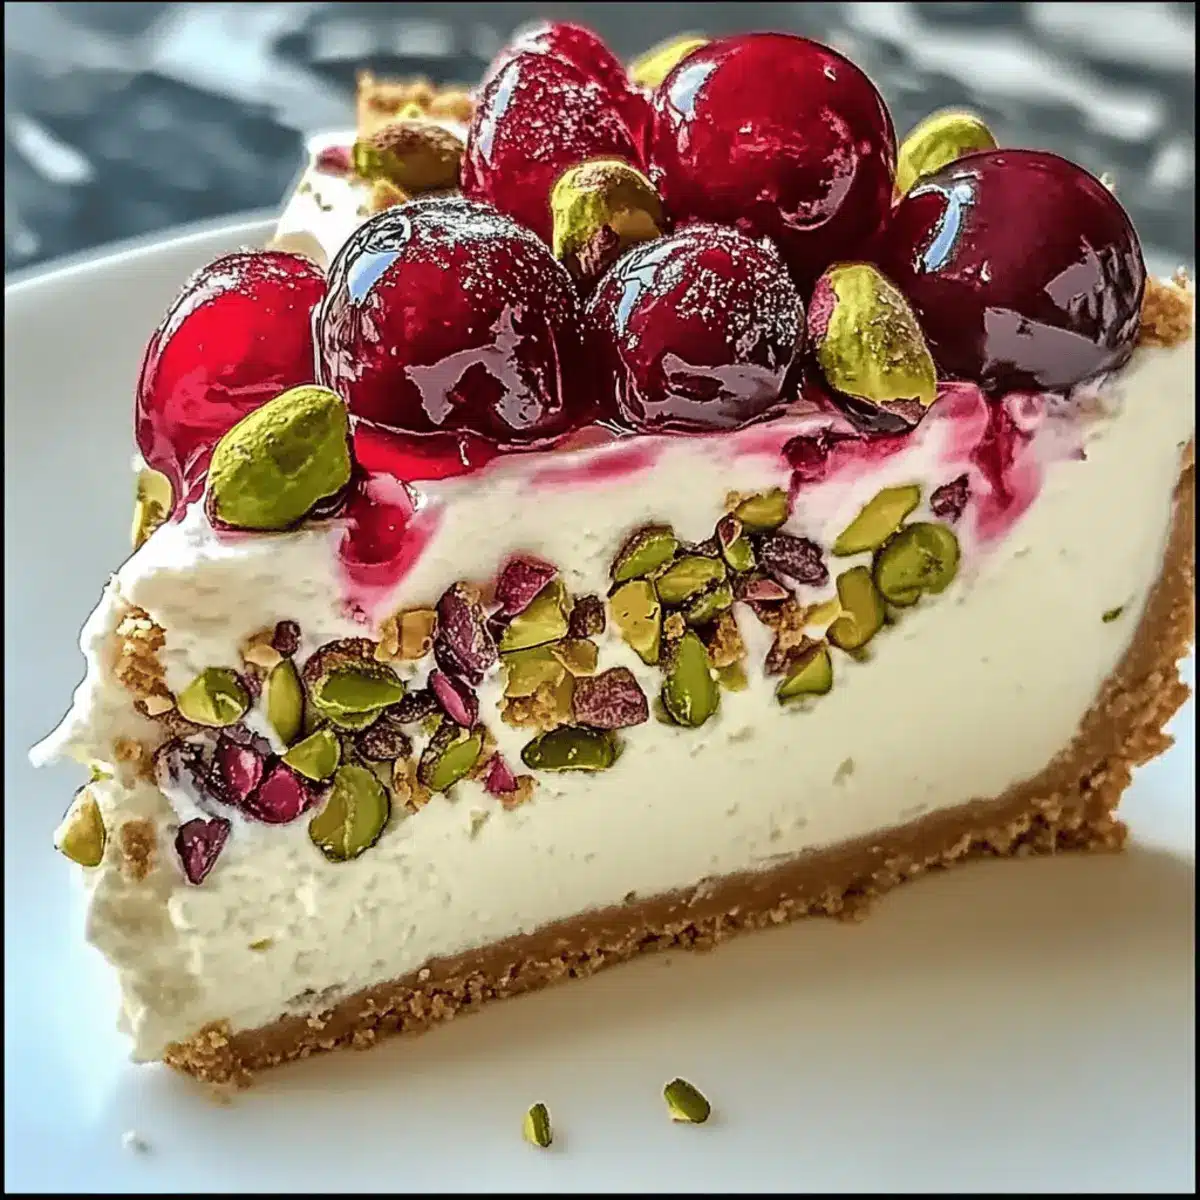
As I opened the fridge door, the vibrant colors of the Cherry Pistachio Cheesecake caught my eye, a sweet reminder that homemade treats can transform any ordinary day into a special occasion. This indulgent dessert marries the tartness of cherries with the buttery richness of pistachios, all perfectly cradled in a graham cracker crust that gives a satisfying crunch. The best part? Making this cheesecake is surprisingly effortless, allowing you to impress your loved ones without spending all day in the kitchen. Whether you’re celebrating a holiday or simply craving a taste of elegance, this cheesecake is a must-try. Are you ready to dive into a slice of creamy bliss?
Why Will You Adore This Cheesecake?
Irresistible Flavor: The blend of tart cherries and nutty pistachios creates a uniquely delicious experience that’s sure to impress.
Effortless Preparation: You’ll be surprised at how easy it is to whip up this stunning dessert, making it perfect for both novice and experienced bakers alike.
Versatile Variations: Feel free to experiment with different nuts or fruit toppings to make each cheesecake uniquely yours! Try swapping maraschino cherries for fresh ones to elevate the flavor even further.
Showstopper Presentation: With its vibrant colors and elegant appearance, this cheesecake is guaranteed to be the centerpiece of any gathering, just like the Velvet Strawberry Cheesecake you might also enjoy.
Guilt-Free Indulgence: Despite its rich flavor, this cheesecake allows you to indulge without the worry, as it can easily be made ahead and stored for later enjoyment!
Cherry Pistachio Cheesecake Ingredients
• Here’s what you’ll need to create this dreamy Cherry Pistachio Cheesecake!
For the Crust
- Graham Cracker Crumbs – Provides the crust structure and sweetness; for a different flavor, try crushed digestive biscuits.
- Ground Pistachios – Enhance the crust and filling with a nutty flavor; use roasted, unsalted nuts for best results.
- Granulated Sugar – Sweetens both the crust and the filling; coconut sugar can be a healthier substitution.
- Unsalted Butter – Binds the crust ingredients together and adds richness; melted margarine works as a dairy-free alternative.
For the Filling
- Cream Cheese – The main component of the filling, offering creaminess and tang; full-fat delivers the best texture.
- Sour Cream – Adds creaminess and slight tang to the filling; plain Greek yogurt can be swapped for a tangy twist.
- Pistachio Pudding Mix – Thickens the filling and amplifies the pistachio flavor; can be omitted for less sweetness.
- Large Eggs – Provide structure and help the cheesecake set; using large eggs ensures consistency.
- Vanilla Extract – Enhances flavors in the filling; choose pure vanilla extract for the best results.
For the Topping
- Cherry Pie Filling – Sweet-tart topping that adds a bright finish; fresh or frozen cherries can also be used, just reduce extra moisture.
- Optional Garnishes – Chopped pistachios and whipped cream to enhance presentation while complementing the Cherry Pistachio Cheesecake beautifully.
Step‑by‑Step Instructions for Cherry Pistachio Cheesecake
Step 1: Preheat the Oven
Begin by preheating your oven to 325°F (160°C). While it warms up, grab a 9-inch springform pan and prepare it for baking by lightly greasing the sides and bottom. This will ensure an easy release of your Cherry Pistachio Cheesecake once it’s baked to perfection.
Step 2: Make the Crust
In a medium bowl, combine graham cracker crumbs, ground pistachios, sugar, and melted unsalted butter. Mix until all ingredients are evenly moistened. Press this mixture firmly into the bottom of your prepared springform pan, creating an even layer. Bake for 8 minutes, until lightly golden, then allow it to cool while you prepare the filling.
Step 3: Prepare the Filling
In a large mixing bowl, beat softened cream cheese and granulated sugar together using an electric mixer until smooth and creamy. Gradually add in the large eggs, one at a time, mixing well after each addition. Next, blend in sour cream, pistachio pudding mix, and vanilla extract until the mixture is completely smooth, ensuring the batter is free from lumps.
Step 4: Bake the Cheesecake
Pour the creamy filling over the cooled graham cracker crust, spreading it gently to ensure even coverage. Bake your Cherry Pistachio Cheesecake in the preheated oven for 45-50 minutes, or until the edges are set but the center still has a slight jiggle to it. This jiggle indicates that it will firm up as it cools.
Step 5: Cooling Method
Once done baking, turn off the oven and crack the door open slightly. Let the cheesecake cool in the oven for 1 hour, which helps prevent any cracks from forming on the surface of your lovely dessert. This gradual cooling is key to achieving the ideal texture.
Step 6: Chill
After the first hour of cooling in the oven, remove the cheesecake and refrigerate it for at least 4 hours, though overnight is best for maximum flavor and texture. Make sure to cover it gently with plastic wrap for a perfect chill without absorbing unwanted flavors from the fridge.
Step 7: Top and Serve
When you’re ready to serve your Cherry Pistachio Cheesecake, spread a generous layer of cherry pie filling over the top, letting these vibrant bursts of flavor shine. For an added touch, sprinkle with chopped pistachios and perhaps a dollop of whipped cream for a beautiful presentation. It’s time to enjoy this stunning dessert!
Cherry Pistachio Cheesecake Variations
Unleash your creativity and personalize this decadent cheesecake to match your taste buds and occasion!
- Nut-Free: Omit pistachios and use crushed cookies or graham crackers for a crust that’s equally delicious.
- Fruit Swap: Replace cherry pie filling with blueberry or raspberry for a vibrant twist that brings a different berry explosion.
- Maple Sweetener: Use maple syrup in place of granulated sugar for a rich flavor that beautifully complements the cheesecake’s creaminess.
- Chocolate Drizzle: Drizzle melted chocolate over the cherry topping for an indulgent, sweet contrast that will captivate any chocolate lover.
- Mini Cheesecakes: Divide the crust and filling into cupcake liners in a muffin tin, adjusting baking time to about 18-22 minutes for delightful individual portions. These little gems can be a showstopper at parties.
- Zesty Citrus: Add some lemon or orange zest to the filling for a fresh citrus note that elevates the flavors, making your cheesecake sing!
- Add Some Crunch: Mix in chopped nuts or even toffee bits into the filling for surprising little bursts of texture in every slice.
If you want to explore more delectable desserts, you might love this Velvet Strawberry Cheesecake or try a seasonal fruit pie as an alternative treat! Remember, the fun in cooking often comes from experimenting, so don’t be shy to make it your own!
What to Serve with Cherry Pistachio Cheesecake
Elevate your dessert experience with delightful pairings that enhance every bite of creamy bliss.
-
Fresh Berries: Juicy strawberries or raspberries add a vibrant contrast and complement the sweetness of the cheesecake beautifully.
-
Chocolate Drizzle: A rich chocolate sauce creates an indulgent layer that complements the nutty pistachios while adding a touch of decadence.
-
Vanilla Ice Cream: The creamy and cool texture of vanilla ice cream balances the cheesecake’s richness and offers an inviting flavor combination.
-
Mint Leaves: A sprig of fresh mint not only adds a pop of color but also provides a refreshing burst of flavor that enhances the dessert’s allure.
-
Sparkling Water: A glass of refreshing sparkling water cuts through the richness, leaving your palate cleansed and ready for another bite of cheesecake.
-
Whipped Cream: Luscious whipped cream adds a light, airy touch to each slice, enhancing the cheesecake’s smooth texture while making it even more decadent.
Indulge in these delightful combinations, and transform your Cherry Pistachio Cheesecake into an unforgettable dessert experience!
How to Store and Freeze Cherry Pistachio Cheesecake
Fridge: Store any uneaten slices in an airtight container for up to 5 days to keep the cheesecake fresh and flavorful.
Freezer: This Cherry Pistachio Cheesecake can be frozen for up to 2 months. Wrap it tightly in plastic wrap, followed by aluminum foil, to prevent freezer burn.
Thawing: When ready to enjoy, thaw your cheesecake overnight in the fridge for the best texture.
Reheating: It’s best served chilled, so no reheating is necessary—just slice and savor!
Make Ahead Options
These Cherry Pistachio Cheesecakes are perfect for meal prep enthusiasts craving a delightful dessert! You can prepare the crust and filling up to 24 hours in advance. Start by making the crust and allowing it to cool completely, then pour the cheesecake filling over the crust and bake as instructed. Once baked, let it cool gradually in the oven, then refrigerate for a minimum of 4 hours or overnight. Just before serving, top with cherry pie filling and sprinkle with chopped pistachios for a fresh finish. This make-ahead strategy ensures your cheesecake is just as delicious while saving you the stress of last-minute preparation. Enjoy the sweet fruits of your labor with minimal hassle!
Expert Tips for Cherry Pistachio Cheesecake
-
Room Temperature Cream Cheese: Ensure your cream cheese is softened at room temperature to prevent lumps in the filling, resulting in a smooth texture.
-
Mixing Lightly: Avoid overmixing once you add the eggs; mixing just until incorporated will help prevent cracks in the cheesecake’s surface.
-
Cooling Technique: Allow the cheesecake to cool gradually in the oven after baking—this essential step helps maintain its texture and prevents unwanted cracks.
-
Moisture Control: If using fresh cherries as a topping, be sure to dry them thoroughly to avoid excess moisture that can affect the cheesecake.
-
Make in Advance: This Cherry Pistachio Cheesecake is best when made a day ahead; it allows the flavors to meld together beautifully and enhances the overall taste.
Cherry Pistachio Cheesecake Recipe FAQs
What type of cherries should I use for the topping?
Absolutely! For the best flavor, I recommend using fresh, pitted cherries whenever possible. They add a brightness that enhances the cheesecake beautifully. If fresh cherries are out of season, frozen pitted cherries can work well too; just be sure to let them thaw and pat them dry to reduce excess moisture before adding them on top.
How should I store leftover cheesecake?
Very easy! Once your Cherry Pistachio Cheesecake has cooled completely, store any leftovers in an airtight container in the refrigerator for up to 5 days. This will keep it tasting fresh and flavorful. I often use a cake dome for extra protection if I have one handy!
Can I freeze the cheesecake?
Absolutely! You can freeze your Cherry Pistachio Cheesecake for up to 2 months. Ensure it’s wrapped tightly in plastic wrap, then in aluminum foil to prevent freezer burn. When you’re ready to enjoy it again, simply thaw it overnight in the fridge for the best texture.
What should I do if my cheesecake cracks during baking?
Oh no, that can happen sometimes! If your cheesecake cracks, it’s often due to overmixing or sudden temperature changes. To prevent this in the future, mix just until incorporated after adding the eggs, and remember to cool the cheesecake gradually in the oven with the door cracked. If a crack does occur, you can usually cover it up with the cherry topping!
Are there any dietary considerations I should keep in mind?
Definitely! If you or your guests have nut allergies, simply omit the pistachios or substitute with a nut-free crust option, like crushed cookies. For a dairy-free version, use dairy-free cream cheese and yogurt alternatives. It’s all about enjoying this delicious treat while keeping everyone’s needs in mind!
How long does the cheesecake need to chill before serving?
The chilling process is crucial! After baking, your cheesecake should chill in the refrigerator for at least 4 hours, but overnight is even better. This bit of patience allows the flavors to meld together beautifully, making every slice delectable!

Cherry Pistachio Cheesecake: The Ultimate Indulgent Treat
Ingredients
Equipment
Method
- Preheat the oven to 325°F (160°C) and prepare a 9-inch springform pan.
- In a bowl, mix graham cracker crumbs, ground pistachios, sugar, and melted butter. Press into the pan and bake for 8 minutes.
- Beat cream cheese and sugar until smooth. Add eggs one at a time, then mix in sour cream, pudding mix, and vanilla.
- Pour the filling over the crust and bake for 45-50 minutes until set with a slight jiggle.
- Cool the cheesecake in the oven with the door cracked for 1 hour.
- Refrigerate for at least 4 hours or overnight before serving.
- Top with cherry pie filling, sprinkle with chopped pistachios, and add whipped cream if desired.
Leave a Reply