
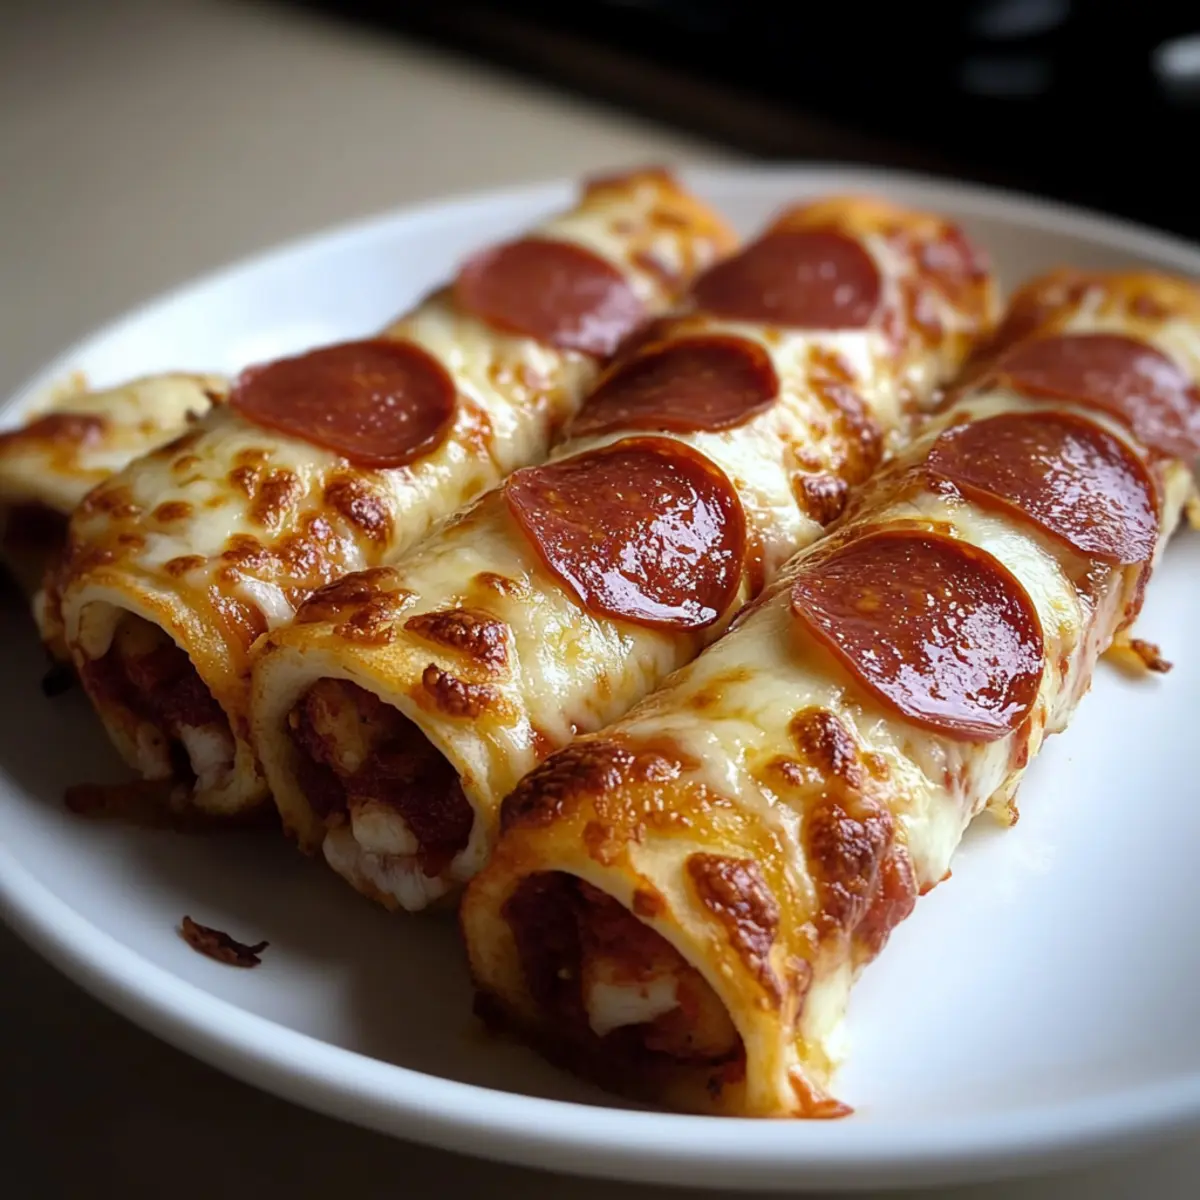
There’s an unmistakable joy that comes with the aroma of melting cheese wafting through the kitchen—especially when it signals the arrival of my Cheesy Pepperoni Pizza Roll Ups! This quick and easy low-carb snack is a lifesaver for those busy days or late-night cravings, taking just under 20 minutes to whip up. Not only do they satisfy your pizza cravings without the guilt, but they’re also customizable, allowing you to personalize each roll to your taste. Picture gooey mozzarella and zesty pepperoni enveloped in a crispy tortilla, transforming simple ingredients into a delightful treat. Trust me, these roll-ups are perfect for game nights or when you want something fun and delicious—without the hassle. Curious about how to make these mouthwatering bites? Let’s dive into the recipe!
Why Are These Pizza Roll Ups Amazing?
Quick and Easy: These Cheesy Pepperoni Pizza Roll Ups come together in less than 20 minutes, making them the perfect solution for busy weekdays or late-night cravings.
Low-Carb Delight: Enjoy a pizza-inspired snack that’s friendly to your waistline without sacrificing flavor. These roll-ups fit perfectly into a low-carb or keto lifestyle!
Customizable Flavors: With the flexibility to add your favorite toppings, like fresh basil or spicy pepperoni, these roll-ups cater to every palate. For a fantastic twist, try them alongside my Air Fryer Cheesy Tortilla Garlic Bread!
Crowd-Pleaser: Perfect for game nights or snack time, these roll-ups are bound to impress family and friends with their crispy exterior and gooey interior.
Snack & Savor: Pair these delicious treats with warm marinara sauce for dipping, making them an instant hit at any gathering. Enjoy them hot from the oven for the ultimate comfort food experience!
Cheesy Pepperoni Pizza Roll Ups Ingredients
• Ready to make your own delicious roll-ups? Here’s what you’ll need:
For the Roll-Ups
- Low-Carb Tortillas – Use Mission carb-smart tortillas for the best texture and low-carb option.
- Marinara Sauce – About 2 tablespoons per tortilla to ensure a flavorful and moist bite.
- Freshly Shredded Mozzarella – Shredding your own gives the ultimate cheesy pull and melt.
- Pepperoni Slices – Choose between regular or spicy pepperoni to suit your taste buds.
- Olive Oil – Brush the outside for a golden crispy finish in the oven.
Optional Add-Ins
- Bell Peppers – Thinly sliced to add a fresh crunch; remember to pat dry before adding.
- Black Olives – These can enhance the flavor; use sparingly for a tasty twist.
- Crushed Red Pepper Flakes – For those who like a little heat, sprinkle for an extra kick.
- Fresh Basil Leaves – A few leaves folded inside add an aromatic touch that’s irresistible.
Step‑by‑Step Instructions for Cheesy Pepperoni Pizza Roll Ups
Step 1: Preheat the Oven
Begin by preheating your oven to 375°F (190°C). This is crucial for ensuring your Cheesy Pepperoni Pizza Roll Ups achieve golden-brown perfection. While the oven heats up, gather all your ingredients and equipment, including a baking sheet lined with parchment paper for easy cleanup.
Step 2: Prepare the Tortillas
Lay your low-carb tortillas flat on a clean surface. Spread approximately 2 tablespoons of marinara sauce evenly across each tortilla, leaving a half-inch border around the edges. This creates a flavorful base for your roll-ups while preventing overflow during baking.
Step 3: Add Cheese and Pepperoni
Sprinkle a generous amount of freshly shredded mozzarella over the marinara sauce, ensuring it’s evenly distributed. Next, layer your preferred pepperoni slices on top of the cheese. The combination of gooey cheese and zesty pepperoni will ensure each bite of your Cheesy Pepperoni Pizza Roll Ups is bursting with flavor.
Step 4: Roll Up the Tortillas
Starting from one edge, carefully roll the tortillas tightly around the filling, making sure to keep everything secure inside. Once rolled, brush the outside of each roll-up with olive oil. This step is important for achieving a crispy, golden finish when baked.
Step 5: Bake for Perfect Crispiness
Place the roll-ups seam-side down on the prepared baking sheet. Bake them in the preheated oven for 10-12 minutes. Watch closely as they bake: they are ready when the outsides are golden and the cheese inside is bubbling deliciously.
Step 6: Cool and Slice
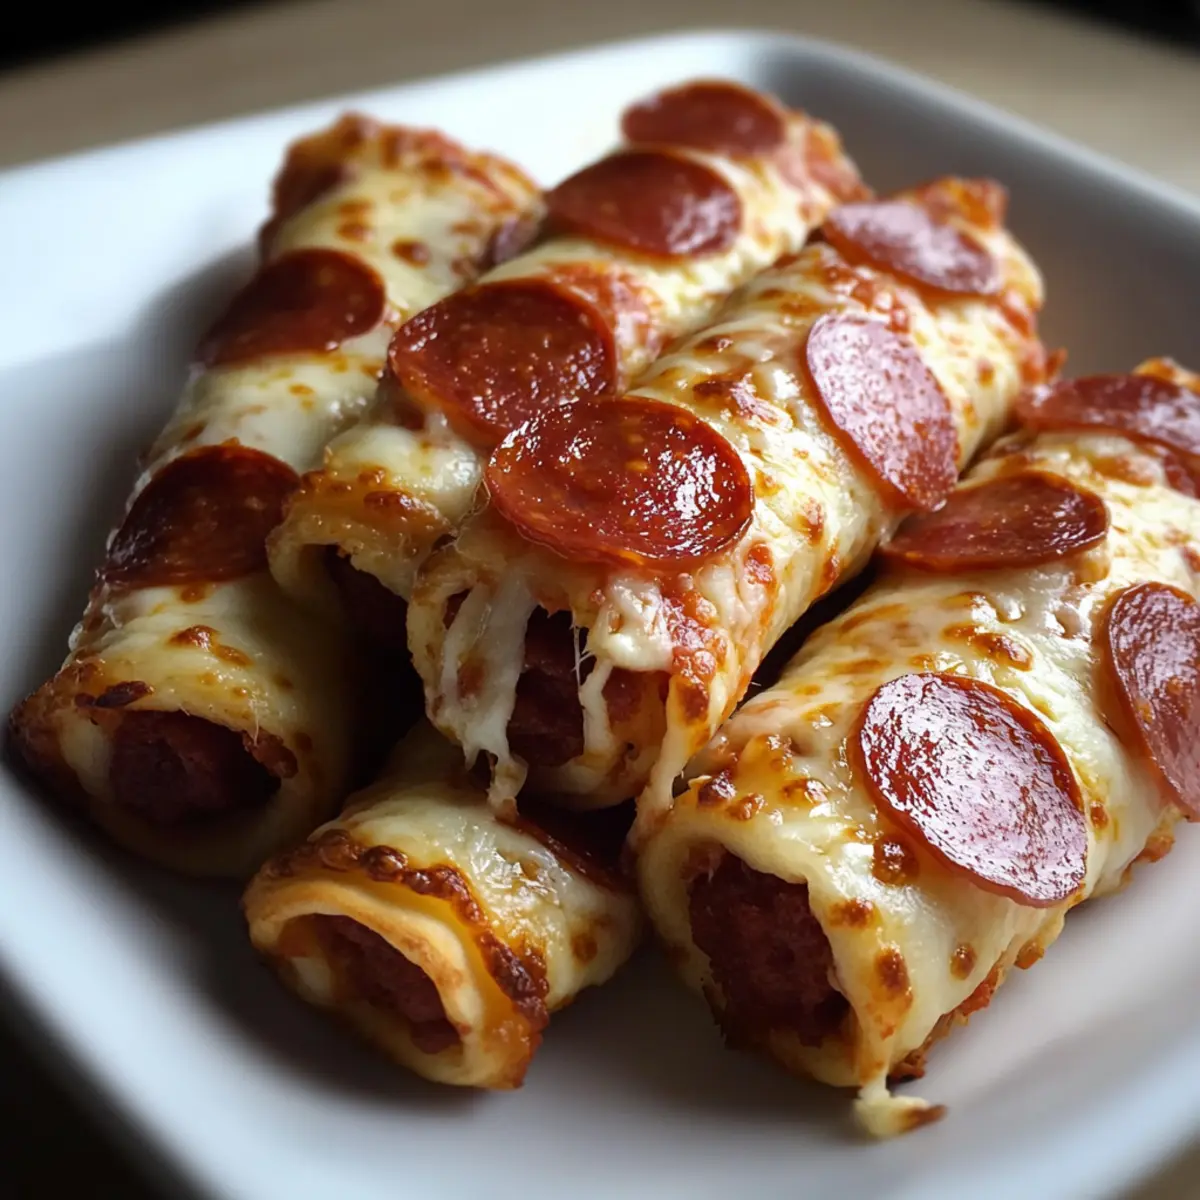
Once baked, remove the Cheesy Pepperoni Pizza Roll Ups from the oven and allow them to cool for a couple of minutes. This cooling period helps the cheese set slightly, making slicing easier. Use a sharp knife to cut into bite-sized pieces, ready to serve!
Step 7: Serve and Enjoy
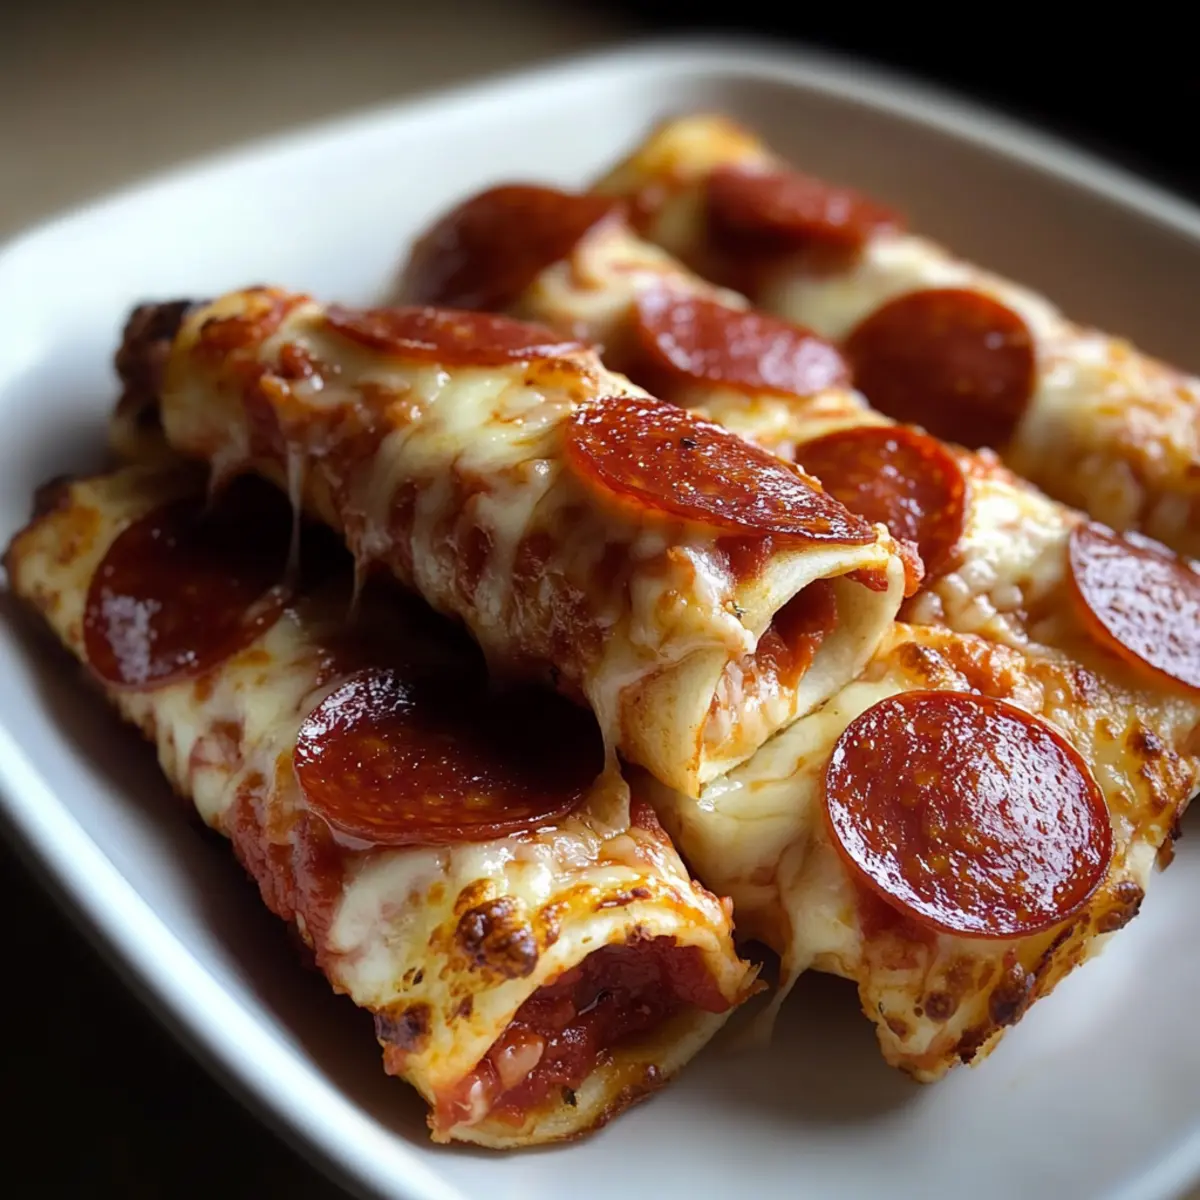
Serve your freshly made roll-ups while still warm, paired with a small dish of marinara sauce for dipping. These Cheesy Pepperoni Pizza Roll Ups are perfect for snacking or as a delightful appetizer that everyone will love.
Expert Tips for Cheesy Pepperoni Pizza Roll Ups
-
Perfect Tortilla Choice: Use low-carb tortillas for a better texture and flavor. Mission carb-smart tortillas are a fantastic option for your Cheesy Pepperoni Pizza Roll Ups.
-
Sauce Sparingly: Avoid sogginess by only spreading about 2 tablespoons of marinara sauce. Over-saucing can lead to a messy filling that oozes out during baking.
-
Cheese Quality: Shred your mozzarella fresh rather than using pre-shredded cheese. This ensures a gooey and melty texture that brings your roll-ups to life.
-
Crispiness Matters: Brush the outside of the roll-ups with olive oil. This will promote a beautiful golden color and delightful crispiness, making every bite irresistible.
-
Cooling Time: Let the roll-ups cool for a few minutes after baking. Cooling allows the cheese to set slightly, which makes slicing easier and less messy.
-
Experiment with Fillings: Don’t hesitate to customize your roll-ups! Adding veggies like bell peppers or swapping for spicy pepperoni can elevate the flavor of your Cheesy Pepperoni Pizza Roll Ups.
What to Serve with Cheesy Pepperoni Pizza Roll Ups
These delightful roll-ups are just the beginning of a flavor-packed meal that your whole family will crave.
-
Fresh Side Salad: A light salad with greens and cherry tomatoes adds a refreshing crunch that balances the rich, cheesy flavors.
-
Garlic Breadsticks: Soft, buttery breadsticks provide a comforting side that complements the pizza vibe. They’re great for dipping too!
-
Marinara Sauce: Serve alongside a warm bowl of marinara for dipping. Its tangy flavor perfectly enhances the cheesy goodness of the roll-ups.
-
Vegetable Platter: Crisp carrot and cucumber sticks add a healthy crunch and colorful pop to your meal while maintaining a light feel.
-
Creamy Ranch Dip: A rich ranch dip on the side adds a creamy contrast that elevates the whole experience. Everyone loves a good dip!
-
Cola or Lemonade: Refreshing drinks like cola or zesty lemonade pair beautifully with the rich flavors of the roll-ups, keeping your meal exciting.
For an extra treat, finish off with a simple dessert such as chocolate-dipped strawberries; the sweetness complements the savory roll-ups wonderfully, making it a balanced meal from start to finish!
How to Store and Freeze Cheesy Pepperoni Pizza Roll Ups
Fridge: Store any leftover roll-ups in an airtight container for up to 3 days. This keeps them fresh and ready for a quick snack at any time.
Freezer: For longer storage, freeze the roll-ups in a single layer on a baking sheet, then transfer to a freezer-safe bag or container for up to 2 months.
Reheating: To reheat, bake frozen roll-ups in a preheated 350°F oven for about 10-12 minutes, or until heated through and crispy again.
Tip: Always allow the roll-ups to cool completely before freezing to help maintain their texture and flavor when reheated.
Make Ahead Options
These Cheesy Pepperoni Pizza Roll Ups are perfect for busy home cooks looking to save time during hectic weeknights! You can prepare the roll-ups up to 24 hours in advance by assembling them completely and then covering them tightly with plastic wrap to keep them fresh. To maintain quality, avoid brushing with olive oil until just before baking to ensure they stay crispy. When you’re ready to enjoy, simply preheat the oven to 375°F (190°C), brush the assembled roll-ups with olive oil, and bake them for 10-12 minutes until golden brown and bubbling. This way, you can impress your family with delicious homemade snacks without the last-minute rush!
Cheesy Pepperoni Pizza Roll Ups Variations
Feel free to take these Cheesy Pepperoni Pizza Roll Ups to new levels of deliciousness with your own unique twists!
-
Dairy-Free: Use vegan cheese alternatives for a guilt-free indulgence. Look for meltable options that mimic the real deal.
-
Veggie-Loaded: Add thinly sliced bell peppers and black olives for a colorful and nutritious boost. The extra crunch pairs wonderfully with the cheesy interior.
-
Spicy Kick: Swap regular pepperoni for hot pepperoni or sprinkle crushed red pepper flakes for an exciting flavor punch. Adding a spicy element will make each bite an adventure!
-
Herb-Infused: Incorporate fresh basil or oregano into the filling for an aromatic twist. These herbs take the classic pizza flavors up a notch, creating a delightful explosion in your mouth.
-
Air Fryer Option: For an even crispier exterior, try preparing these roll-ups in an air fryer at 375°F for 8-10 minutes. This method makes them super crunchy and delicious! Want to double down on the flavors? Serve them with my Air Fryer Cheesy Tortilla Garlic Bread on the side.
-
Low-Carb Alternative: Experiment with almond flour tortillas if you’re looking for a grain-free version. They work beautifully and can make these roll-ups even healthier!
-
Italian Twist: Mix in some Italian sausage or cooked ground beef for a heartier filling. Pairing these proteins with your cheese and pepperoni will surely satisfy any savory craving!
-
Nut-Free Option: If you’re in need of a nut-free alternative, use regular tortillas instead of almond flour ones. A simple swap that still yields delicious results, perfect for everyone to enjoy!
Embrace your culinary creativity and make these roll-ups truly your own!

Cheesy Pepperoni Pizza Roll Ups Recipe FAQs
What type of tortillas should I use for the roll-ups?
I recommend using low-carb tortillas, such as Mission carb-smart tortillas, for the best texture and flavor. They hold up well and keep the roll-ups crispy, making your Cheesy Pepperoni Pizza Roll Ups healthier and tastier!
How do I store leftover Cheesy Pepperoni Pizza Roll Ups?
Leftover roll-ups can be stored in an airtight container in the refrigerator for up to 3 days. To maintain their crispiness, I suggest reheating them in a 350°F oven for about 5 minutes before enjoying.
Can I freeze these pizza roll-ups? How?
Absolutely! To freeze your Cheesy Pepperoni Pizza Roll Ups, place them in a single layer on a baking sheet and freeze until solid. Then, transfer them to a freezer-safe bag or container, where they can be stored for up to 2 months. When you’re ready to enjoy, bake them from frozen in a preheated 350°F oven for about 10-12 minutes.
What should I do if my roll-ups turn out soggy?
To avoid soggy roll-ups, ensure you’re not overdoing the marinara sauce—stick to about 2 tablespoons per tortilla. Also, check the pepperoni for excess grease; pat them dry if necessary. Baking on a wire rack can also help maintain crispiness, allowing air to circulate around the roll-ups.
Are these roll-ups suitable for people with gluten allergies?
If you have gluten allergies, check the label on the tortillas you use. There are gluten-free low-carb tortilla options available that can make these Cheesy Pepperoni Pizza Roll Ups safe for your diet. Always ensure your other ingredients, like the marinara sauce, are also gluten-free.
Cheesy Pepperoni Pizza Roll Ups for Quick Snack Cravings
Ingredients
Equipment
Method
- Preheat your oven to 375°F (190°C). Gather all ingredients and equipment, including a baking sheet lined with parchment paper.
- Lay the low-carb tortillas flat. Spread approximately 2 tablespoons of marinara sauce evenly across each tortilla, leaving a half-inch border.
- Sprinkle mozzarella over the marinara sauce, ensuring it's evenly distributed. Layer pepperoni slices on top.
- Roll the tortillas tightly around the filling, then brush the outside with olive oil.
- Place the roll-ups seam-side down on the baking sheet and bake for 10-12 minutes until golden.
- Remove from the oven, cool for a couple of minutes, then slice into bite-sized pieces.
- Serve warm with marinara sauce for dipping.
Leave a Reply