
There’s nothing quite like the satisfaction of transforming simple ingredients into a delightful dessert, especially when it’s as easy as these High Protein Cheesecake Jars! Offering a creamy, no-bake treat that combines the rich goodness of cottage cheese and Greek yogurt, this recipe is not just about indulgence; it’s also a smart choice for those looking to pack in the protein without sacrificing flavor. With a delightful hint of maple syrup and the fresh burst of seasonal berries, this easy dessert is perfect for meal prep or satisfying your sweet tooth after a long day. Can you believe you can enjoy a guilt-free dessert that also boosts your protein intake? Let’s dive into the layers of deliciousness!
Why choose cheesecake jars for dessert?
Irresistible Appeal: These Cheesecake Jars are a delightful fusion of flavors and textures, creating a stunning dessert that will impress family and friends.
Protein-Packed Goodness: Each serving boasts a hefty 30 grams of protein, making it a health-conscious indulgence without compromising taste.
Effortless Preparation: With no baking required, this recipe is perfect for both novice cooks and busy chefs alike.
Versatile Layers: Customize your jars with seasonal fruits or flavored yogurts, offering endless variations to satisfy any palate.
Meal Prep Friendly: Make these jars in advance and store them in the fridge for a quick and delicious snack throughout the week. Whether you’re craving something sweet after dinner or prepping for lunch, these cheesecake jars are the answer!
Cheesecake Jars Ingredients
For the Cheesecake Filling
• Cottage Cheese – Provides creaminess and protein; low-fat or full-fat options work based on your preference.
• Plain Greek Yogurt – Enhances texture and adds extra protein; any full-fat or dairy-free yogurt can be used as a substitution.
• Maple Syrup – Adds natural sweetness to your cheesecake; honey or agave syrup can serve as excellent alternatives.
For the Crunchy Base
• Crushed Graham Crackers – Creates a crunchy layer to balance the creamy filling; gluten-free graham crackers are available for those with dietary restrictions.
For the Fruit Topping
• Berries – Freshens up the dessert and adds natural sweetness; feel free to mix with any seasonal berries or fruits you enjoy for a delightful twist!
Step‑by‑Step Instructions for High Protein Cheesecake Jars
Step 1: Blend the Base
Start by adding 2 cups of cottage cheese to a large food processor. Blend for 1-2 minutes until the mixture is completely smooth and creamy, resembling a velvety puree. This step is crucial for ensuring the cheesecake jars have a luxurious texture, so be patient and check for any lumps before proceeding.
Step 2: Sweeten the Mix
Incorporate 4 tablespoons of maple syrup into the blended cottage cheese. Blend again for another 30 seconds until the syrup is fully integrated into the mixture. The sweetness will enhance the overall flavor of your cheesecake jars, making them a decadent treat without the guilt!
Step 3: Combine with Yogurt
Transfer the blended cottage cheese mixture into a mixing bowl. Gently fold in 3 cups of plain Greek yogurt using a silicone spatula for about 1-2 minutes, until both mixtures are completely combined. This technique keeps air in the mixture, providing that light, fluffy texture essential for your cheesecake jars.
Step 4: Layer the Jars
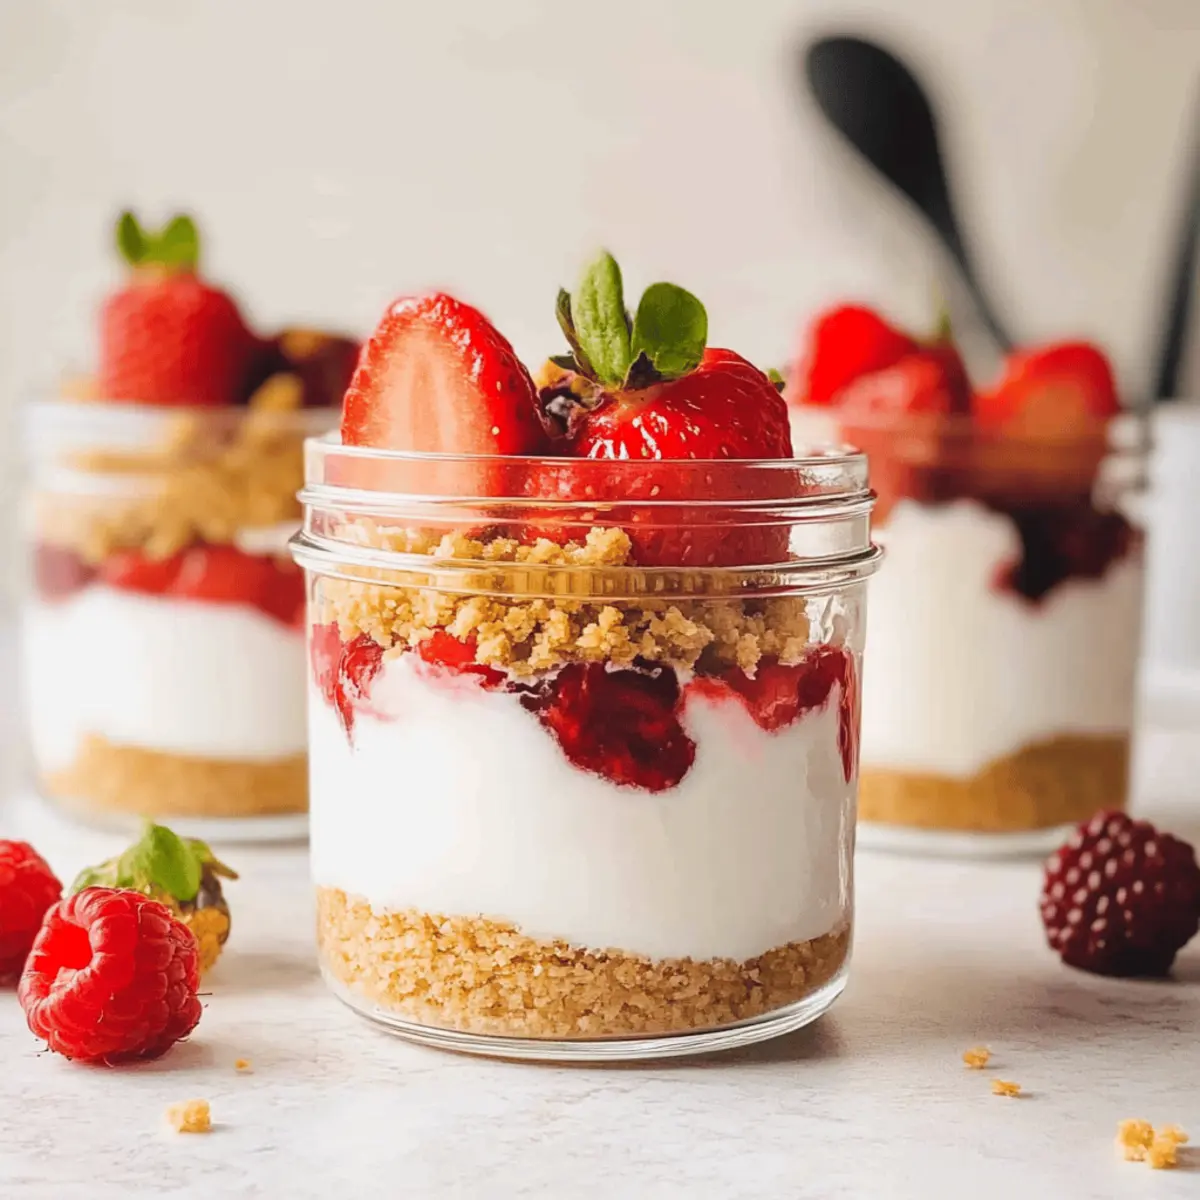
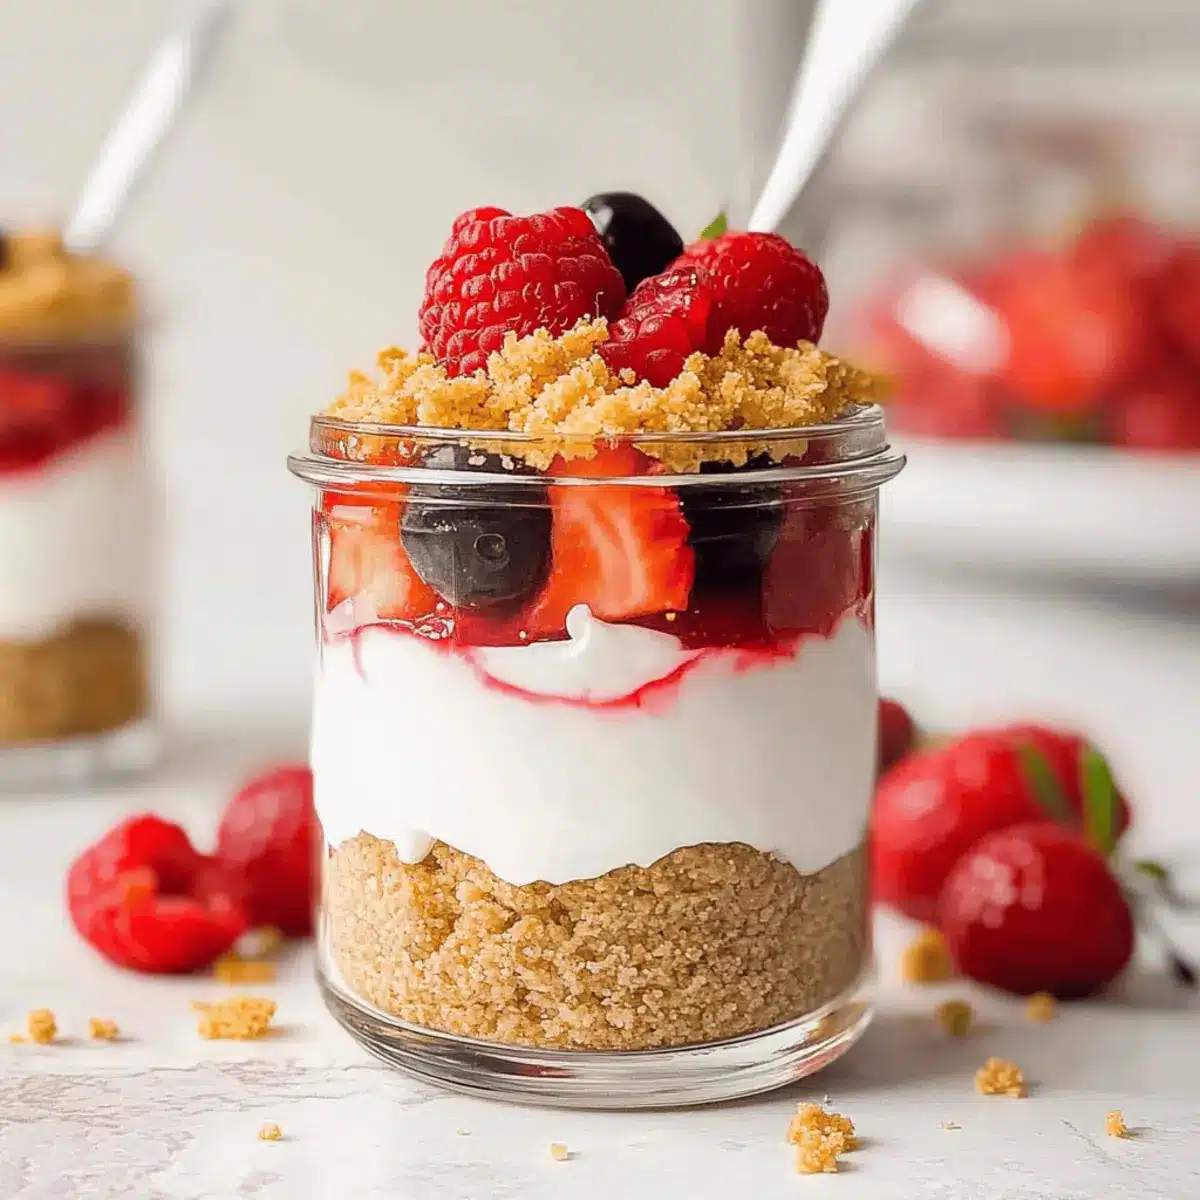
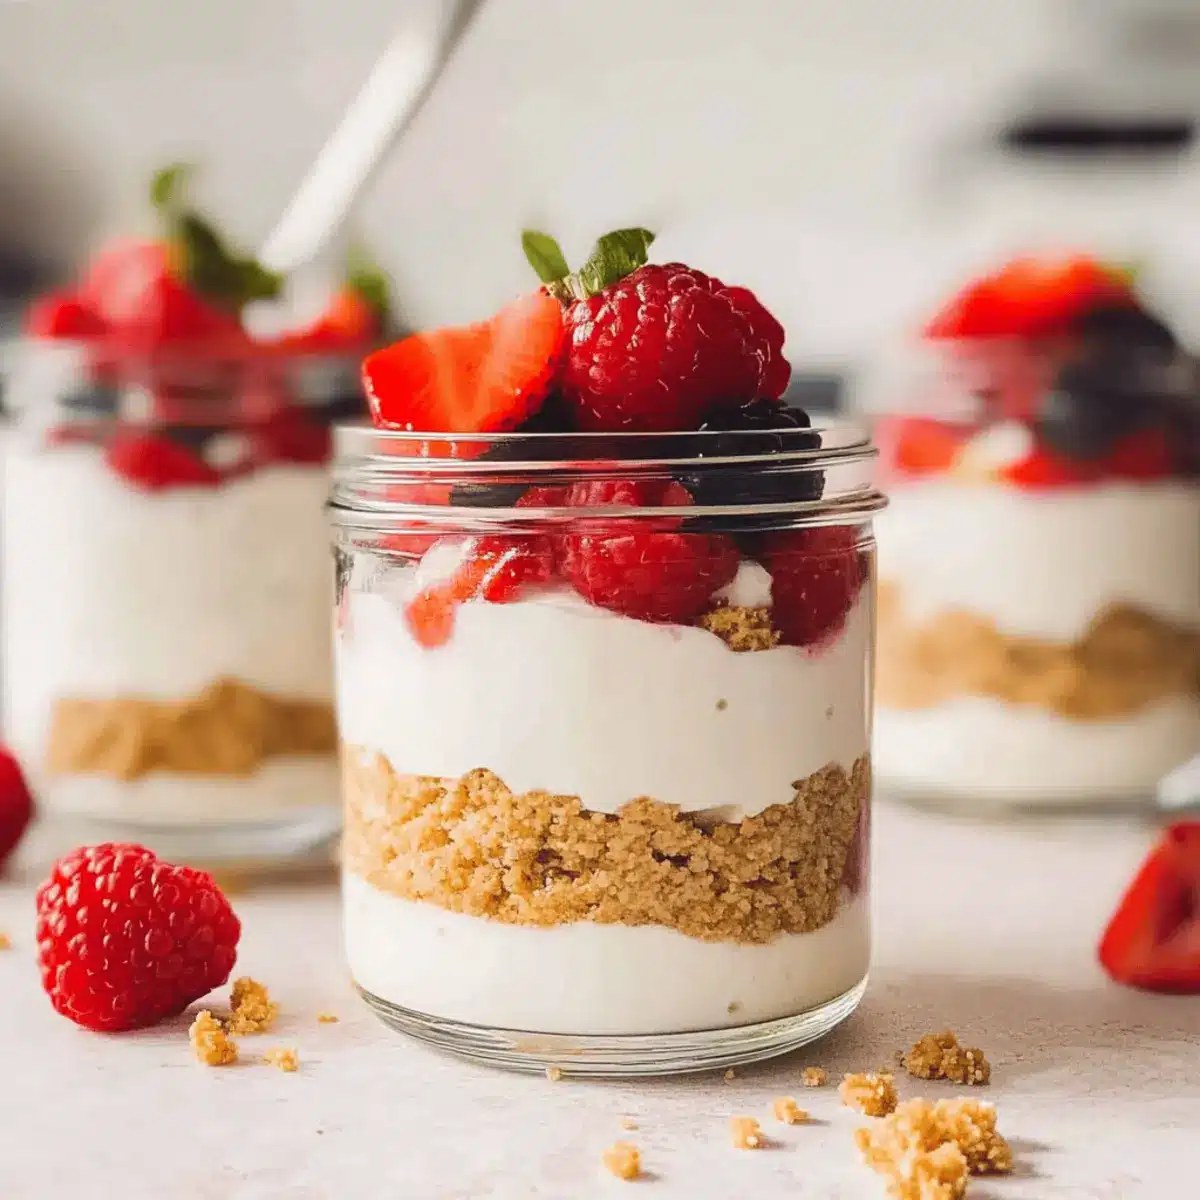
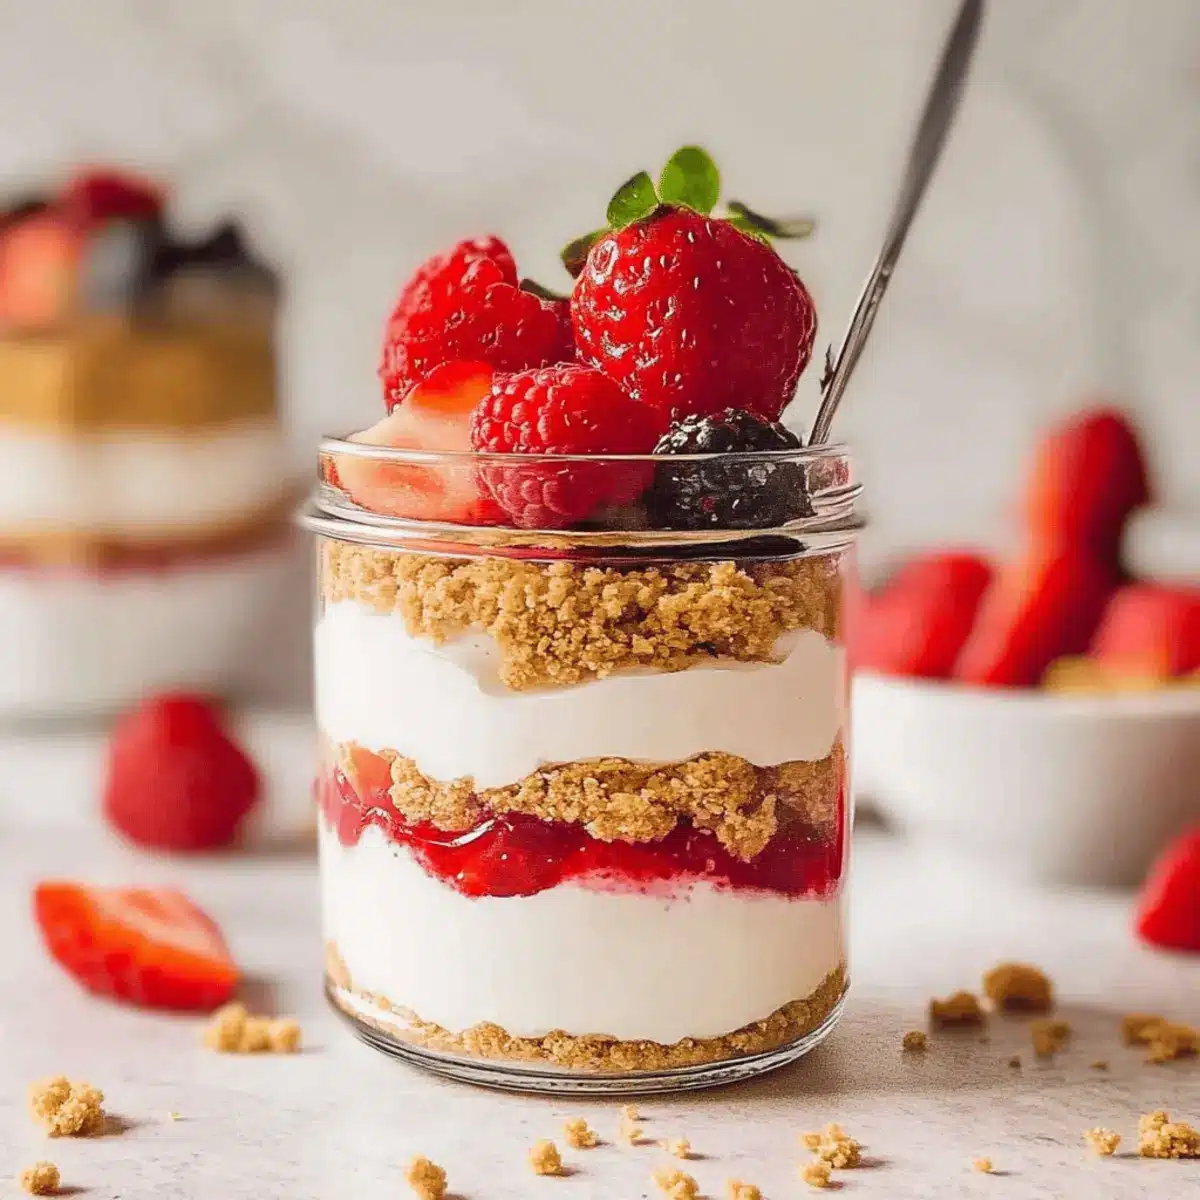
Now it’s time to assemble your cheesecake jars! Start by adding a layer of crushed graham crackers at the bottom of each jar. Spoon in a layer of the cheesecake mixture, followed by another layer of graham crackers. Continue this layering process until the jars are filled, creating a beautiful contrast between the creamy filling and the crunchy base.
Step 5: Add the Berries
Top off the layers with a generous handful of fresh berries, pressing them lightly into the cheesecake mixture. This bright and colorful layer not only enhances the visual appeal but also adds a burst of flavor. Choose your favorite seasonal berries to elevate the freshness of your High Protein Cheesecake Jars.
Step 6: Chill and Serve
For the best taste experience, allow the cheesecake jars to chill in the refrigerator for about 30 minutes. This will help the flavors meld together beautifully. After chilling, simply remove them from the fridge and garnish with additional berries before serving to friends and family!
Expert Tips for Cheesecake Jars
-
Blend Smoothly: Ensure the cottage cheese is blended until completely smooth for a silky texture; lumps can lead to an unappealing consistency.
-
Chill Time: Allow the jars to chill for at least 30 minutes before serving to enhance the flavor and make them extra refreshing.
-
Use a Silicone Spatula: When combining the cheesecake filling and yogurt, use a silicone spatula to gently fold and keep the mixture fluffy—this is key for your cheesecake jars’ texture.
-
Layer Creatively: Don’t be afraid to mix it up! Add different fruits, flavored yogurt, or nuts in the layers for a fun twist and variety in each jar.
-
Meal Prep Ready: Make your cheesecake jars ahead of time and store in the fridge for up to 3 days; they’re perfect for quick snacks or dessert throughout the week!
What to Serve with High Protein Cheesecake Jars?
Elevate your dessert experience by pairing these delightful cheesecake jars with complementary dishes that bring harmony to every bite.
-
Fresh Fruit Salad: A vibrant mix of seasonal fruits adds a refreshing crunch, enhancing the sweetness of the cheesecake jars.
-
Chocolate Drizzle: A gentle drizzle of dark chocolate sauce offers a luxurious contrast to the light flavors, creating a sweet and savory balance.
-
Whipped Cream: Light and airy whipped cream on top provides a soft texture, making each bite of cheesecake even more indulgent and heavenly.
-
Peanut Butter Sauce: A luscious swirl of peanut butter sauce introduces a nutty flavor that perfectly complements the creamy cheesecake, adding depth to your dessert.
-
Coffee or Espresso: The rich bitterness of a freshly brewed coffee or espresso pairs beautifully, balancing out the sweetness of the cheesecake jars and awakening your palate.
-
Mini Cheesecake Bites: For a cheesecake lover’s dream, serve these jars alongside bite-sized cheesecake squares for a fun and playful presentation that tantalizes the taste buds.
-
Almonds or Pecans: A sprinkle of crushed nuts on top adds a delightful crunch, bringing a satisfying contrast to the creamy layers while enhancing the overall flavor profile.
Cheesecake Jars: Flavor Variations
Feel free to put your own spin on these delightful cheesecake jars—there are so many ways to make them uniquely yours!
-
Flavor Boost: Add Cocoa Powder to the cheesecake mixture for a rich chocolatey twist. Simply mix in 2 tablespoons before blending with yogurt for a delightful variation.
-
Dairy-Free Delight: Use Coconut Yogurt and Almond Cream Cheese as substitutes for a creamy, dairy-free version that still packs a protein punch. This swap will bring a tropical flavor while keeping it light and luscious.
-
Nutty Crunch: Sprinkle in Chopped Nuts such as walnuts or almonds between layers for a satisfying crunch. A small handful of nuts can elevate texture and flavor deliciously.
-
Fruity Fun: Substitute berries with a Fruit Compote made of cherries or peaches for a deeper fruit flavor. Cook the fruits down and cool before adding them in—this adds a lovely homemade touch.
-
Spicy Kick: Add a dash of Cinnamon or Nutmeg to the filling for warm, cozy notes. These spices add a comforting depth that complements the sweetness beautifully.
-
Sweetness Adjustments: If you’re looking for a lower sugar option, use Stevia or Monk Fruit Sweetener to replace maple syrup. This allows you to customize sweetness without compromising the creamy texture.
-
Layered Indulgence: Create an impressive visual by using Chocolate Graham Crackers for the crust. This twist not only adds a different aesthetic but also enhances the overall flavor experience—pair with raspberry for an unforgettable combo!
If you’re inspired to explore a more decadent treat, try pairing these jars with my delightful Velvet Strawberry Cheesecake for a colorful double dessert experience! The possibilities are endless—enjoy experimenting!
How to Store and Freeze Cheesecake Jars
Fridge: Store your cheesecake jars in the refrigerator for up to 3 days. Make sure to cover them tightly with a lid or plastic wrap to maintain freshness and prevent odors from other foods.
Freezer: If you want to freeze your cheesecake jars, do so before adding the berries. They can be frozen for up to 2 months. Allow them to thaw in the fridge overnight before enjoying.
Reheating: These cheesecake jars are best enjoyed cold. Simply remove from the fridge and enjoy directly. There’s no need to reheat, as the creamy texture works perfectly chilled!
Assembly Tips: If you’ve made your cheesecake jars ahead of time, remember not to add the berries until just before serving for the best flavor and presentation.
Make Ahead Options
These Cheesecake Jars are perfect for busy weeknights or meal prep enthusiasts! You can prepare the cheesecake filling up to 3 days in advance, blending your cottage cheese and Greek yogurt with maple syrup just until smooth. Store the mixture in an airtight container in the refrigerator to keep it fresh. You can also crush the graham crackers and store them separately to maintain their crunch. When you’re ready to serve, simply layer the filling, graham crackers, and berries in the jars as per the original instructions. With a little prep in advance, you’ll have a delightful dessert ready to impress at a moment’s notice—just as delicious as if you made it all at once!
High Protein No-Bake Cheesecake Jars Recipe FAQs
How do I choose ripe berries for my cheesecake jars?
Absolutely! Look for berries that are firm and vibrant in color. Avoid those with dark spots all over, as they may be overripe. Berries should not be mushy or leaking juice, ensuring you get the freshest flavor in your cheesecake jars!
What’s the best way to store cheesecake jars in the fridge?
Very simply! Store your cheesecake jars in the refrigerator for up to 3 days. Be sure to cover them tightly with lids or plastic wrap. This helps preserve their deliciousness and prevent other food odors from ruining your creamy dessert.
Can I freeze cheesecake jars for later?
Yes, you can! However, I recommend freezing them before adding the berries. To do this, pour your cheesecake mixture into jars, seal them tightly, and place them in the freezer, where they can stay for up to 2 months. When you’re ready to enjoy, let them thaw in the fridge overnight, then add fresh berries just before serving.
What if my mixture is too lumpy?
No worries! If you find your mixture is lumpy, simply return it to the food processor and blend until smooth again. If you’ve already folded in the yogurt, you can use a whisk or a spatula to gently mix while breaking up any lumps. The goal is a silky-smooth texture for your cheesecake jars!
Are there any dietary considerations I should be aware of?
Definitely! This recipe is easily adjustable for various dietary needs. For lactose intolerance, you can substitute with dairy-free yogurt and cottage cheese alternatives. For gluten-free options, don’t forget to use gluten-free graham crackers in your crust. Always check the labels to ensure they meet your dietary preferences!
How should I layer the jars for the best presentation?
For visual appeal, start with a layer of crushed graham crackers at the bottom of the jar, followed by a smooth layer of the cheesecake filling, then more graham crackers, followed by berries on top. This creates beautiful layers and ensures a delightful flavor in every scoop!
Creamy Cheesecake Jars: High Protein Dessert Bliss
Ingredients
Equipment
Method
- Blend the Base: Add 2 cups of cottage cheese to a food processor. Blend until smooth and creamy.
- Sweeten the Mix: Add 4 tablespoons of maple syrup to the blended cottage cheese and blend until integrated.
- Combine with Yogurt: Transfer the mixture to a bowl and gently fold in 3 cups of plain Greek yogurt.
- Layer the Jars: Add a layer of crushed graham crackers at the bottom of each jar, followed by the cheesecake mixture, and repeat until filled.
- Add the Berries: Top with a generous handful of fresh berries, pressing them lightly into the mixture.
- Chill and Serve: Allow the jars to chill in the refrigerator for about 30 minutes before serving.
Leave a Reply