
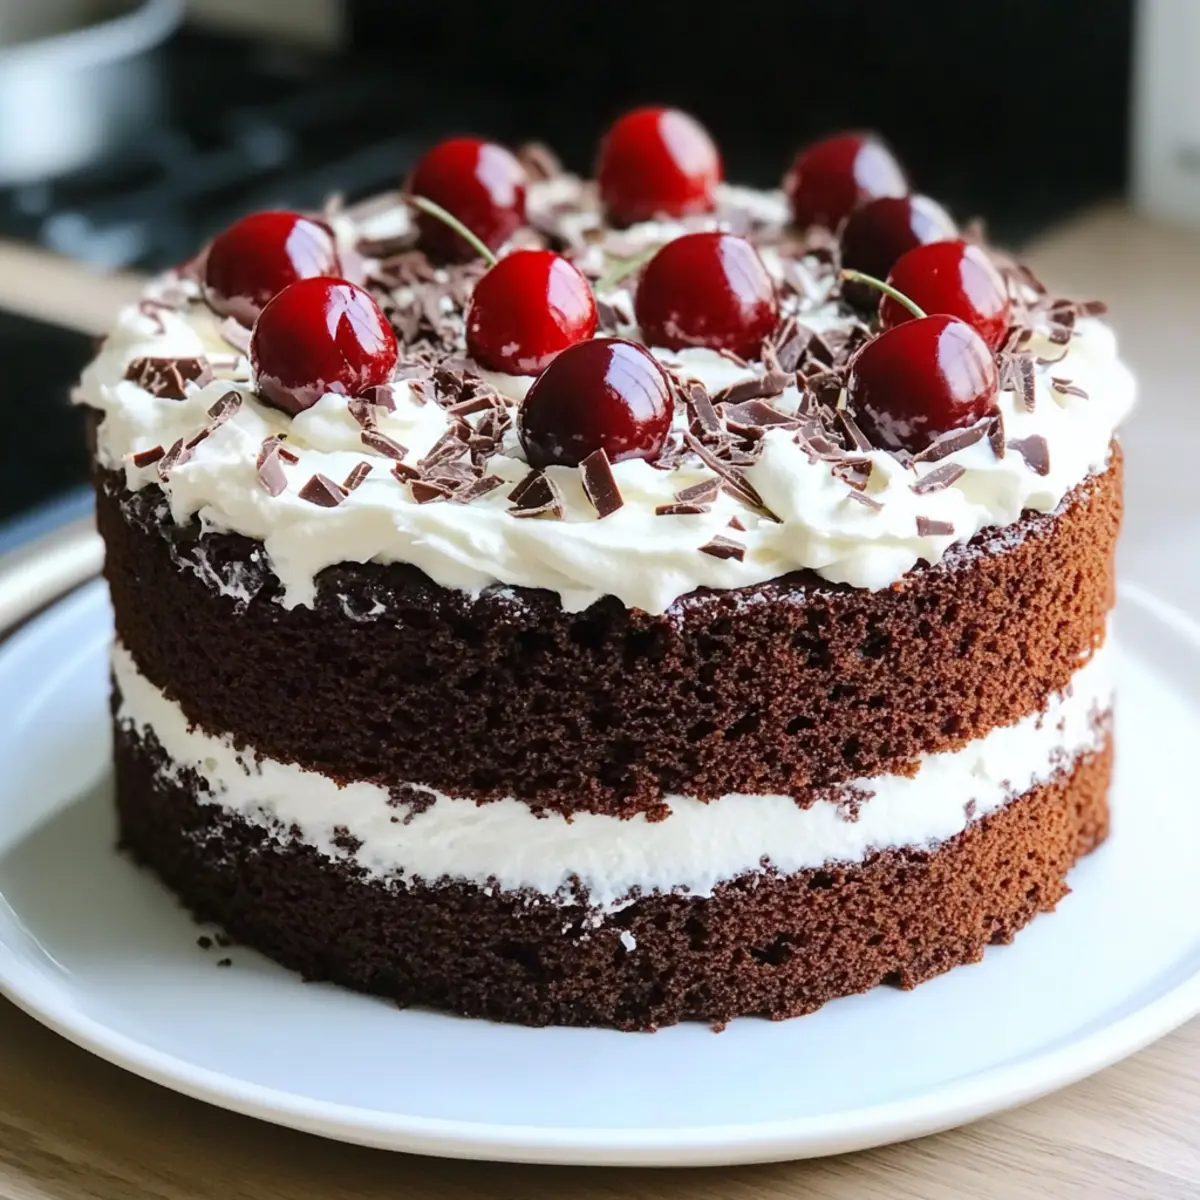
The aroma of chocolate filling the kitchen can transform an ordinary day into something extraordinary. I recently found myself whisking together ingredients for a classic Black Forest Cake Recipe, that beloved German dessert known for its rich layers of chocolate, cherries, and fluffy cream. What I adore about this cake is not just its impressive look, but its sheer simplicity in preparation—it seriously comes together in a snap! Perfect for a crowd-pleasing birthday celebration or a cozy family gathering, this recipe also promises to satisfy that sweet tooth without the hassle of countless steps. Trust me, your loved ones will be begging for seconds! Are you ready to dive into the world of luscious layers and delightful flavors? Let’s craft a masterpiece together.
Why is Black Forest Cake So Irresistible?
Crowd-Pleaser: Everyone loves a classic, and this Black Forest Cake never fails to impress at gatherings. Its stunning layers of chocolate and cherries are enough to make anyone swoon!
Effortless Elegance: With straightforward steps, you’ll achieve a show-stopping dessert that looks like a bakery masterpiece without the stress.
Rich, Delightful Flavor: The balance of bittersweet chocolate and sweet-tart cherries creates a flavor explosion that truly satisfies your cravings.
Versatile Cake: Want to create a unique twist? Try swapping cherries for raspberries or strawberries for a delightful change!
Perfect Make-Ahead Option: Preparing this cake a day in advance allows flavors to meld beautifully—plus it saves you time when hosting!
Get ready to impress your friends and family with this easy yet luxurious treat!
Black Forest Cake Ingredients
For the Cake
- All-Purpose Flour – This is the backbone of your cake; you can substitute with gluten-free flour for a gluten-free option.
- Granulated Sugar – It sweetens the cake; try coconut sugar for a lower glycemic alternative.
- Cocoa Powder (unsweetened) – Essential for that rich chocolate flavor; avoid sweetened versions to keep the balance.
- Baking Powder & Baking Soda – These are your leavening agents; make sure they’re fresh for fluffy results.
- Salt – A pinch enhances the other flavors beautifully.
- Eggs – They provide moisture and bind the cake; flax eggs make for a great vegan swap.
- Whole Milk – Adds richness; you can use almond milk for a dairy-free version.
- Vegetable Oil – Keeps the cake moist; melted coconut oil works well as a substitute.
- Vanilla Extract – This elevates the overall flavor perfectly.
- Boiling Water – Helps bloom the cocoa and create a velvety batter.
For the Cherry Filling
- Cherries (fresh or canned) – The star of the filling; if using canned, be sure to drain them well.
- Granulated Sugar (for filling) – Sweetens the cherry mixture.
- Cornstarch – Thickens the cherry sauce for a perfect consistency.
- Kirsch (cherry liqueur) – Optional, but it adds a wonderful depth to the cherry flavor.
For the Whipped Topping
- Heavy Cream – Essential for that light, fluffy topping; use coconut cream for a dairy-free alternative.
- Powdered Sugar – Sweetens the whipped cream to perfection.
Garnish
- Chocolate Shavings – Adds an elegant touch on top.
- Fresh Cherries – They enhance both presentation and flavor!
With this easy Black Forest Cake recipe, you’ll create delicious layers that are sure to win over everyone at your next gathering!
Step‑by‑Step Instructions for Black Forest Cake Recipe
Step 1: Preheat and Prepare Pans
Begin by preheating your oven to 350°F (175°C). While the oven warms up, prepare two 9-inch round cake pans by greasing them well with butter or oil and lining the bottom with parchment paper. This will help ensure that your chocolate cake layers come out easily after baking, achieving that perfect round shape for your classic Black Forest Cake.
Step 2: Mix Dry Ingredients
In a large mixing bowl, whisk together 1 ¾ cups of all-purpose flour, 2 cups of granulated sugar, ¾ cup of unsweetened cocoa powder, 1 ½ teaspoons of baking powder, 1 ½ teaspoons of baking soda, and 1 teaspoon of salt. Ensure the dry ingredients are well combined to avoid clumps, creating a light chocolate batter that adds delightful texture to your Black Forest Cake layers.
Step 3: Combine Wet Ingredients
Now, add 2 large eggs, 1 cup of whole milk, ½ cup of vegetable oil, and 2 teaspoons of vanilla extract to the dry mixture. Mix thoroughly with an electric mixer for about 2-3 minutes on medium speed until everything is smooth and well blended, forming a luscious chocolate batter that promises to be rich and moist.
Step 4: Incorporate Boiling Water
Next, carefully stir in 1 cup of boiling water, mixing until the batter is completely combined and smooth. The hot water helps to bloom the cocoa powder, enhancing the chocolate flavor. Be cautious as the batter will be quite thin, which is perfect for creating those melt-in-your-mouth layers in your Black Forest Cake.
Step 5: Bake the Cakes
Pour the batter evenly into the prepared cake pans, smoothing the tops with a spatula. Place them in the preheated oven and bake for 30-35 minutes, or until a toothpick inserted in the center comes out clean. Your cakes should rise beautifully and smell heavenly, creating a delightful base for your celebration dessert.
Step 6: Cool the Cakes
Remove the cakes from the oven and let them cool in the pans for about 10 minutes. Carefully transfer the cakes to a cooling rack to cool completely. This step is crucial to ensure that the layers firm up nicely, making it easier to frost and assemble your sumptuous Black Forest Cake without any crumbling.
Step 7: Prepare the Cherry Filling
While the cakes cool, prepare your cherry filling by combining 2 cups of pitted cherries and ½ cup of granulated sugar in a saucepan. Cook over medium heat for about 5-7 minutes, stirring occasionally, until the cherries release their juices and soften. The aroma of cherry will begin to fill your kitchen, setting the stage for that irresistible flavor.
Step 8: Thickening the Filling
In a small bowl, mix 2 tablespoons of cornstarch with 2 tablespoons of water to create a slurry. Add this to the cherry mixture in the saucepan and cook for an additional 2-3 minutes until it thickens. If you’re using Kirsch, stir it in now, allowing the cherry filling to cool completely before assembling your Black Forest Cake to prevent any melting of the whipped cream.
Step 9: Whip the Cream
For the fluffy topping, pour 2 cups of heavy cream into a mixing bowl. Using a hand mixer, whip the cream on medium-high speed for about 3-5 minutes until soft peaks form. Gradually add ¼ cup of powdered sugar, continuing to whip until you achieve stiff peaks. This light, whipped cream will elevate the layers of your Black Forest Cake, creating that signature finish.
Step 10: Assemble the Cake
Start by placing one cake layer on a serving platter. Generously spread a layer of whipped cream followed by half of the cherry filling over the cake. Gently top with the second cake layer, pressing down slightly to secure it in place. Frost the entire cake with the remaining whipped cream, creating a smooth, delightful exterior that brings your Black Forest Cake to life.
Step 11: Garnish and Chill
Finish your masterpiece by decorating the top with chocolate shavings and fresh cherries for that eye-catching presentation. Cover the completed cake with plastic wrap and refrigerate for 2-3 hours before serving. This chilling time allows the flavors to meld, ensuring that each slice of your Black Forest Cake is as delicious as it is beautiful.
How to Store and Freeze Black Forest Cake
Fridge: Store your assembled Black Forest Cake in the refrigerator, covered with plastic wrap or in an airtight container. It’s best enjoyed within 2-3 days for optimal freshness.
Freezer: If you want to save leftovers, slice the cake and wrap each piece individually in plastic wrap, then place them in a freezer-safe bag. It can be frozen for up to 3 months!
Reheating: To enjoy frozen slices, simply thaw them in the refrigerator overnight. For a warm treat, pop them in the microwave for about 10-15 seconds.
Assembling for Freezing: If you’re freezing the cake before decorating, ensure it’s fully cooled, then wrap the layers tightly in plastic wrap. Frost them once thawed for best texture and taste.
Expert Tips for Black Forest Cake Recipe
-
Quality Ingredients: Use the best cocoa powder and fresh cherries to ensure your cake is as rich and flavorful as possible.
-
Layering Precision: Distribute cherries and whipped cream evenly between layers for a stunning presentation and balanced flavor in your Black Forest Cake.
-
Cooling Time: Allow the cherry filling to cool completely before layering it on the cake to prevent melting the whipped cream.
-
Don’t Rush the Bake: Be sure to bake until a toothpick comes out clean; underbaking can lead to a soggy texture.
-
Chilling is Key: Refrigerate the assembled cake for a few hours before serving to enhance the flavors and make slicing easier.
What to Serve with Black Forest Cake Recipe
Elevate your dessert experience with delightful pairings that harmonize perfectly with the luscious layers of Black Forest cake.
-
Rich Vanilla Ice Cream: A scoop of creamy vanilla ice cream balances the cake’s rich chocolate and tart cherry flavors, making each bite unforgettable.
-
Fresh Berry Medley: A mix of strawberries, blueberries, and raspberries adds a refreshing burst of flavor and a vibrant color contrast to the cake’s dark chocolate tones.
-
Decadent Coffee: The warm, aromatic taste of a freshly brewed cup of coffee enhances the cake’s richness while providing a delightful pick-me-up for your guests.
-
Whipped Cream Clouds: Extra whipped cream on the side allows everyone to customize their slice, adding lightness that complements the cake’s dense layers.
-
Chocolate-Covered Cherries: Elevate your dessert table with these sweet treats; their deep cherry flavor echoes the cake while offering an added crunch.
-
Sparkling Water with Citrus: A fizzy drink with a twist of lemon or lime refreshes the palate, balancing the cake’s richness and cleansing your taste buds between bites.
-
Chocolate Ganache Drizzle: Adding a glossy, smooth chocolate ganache over each slice creates an elegant finish and an extra burst of chocolatey goodness.
-
Bourbon or Cherry Liqueur: A splash of bourbon or a pour of cherry liqueur adds sophistication to your dessert servings, enhancing both flavors and enjoyment.
-
Homemade Cherry Sauce: Serve a rich cherry sauce alongside for a luxurious touch, allowing guests to drizzle more of that delightful fruitiness over their cake.
Make Ahead Options
These Black Forest Cake Recipe components are perfect for meal prep, allowing you to save time without sacrificing flavor! You can bake the chocolate cake layers up to 24 hours in advance; just be sure to let them cool completely before wrapping them tightly in plastic wrap to keep them moist. The cherry filling can be prepared ahead as well, lasting up to 3 days in the refrigerator; simply store it in an airtight container. When you’re ready to serve, whip the cream and assemble the cake—this way, you’ll enjoy that fresh, whipped topping just before indulging. Your homemade treat will be just as delicious and beautifully layered, giving you a stunning dessert with minimal effort on the day of your gathering!
Black Forest Cake Recipe Variations
Feel free to get creative with this classic recipe and make it your own!
-
Berry Bliss: Swap cherries for fresh raspberries or strawberries for a delightful new flavor twist. The tartness complements the chocolate beautifully.
-
Coffee Infusion: Add 1-2 tablespoons of espresso powder into the dry ingredients for a deeper flavor; it enhances the chocolate and adds a subtle coffee kick.
-
Nutty Crunch: Fold in 1 cup of chopped walnuts or almonds into the batter for a delightful crunch. This adds texture and a nutty aroma that harmonizes with the chocolate.
-
Vegan Delight: Replace eggs with flax eggs and use almond milk to create a vegan version of this luscious cake. You’ll enjoy the same great taste without dairy!
-
Trifle Twist: Instead of layered cake, create individual trifles with cubed cake, cherry filling, and whipped cream in jars for a beautiful presentation.
-
Coconut Cream: Use coconut cream instead of heavy cream for a tropical twist. Its richness adds an exotic flair to the traditional recipe, bringing flavors to a whole new level.
-
Add Spice: Incorporate a pinch of cinnamon or a splash of orange extract into the batter for a warm, aromatic flavor that elevates the chocolate experience.
-
Daring Chocolate: Experiment with dark chocolate or a chocolate stout for a deeper flavor profile. The rich depth will surprise any chocolate lover!
These variations can turn your Black Forest Cake into a unique expression of your taste. Whether you’re looking for something lighter and fruity or richer and more decadent, there’s a perfect option waiting for you! For more delightful ideas, check out my recipe for Indulge Raspberry Cake or try these tasty Lemon Truffles Zesty. Happy baking!
Black Forest Cake Recipe FAQs
How do I choose the right cherries for my Black Forest Cake?
Absolutely! Opt for fresh cherries when in season for the best flavor and texture. Look for plump cherries with a deep, vibrant color and no dark spots or blemishes. If using canned cherries, ensure they are well-drained and preferably in light syrup or juice rather than heavy syrup for a more balanced sweetness.
What is the best way to store leftover Black Forest Cake?
Very easy! Store your assembled cake in the refrigerator, covered with plastic wrap or placed in an airtight container. It’s best consumed within 2-3 days to ensure freshness and maintain its delightful texture. If you know you won’t finish it in that timeframe, consider freezing it!
Can I freeze my Black Forest Cake, and how?
Certainly! To freeze, slice the cake and wrap each piece tightly in plastic wrap, ensuring no air gets in—this prevents freezer burn. Place the wrapped slices inside a freezer-safe bag or container. It can be frozen for up to 3 months, allowing you to enjoy a delicious slice anytime you want a treat!
What should I do if my cake layers domed during baking?
Absolutely, it can happen! If your cake layers dome, it’s usually due to the oven temperature being too high or overmixing the batter. To fix it, once cooled, simply use a serrated knife to level the tops before layering. Don’t rush; the straight layers will make your cake look professional and maintain its beautiful appearance.
Is this Black Forest Cake suitable for people with nut allergies?
Very much so! This recipe does not contain nuts, but always check all your ingredient labels. If you decide to add other flavors or variations, be cautious and ensure any added elements are nut-free to keep it safe for those with allergies.
Can I use a sugar substitute in my Black Forest Cake?
Yes, absolutely! You can swap granulated sugar with alternatives like coconut sugar for a lower glycemic option. However, keep in mind that different substitutes can vary in sweetness, so adjust the quantity to taste. For best results, I recommend sticking closely to amounts given in the recipe until you’re comfortable with the taste adjustments.
Irresistible Black Forest Cake Recipe for Any Celebration
Ingredients
Equipment
Method
- Preheat your oven to 350°F (175°C) and prepare two 9-inch round cake pans by greasing them and lining with parchment paper.
- In a large bowl, whisk together the dry ingredients: flour, sugar, cocoa powder, baking powder, baking soda, and salt.
- Add the wet ingredients: eggs, milk, vegetable oil, and vanilla extract. Mix thoroughly until smooth.
- Gradually stir in the boiling water until the batter is smooth.
- Pour the batter evenly into the prepared pans and bake for 30-35 minutes.
- Let the cakes cool in the pans for 10 minutes, then transfer to a cooling rack.
- Combine cherries and sugar in a saucepan. Cook over medium heat for 5-7 minutes until juices are released.
- Mix cornstarch and water to create a slurry, then add to the cherry mixture and cook until thickened.
- Whip the heavy cream on medium-high speed until soft peaks form, then gradually add powdered sugar and whip to stiff peaks.
- Place one cake layer on a platter, spread whipped cream and half of the cherry filling on top, then add the second layer.
- Frost the entire cake with remaining whipped cream, garnish with chocolate shavings and fresh cherries.
- Refrigerate the completed cake for 2-3 hours before serving.
Leave a Reply