
Stepping into the kitchen always feels like embarking on a delicious adventure, and today, I’ve got a treat that’s sure to bring joy to your weeknight meals: Soy Chicken Garlic Ginger. This recipe not only showcases tender chicken bathed in a rich, savory sauce, but also brings the vibrant flavors of garlic and ginger right into your home. Perfect for those busy evenings, it’s both quick to prepare and a true crowd-pleaser. Plus, you can easily customize it with a hint of heat or sweetness to suit your cravings. Are you ready to tantalize your taste buds and impress your family with this easy, Asian-inspired delight? Let’s dive in!
Why is this soy chicken a must-try?
Quick and Easy: This recipe is perfect for busy weeknights, allowing you to whip up a flavorful meal in no time.
Flavor Explosion: The captivating combination of garlic and ginger elevates the dish, creating a mouthwatering experience that won’t disappoint.
Versatile Variations: Personalize it easily! Adjust spice levels or substitute chicken for tofu, making it perfect for everyone at the table.
Crowd-Pleaser: No one can resist the savory goodness of this soy chicken, ensuring leftovers (if any!) are a hit for lunch.
Health-Conscious: With gluten-free options and fresh ingredients, this dish supports a healthier lifestyle without sacrificing taste.
Don’t forget to pair this with some stir-fried vegetables, or check out Sticky Garlic Chicken for another delightful dinner idea!
Soy Chicken Garlic Ginger Ingredients
For the Chicken
• Boneless, Skinless Chicken Thighs – Tender and ideal for absorbing the rich marinade; swap with tofu or tempeh for a vegan option.
For the Marinade
• Low-Sodium Soy Sauce – Infuses umami flavor; opt for low-sodium to control saltiness.
• Rice Vinegar – Adds acidity to balance the dish; white vinegar can be used as a substitute.
• Fresh Ginger (grated) – Brings warmth and spice; fresh ginger maximizes flavor.
• Garlic (minced) – Enhances aroma and depth; always choose fresh for the best taste.
• Brown Sugar – Provides sweetness and aids in caramelization; replace with honey or maple syrup if desired.
• Sesame Oil – Offers a nutty richness essential for authentic taste.
• Red Pepper Flakes (optional) – Introduces heat; adjust based on your spice preference.
• Cornstarch – Thickens the sauce for a luscious texture.
• Chicken Broth – Adds moisture and depth; vegetable broth makes a great vegan alternative.
For Finishing Touches
• Honey or Maple Syrup – Used for added sweetness; maple syrup is a vegan option.
• Vegetable Oil – For frying; a neutral oil is best for this dish.
• Green Onion (for garnish) – Provides freshness and a vibrant color pop.
• Sesame Seeds (optional) – Adds a delightful crunch and enhances presentation.
Step‑by‑Step Instructions for Soy Chicken Garlic Ginger
Step 1: Prepare Marinade
In a mixing bowl, whisk together low-sodium soy sauce, rice vinegar, grated ginger, minced garlic, brown sugar, sesame oil, red pepper flakes, and cornstarch until thoroughly dissolved and well-combined. The mixture should be smooth and fragrant, filled with the savory aromas of ginger and garlic, which will form the delicious base for your Soy Chicken Garlic Ginger.
Step 2: Marinate Chicken
Take the boneless, skinless chicken thighs and place them in a shallow dish. Pour the prepared marinade over the chicken, ensuring each piece is well coated. Cover the dish with plastic wrap and refrigerate for at least 30 minutes, although 2 to 4 hours would deepen the flavor. This step is crucial for enhancing tenderness and infusion of the bold marinade flavors.
Step 3: Combine Sauce Ingredients
Once the chicken has marinated, gather a separate mixing bowl. Whisk together additional soy sauce, chicken broth, honey or maple syrup, rice vinegar, ginger, and garlic until smooth. This mixture serves as the finishing sauce, adding depth and a hint of sweetness that perfectly complements the savory marinated chicken.
Step 4: Prepare Cornstarch Slurry
In a small bowl, mix cornstarch with an equal amount of water, stirring until smooth. This slurry will help thicken the sauce later on, giving it that perfect glossy texture that clings beautifully to the soy chicken. Set it aside for use in a later step to ensure you’re ready for a rich outcome.
Step 5: Heat Oil
In a skillet or wok, heat about two tablespoons of vegetable oil over medium-high heat. Allow the oil to heat until shimmering, which usually takes about 1-2 minutes. This step is vital for achieving a nice sear on the chicken, ensuring it locks in moisture while developing golden-brown edges, making the Soy Chicken Garlic Ginger both visually appealing and flavorsome.
Step 6: Cook Chicken
Add the marinated chicken pieces to the heated skillet in a single layer. Cook for approximately 3-4 minutes on each side, or until the chicken is golden brown and reaches an internal temperature of 165°F (74°C). As the chicken cooks, it should sizzle gently, releasing an enticing aroma—part of what makes this dish so delightful!
Step 7: Remove Chicken
Once cooked through and beautifully browned, transfer the chicken to a plate and set it aside. The chicken will be juicy and fragrant, but remember not to cover it just yet to keep that crispy exterior. This resting step allows the flavors to settle while you prepare the next component of your Soy Chicken Garlic Ginger recipe.
Step 8: Simmer Sauce
In the same skillet, pour in the sauce mixture you prepared earlier, scraping up any browned bits from the bottom—this adds tons of flavor! Allow the sauce to simmer on medium heat for about 2-3 minutes until it becomes aromatic and slightly reduced. This transformation helps meld the flavors together, creating a rich sauce that will envelop the chicken.
Step 9: Thicken Sauce
While whisking, gradually add the prepared cornstarch slurry into the simmering sauce. Continue to cook for a couple of minutes until the sauce thickens to your desired consistency. Watch for the sauce to bubble gently and coat the back of a spoon easily; this indicates it’s ready to beautifully finish off your Soy Chicken Garlic Ginger.
Step 10: Adjust Seasoning
Taste the sauce and adjust as needed, adding more soy sauce for saltiness or a little honey/maple syrup for sweetness. Balancing these flavors enhances the overall dish and ensures that every mouthful of Soy Chicken Garlic Ginger sings with delightful taste. This step is about making the dish just perfect for your palate!
Step 11: Combine Chicken and Sauce
Return the cooked chicken back to the skillet, tossing it gently in the thickened sauce to ensure the pieces are evenly coated. This will allow the chicken to absorb the wonderful flavors of the sauce while reheating just slightly. It’s a step full of rich aromas and colors that signals your delicious meal is almost ready!
Step 12: Garnish and Serve
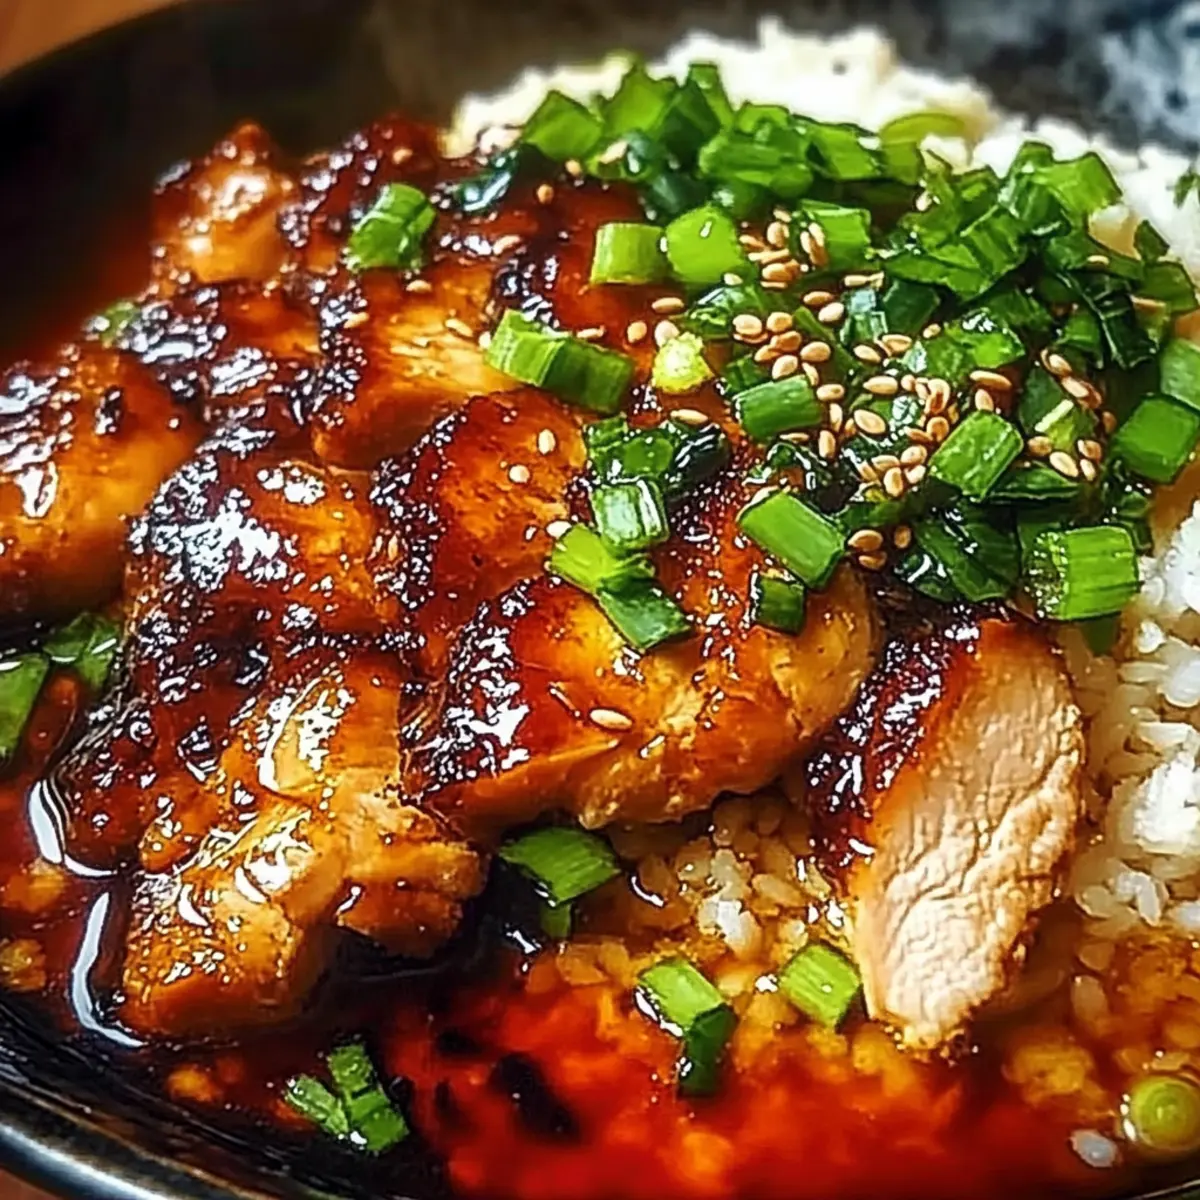
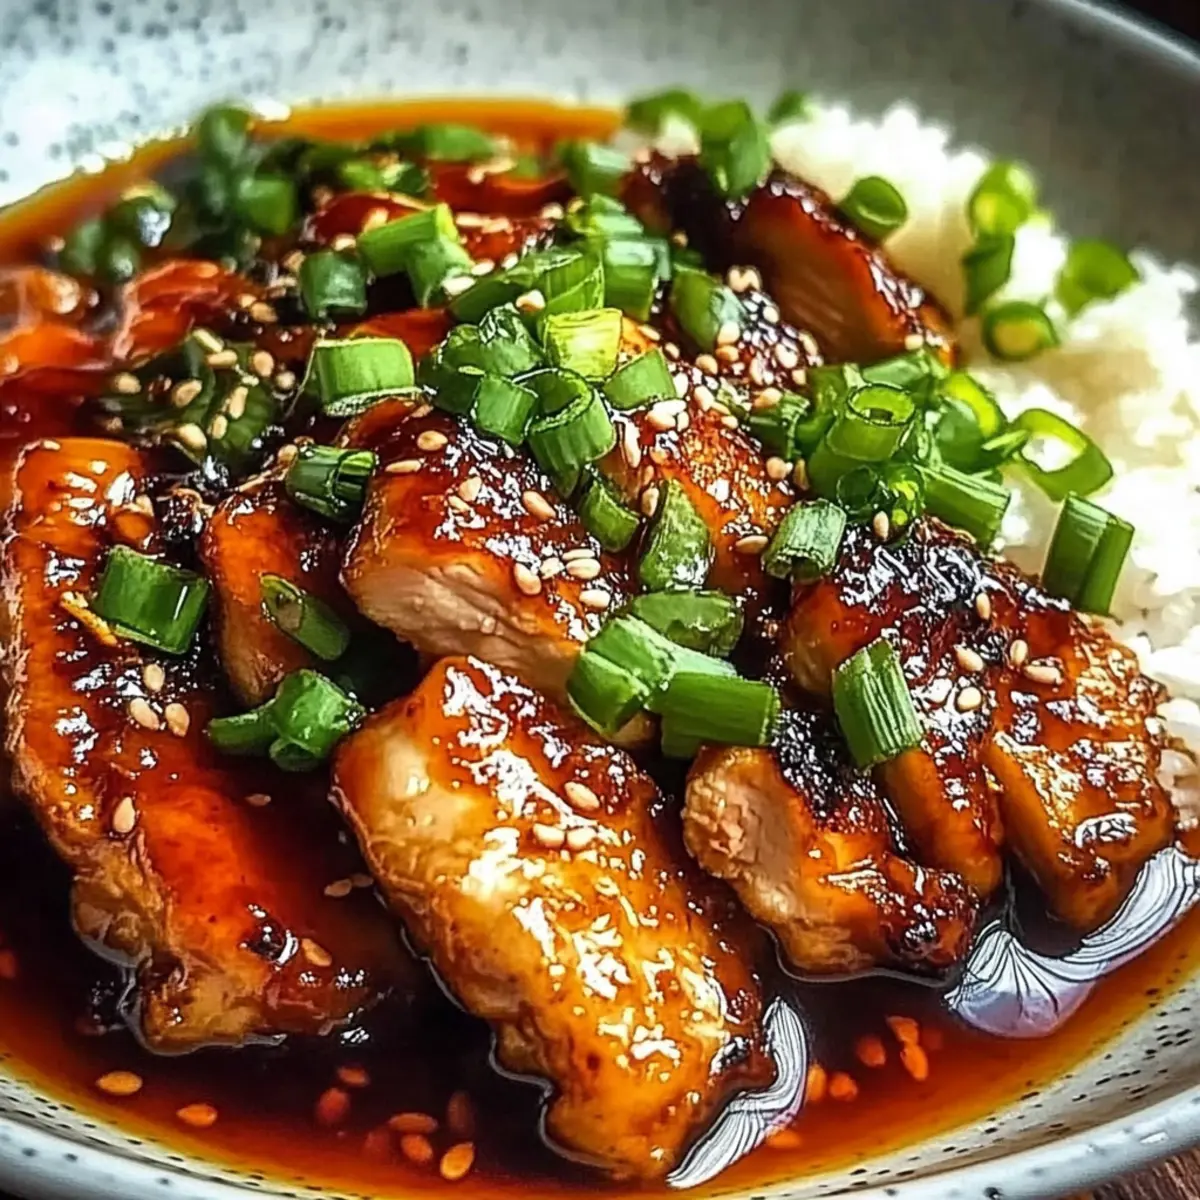
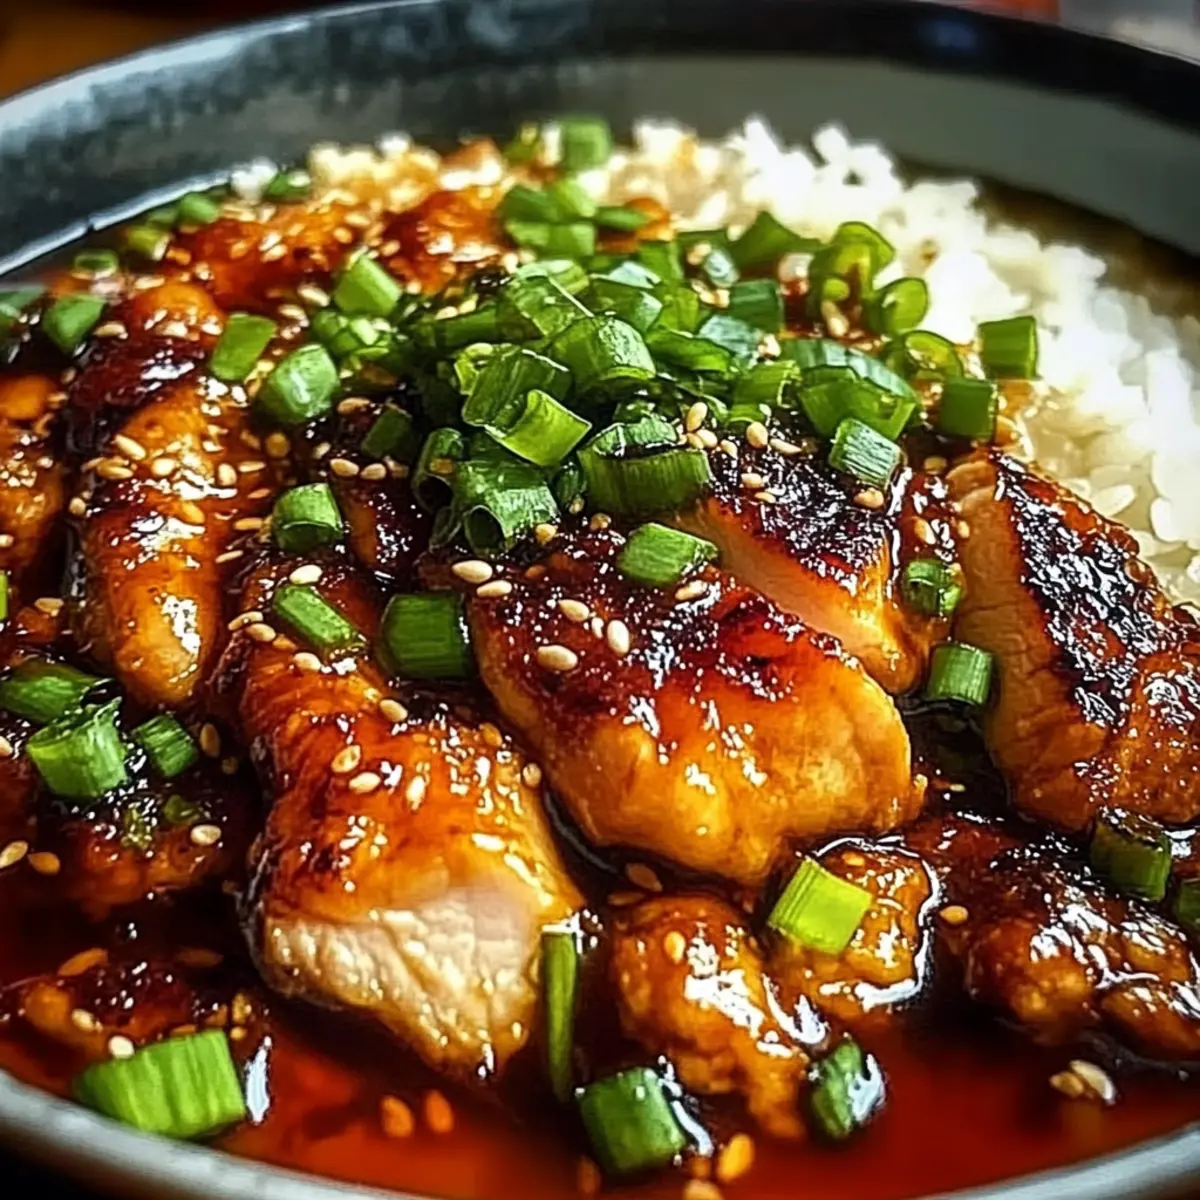
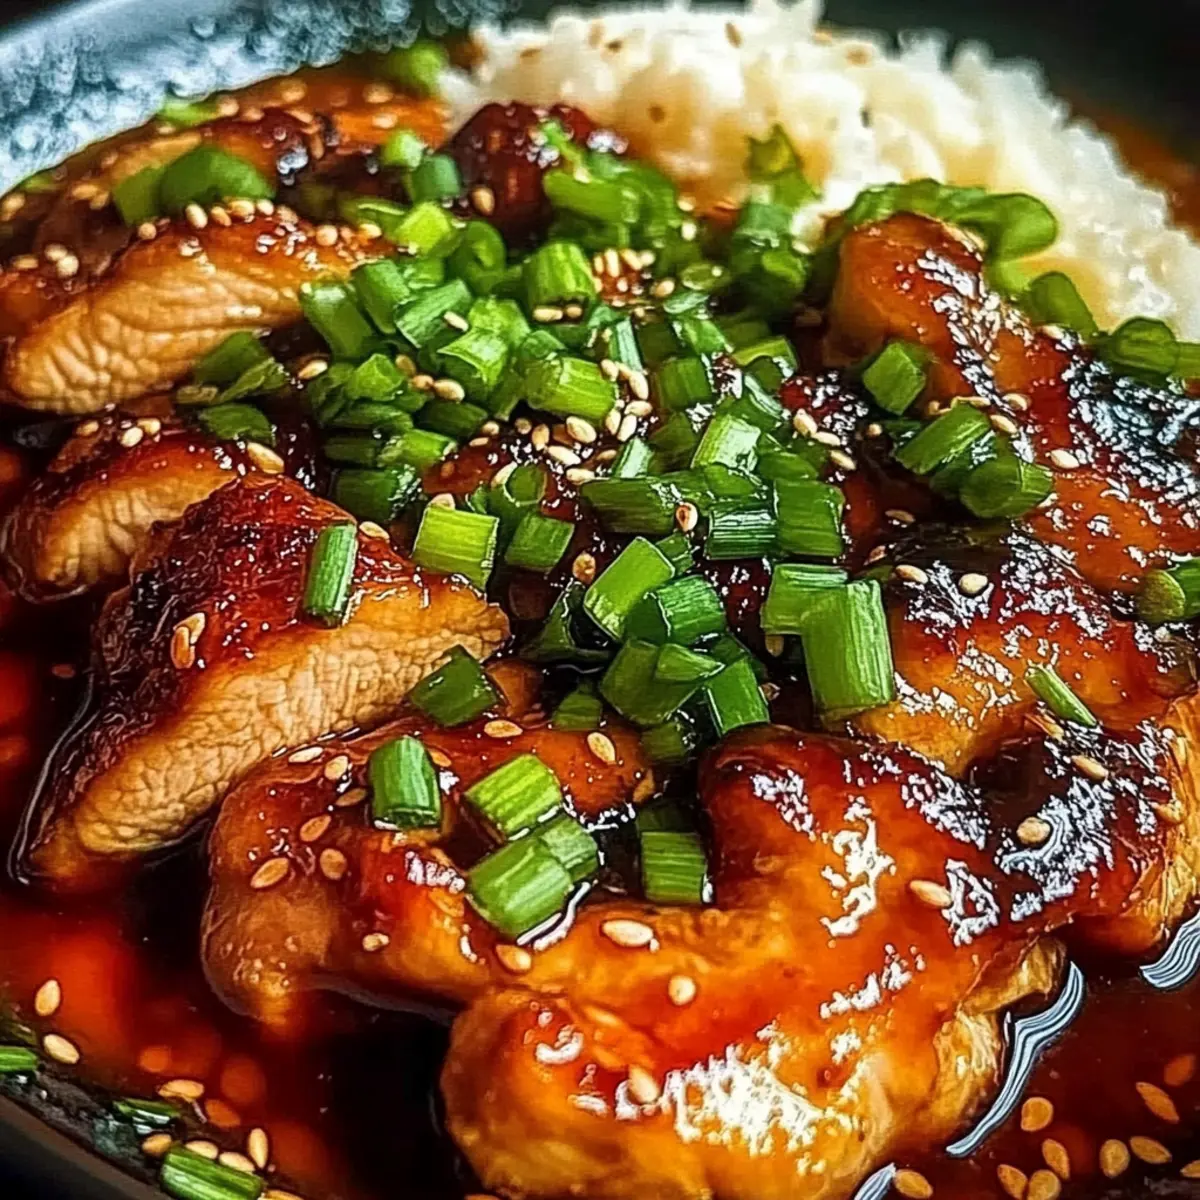
Finally, garnish your Soy Chicken Garlic Ginger with a drizzle of sesame oil, a scattering of chopped green onions, and a sprinkle of sesame seeds if desired. Serve this comforting dish over steamed rice, quinoa, or cauliflower rice for a wholesome meal. It’s visually stunning and bursting with flavor, ready to impress your family!
Storage Tips for Soy Chicken Garlic Ginger
Fridge: Store leftovers in an airtight container for up to 3-4 days. This keeps the chicken moist while retaining the flavors of the sauce.
Freezer: For longer storage, freeze portioned soy chicken in freezer-safe bags for up to 3 months; remove excess air to prevent freezer burn.
Reheating: Reheat frozen chicken in the fridge overnight before warming it in a skillet over medium heat until heated through, ensuring the sauce remains glossy.
Airtight Containers: Always use airtight containers for both fridge and freezer storage to maintain the dish’s delicious taste and texture in your Soy Chicken Garlic Ginger.
Tips for the Best Soy Chicken Garlic Ginger
- Fresh Ingredients Matter: Always use fresh garlic and ginger for the most vibrant flavors. Dried or powdered may not deliver the same punch in your Soy Chicken Garlic Ginger.
- Marinate Longer: For a deeper flavor, marinate the chicken for 2-4 hours or even overnight. This step enhances tenderness and allows the flavors to penetrate fully.
- Avoid Overcrowding: When cooking the chicken, ensure not to overcrowd the pan. This helps achieve a better sear and prevents steaming, ensuring the chicken remains juicy.
- Watch the Heat: Keep an eye on the heat while simmering the sauce. Too high can lead to burning, while too low might not allow for proper thickening.
- Adjust to Taste: Don’t hesitate to taste the sauce before finishing. Add more soy sauce for a saltier kick or honey/maple syrup for additional sweetness in your Soy Chicken Garlic Ginger.
- Keep It Balanced: For extra depth, consider adding vegetables like bell peppers or broccoli to your stir-fry, enhancing nutrition and flavor.
What to Serve with Soy Chicken Garlic Ginger
Stepping away from the stove after preparing your Soy Chicken Garlic Ginger, you might be wondering what delicious sides can complete this hearty dinner experience.
-
Steamed Jasmine Rice: Perfectly fluffy and slightly fragrant, it soaks up the savory sauce beautifully, making each bite a delightful experience.
-
Stir-Fried Vegetables: Add colorful, crisp-cut vegetables like bell peppers and snap peas for a crunchy contrast. Their freshness balances the richness of the soy sauce.
-
Cucumber Salad: A cool, tangy cucumber salad with sesame dressing offers a refreshing palate cleanser to accompany the savory chicken and enhances your meal.
-
Cauliflower Rice: For a low-carb option, serve your chicken over cauliflower rice. It provides a light and healthy base while still capturing the essence of the delicious sauce.
-
Maple-Glazed Carrots: Sweet roasted carrots seasoned with a hint of maple syrup enhance the sweet elements of the dish and add a pop of color to your plate.
-
Miso Soup: A warm bowl of miso soup serves as a comforting starter, its umami flavor pairs wonderfully with the bold garlic and ginger in the main course.
-
Chopped Salad: A blend of mixed greens, cherry tomatoes, and a light sesame vinaigrette brings brightness and freshness, elevating the overall meal experience.
-
Green Tea: For a soothing beverage, a cup of green tea complements the savory flavors while helping with digestion, making your dinner even more satisfying.
Soy Chicken Garlic Ginger Variations
Customize your soy chicken experience with these delightful twists that enhance flavor, texture, and dietary needs!
- Dairy-Free: Substitute brown sugar with maple syrup for a vegan-friendly sweetness without compromising on flavor.
- Spicy Kick: Add sriracha or chili oil to the marinade for an extra punch of heat, perfect for spice lovers!
- Extra Crunch: Toss in some chopped cashews or roasted peanuts just before serving for a delightful crunch and added richness.
- Vegetable Boost: Stir in seasonal veggies like bell peppers, broccoli, or snap peas for color and extra nutrients—a win for healthy eating!
- Sweet & Tangy: Incorporate pineapple chunks into the stir-fry for a refreshing, tropical twist that balances the savory flavors beautifully.
- Thai Inspired: Combine some Thai basil in the final stages of cooking for an aromatic flair that transports you straight to Southeast Asia.
- Gluten-Free: Use tamari sauce instead of soy sauce to make this recipe gluten-free, so everyone can enjoy it!
- Herb-Infused: Infuse the oil with ginger and garlic before cooking the chicken for an enhanced, aromatic flavor that adds depth to every bite.
Feel free to explore these variations for your very own rendition! If you’re curious for more inspiration, check out our Garlic Parmesan Chicken or try the exciting blend of flavors in Chicken Shawarma Garlic for another fantastic dinner option.
Make Ahead Options
These Soy Chicken Garlic Ginger are perfect for meal prep enthusiasts! You can marinate the chicken thighs up to 24 hours in advance, allowing the flavors to meld together beautifully. Simply follow the marinade instructions and refrigerate the coated chicken in an airtight container. Additionally, you can prepare the sauce ingredients ahead of time and store them in the fridge for up to 3 days. This helps save valuable cooking time on busy weeknights, as you’ll be ready to simply heat the oil, cook the chicken, and finish with the sauce when it’s time to serve. Rest assured, your dish will be just as delicious and fragrant as if you made it fresh in one go!
Soy Chicken Garlic Ginger Recipe FAQs
What’s the best way to select ripe ginger and garlic?
Absolutely! For the freshest flavors, choose ginger that’s firm and smooth, without any dark spots or wrinkles. Fresh garlic bulbs should feel heavy and compact, avoiding any that are sprouting or have soft spots. Fresh ingredients greatly enhance the taste of your Soy Chicken Garlic Ginger.
How should I store leftover Soy Chicken Garlic Ginger?
Store any leftovers in an airtight container in the refrigerator for up to 3-4 days. Make sure it’s cooled down to room temperature before sealing it to maintain moisture. For the best results, I often reheat it in a skillet over medium heat for a few minutes to regain its glory!
Can I freeze Soy Chicken Garlic Ginger? If so, how?
Definitely! To freeze, portion the Soy Chicken Garlic Ginger into freezer-safe bags, squeezing out excess air to avoid freezer burn. It can be stored for up to 3 months. For reheating, let it thaw in the fridge overnight, then reheat into a skillet on medium heat, adding a splash of water to keep it moist.
What if my sauce turns out too thick when cooking?
No worries! If your sauce thickens more than you’d like, simply add a little chicken or vegetable broth gradually, stirring until the desired consistency is achieved. This way, you won’t lose the delicious flavor of your Soy Chicken Garlic Ginger while adjusting the texture!
Are there any dietary considerations for my family or pets?
It’s important to ensure no one has allergies to soy or gluten, especially when using soy sauce. For children or pets, I suggest using a smaller amount of sauce or switching to a gluten-free soy sauce. This can help accommodate various dietary needs without compromising the dish’s flavor.
How can I make this dish vegan-friendly?
To make a delicious vegan version of Soy Chicken Garlic Ginger, simply substitute the chicken with tofu or tempeh. Marinate as you would the chicken, and follow the same cooking instructions. It’s just as flavorful and satisfying—perfect for everyone at the table!
Savory Soy Chicken Garlic Ginger for Busy Weeknight Dinners
Ingredients
Equipment
Method
- In a mixing bowl, whisk together low-sodium soy sauce, rice vinegar, grated ginger, minced garlic, brown sugar, sesame oil, red pepper flakes, and cornstarch until thoroughly dissolved and well-combined.
- Take the boneless, skinless chicken thighs and place them in a shallow dish. Pour the prepared marinade over the chicken, ensuring each piece is well coated. Cover the dish with plastic wrap and refrigerate for at least 30 minutes.
- In a separate mixing bowl, whisk together additional soy sauce, chicken broth, honey or maple syrup, rice vinegar, ginger, and garlic until smooth.
- In a small bowl, mix cornstarch with an equal amount of water, stirring until smooth.
- In a skillet or wok, heat about two tablespoons of vegetable oil over medium-high heat.
- Add the marinated chicken pieces to the heated skillet in a single layer. Cook for approximately 3-4 minutes on each side.
- Once cooked through and beautifully browned, transfer the chicken to a plate and set it aside.
- In the same skillet, pour in the sauce mixture and allow it to simmer on medium heat for about 2-3 minutes.
- While whisking, gradually add the prepared cornstarch slurry into the simmering sauce.
- Taste the sauce and adjust as needed, adding more soy sauce for saltiness or a little honey/maple syrup for sweetness.
- Return the cooked chicken back to the skillet, tossing it gently in the thickened sauce.
- Garnish your Soy Chicken Garlic Ginger with a drizzle of sesame oil, green onions, and sesame seeds. Serve over steamed rice, quinoa, or cauliflower rice.
Leave a Reply