
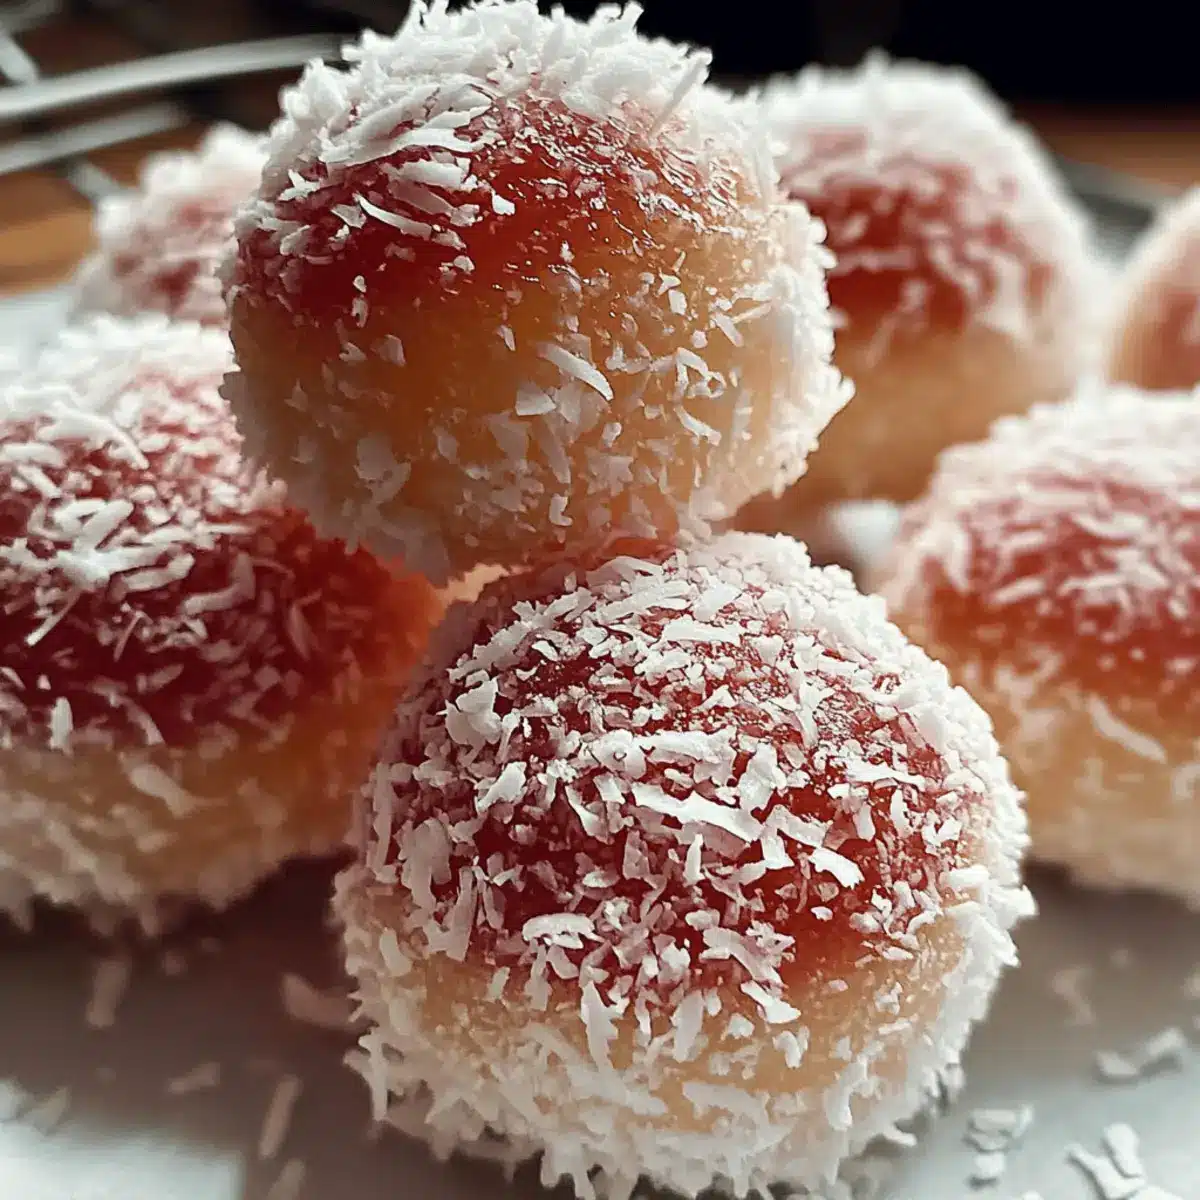
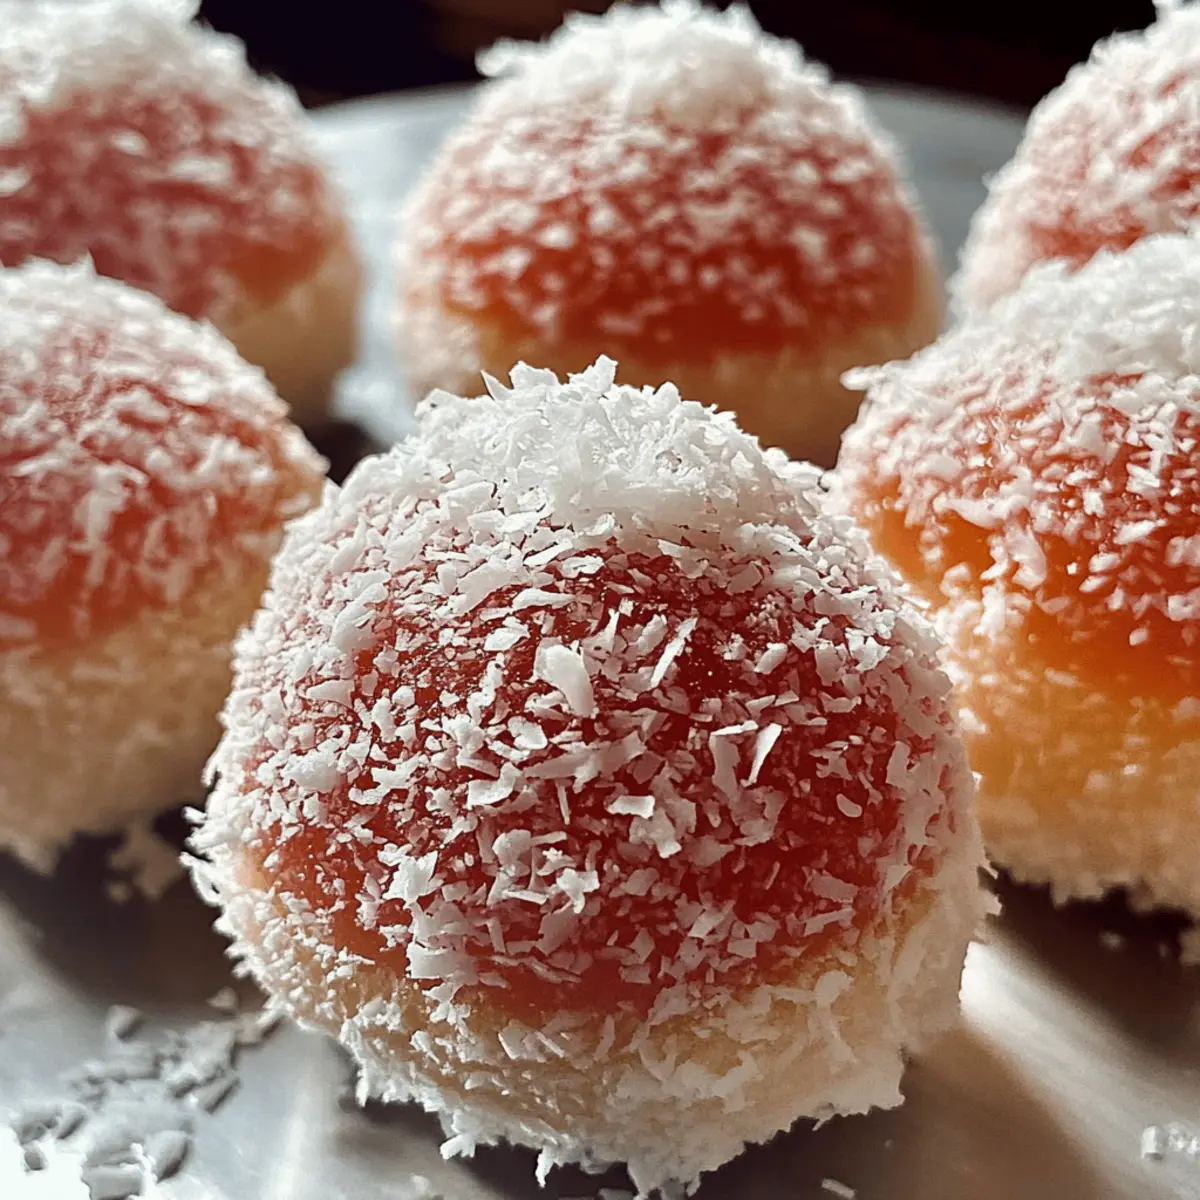
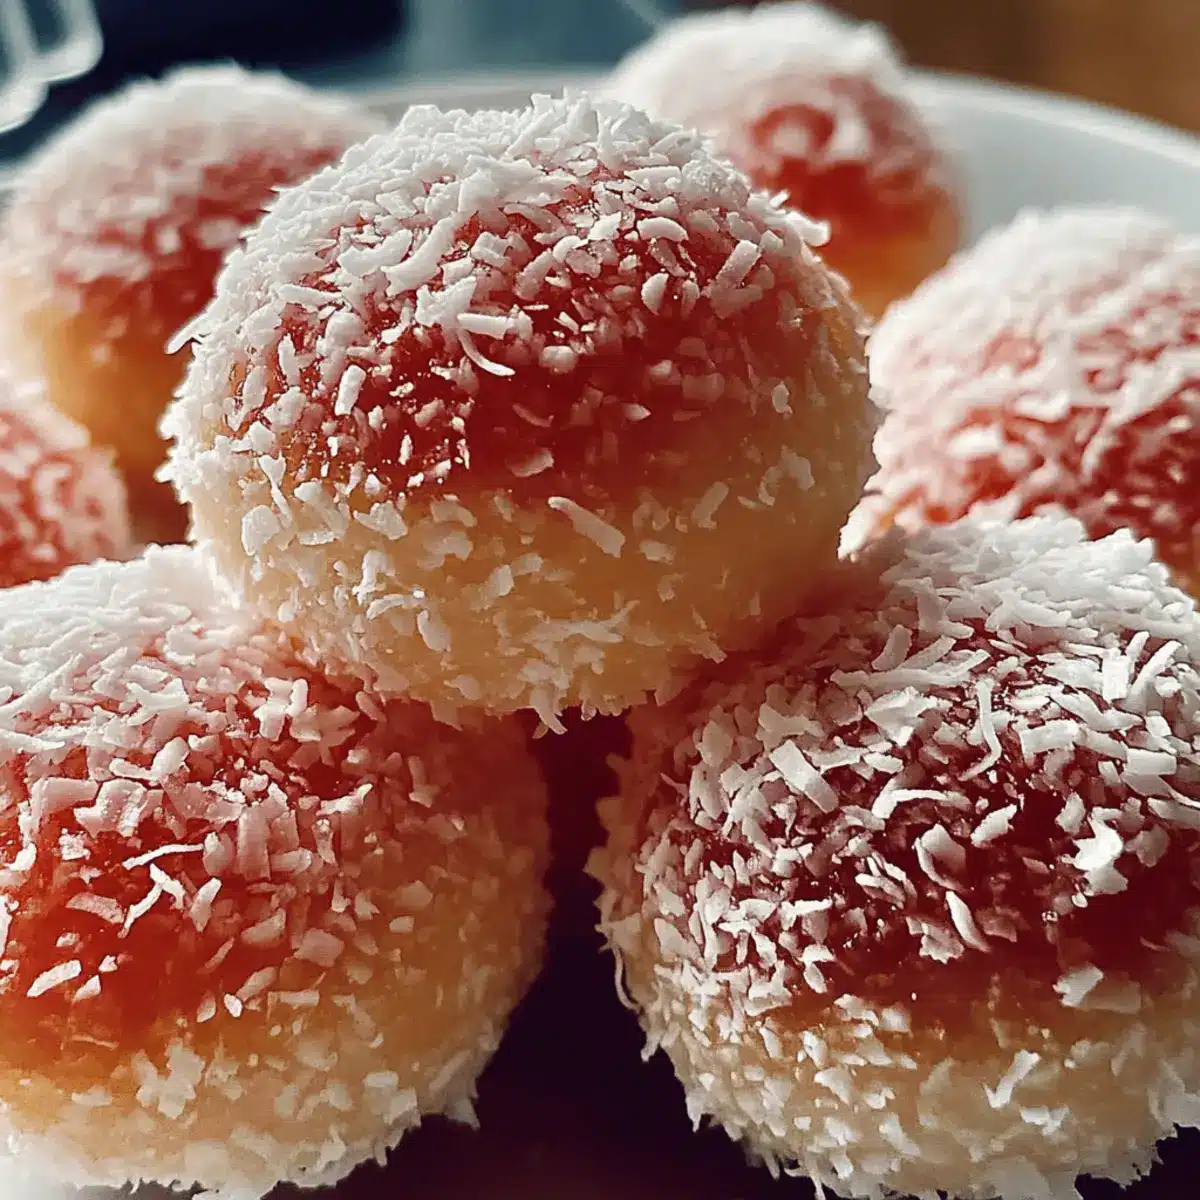
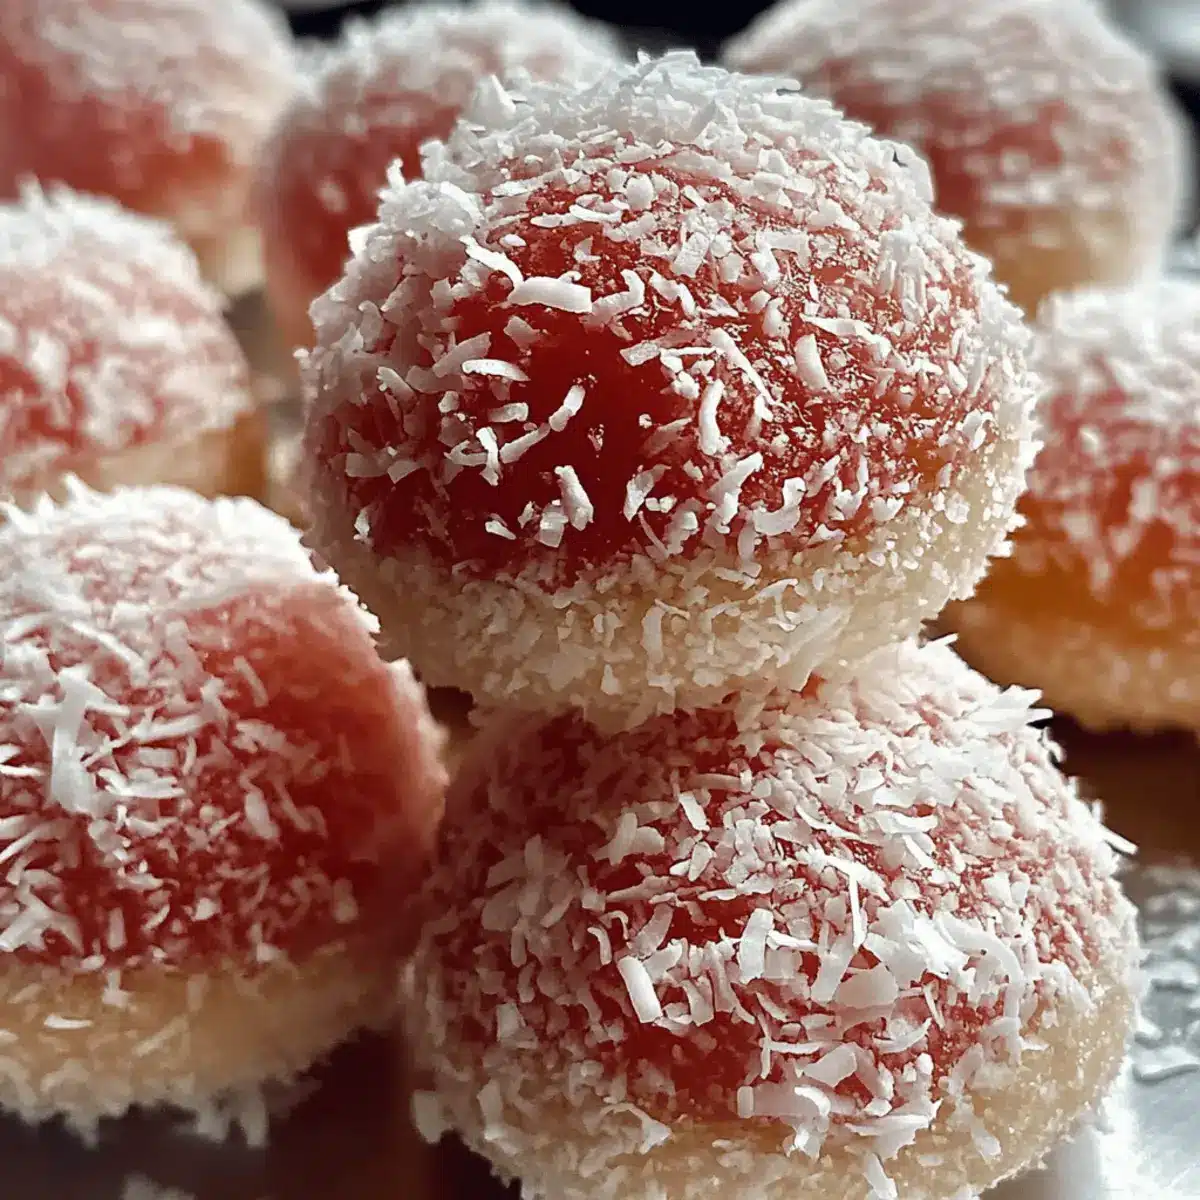
There’s something magical about the sight of fluffy coconut-covered treats resting on a plate, isn’t there? These Easy Snowballs evoke the sweet nostalgia of childhood, conjuring memories of festive gatherings and cozy afternoons with family. Not only are they a breeze to whip up—perfect for both seasoned bakers and those just starting their culinary journey—but they also offer a customizable experience that allows everyone to tailor their treats to their taste. Whether you prefer a classic vanilla flavor or want to experiment with almond extract or zesty lemon, the possibilities are endless. So, gather your ingredients, and let’s dive into making these delectable Snowballs that are sure to charm anyone lucky enough to take a bite! Ready for a delightful adventure in your kitchen?
Why are Snowballs a Must-Try?
Simplicity: These Easy Snowballs require minimal ingredients and time, making them a perfect choice for anyone craving a homemade treat without the hassle.
Customizable: Tailor them to your taste! Swap vanilla for lemon zest or almond extract, or experiment with colorful syrups for festive occasions.
Nostalgic Flavor: They evoke sweet memories and cozy moments, making every bite a delightful trip down memory lane.
Versatile Delight: Enjoy these snowballs as a dessert, snack, or party treat—everyone will adore them!
Quick Prep: Whip up a batch in under an hour, a fantastic option for last-minute gatherings or simple indulgences.
These treats truly shine during holiday celebrations and special occasions, so don’t hesitate to explore more variations to impress your family and friends!
Snowballs Ingredients
• Unleash your inner baker with this easy snowballs recipe!
For the Cake
- 4 large eggs – Provide structure and moisture; using room temperature eggs helps them mix better.
- 1½ cups sugar – Sweetens the cake and contributes to its moist texture.
- 1 tablespoon vanilla essence – Adds depth of flavor; consider almond extract for a delightful twist.
- 1 cup oil – Keeps the cake tender; melted butter is a rich alternative but may yield a denser result.
- 2½ cups cake flour – Forms the cake base; substitute with gluten-free flour blend for dietary needs.
- 3 teaspoons baking powder – Essential leavening agent for that light and airy texture.
- ½ teaspoon salt – Enhances the overall flavor profile of the cake.
- 1 cup milk – Adds moisture; non-dairy milk works wonderfully as a substitute.
For the Syrup
- 1½ cups sugar – Sweetens the little cake bites and creates that delightful syrupy coating.
- 1½ cups water – Essential for dissolving the sugar and making the syrup.
- 2 teaspoons red food coloring – For a vibrant look; try beetroot powder for a natural hue.
- 2-3 cups desiccated coconut – Provides the signature coating that gives texture and flavor; toasting it enhances nuttiness.
For the Icing
- 1 cup icing sugar (sifted) – Necessary for sticking the cake pieces together beautifully.
- 1-2 tablespoons hot water – Adjust to achieve the perfect icing consistency.
Embrace the joy of baking these customizable snowballs that everyone will adore!
Step‑by‑Step Instructions for Easy Snowballs
Step 1: Preheat and Prep
Begin by preheating your oven to 180°C (350°F). While it heats up, grease a baking pan with a bit of oil or butter to ensure your Easy Snowballs won’t stick. You want a smooth, prepared surface, so take your time with this. Set the pan aside and grab a large mixing bowl for the batter.
Step 2: Beat the Eggs and Sugar
In your mixing bowl, crack in 4 large eggs and add 1½ cups of sugar. Use a whisk or an electric mixer to beat this mixture until it’s light and fluffy, which should take about 3-4 minutes. You’re aiming for a pale, airy texture that signals the eggs are well incorporated, which helps your Snowballs rise beautifully in the oven.
Step 3: Add Flavor and Oil
Once the egg-sugar mixture is fluffy, mix in 1 tablespoon of vanilla essence and 1 cup of oil. Stir gently until combined. The vanilla will add a wonderful aroma, while the oil keeps the cake moist. It should look glossy and smooth. This will be the base for your Easy Snowballs, so make sure it’s well blended.
Step 4: Combine Dry Ingredients
In a separate bowl, sift together 2½ cups of cake flour, 3 teaspoons of baking powder, and ½ teaspoon of salt. This step helps to aerate the flour and ensure a light cake texture. Gradually sprinkle this dry mixture into your wet ingredients, alternating with 1 cup of milk, and gently mix until just combined. Avoid overmixing, as you want your Snowballs to remain tender and soft.
Step 5: Bake the Cake
Pour the batter into the prepared baking pan, spreading it evenly. Pop it into your preheated oven and bake for 25-30 minutes, or until a toothpick inserted into the center comes out clean. Keep an eye on it to prevent overbaking—a slight golden edge is a good visual cue that it’s ready.
Step 6: Prepare the Syrup
While the cake bakes, prepare the syrup by combining 1½ cups of sugar with 1½ cups of water in a saucepan. Bring it to a boil and stir in 2 teaspoons of red food coloring. Reduce the heat and let it simmer for about 5-7 minutes until slightly thickened. The syrup should coat the back of a spoon, adding a luscious sweetness to your Easy Snowballs.
Step 7: Cut and Dip the Cake
Once your cake has cooled completely, cut it into squares or balls, depending on your preference. Take each piece and dip it in the warm syrup, ensuring it’s fully coated. The syrup will create a delightful sticky layer that helps the coconut adhere.
Step 8: Coat with Coconut
After dipping in syrup, roll each piece in 2-3 cups of desiccated coconut until pleasantly coated. If you desire a toasted coconut flavor, consider toasting the coconut beforehand. Lay the coated Snowballs on a plate to set and absorb that wonderful syrupy sweetness, which should elevate the flavors beautifully.
Step 9: Join Your Snowballs
For a fun twist, join the pieces using an icing made from 1 cup of sifted icing sugar mixed with 1-2 tablespoons of hot water. This creates a delightful adhesion between cake pieces. You can layer them in any cute configurations— a creative way to serve your Easy Snowballs while enhancing their presentation!
Step 10: Serving Suggestions
Now, display your delightful Easy Snowballs on a serving platter! They can be enjoyed right away or stored at room temperature for up to two days. Pair them with a warm cup of tea or coffee to create a delightful treat that everyone will love.
Snowballs Variations & Substitutions
Feel free to let your creativity shine and customize your Snowballs with these fun and delicious ideas!
- Coconut-Free: Replace desiccated coconut with crushed nuts for a delightful crunch instead of chewiness.
- Gluten-Free: Use a gluten-free flour blend to make this dessert accessible for everyone at your table. It’s a simple swap that doesn’t compromise on taste.
- Vegan Version: Substitute eggs with 1 cup of unsweetened applesauce and use plant-based milk—delicious without animal products!
- Flavor Zing: Swap traditional vanilla essence for almond extract or orange zest for an unexpected flavor twist that brightens the taste.
- Fruity Burst: Use a sweet fruit syrup instead of simple syrup for a fresh and fruity take. Raspberry or strawberry flavor adds a burst of color and taste!
- Colorful Treats: Get festive by using colored syrups—green for Christmas or pastel shades for spring-themed gatherings. Kids (and adults) will love the vibrant presentation.
- Spicy Kick: Incorporate a pinch of cinnamon or nutmeg into the cake batter for a warm, spiced flavor that pairs beautifully with the coconut.
- Crunchy Coating: Mix toasted coconut with crushed graham crackers for a unique texture and flavor, giving your Snowballs a delightful crunch.
These variations not only allow you to cater to different dietary needs but also enhance the reminiscence of childhood bites. Whether you’re serving these at a family gathering or enjoying a cozy night in, each twist makes them a little more special. Don’t forget to check out some of my other favorites, like Almond Joy Cupcakes and Classic Coconut Macaroons, which are also sure to be crowd-pleasers!
How to Store and Freeze Snowballs
Room Temperature: Store Snowballs in an airtight container for up to 2 days at room temperature to keep them fresh and soft. Make sure they are completely cooled before sealing.
Fridge: If you need to keep your Snowballs longer, place them in the refrigerator where they can last up to a week, still stored in an airtight container to prevent drying out.
Freezer: For long-term storage, freeze uncoated cake balls for up to 3 months. Thaw them in the fridge overnight before coating and serving, preserving their moist texture.
Reheating: If desired, gently warm them in the microwave for a few seconds to bring back softness and flavor before serving.
Make Ahead Options
These Easy Snowballs are perfect for busy cooks looking to save time while preparing delightful treats! You can make the cake base up to 24 hours in advance; simply bake and allow it to cool completely. Once cooled, cut it into squares or balls and store them in an airtight container at room temperature to maintain moisture. The syrup can also be prepared a day ahead; let it cool and then refrigerate. When you’re ready to serve, warm the syrup slightly and dip the cake pieces, then roll them in coconut. This way, you’ll enjoy fresh, delicious Snowballs with minimal effort on the day of serving!
What to Serve with Easy Snowballs
There’s nothing quite like a sweet, fluffy treat to elevate any gathering, and these coconut delights are ready to shine
-
Creamy Vanilla Ice Cream: A scoop of velvety ice cream perfectly complements the chewy Snowballs, adding a delightful creaminess to each bite.
-
Fresh Fruit Salad: Bright, juicy fruits provide a refreshing contrast to the rich sweetness of the Snowballs, creating a balanced dessert experience.
-
Chocolate Dipping Sauce: Drizzling warm chocolate over the Snowballs adds an indulgent twist, turning them into a deliciously decadent treat.
-
Coffee or Tea: Serve with a warm cup of your favorite brew; the bitterness of coffee or tea balances the sweetness, enhancing the flavors.
-
Coconut Whipped Cream: Add a dollop of whipped coconut cream for an extra layer of tropical flavor that harmonizes with the coconut-coated treats.
-
Toasted Nuts: Sprinkle some toasted almonds or pecans for a crunchy texture that contrasts beautifully with the soft Snowballs.
-
Sparkling Lemonade: A refreshing citrus drink cuts through the sweetness, providing a fizzy and vibrant complement to your dessert.
-
Holiday Punch: A festive punch can enhance gatherings, making every bite of Snowballs taste even more delightful.
-
Mint Chocolate Chip Cookies: Pair these snowballs with soft cookies for a delightful dessert platter that guests will adore.
Tips for the Best Snowballs
-
Eggs Matter: Make sure your eggs are at room temperature; this helps achieve a fluffier batter and better rise.
-
Sifting is Key: Always sift your dry ingredients before mixing. This aerates the flour, ensuring the Snowballs are light and tender.
-
Syrup Temperature: Keep the syrup warm while you work. A warm syrup allows for better adhesion of the coconut coating.
-
Coconut Coating: Use one hand for dipping in syrup and the other for rolling in coconut to avoid a sticky situation.
-
Storage Secrets: Store your snowballs in an airtight container to maintain freshness, and enjoy them within two days for the best texture!
These tips will help you master the art of making delightful Snowballs that everyone will rave about!
Snowballs Recipe FAQs
How do I choose the right eggs for the recipe?
Absolutely! When selecting eggs, look for ones that are fresh and ideally at room temperature. You can check for freshness by placing the egg in a bowl of water; fresh eggs will sink, while older ones float.
What is the best way to store Snowballs?
For room temperature storage, place your Snowballs in an airtight container for up to 2 days to keep them soft and fresh. If you plan to keep them longer, refrigerate for up to a week in the same manner. Ensure they are completely cooled before sealing to avoid excess moisture.
Can I freeze the Snowballs?
Yes! You can freeze uncoated cake balls for up to 3 months. To do this, first, let them cool completely, then arrange them in a single layer on a baking sheet before freezing them. Once they’re frozen, transfer them to a freezer-safe container. When ready to enjoy, simply thaw in the refrigerator overnight, coat with syrup and coconut as fresh!
What should I do if my cake doesn’t rise properly?
Very! If your Easy Snowballs come out flat, there are a couple of common culprits. First, ensure you’re using fresh baking powder; old leavening agents can lose their potency. Be certain that the egg-sugar mixture is well-aerated before adding the dry components. Also, avoid opening the oven door too soon to maintain a consistent baking temperature.
Are there any dietary considerations for Snowballs?
Certainly! This Snowballs recipe is vegetarian-friendly. However, if allergies are a concern, keep in mind that it contains eggs and can be made gluten-free using a suitable flour blend. For those avoiding dairy, non-dairy milk is a perfect substitute. Always double-check your ingredients to accommodate any dietary restrictions your guests might have.
Snowballs: Irresistibly Soft Coconut Treats You’ll Love
Ingredients
Equipment
Method
- Preheat your oven to 180°C (350°F) and grease a baking pan.
- Beat together the eggs and sugar until light and fluffy, about 3-4 minutes.
- Add vanilla essence and oil, stirring until smooth.
- Sift flour, baking powder, and salt into a separate bowl. Gradually mix with wet ingredients, alternating with milk.
- Pour the batter into the prepared pan and bake for 25-30 minutes until a toothpick comes out clean.
- Prepare syrup by boiling sugar and water, then add red food coloring and simmer until thickened.
- Cut cooled cake into squares or balls, and dip in warm syrup.
- Roll coated pieces in desiccated coconut and place on a plate.
- Join cake pieces with icing sugar mixture if desired for presentation.
- Serve immediately or store at room temperature for up to 2 days.
Leave a Reply