
As I whipped up these Shamrock Shake Pudding Cups, a wave of nostalgia washed over me—reminding me of bright St. Patrick’s Day celebrations where every bite feels like a festive cheer. This easy, no-fuss dessert combines creamy chocolate and refreshing mint flavors, layered beautifully to create a stunning visual treat that’s sure to wow your guests. Perfect for both kids and adults alike, these pudding cups are quick to prepare and can even be made a day in advance, giving you more time to enjoy the festivities. Trust me, the delightful combination of textures and colors will have everyone reaching for seconds! Are you ready to delight your taste buds with this inventive twist on a seasonal favorite?
Why Are These Pudding Cups A Must?
Easy as Pie: Whip up these Shamrock Shake Pudding Cups in no time—perfect for busy schedules or last-minute gatherings.
Flavorful Duo: The marriage of creamy chocolate and refreshing mint delivers a taste that’s simply irresistible.
Festive Presentation: Layered in clear cups, they become an eye-catching centerpiece at any St. Patrick’s Day celebration.
Make Ahead: Prep them a day before to save time and maintain a stress-free holiday spirit. Want another quick treat? Check out these Cinnamon Oatmeal Cups for a cozy dessert option!
Family-Friendly: This dessert is a hit with both kids and adults, making it a versatile choice for any festive occasion. Enjoy with your loved ones and create sweet memories!
Ingredients for Shamrock Shake Pudding Cups
• For the Puddings
- Chocolate Pudding – Provides a rich, creamy base; feel free to substitute with instant vanilla pudding for a different flavor.
- Mint Pudding – Adds a refreshing mint flavor essential for the Shamrock theme; can replace with a few drops of mint extract mixed into vanilla pudding.
• For the Topping
- Whipped Cream – For topping, contributing a light texture and sweetness; use store-bought or homemade; coconut whipped cream is a great dairy-free alternative.
- Chocolate Shavings or Mint Candies – Adds an extra crunch and festive appearance; optional sprinkles can be used for a fun variety.
Step‑by‑Step Instructions for Shamrock Shake Pudding Cups
Step 1: Prepare Puddings
In separate bowls, whisk together the chocolate pudding mix with the appropriate amount of milk as indicated on the package. Do the same with the mint pudding mix. Stir well for about two minutes until both mixtures are smooth and creamy, then set them aside for about five minutes to allow them to thicken perfectly.
Step 2: Layer Puddings
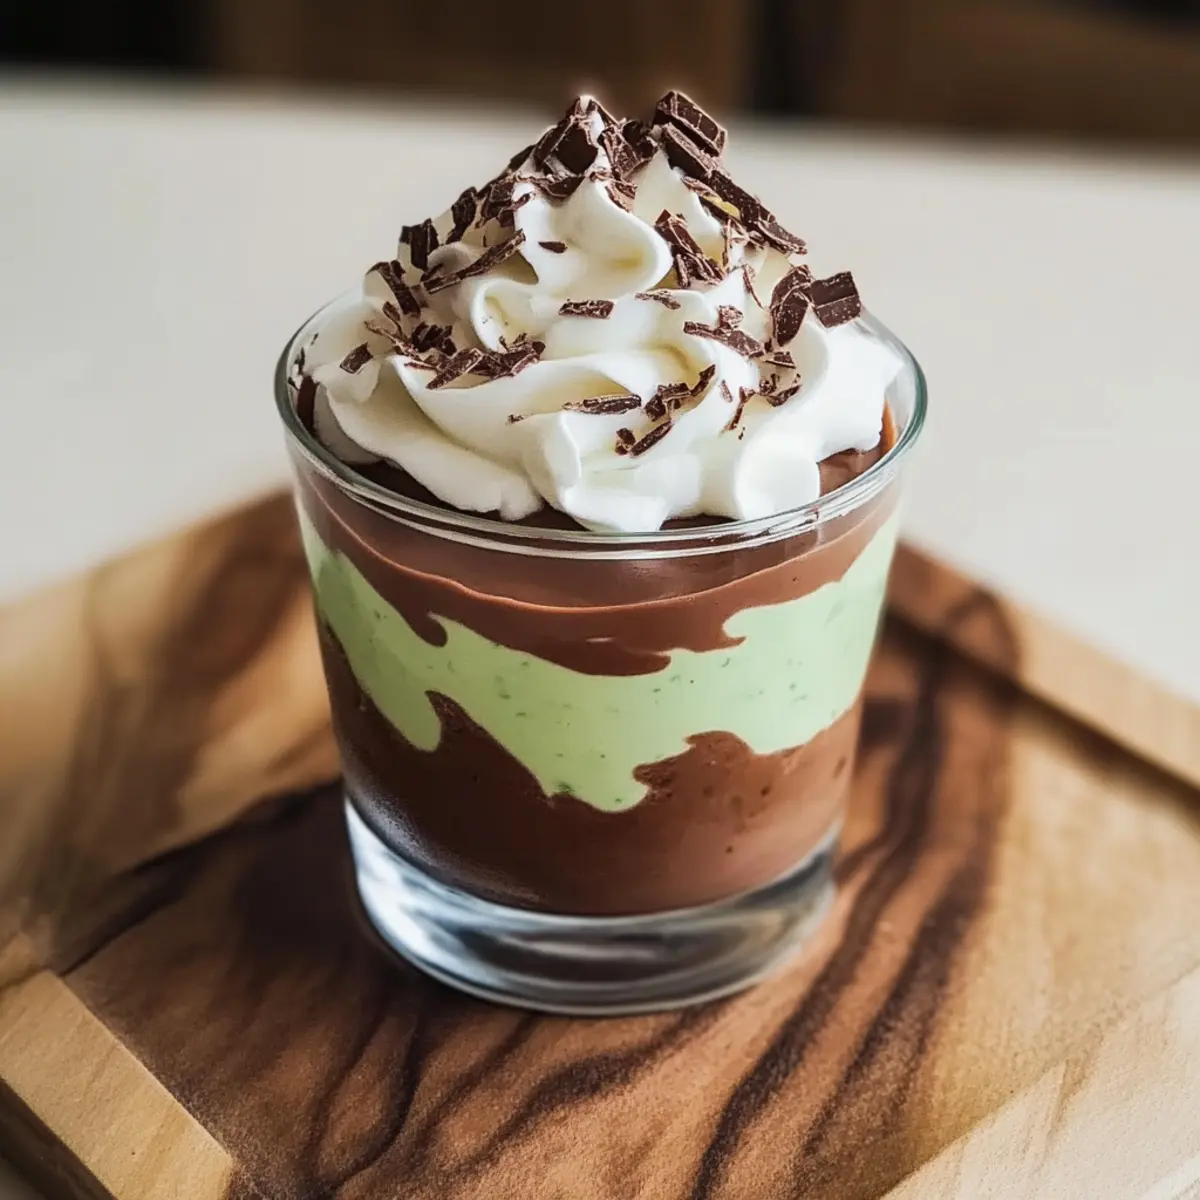
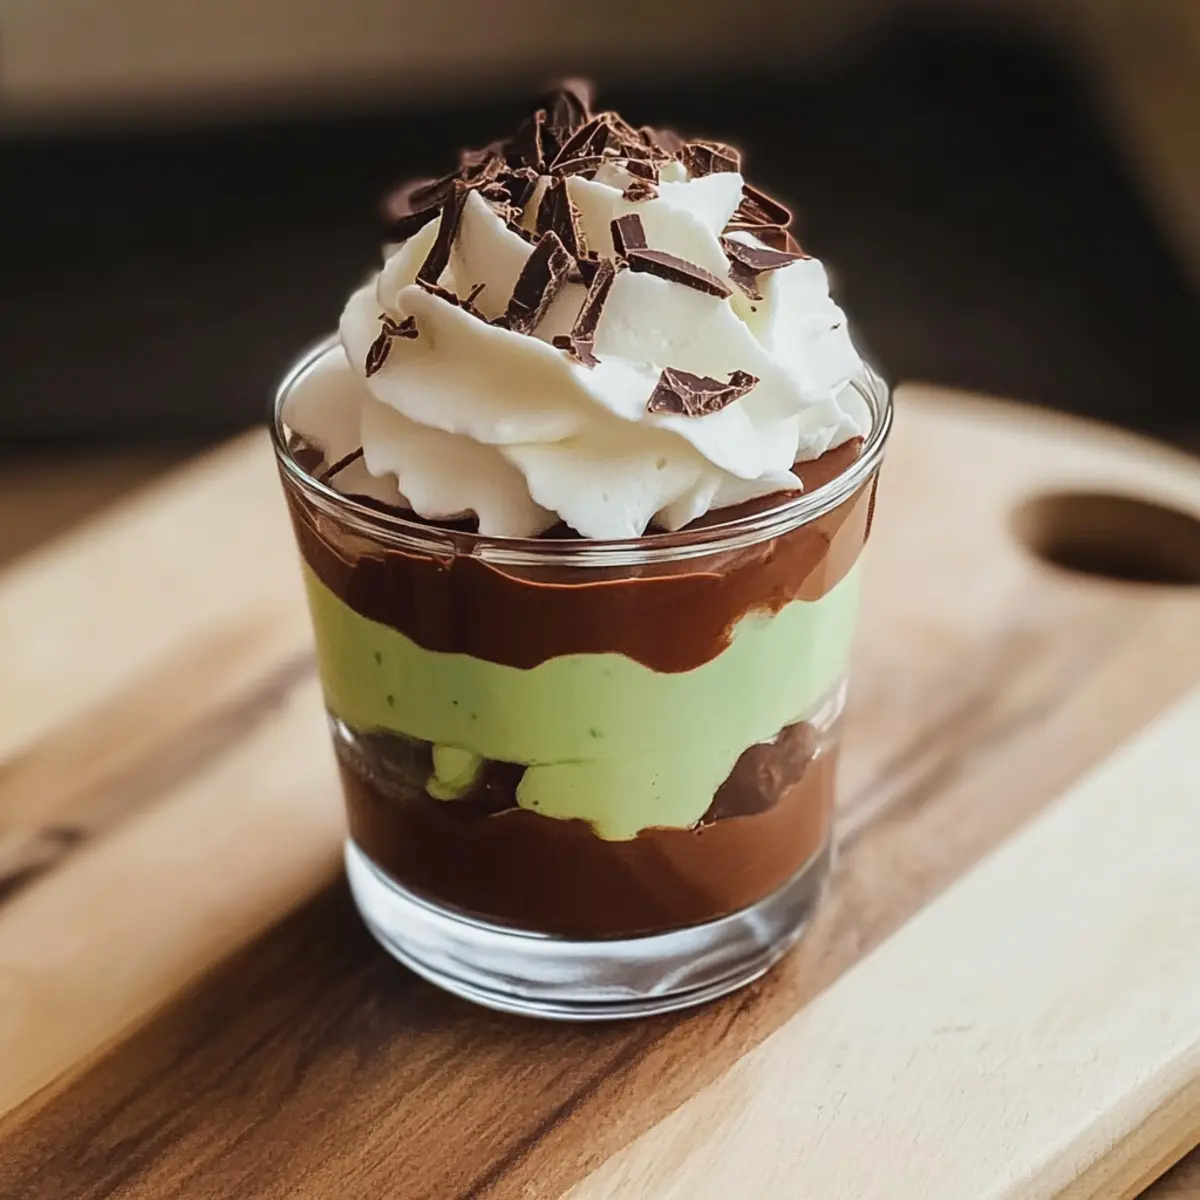
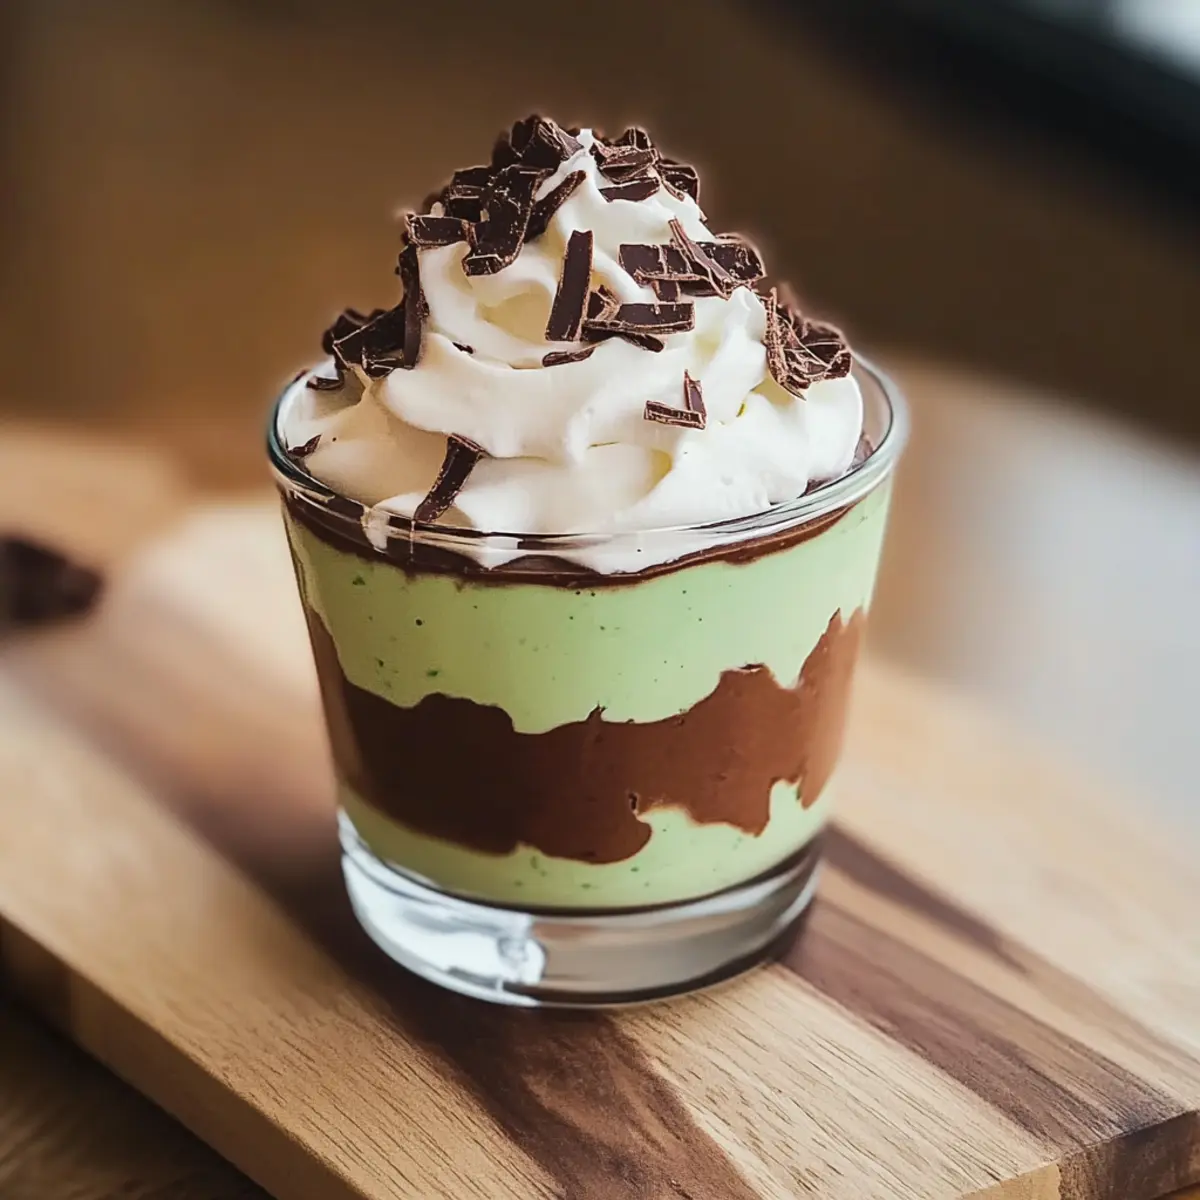
Grab clear cups or dessert glasses for a festive display. Start by spooning a layer of chocolate pudding into the bottom of each cup, filling it about one-third full. Gently tap the cups on the counter to level the pudding, ensuring a smooth base. Follow this with a layer of mint pudding, filling it to about two-thirds full.
Step 3: Repeat Layering
Continue the layering process by adding another layer of chocolate pudding on top of the mint layer, completing the cup to about three-quarters full. Ensure even distribution by tapping the cups again gently. Finish off the layering with a final mint pudding layer, creating a beautiful contrast of colors that embodies the essence of Shamrock Shake Pudding Cups.
Step 4: Chill
Once all the cups are filled with pudding layers, cover them securely with plastic wrap. Place the covered cups in the refrigerator and chill for at least 30 minutes. This allows the flavors to meld beautifully and the puddings to set to the perfect creamy consistency, making every bite of your Shamrock Shake Pudding Cups delightful.
Step 5: Serve and Garnish
Before serving, remove the cups from the refrigerator and uncover them. Top each cup generously with a dollop of whipped cream for that light texture. For added flair, sprinkle chocolate shavings or mint candies on top. This final touch adds both flavor and an eye-catching festive appearance, making your Shamrock Shake Pudding Cups truly irresistible.
How to Store and Freeze Shamrock Shake Pudding Cups
- Fridge: Keep the pudding cups covered with plastic wrap in the refrigerator for up to 3 days. This helps maintain their creamy texture and freshness.
- Freezer: Ideally, do not freeze the pudding cups, as the texture may change after thawing. They’re best enjoyed fresh!
- Make Ahead: Prepare your Shamrock Shake Pudding Cups a day in advance; simply chill them in the fridge to enhance their flavor and allow for easy serving.
- Reheating: These pudding cups are served cold, so there’s no need for reheating—just grab a spoon and dig in!
What to Serve with Easy Shamrock Shake Pudding Cups
Create a festive St. Patrick’s Day feast with these delightful accompaniments that will make your dessert shine even brighter.
-
Fresh Fruit Salad: A vibrant mix of seasonal fruits adds a refreshing contrast to the creamy pudding cups, balancing sweetness with natural tartness.
-
Chocolate Mint Cookies: These chewy treats echo the minty notes of the pudding, offering a delightful crunch and enhancing the dessert experience with every bite.
-
Creamy Vanilla Ice Cream: This classic pairing provides a cool, velvety element that pairs beautifully with the rich chocolate and mint flavors of your pudding cups.
-
Irish Coffee: Elevate your dessert table with a warm cup of Irish coffee, enhancing the festive spirit while the rich coffee complements the chocolate pudding perfectly.
-
Festive Green Cupcakes: Add a whimsical touch with these colorful cupcakes. Their light, fluffy texture offers a delightful contrast to the creamy pudding and makes for a charming presentation.
-
Minted Lemonade: A refreshing, citrus drink that cuts through the richness of the pudding while echoing the mint flavor, creating a bright and zesty finish to your meal.
-
Chocolate-Covered Strawberries: These elegant bites offer a sweet surprise and a touch of romance, balancing the festive elements of your St. Patrick’s Day celebration.
-
Nutty Granola Parfaits: Layering granola between the pudding cups adds a satisfying crunch and nutty flavor, providing a perfect textural contrast.
Each of these pairings enhances the joy of celebrating with your Easy Shamrock Shake Pudding Cups, making your festive gathering truly unforgettable.
Make Ahead Options
These Shamrock Shake Pudding Cups are a fantastic make-ahead treat for busy home cooks! You can prepare the layers of chocolate and mint pudding up to 24 hours in advance, allowing the flavors to meld beautifully in the fridge. Simply layer the puddings in clear cups, cover securely with plastic wrap, and refrigerate. This not only saves you time but also ensures that they remain just as delicious when you’re ready to serve. When it’s time for the festivities, just add a dollop of whipped cream and sprinkle with chocolate shavings or mint candies for a festive finish. Enjoy stress-free serving on St. Patrick’s Day!
Shamrock Shake Pudding Cups Variations
Feel free to get creative with these Shamrock Shake Pudding Cups and customize them to your tastes!
- Dairy-Free: Use coconut milk and coconut whipped cream for a completely dairy-free version that’s still rich and creamy.
- Flavor Boost: Swap out vanilla pudding for butterscotch pudding to add a sweet twist and a hint of caramel flavor.
- Mint Choc Chip: Mix in mini chocolate chips with the mint pudding for an exciting texture and extra chocolatey goodness.
- Crushed Cookie Layer: Layer in crushed Oreos or chocolate wafers between the pudding layers for a delightful crunch.
- Festive Color: Add a few drops of green food coloring to the mint pudding for a more vibrant and festive look.
- Peanut Butter Drizzle: Drizzle melted peanut butter over the layers for a delicious nutty contrast against the chocolate and mint flavors.
- Berry Sensation: For a fruity twist, add a layer of pureed raspberries or strawberries in between pudding layers for a splash of color and flavor.
- Coconut Twist: Substitute some of the chocolate pudding with chocolate coconut pudding for a tropical flavor that will enchant your guests!
Each of these variations offers a unique and delightful spin on the classic Shamrock Shake Pudding Cups. Want to keep the creative juices flowing? Pair these with some Cinnamon Oatmeal Cups for a delightful dessert table. Enjoy the festivities with your family!
Expert Tips for Shamrock Shake Pudding Cups
• Thickening Matters: Ensure your puddings are whipped well and thickened before layering. This prevents them from mixing and maintains the distinct layers!
• Mint Extract Caution: If opting for mint extract instead of pudding, start with just a few drops. It’s potent and can quickly overpower the dessert’s creamy flavors.
• Garnish Wisely: When adding chocolate shavings or mint candies, sprinkle lightly to ensure they don’t overpower the pudding. A little goes a long way for your Shamrock Shake Pudding Cups!
• Use Clear Cups: Choosing clear dessert cups not only showcases the beautiful layers but also enhances the festive presentation—perfect for St. Patrick’s Day gatherings!
• Prep Ahead: Make these pudding cups a day in advance, allowing them to chill and flavors to meld beautifully, saving you time on the day of the celebration.
Shamrock Shake Pudding Cups Recipe FAQs
How do I choose ripe ingredients for the Shamrock Shake Pudding Cups?
Absolutely! For the best results, ensure your mint pudding mix is fresh, as expired ingredients may affect the flavor. Check for any lumps in the chocolate pudding mix and confirm that your whipped cream hasn’t been opened for too long. If using mint extract, opt for high-quality brands for that refreshing taste!
What’s the best way to store Shamrock Shake Pudding Cups?
For optimal freshness, cover the pudding cups tightly with plastic wrap and store them in the refrigerator. They’ll stay fresh for up to 3 days. Just give them a quick check for any separation before serving!
Can I freeze Shamrock Shake Pudding Cups?
Very! While it’s not recommended to freeze these pudding cups due to potential changes in texture that may occur during thawing, you can prepare the pudding layers in advance. Just make sure to chill them in the refrigerator instead, and they’ll be ready for serving when you need them.
What if my pudding layers mix together while I’m preparing them?
No worries! If your layers mix, it could be that the pudding wasn’t thick enough. To avoid this, ensure each pudding has sat and thickened properly before layering. If you find the layers disturbed, a layered dessert is still delicious at the end of the day—just embrace the special mix-up!
Can I make Shamrock Shake Pudding Cups for someone with dietary restrictions?
Definitely! If you’re making these pudding cups for someone with dietary restrictions, consider using dairy-free alternatives like coconut whipped cream and dairy-free pudding mixes. Additionally, for allergies, make sure to keep an eye on label contents to avoid any allergens—instead of mint candies, try adding fresh mint leaves for a natural garnish!
How can I add my personal twist to these Shamrock Shake Pudding Cups?
Want to customize your dessert? Start by including layers of crushed cookies or fresh fruit between the pudding layers for added texture! You can also play around with different pudding flavors—like vanilla or strawberry—and change up your garnish with colorful sprinkles or themed decorations for extra festivity!

Irresistibly Creamy Shamrock Shake Pudding Cups Recipe
Ingredients
Equipment
Method
- In separate bowls, whisk together the chocolate pudding mix with the appropriate amount of milk as indicated on the package. Do the same with the mint pudding mix. Stir well for about two minutes until both mixtures are smooth and creamy, then set them aside for about five minutes to allow them to thicken perfectly.
- Grab clear cups or dessert glasses for a festive display. Start by spooning a layer of chocolate pudding into the bottom of each cup, filling it about one-third full. Gently tap the cups on the counter to level the pudding, ensuring a smooth base. Follow this with a layer of mint pudding, filling it to about two-thirds full.
- Continue the layering process by adding another layer of chocolate pudding on top of the mint layer, completing the cup to about three-quarters full. Ensure even distribution by tapping the cups again gently. Finish off the layering with a final mint pudding layer, creating a beautiful contrast of colors.
- Once all the cups are filled with pudding layers, cover them securely with plastic wrap. Place the covered cups in the refrigerator and chill for at least 30 minutes.
- Before serving, remove the cups from the refrigerator and uncover them. Top each cup generously with a dollop of whipped cream. For added flair, sprinkle chocolate shavings or mint candies on top.
Leave a Reply