
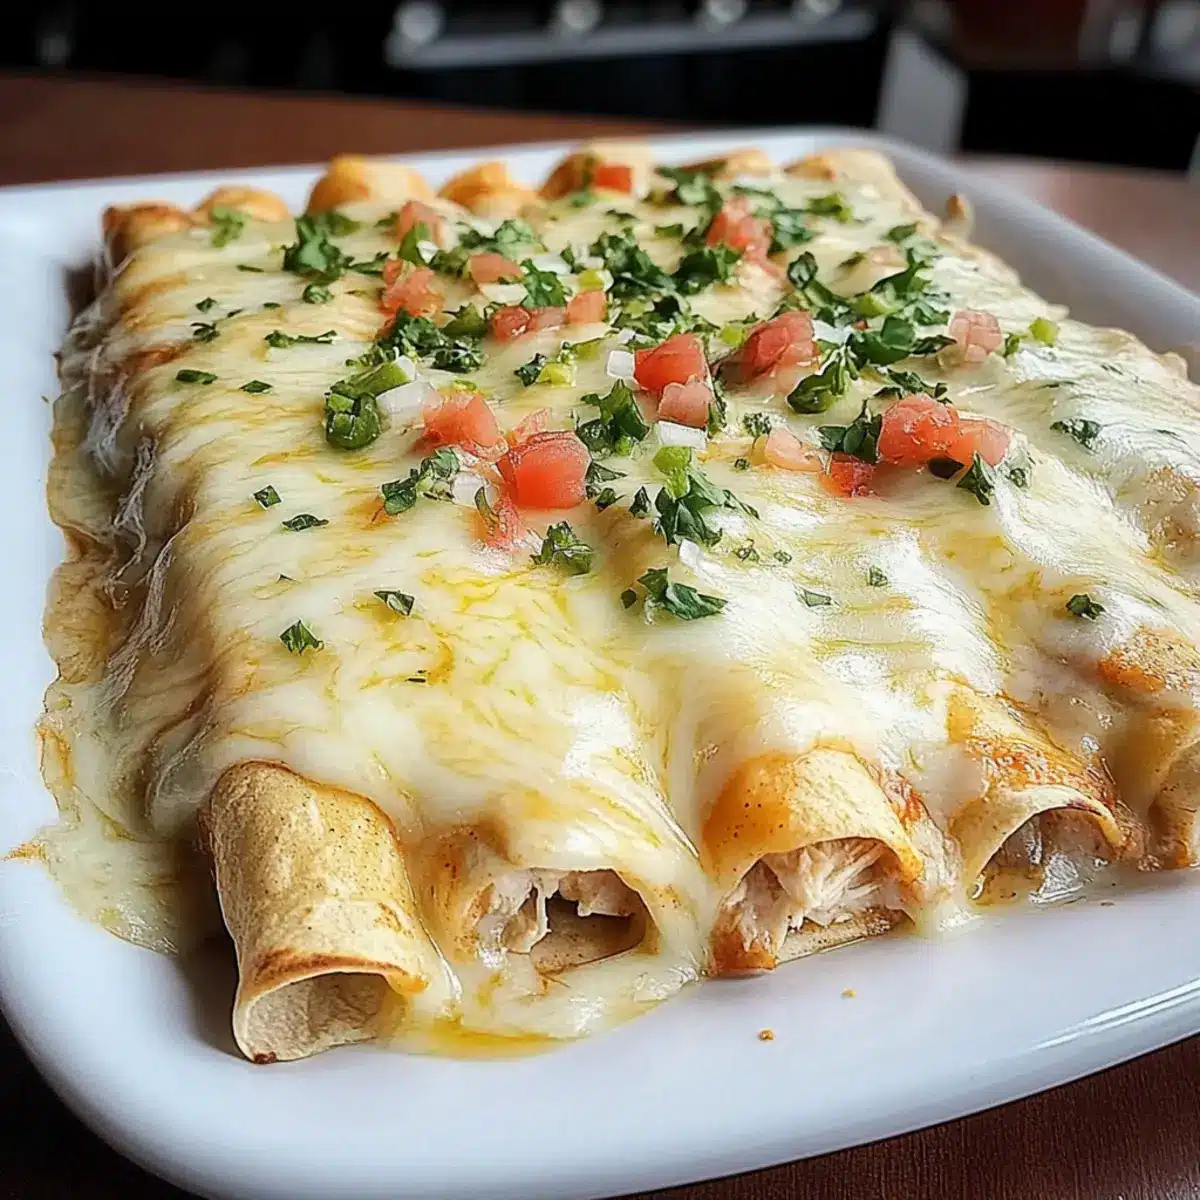
As I diced the ripe tomatoes and inhaled the fragrant aroma wafting through my kitchen, I couldn’t help but feel a wave of comfort wash over me. My Queso Chicken Enchiladas are the ultimate remedy for long, busy days, combining convenience and burst-your-belt flavors in just 40 minutes. This recipe is designed with families in mind, ensuring your dinner table is filled with satisfied smiles and happy bellies. With minimal prep time and ingredients you likely already have in your pantry, these cheesy delights make weeknight meals feel special without any fuss. Plus, they’re sure to be kid-approved, making mealtime a breeze! What’s your favorite way to enjoy enchiladas? Let’s dive into this delicious dish!

Why are Queso Chicken Enchiladas a Must-Try?
Quick and Easy: These enchiladas come together in just 40 minutes, making them a perfect solution for busy weeknights.
Kid-Approved Flavor: The rich, cheesy filling is loved by both kids and adults, ensuring everyone leaves the table satisfied.
Flexible Ingredients: You can easily adjust the recipe by substituting ingredients like shredded chicken for rotisserie or Greek yogurt for sour cream, tailoring it to your taste.
Versatile and Delicious: Serve them with a side of chips and salsa or a fresh green salad for a family-friendly feast that feels festive.
Leftover Friendly: Don’t worry about waste! They keep well in the fridge for up to three days, allowing you to savor your delicious creation again.
These cheesy Queso Chicken Enchiladas are not just a meal; they’re a cozy family experience, reminiscent of flavors found in recipes like Chopped Chicken Caesar or Sticky Garlic Chicken. Give them a try; you might just find your new favorite dinner!
Queso Chicken Enchiladas Ingredients
-
For the Enchiladas
-
Flour Tortillas – These are the base that wraps up all the deliciousness.
-
Shredded Chicken – Provides protein and texture; substitute with rotisserie chicken for convenience.
-
Taco Seasoning – This adds flavor depth; feel free to experiment with your own spice blends.
-
Sour Cream – Contributes richness and tanginess; Greek yogurt can lighten it up.
-
Shredded Cheddar Cheese – Offers a melty goodness; try Monterey Jack or dairy-free alternatives if desired.
-
Chopped Green Chilies – Enhances flavor with a mild kick; swap in fresh jalapeños for more heat.
-
Diced Tomatoes with Green Chilies – Adds moisture and flavor; canned varieties save prep time.
-
For the Creamy Sauce
-
Queso Blanco Velveeta – Melts beautifully into a creamy sauce; any creamy processed cheese works as a substitute.
These Queso Chicken Enchiladas might just become your family’s favorite dish, merging convenience with heartwarming flavors that create lasting memories around the dinner table!
Step‑by‑Step Instructions for Queso Chicken Enchiladas
Step 1: Preheat the Oven
Begin by preheating your oven to 350°F (175°C). This ensures the Queso Chicken Enchiladas will bake evenly. While the oven heats up, you’ll have time to prep your filling. Keep an eye on the temperature and visual cues, as a properly heated oven is vital for achieving that bubbly melted cheese topping.
Step 2: Prepare the Filling
In a large mixing bowl, combine shredded chicken, taco seasoning, sour cream, cheddar cheese, and chopped green chilies. Stir thoroughly until well mixed, ensuring the flavors blend beautifully together. The mixture should be creamy and uniform in appearance, signaling that it’s ready to be encased in tortillas.
Step 3: Make the Creamy Sauce
In a medium saucepan over medium heat, melt the Queso Blanco Velveeta with the un-drained diced tomatoes. Continuously stir until the cheese is smoothly integrated with the tomatoes, forming a creamy sauce; this should take about 5–7 minutes. Look for a velvety texture without lumps to assure the perfect topping for your enchiladas.
Step 4: Assemble the Enchiladas
Lay out the flour tortillas flat on a clean surface. Spoon an ample amount of the chicken mixture into the center of each tortilla, then roll them tightly, tucking in the sides as you go. Arrange the rolled tortillas seam-side down in a greased 9×13-inch baking dish. You should see the tortillas neatly lined up, ready for the final creamy touch.
Step 5: Pour the Sauce
Once the enchiladas are in the baking dish, pour the prepared queso sauce generously over them. Make sure to cover each enchilada completely — this step is crucial for that rich, cheesy flavor throughout. Ensure that the sauce pools slightly in the corners, which will help keep everything moist while baking.
Step 6: Bake to Perfection
Place the baking dish in your preheated oven and bake uncovered for 20–25 minutes. You’ll know the Queso Chicken Enchiladas are done when the sauce is bubbling and the edges start to get a golden color. The enticing aroma will fill your kitchen, inviting everyone to the table as you prepare to serve this comforting dish.
Step 7: Serve Hot
After baking, carefully remove the enchiladas from the oven and let them cool for a few minutes. This allows the flavors to settle. Serve the Queso Chicken Enchiladas while they’re still hot, and prepare for those satisfied smiles around the dinner table.
Make Ahead Options
These Queso Chicken Enchiladas are perfect for busy weeknights when you need to save time! You can assemble the enchiladas up to 24 hours in advance; simply cover them tightly with plastic wrap or aluminum foil and refrigerate. To maintain the quality, ensure the tortillas are stored properly to prevent them from getting soggy. When you’re ready to enjoy, bake them directly from the fridge, adding an extra 5 minutes to the cooking time if needed, until hot and bubbling. This way, you’ll have a delicious, comforting dinner ready with minimal last-minute effort—just as heavenly as if you made them fresh!
What to Serve with Queso Chicken Enchiladas
Picture a lively dinner scene, where every bite is bursting with comfort and satisfaction, perfectly complementing your cheesy enchiladas.
-
Crisp Green Salad: A fresh salad with vibrant greens and zesty vinaigrette balances the rich flavors of the enchiladas wonderfully. Use a variety of colorful veggies for a delightful crunch!
-
Spanish Rice: This flavorful side, cooked with aromatic spices, complements the cheesy filling and provides a hearty base for your meal.
-
Refried Beans: Creamy and flavorful, these beans add protein and create a comforting and traditional Mexican experience, pairing perfectly with your enchiladas.
-
Chips and Salsa: Crunchy tortilla chips served with a fresh salsa make for a tasty appetizer that brightens the meal. The salsa’s tanginess contrasts beautifully with the creamy filling.
-
Guacamole: Adding a scoop of guacamole brings a rich, creamy texture packed with flavor, elevating the entire meal.
-
Mexican Street Corn: Grilled corn slathered with crema, cheese, and spices creates a delicious sweet and savory side that is full of uplifting flavors.
-
Margaritas: A refreshing margarita enhances the fiesta vibes and complements the cheesy, rich flavors in the dish, making every bite feel like a celebration.
-
Churros with Chocolate Sauce: For dessert, these warm, cinnamon-sugared churros dipped in chocolate sauce will end your meal on a sweet note that everyone will love.
Storage Tips for Queso Chicken Enchiladas
Fridge: Store leftover Queso Chicken Enchiladas in an airtight container for up to 3 days. Ensure they are cooled to room temperature before sealing to avoid condensation.
Freezer: For longer storage, freeze assembled but unbaked enchiladas wrapped tightly in plastic wrap, followed by aluminum foil, for up to 2 months. Thaw in the fridge overnight before baking.
Reheating: Reheat leftovers in the oven at 350°F (175°C) for 15–20 minutes, or in the microwave covered with a damp paper towel for about 1–2 minutes, until heated through.
Serving Suggestions: Reinvent your enchiladas by adding fresh toppings like cilantro, diced avocado, or a drizzle of sour cream after reheating to freshen up those comforting flavors.
Expert Tips for Queso Chicken Enchiladas
-
Warm Tortillas: Briefly heating tortillas before rolling prevents tearing and makes them easier to work with.
-
Prep Ahead: Assemble enchiladas in advance and refrigerate for up to 24 hours. Just adjust the baking time accordingly.
-
Spice It Up: Enhance flavor by adding jalapeños to the filling or drizzling hot sauce on top before serving for extra heat.
-
Melted Cheese: Ensure the queso sauce is smooth and lump-free for the best creamy topping over your enchiladas.
-
Ingredient Flexibility: Feel free to customize the filling by adding black beans or corn for extra texture, or swap sour cream for Greek yogurt for a lighter option.
Queso Chicken Enchiladas Variations & Substitutions
Feel free to explore these delightful twists on your Queso Chicken Enchiladas, tailoring the dish to your family’s taste buds! Each variation brings a new layer of flavor and excitement.
-
Gluten-Free: Substitute flour tortillas with warmed corn tortillas for a delightful gluten-free option. The corn adds a slightly sweet flavor that perfectly complements the cheesy stuffing.
-
Vegetarian Twist: Replace shredded chicken with black beans or lentils for a hearty vegetarian option. You’ll still get that rich flavor, while keeping it meat-free!
-
Extra Creamy: Toss in some cream cheese or additional sour cream into the chicken mixture for a richer filling. This extra creaminess will yield enchiladas that feel indulgently decadent.
-
Heat Lover’s Delight: For a spicy kick, incorporate chopped jalapeños or a splash of hot sauce into the filling. You can also drizzle extra hot sauce on top right before serving for an added zing.
-
Mild & Sweet: Use roasted red peppers instead of green chilies for a milder, slightly sweet flavor profile. The vibrant color will make your dish visually stunning as well.
-
Tasty Toppings: Garnish your enchiladas with fresh avocado slices, chopped cilantro, or a dollop of Greek yogurt for both flavor and aesthetic appeal. Toppings can elevate the whole experience!
-
Flavor Boost: Mix in some corn or diced bell peppers to your chicken filling for added texture and flavor. The sweetness of corn balances beautifully with the cheesy goodness.
-
Change the Cheese: Experiment with different cheeses like Monterey Jack or a dairy-free cheese option. Each will bring a distinct flavor and melting quality to your dish.
These Queso Chicken Enchiladas are versatile enough to adapt to your preferences or even incorporate ideas from other delicious recipes. If you’re looking for other comforting options, consider pairing them with a side of Chopped Chicken Caesar or a hearty Coconut Chicken Rice. Dive into this culinary adventure and make these enchiladas uniquely yours!
Queso Chicken Enchiladas Recipe FAQs
What type of tortillas should I use for the best Queso Chicken Enchiladas?
For these enchiladas, I recommend using flour tortillas because they are soft and pliable, making them easy to roll without tearing. However, if you’re looking for a gluten-free option, warmed corn tortillas can work wonderfully. Just keep in mind that corn tortillas may be slightly more delicate, so handle them with care.
How long can I store leftover enchiladas in the fridge?
Leftover Queso Chicken Enchiladas can be stored in an airtight container in the refrigerator for up to 3 days. Allow them to cool to room temperature before sealing to prevent any condensation, which can make them soggy.
Can I freeze Queso Chicken Enchiladas, and if so, how?
Absolutely! To freeze your enchiladas, assemble them but do not bake. Wrap the baking dish tightly with plastic wrap and then cover it with aluminum foil for extra protection. They can be stored in the freezer for up to 2 months. When you’re ready to bake, thaw them in the fridge overnight before baking them as directed.
What can I do if my tortilla is tearing while rolling?
If you’re experiencing tearing, it’s likely due to cold tortillas. To prevent this, I suggest warming the tortillas in the microwave for about 15–20 seconds, or briefly on a skillet. This softening process makes them much more pliable, allowing you to roll them without tearing.
Are there any dietary considerations I should be aware of?
Yes! If you’re cooking for someone with dietary restrictions, consider using rotisserie chicken to save time, or Greek yogurt instead of sour cream for a lighter alternative. Also, check that your shredded cheese and queso sauce options are free from allergens, especially if you’re serving those with dairy allergies. For a vegetarian version, you can swap the chicken for black beans or sautéed mushrooms!
What’s the best way to add spice to my Queso Chicken Enchiladas?
For a spicier flavor, you can mix diced fresh jalapeños into the chicken filling or drizzle some hot sauce over the enchiladas before serving. If you prefer a milder dish, just opt for a nice blend of spices in the taco seasoning. Experiment with different levels of heat until you find the perfect balance for your family!
Queso Chicken Enchiladas: Cheesy Delight in Just 40 Minutes
Ingredients
Equipment
Method
- Preheat your oven to 350°F (175°C).
- In a large mixing bowl, combine shredded chicken, taco seasoning, sour cream, cheddar cheese, and chopped green chilies. Stir until well mixed.
- In a medium saucepan over medium heat, melt the Queso Blanco Velveeta with the un-drained diced tomatoes. Stir until the cheese is smoothly integrated.
- Lay out the flour tortillas flat. Spoon the chicken mixture into the center of each tortilla, roll tightly and place seam-side down in a greased baking dish.
- Pour the queso sauce generously over the enchiladas.
- Bake uncovered for 20–25 minutes until the sauce is bubbling and edges are golden.
- Let cool for a few minutes before serving hot.
Leave a Reply