
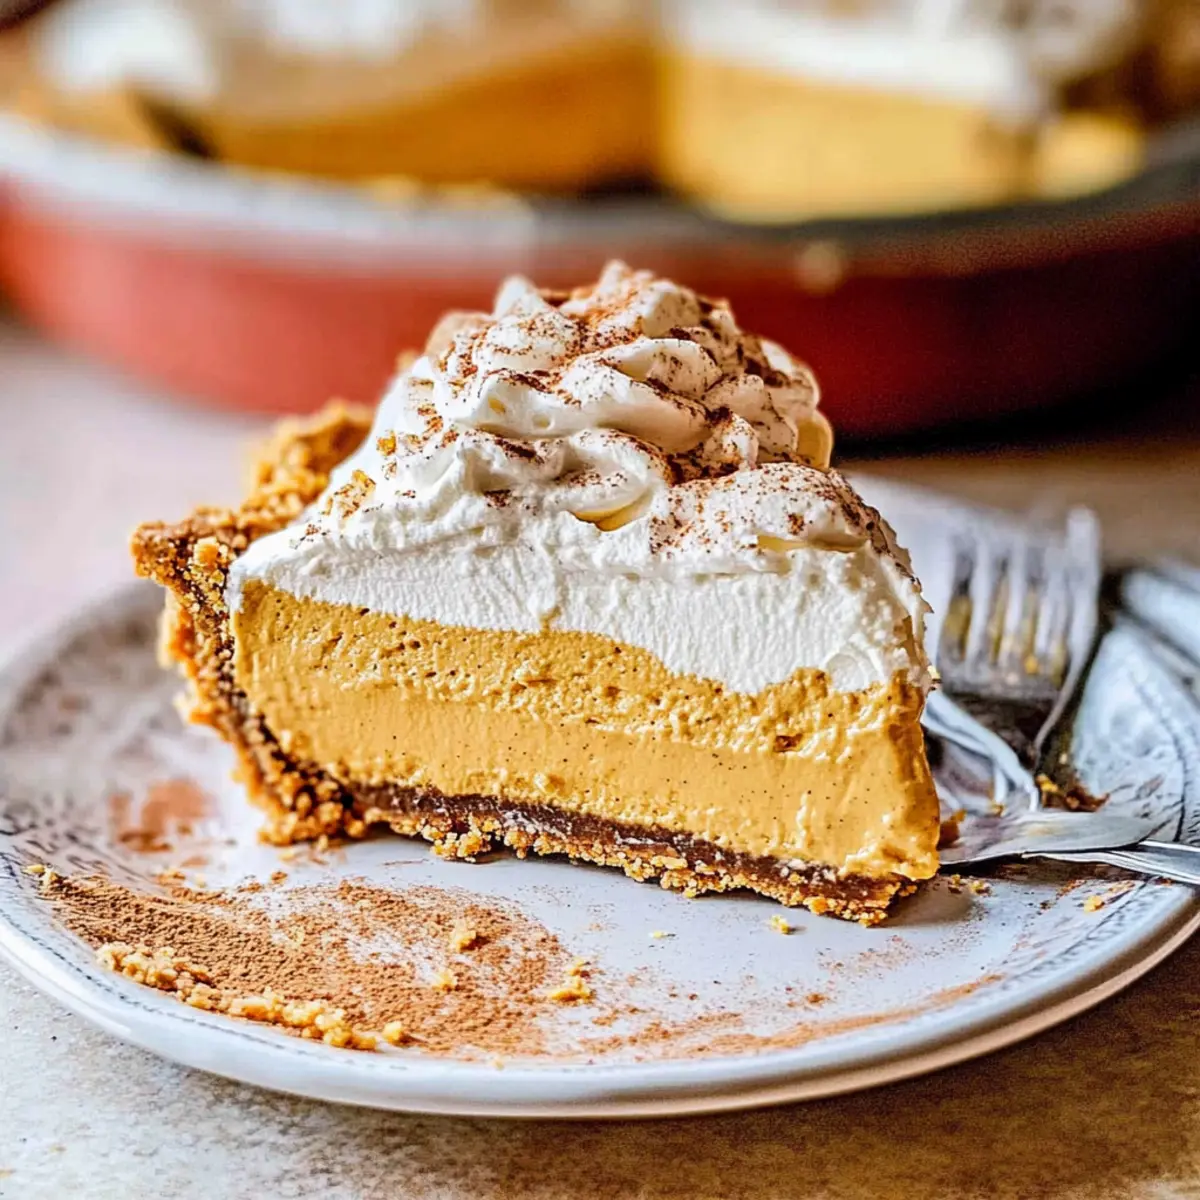
As I stood in my kitchen, the scent of autumn swirled around me like a warm embrace. There’s something truly enchanting about the blend of spices that comes with fall, and that’s exactly what I’ve captured in this No-Bake Pumpkin Mousse Pie. Effortlessly light and undeniably delicious, this dessert combines a crunchy gingersnap crust with an airy pumpkin spice mousse, finished off with a dollop of cinnamon maple whipped cream. Not only is it a crowd-pleaser for Thanksgiving gatherings, but it also offers a refreshing twist to the traditional pumpkin pie experience. Plus, with a quick prep time and the convenience of being a no-bake recipe, you can indulge without the fuss. Are you ready to elevate your autumn dessert game?
Why is Pumpkin Mousse Pie a Must-Try?
Irresistibly Light: This no-bake dessert is perfect for those who love fluffy, airy textures that won’t weigh you down after a hearty meal.
Effortless Preparation: With minimal ingredients and a straightforward method, you can whip this pie up quickly, freeing up time for family and friends during the busy fall season.
Versatile Flavor: The gingersnap crust adds a delightful spiced crunch, and you can easily switch it up by using graham crackers or even chocolate cookies for a fun twist.
Deliciously Decadent: Each slice offers a wonderful balance of sweet and spiced pumpkin flavor, topped with luscious cinnamon maple whipped cream that elevates the entire experience.
Perfect for Sharing: Whether for Thanksgiving or an autumn gathering, this Pumpkin Mousse Pie will be the star of the dessert table, leaving everyone raving about your culinary skill. You might also enjoy pairing it with a slice of Moist Pumpkin Bread for a complete fall flavor feast!
Pumpkin Mousse Pie Ingredients
Elevate your fall treats with this delightful recipe!
For the Crust
- Gingersnap Cookie Crumbs – Provides a crunchy base for the crust; substitute with graham cracker or chocolate cookie crumbs if desired.
- Unsalted Butter (½ cup, melted) – Binds the cookie crumbs together; for a lighter version, consider using coconut oil.
- Kosher Salt (¼ teaspoon) – Enhances the flavors in the crust.
For the Mousse Filling
- Cream Cheese (8 oz, room temperature) – Stabilizes the mousse filling and provides a rich base flavor; ensure it’s softened for mixing ease.
- Powdered Sugar (1 cup) – Sweetens the mousse and helps achieve a smooth texture.
- Pure Pumpkin Puree (1 cup) – The star ingredient that infuses the pie with pumpkin flavor; make sure to use 100% pure, not pie filling.
- Vanilla Extract (½ tablespoon) – Adds depth of flavor to the mousse.
- Pumpkin Pie Spice (2 teaspoons) – Gives the mousse its traditional fall spiciness.
For the Whipped Cream Topping
- Heavy Whipping Cream (2 cups, very cold) – Essential for whipping into the mousse and topping; must be cold for stiff peaks.
- Maple Syrup (2 tablespoons) – Sweetens the whipped cream topping, adding a rich depth.
- Ground Cinnamon (1 teaspoon) – Adds flavor to the whipped cream topping.
With this Pumpkin Mousse Pie, you’re not just making a dessert; you’re creating a memory wrapped in the warmth of spices that invoke the joy of fall. Happy baking!
Step‑by‑Step Instructions for Pumpkin Mousse Pie
Step 1: Prepare the Crust
In a mixing bowl, combine gingersnap cookie crumbs, melted unsalted butter, and kosher salt until the mixture is fully moistened. Press this crumb mixture firmly into a 9-inch pie plate, making an even layer on the bottom and up the sides. Place the pie crust in the freezer for about 15 minutes while you prepare the luscious filling.
Step 2: Make the Mousse Filling
In the bowl of a stand mixer, beat the room-temperature cream cheese and powdered sugar on medium speed until smooth and creamy, about 2-3 minutes. Gradually blend in the pure pumpkin puree, vanilla extract, and pumpkin pie spice, mixing until completely combined and there are no lumps. The filling should be velvety and well-incorporated.
Step 3: Whip the Cream
In a separate large bowl, use a handheld mixer to whip the very cold heavy whipping cream on high speed until stiff peaks form, approximately 3-5 minutes. Ensure that the bowl is chilled and the cream is cold to achieve the best texture. The whipped cream should hold its shape, indicating it’s ready to be folded into the mousse.
Step 4: Combine Mixtures
Gently fold the whipped cream into the pumpkin mixture in two batches, using a spatula to incorporate evenly. Be careful not to deflate the whipped cream, as you want to maintain that light, airy texture for your Pumpkin Mousse Pie. Continue folding until there are no visible streaks of white remaining, and the mixture is smooth and fluffy.
Step 5: Fill the Crust
Remove the chilled gingersnap crust from the freezer and spoon the pumpkin mousse filling into the crust, spreading it out evenly with a spatula. Smooth the top as needed, and then cover the pie with plastic wrap. Refrigerate for at least 3 hours, or until fully set and firm to the touch, allowing the flavors to meld beautifully.
Step 6: Prepare the Topping
Once the pie is set, use a clean bowl to whip another cup of very cold heavy cream along with powdered sugar, maple syrup, ground cinnamon, and a bit of vanilla extract until fluffy and soft peaks form. This should take about 3-4 minutes. The whipped cream topping will enhance the flavors in the Pumpkin Mousse Pie.
Step 7: Serve
After making the topping, spread it generously on top of the chilled pumpkin mousse filling, creating a beautiful layer. Allow the pie to sit at room temperature for about 20-30 minutes before slicing, which will soften the crust for easier serving. Cut into slices and enjoy the delightful flavors of your homemade Pumpkin Mousse Pie!
How to Store and Freeze Pumpkin Mousse Pie
Fridge: Store the pie uncovered in the refrigerator for up to 3-4 days. This helps maintain its creamy texture while preventing the crust from getting soggy.
Freezer: If you need to keep it longer, the Pumpkin Mousse Pie can be frozen for up to two weeks. Wrap it tightly in plastic wrap and aluminum foil to prevent freezer burn.
Thawing: To enjoy frozen pie, transfer it to the fridge a few hours before serving, allowing it to thaw gently while retaining its delightful texture.
Serving Reminder: Before serving, let the pie sit at room temperature for about 20-30 minutes. This makes slicing easier and enhances the flavors for a truly enjoyable dessert experience.
Make Ahead Options
This delightful Pumpkin Mousse Pie is perfect for meal prep enthusiasts looking to save time during the busy fall season! You can prepare the gingersnap crust up to 24 hours in advance and keep it stored in the refrigerator covered with plastic wrap to maintain its crunch. Additionally, the mousse filling can be made and refrigerated for up to 3 days before serving, just be sure to cover it tightly to prevent drying out. When you’re ready to assemble, simply spread the mousse into the prepared crust, refrigerate until fully firm, and whip up the cream topping just before serving for that luscious, fresh taste. This way, you can enjoy a delicious dessert with minimal last-minute effort!
Expert Tips for Pumpkin Mousse Pie
• Room Temperature Cream Cheese: Ensure your cream cheese is at room temperature for smoother mixing and to avoid lumps in your mousse.
• Chill the Cream: Whip the heavy cream when it’s very cold for the best volume and stability, essential for achieving that airy texture in your Pumpkin Mousse Pie.
• Gently Fold: When combining the whipped cream with the pumpkin mixture, fold gently. This helps maintain the airy fluffiness that makes the mousse so delightful.
• Proper Freezing Time: Don’t rush the initial crust freezing step. It allows the gingersnap crust to set properly, preventing it from becoming soggy.
• Serve at Room Temperature: Let the pie sit out for about 20-30 minutes before serving to ensure cleaner slices and a softer crust, enhancing your pumpkin mousse pie experience.
Pumpkin Mousse Pie Variations to Delight
Feel free to experiment and find your perfect twist on this delicious Pumpkin Mousse Pie, making it your own!
-
Graham Cracker Crust: Swap the gingersnap crumbs for graham cracker crumbs for a simpler, classic flavor.
-
Chocolate Cookie Crust: For a rich, decadent taste, use chocolate cookies instead of gingersnaps. Imagine that delightful combo of pumpkin and chocolate; it’s irresistible!
-
Dairy-Free Delight: Use vegan cream cheese and coconut cream to replace the dairy ingredients, making a luscious pie for everyone.
-
Pumpkin Spice Boost: For more intense flavor, add an extra teaspoon of pumpkin pie spice. Give your pie an extra punch of warmth that autumn lovers crave!
-
Nutty Variation: Toss in crushed pecans or walnuts into the crust for an added crunch. This nutty flavor will harmonize beautifully with the creamy mousse.
-
Bourbon Infusion: Stir in a splash of bourbon or spiced rum into the mousse for an adult-only twist. The depth of flavor will truly elevate your dessert experience.
-
Maple Cream Topping: Replace the maple syrup with maple flavored whipped cream for a sweet twist. It adds an extra layer of delightful goodness!
-
Whipped Cheesecake Combo: Blend a bit of whipped cream cheese into the topping for a cheesecake-inspired layer of creaminess. This will give each bite that cheesecake silkiness!
With these tips in mind, you’ll elevate your fall gatherings, and if you’re looking for complementary treats, consider serving alongside a slice of Moist Pumpkin Bread or a bite of delicious Cheddar Bay Pie!
What to Serve with Pumpkin Mousse Pie
As you indulge in the mouthwatering flavors of this creamy dessert, take a moment to consider the perfect companions that will elevate your fall feast.
- Spiced Apple Cider: Warm and fragrant, spiced apple cider enhances the autumn vibes and complements the pumpkin mousse beautifully.
- Candied Pecans: Crunchy with a hint of sweetness, these nuts provide a delightful texture contrast while complementing the pie’s spiced flavors.
- Maple-Glazed Carrots: Tender and slightly sweet, these veggies bring a splash of color to your plate, balancing the creamy richness of the mousse.
- Rosemary Focaccia Bread: The herbaceous notes of the bread add a lovely savory touch, making each bite of dessert taste even better.
- Vanilla Ice Cream: A scoop of icy vanilla balances the warm spices, creating a delightful temperature contrast alongside each piece of pie.
- Pumpkin Spice Latte: This cozy drink embraces the flavors of fall and is a great way to warm up after enjoying a slice of pumpkin mousse pie.
- Chocolate Chip Cookies: The sweetness and chewiness of chocolate chip cookies make for an irresistible pairing, a nostalgic treat everyone loves.
- Pomegranate Salad: A refreshing salad sprinkled with pomegranate seeds and greens brightens your meal, adding a splash of color and a touch of tartness.
- Chai Tea: Fragrant and warm, chai tea complements the flavors of pumpkin while offering a soothing finish to your autumn gathering.
Pumpkin Mousse Pie Recipe FAQs
What type of pumpkin puree should I use?
Absolutely! It’s essential to use 100% pure pumpkin puree rather than pumpkin pie filling, which contains additional sweeteners and spices. If you prefer a more homemade touch, you can make your own pumpkin puree; just make sure to drain it well to avoid excess moisture.
How should I store the Pumpkin Mousse Pie?
You can store the pie uncovered in the refrigerator for 3-4 days. This helps maintain its creamy texture and ensures that the crust stays crunchy. Keeping it uncovered allows any excess moisture to evaporate, preventing a soggy crust.
Can I freeze the Pumpkin Mousse Pie?
Yes, you can! To freeze your pumpkin mousse pie, wrap it tightly in plastic wrap and then in aluminum foil to prevent freezer burn. It can be stored in the freezer for up to two weeks. When you’re ready to enjoy it, simply transfer it to the refrigerator to thaw for a few hours before serving.
What should I do if my whipped cream doesn’t form stiff peaks?
Very! If your whipped cream isn’t forming stiff peaks, it might be because the cream wasn’t cold enough or the mixing bowl was too warm. Make sure to chill both the cream and the mixing bowl beforehand, and whip on high speed until you see those glorious stiff peaks form. If it still doesn’t cooperate, you can try adding a little bit of cornstarch or instant pudding mix to help stabilize it.
Are there any dietary considerations for this recipe?
Of course! For a lighter option, you can swap the unsalted butter in the crust for coconut oil. To make the pie dairy-free, use a vegan cream cheese alternative and substitute the heavy cream with coconut cream. Always check labels for potential allergens like gluten from the cookie crumbs if you have dietary restrictions or allergies in your household.
How can I ensure the crust is perfectly set before adding the mousse?
Definitely! After pressing the gingersnap crumb mixture into the pie plate, pop it in the freezer for about 15 minutes. This will help the crust firm up nicely and hold its shape when you add the pumpkin mousse filling, creating a satisfying crunch against the creamy mousse.
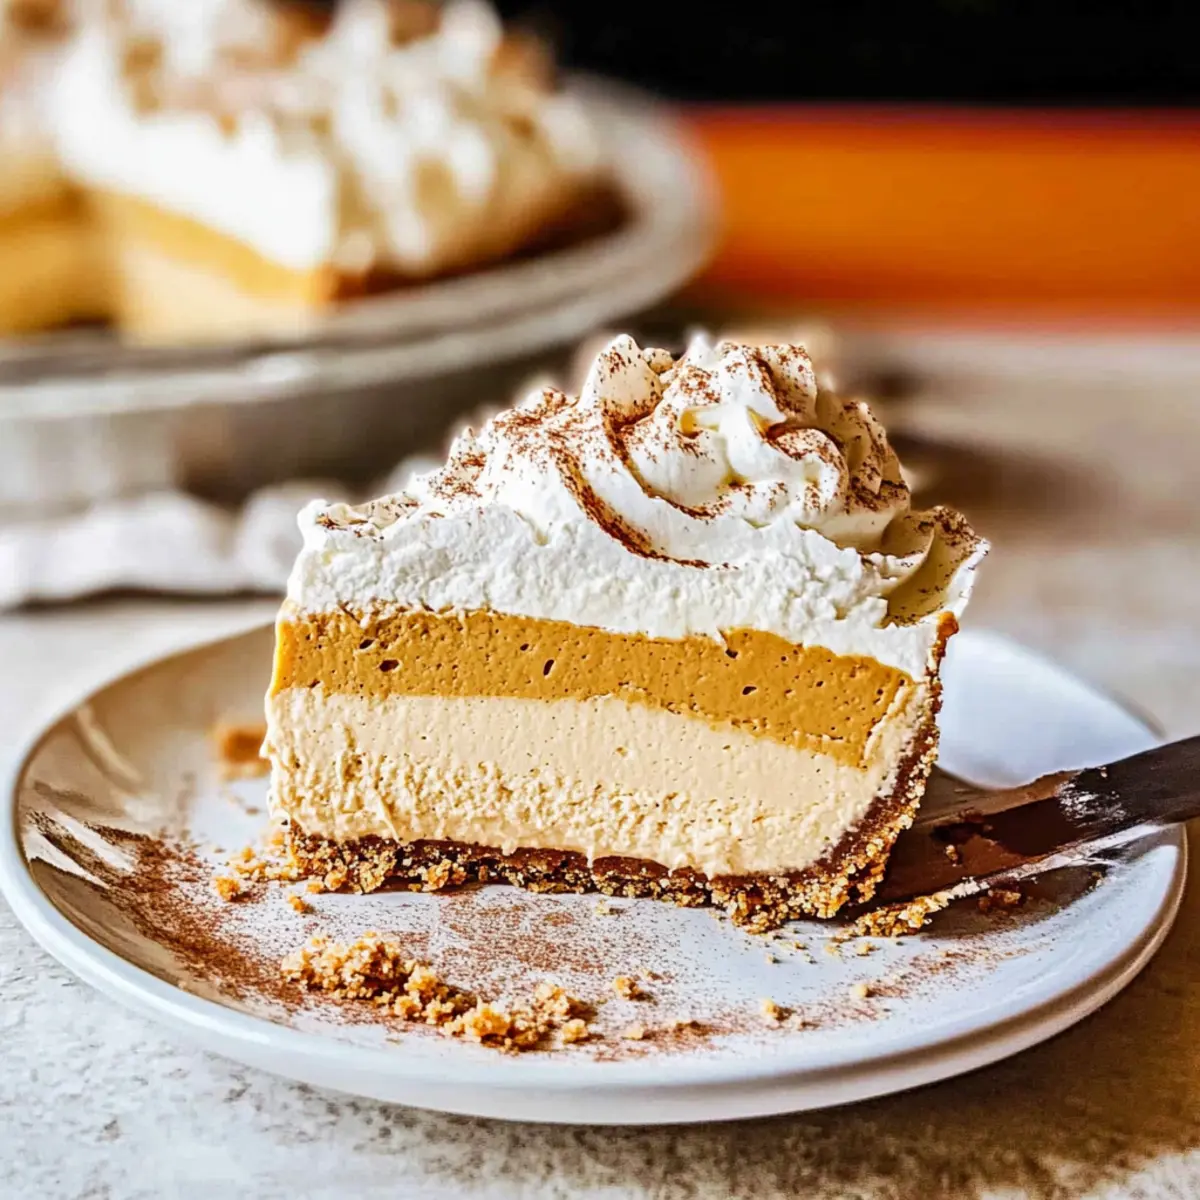
Light and Creamy Pumpkin Mousse Pie for Fall Bliss
Ingredients
Equipment
Method
- In a mixing bowl, combine gingersnap cookie crumbs, melted unsalted butter, and kosher salt until moistened. Press the mixture firmly into a 9-inch pie plate and freeze for 15 minutes.
- In a stand mixer, beat cream cheese and powdered sugar on medium speed until smooth, about 2-3 minutes. Gradually blend in pumpkin puree, vanilla extract, and pumpkin pie spice until combined.
- In a separate bowl, whip cold heavy whipping cream on high speed until stiff peaks form, about 3-5 minutes.
- Gently fold the whipped cream into the pumpkin mixture in two batches, using a spatula until there are no visible streaks.
- Spoon the pumpkin mousse filling into the prepared crust and smooth the top. Cover with plastic wrap and refrigerate for at least 3 hours.
- Prepare the topping by whipping another cup of cold heavy cream with powdered sugar, maple syrup, and ground cinnamon until soft peaks form, about 3-4 minutes.
- Spread the whipped cream topping on the chilled mousse, let sit at room temperature for 20-30 minutes before slicing and serving.
Leave a Reply