
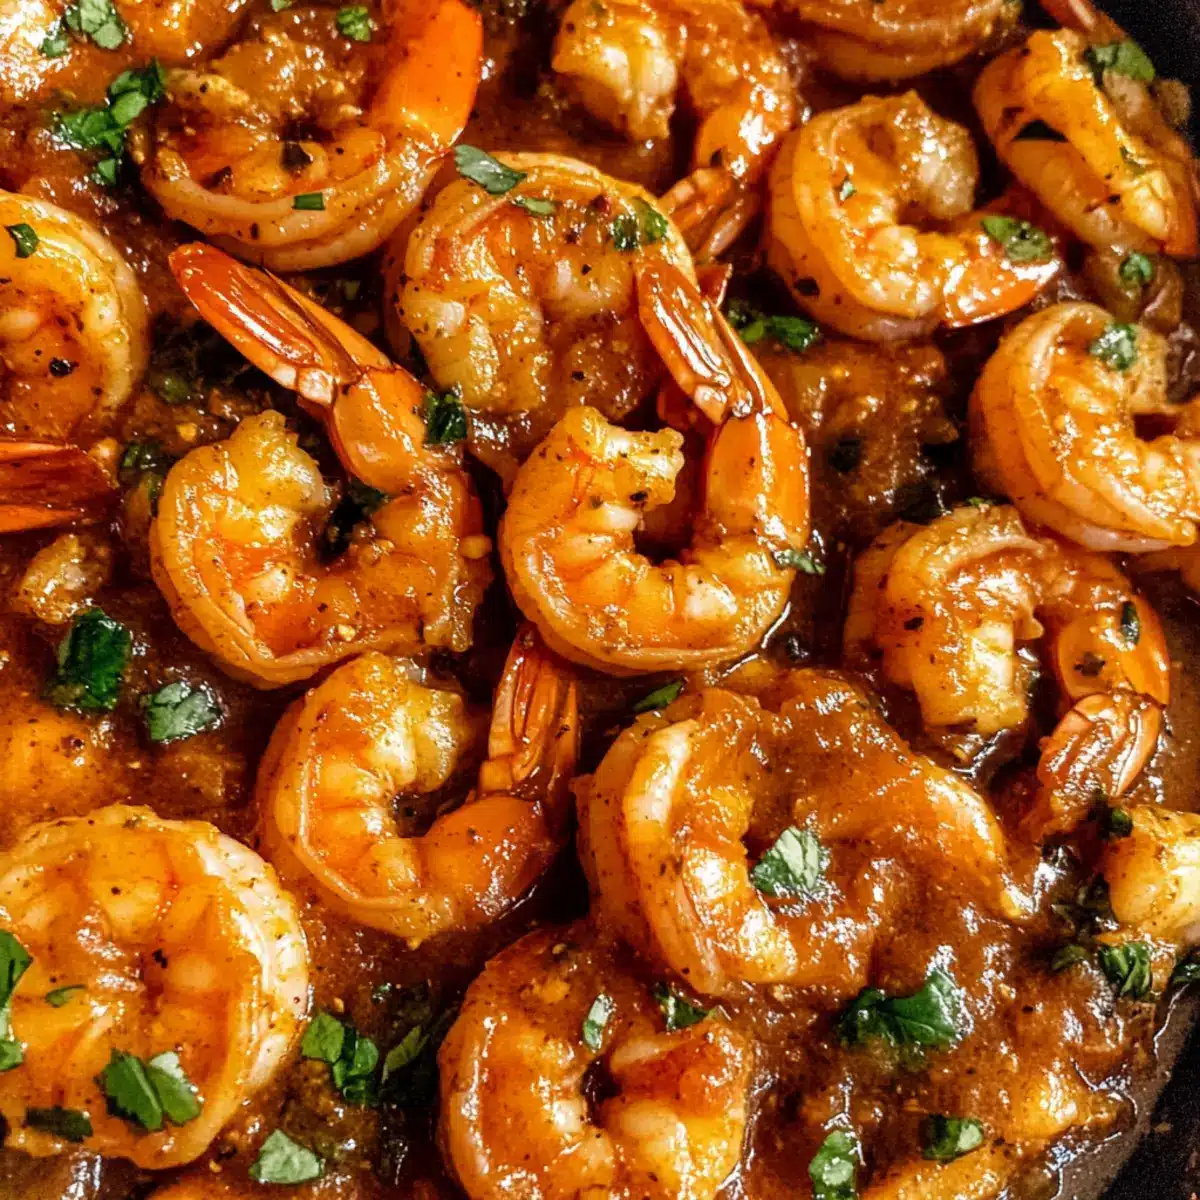
The sizzle of shrimp hitting the pan transports me straight to a vibrant Portuguese marketplace, where the aroma of garlic dances in the air, inviting me to create something special. Today, I’m thrilled to share my recipe for Portuguese Garlic Shrimp with Peri-Peri Spice, a dish that’s as fiery as it is comforting. With minimal ingredients and quick prep time, this recipe not only satisfies that craving for a zesty, exciting meal, but it also transforms weeknight dinners into something truly spectacular. Whether you’re a passionate home-chef or just someone seeking a break from fast food, this garlic shrimp dish is bound to impress your taste buds. Are you ready to make your kitchen the place to be?
Why is Portuguese Garlic Shrimp a Must-Try?
Quick, Satisfying Meal: This recipe is perfect for those busy weeknights when you crave something good but don’t want to spend hours cooking.
Robust Flavors: The combination of garlic, peri-peri spice, and fresh shrimp creates an unforgettable flavor experience that will have you coming back for seconds.
Minimal Ingredients: Featuring just a handful of items that are easy to find, this dish allows you to whip up a gourmet meal without the fuss.
Versatile Pairing: Serve it over rice, or alongside crusty bread for soaking up that delicious sauce, making it a hit for any dinner setting.
Cultural Delight: Dive into vibrant Portuguese cuisine and experience a dish that’s both simple and steeped in rich culinary tradition. You’ll love it, just like our Cheddar Garlic Herb Soup or Sticky Garlic Chicken!
Portuguese Garlic Shrimp Ingredients
For the Shrimp
• Fresh Shrimp – Use shell-off, de-veined shrimp for optimal texture and flavor in this delightful dish.
For the Sauce
• Olive Oil – 2 tbsp and more for cooking; a key ingredient adds delicious flavor and aids in perfectly cooking the shrimp.
• Butter – 3 tbsp for richness that enhances the overall taste of the sauce.
• Garlic – 8 cloves, minced; the aromatic component that defines this Portuguese Garlic Shrimp recipe.
• Onion – 1/2 medium, diced; adds a sweet depth that balances the heat.
• Tomato Paste – 2 tbsp; provides body and a robust tomato flavor that ties the dish together.
• Peri-Peri Spice Mix – 2 tsp, adjust to taste; contributes spicy warmth and complex flavors—try substituting with paprika and cayenne for a milder option.
• White Wine – 3/4 cup, dry; deglazes the pan, adding acidity to beautifully balance the sauce’s flavors.
• Chicken Broth – 1 cup; enhances the dish’s depth and provides the necessary liquid for simmering.
• Cilantro – 1/4 cup, chopped; fresh herb to finish, adding a burst of brightness to the final dish.
Now that you have the ingredients, let’s get cooking and bring that exciting taste of Portugal straight to your table!
Step‑by‑Step Instructions for Portuguese Garlic Shrimp
Step 1: Prepare the Shrimp
Begin by seasoning your fresh, shell-off, de-veined shrimp with salt. Heat 2 tablespoons of olive oil in a large skillet over medium-high heat until shimmering. Add the shrimp and sear them for 2–3 minutes on each side until they turn golden brown but are slightly undercooked. Remove the shrimp from the skillet and set aside, ensuring they stay juicy and tender.
Step 2: Sauté Aromatics
Lower the heat to medium-low, and add 3 tablespoons of butter to the skillet, allowing it to melt. Toss in 8 minced garlic cloves and 1/2 diced medium onion, cooking for about 2–3 minutes until the onion becomes translucent and aromatic. This will create a fragrant base for your Portuguese Garlic Shrimp, filling your kitchen with delightful scents.
Step 3: Create the Sauce Base
Next, stir in 2 tablespoons of tomato paste, cooking for about 7 minutes; this will deepen the red color and flavor of your sauce. As the tomato paste caramelizes, sprinkle in 2 teaspoons of peri-peri spice mix during the last 2 minutes to infuse the rich heat without burning. The mixture should turn a deep, inviting red.
Step 4: Deglaze the Pan
Now it’s time to deglaze the skillet. Pour in 3/4 cup of dry white wine, letting it cook for 3 minutes while scraping up any flavorful brown bits from the bottom of the pan. This step will enrich your sauce, combining all those delicious flavors together beautifully.
Step 5: Add the Broth and Simmer
After deglazing, pour in 1 cup of chicken broth and bring the mixture to a gentle simmer. Let it reduce for about 5 minutes, allowing the sauce to thicken slightly while the flavors meld. The aroma of your Portuguese Garlic Shrimp will be absolutely irresistible at this stage!
Step 6: Finish Cooking the Shrimp
Return the previously cooked shrimp along with any accumulated juices back to the skillet. Stir in 1/4 cup of chopped cilantro and continue to cook for an additional 3 minutes until the shrimp are fully cooked, turning opaque and plump. This final step ensures each shrimp is perfectly coated in the zesty sauce, ready to be savored.
Step 7: Serve the Dish
Your Portuguese Garlic Shrimp is now ready to serve! Scoop out generous portions onto plates and consider pairing them with fluffy rice or crusty bread to soak up that wonderfully rich sauce. This dish is a burst of vibrant flavors that will transport you straight to the heart of Portugal!

How to Store and Freeze Portuguese Garlic Shrimp
Fridge: Store leftovers in an airtight container for up to 2 days. Reheat gently in the microwave, adding a splash of water to maintain moisture.
Freezer: For longer storage, freeze Portuguese garlic shrimp in a single layer on a baking sheet, then transfer to a freezer bag. Best enjoyed within 1 month for optimal flavor.
Reheating: Thaw overnight in the fridge before reheating to retain texture and taste. Heat in a skillet over medium-low heat, stirring occasionally, until warmed through.
Expert Tips for Portuguese Garlic Shrimp
• Freshness Matters: Use the freshest shrimp available to ensure the best flavor and texture in your Portuguese Garlic Shrimp dish.
• Don’t Overcook: Aim for a perfect sear on the shrimp; remove them when they are slightly undercooked, as they’ll finish cooking in the sauce.
• Timing the Spice: Add the peri-peri spice towards the end of cooking to keep its vibrant flavor intact and avoid burning.
• Deglazing Technique: Be sure to scrape up any browned bits after adding the white wine. These add depth and richness to your sauce.
• Storage Guidelines: Keep leftovers in the fridge for up to 2 days, reheating gently in the microwave for the best experience.
• Experiment with Proteins: Feel free to substitute shrimp with scallops or calamari for delightful variations while maintaining the essence of this flavorful dish!
Portuguese Garlic Shrimp Variations
Now that you’re excited to make Portuguese Garlic Shrimp, let’s explore some fun ways to customize this delightful dish to suit your taste!
- Dairy-Free: Substitute butter with coconut oil for a rich flavor without the dairy.
- Heat Level: Add more peri-peri spice or a touch of crushed red pepper for an extra kick. Fire up your taste buds!
- Seafood Swap: Use scallops or calamari instead of shrimp for a different texture and flavor. Dive into new tastes!
- Vegetarian Version: Replace shrimp with grilled zucchini or eggplant for a wholesome plant-based option that still packs a punch.
- Citrus Zing: Squeeze fresh lemon or lime juice over the finished dish to brighten the flavors. It’s like sunshine on your plate!
- Herb Twist: Try swapping cilantro for fresh parsley or basil to add a unique twist that complements the garlic beautifully.
- Broth Variation: Use vegetable broth instead of chicken broth for a lighter, vegetarian-friendly sauce.
- Serving Style: Serve over fluffy couscous or alongside a crisp green salad to enhance the meal’s freshness and texture.
These variations open the door to a world of flavors, just like how our Cheddar Garlic Herb Soup and Sticky Garlic Chicken bring their own unique flair to the table! Enjoy experimenting!
Make Ahead Options
These Portuguese Garlic Shrimp are fantastic for meal prep enthusiasts looking to save time during busy weeknights! You can season and marinate the shrimp up to 24 hours in advance, allowing the flavors to deepen. Additionally, you can prepare the sauce base (butter, garlic, onion, tomato paste, and peri-peri spices) and refrigerate it for up to 3 days. When you’re ready to serve, simply reheat the sauce in a skillet, add the white wine and chicken broth, and let it simmer before returning the shrimp to finish cooking for about 3 minutes. This way, you’ll enjoy a delicious, restaurant-quality dish with minimal effort!
What to Serve with Portuguese Garlic Shrimp?
Indulge in the flavors of Portugal as you create a full meal that’ll transport you straight to a sun-kissed coastal getaway.
-
Fluffy Rice: A perfect canvas for the rich sauce, allowing the fiery garlic shrimp to shine while soaking up all those tantalizing flavors.
-
Crusty Bread: Ideal for dipping and savoring every drop of sauce. Each bite brings warmth and heartiness to your meal.
-
Garlic Butter Noodles: Tossed in fragrant garlic butter, these noodles provide a delightful contrast to the spice of the shrimp, making for a comforting pairing.
-
Chilled Green Salad: Fresh greens with a light vinaigrette give a crisp counterpoint to the warm, spicy shrimp. It’s a refreshing way to balance flavors.
-
Roasted Vegetables: Colorful and caramelized, an assortment of roasted seasonal veggies enhances the meal with both flavor and visual appeal.
-
Sparkling White Wine: A chilled glass of crisp sparkling white brings out the shrimp’s zest, cutting through the richness beautifully.
-
Lemon Sorbet: For dessert, this light and refreshing sorbet cleanses the palate and rounds out your Portuguese-inspired dinner perfectly, leaving you feeling satisfied yet light.
Portuguese Garlic Shrimp Recipe FAQs
What type of shrimp should I use for this recipe?
Absolutely! For the best flavor and texture in your Portuguese Garlic Shrimp, opt for fresh, shell-off, de-veined shrimp. They cook quickly and provide a tender bite that complements the zesty sauce beautifully.
How do I store leftovers from this dish?
Very simply! Store any leftover Portuguese garlic shrimp in an airtight container in the fridge for up to 2 days. When you’re ready to enjoy it again, reheat gently in the microwave, adding a splash of water to maintain moisture.
Can I freeze Portuguese Garlic Shrimp for later use?
Yes, you can! To freeze, first spread the shrimp in a single layer on a baking sheet and freeze them for about 30 minutes. Once they’re firm, transfer them to a freezer bag. This method prevents them from sticking together. Make sure to enjoy them within 1 month for the best flavor!
What should I do if my shrimp is overcooked?
If your shrimp turns out a bit overcooked, don’t fret! To salvage it, try adding a splash of stock or broth while you reheat, allowing the shrimp to soak up some moisture. You might also try tossing it into a rich sauce to help bring back some tenderness.
Is this recipe suitable for people with shellfish allergies?
Not at all! If you or someone you’re serving has a shellfish allergy, it’s best to substitute the shrimp with other proteins like scallops, chicken, or even a hearty vegetable medley for a vegetarian twist. Just be mindful that cooking times may vary based on your substitution!
How spicy is the peri-peri spice mix?
The peri-peri spice mix can vary in heat, but it typically offers a balanced kick; if you’re sensitive to spice, you can adjust the quantity to taste or substitute it with a mix of paprika and cayenne for a milder flavor. Always taste as you go!
Spicy Portuguese Garlic Shrimp Ready in 20 Minutes
Ingredients
Equipment
Method
- Season shrimp with salt. Heat 2 tbsp olive oil in a skillet over medium-high heat. Add shrimp and sear for 2-3 minutes on each side until golden but slightly undercooked. Remove and set aside.
- Lower heat to medium-low, add 3 tbsp butter, allow to melt. Add garlic and onion, cooking for about 2-3 minutes until the onion is translucent.
- Stir in 2 tbsp tomato paste, cook for about 7 minutes, caramelizing the paste. Add 2 tsp of peri-peri spice mix during the last 2 minutes.
- Pour in 3/4 cup dry white wine and deglaze the skillet, scraping the bottom. Cook for 3 minutes.
- Add 1 cup of chicken broth and let simmer for about 5 minutes to thicken.
- Return shrimp with accumulated juices, stir in 1/4 cup cilantro, cook for an additional 3 minutes until shrimp are fully cooked.
- Serve shrimp on plates, pairing with rice or crusty bread.
Leave a Reply