
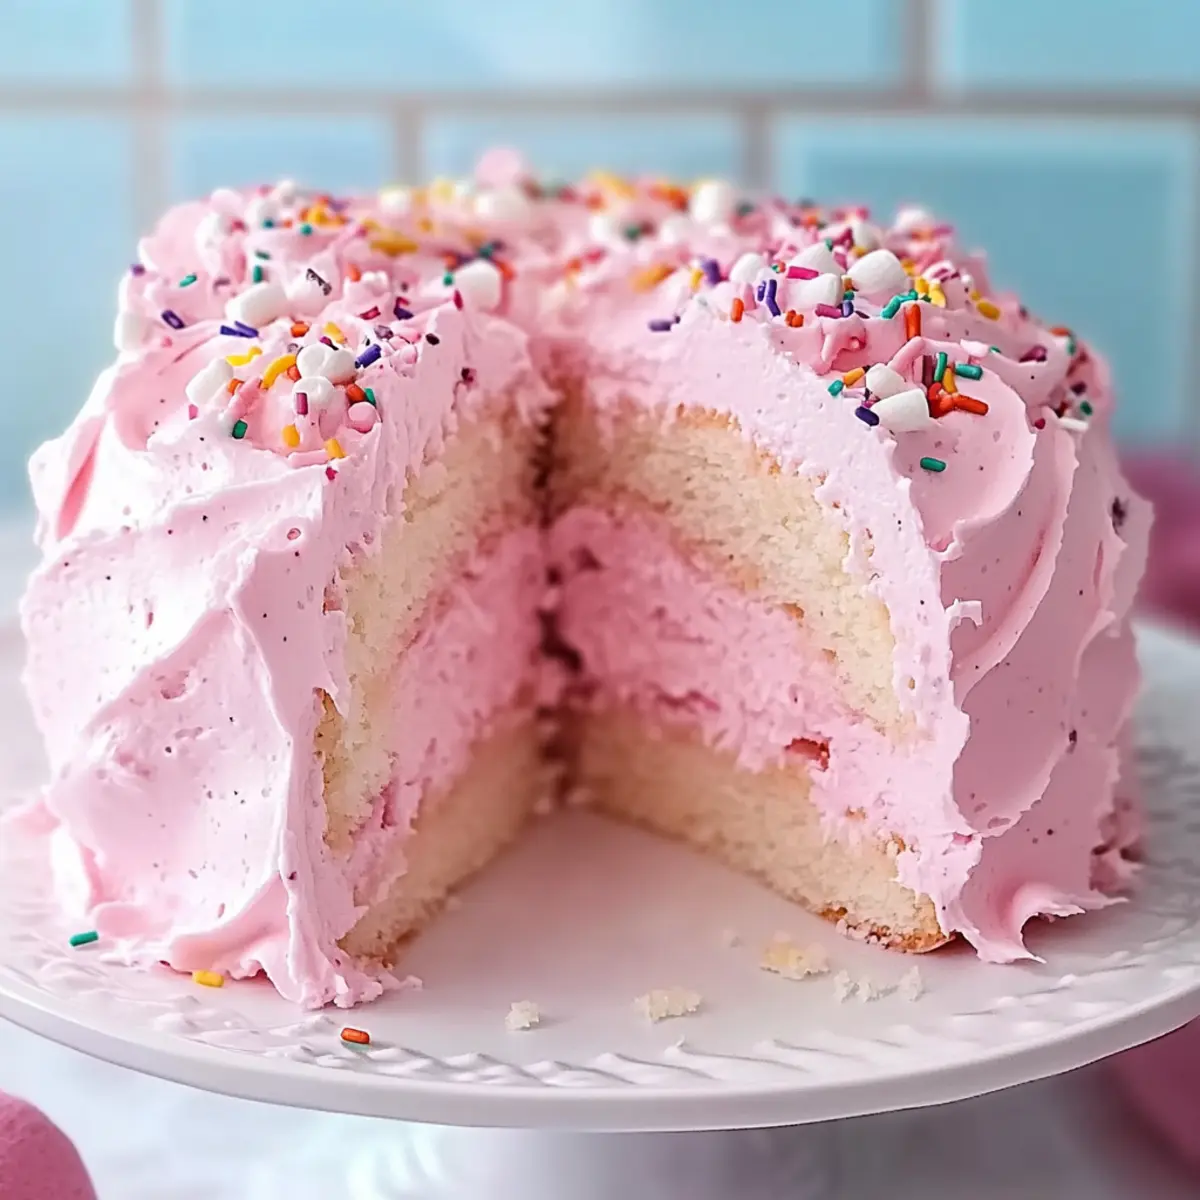
Amidst a sea of cream-laden confections, there lies a lighter choice that whispers elegance—Pink Angel Food Cake! This delightful dessert doesn’t just dazzle with its soft pink hue; it offers a fluffy texture that floats like a cloud on your palate, making it the perfect end to any meal. With just the right amount of sweetness, it’s a low-sugar option that still feels indulgent—a game changer for anyone tired of the heavy stuff. Plus, this cake is incredibly versatile! Dress it up with fresh fruit toppings or a swirl of whipped cream for a stunning presentation. Curious how to create this airy masterpiece that will leave your guests raving? Let’s dive into the magic of baking this charmingly whimsical cake together!
Why is Pink Angel Food Cake special?
Lightness: This cake is a feather-light dessert that floats on your palate, making it an exquisite treat for any occasion.
Versatile Base: Its neutral flavor allows you to customize it endlessly—top with berries or serve with a luscious sauce for a unique twist.
Low-Sugar Delight: Indulge without guilt! This recipe offers a reduced-sugar option, perfect for health-conscious dessert lovers.
Crowd-Pleaser: Whether it’s a birthday celebration or a simple afternoon coffee break, this cake will charm your guests and impress even the pickiest eaters!
Check out how to add a burst of flavor with Seafood Stuffed Shells for a complete meal idea.
Pink Angel Food Cake Ingredients
• Let’s gather what you need to make this ethereal treat!
For the Cake
- Cake Flour – Provides a delicate structure; substituting with all-purpose flour will yield a slightly denser cake.
- Powdered Sugar – Adds sweetness and ensures a smooth batter; while granulated sugar may work in a pinch, it’s best to stick with powdered sugar for this recipe.
- Salt – Balances sweetness and enhances the overall flavor.
- Egg Whites (2 cups) – The star ingredient for that light, airy texture; ensure they are at room temperature for optimal whipping.
- Cream of Tartar (1.5 tsp) – Stabilizes the egg whites, helping them achieve maximum volume.
- Superfine Sugar (3/4 cup + 2 tbsp) – Mixes in effortlessly with egg whites for smoothness; regular granulated sugar can be used but may require longer whipping.
- Vanilla Bean Paste or Pure Vanilla Extract (1/2 tsp) – Infuses warm, inviting flavors; feel free to substitute with vanilla extract if needed.
- Almond Extract (1/8 tsp) – Enhances complexity; can be omitted if you prefer a pure vanilla flavor.
- Pink Food Coloring (several drops, optional) – Adds that charming pink hue; consider using natural coloring agents for a healthier substitute.
For the Frosting
- Granulated Sugar (1 3/4 cups + 2 tbsp) – Essential for sweetness and structure in your frosting.
- Light Corn Syrup (2 tbsp) – Contributes gloss and stability; no substitute recommended for desired texture.
- Heavy Cream (for serving, optional) – Elevates the dessert even further; highly recommended!
This Pink Angel Food Cake is all set to make your dessert table sing with its pastel charm and delightful flavor!
Step‑by‑Step Instructions for Pink Angel Food Cake
Step 1: Preheat Your Oven
Begin by preheating your oven to 350°F (180°C) and positioning the rack in the lower third of the oven. This will ensure even heat circulation, promoting a perfectly risen Pink Angel Food Cake. Make sure your oven is fully heated before placing the cake inside for optimal baking results.
Step 2: Sift the Dry Ingredients
In a large mixing bowl, sift together 1 cup of cake flour, 1 cup of powdered sugar, and a pinch of salt four times. Sifting is key to achieving that delicate texture, so take your time with it. Set the mixture aside, allowing the light, fluffy dry ingredients to rest while you prepare the egg whites.
Step 3: Clean the Mixing Equipment
To ensure your egg whites whip up perfectly, wipe the mixing bowl and beaters with lemon juice. This will help remove any grease, allowing for maximum volume. Once cleaned, you’re ready to begin whipping the egg whites for your Pink Angel Food Cake, which is critical for its airy texture.
Step 4: Whip the Egg Whites
In the prepared mixing bowl, add 2 cups of room-temperature egg whites and beat on low speed until frothy. Gradually incorporate 1.5 teaspoons of cream of tartar into the whites, then increase the speed and continue beating until the mixture thickens and holds soft peaks. Achieving that right stage is essential for the cake’s lift.
Step 5: Add the Superfine Sugar
With the egg whites whipped to soft peaks, slowly add 3/4 cup of superfine sugar, one tablespoon at a time. Continue beating until the mixture begins to form glossy, stiff peaks. This step is crucial for gaining the right structure and sweetness for your Pink Angel Food Cake, elevating its airy quality.
Step 6: Incorporate Flavors and Color
Gently mix in 1/2 teaspoon of vanilla bean paste and several drops of pink food coloring, if desired. Use a spatula to fold in these ingredients carefully, maintaining the airy texture achieved in the egg whites while adding a delightful flavor and a charming pink hue to the batter.
Step 7: Fold in the Dry Ingredients
Gradually fold the sifted dry ingredients into the egg whites in four additions, using a gentle motion to avoid deflating the batter. This step is essential for integrating flavors while keeping your Pink Angel Food Cake light and fluffy. Patience is key, as these gentle folds help transport air throughout the mixture.
Step 8: Transfer to the Cake Pan
Carefully pour the batter into an ungreased angel food cake pan, smoothing the top with a spatula. Avoid greasing the pan, as the batter needs to cling to the sides for proper rising. This will help create the signature height and texture that makes the Pink Angel Food Cake so delightful.
Step 9: Bake to Perfection
Place the pan in the preheated oven to bake for 35 minutes. The cake is done when the top springs back gently upon touch and a toothpick inserted into the center comes out clean. Keep a close eye on it as it bakes, as you want to capture that light golden hue on the surface.
Step 10: Cool the Cake Upside Down
Once baked, carefully invert the pan to cool it on a wire rack for about 1 hour. This cooling method helps set the cake’s fluffy structure. After cooling, gently release the cake from the pan, ensuring that the airy texture remains intact for your delightful Pink Angel Food Cake.
Step 11: Prepare the Frosting
For the frosting, whisk together egg whites, 1 3/4 cups of granulated sugar, 2 tablespoons of light corn syrup, 1.5 teaspoons of cream of tartar, and a pinch of salt over simmering water until it reaches 130°F (54°C). This warm stage is crucial for creating a stable, marshmallow-like frosting that will adorn your cake beautifully.
Step 12: Beat and Finish the Frosting
Transfer the mixture to a stand mixer and beat until thick and glossy. Once it reaches the desired texture, gently fold in vanilla and a few drops of food coloring, if you’d like. This delightful frosting will add a beautiful finish to your Pink Angel Food Cake, turning it into a show-stopping dessert.
Step 13: Frost and Decorate the Cake
Once the cake has cooled completely, generously frost the top and sides with your marshmallow frosting, creating swirls and peaks for a charming look. Feel free to add colorful sprinkles or fresh fruit on top for decorative flair, making your Pink Angel Food Cake not only delicious but also visually stunning!
Expert Tips for Pink Angel Food Cake
-
Choose Fresh Egg Whites: Always use fresh egg whites and bring them to room temperature for maximum volume when whipping. This is key to achieving the light texture of your Pink Angel Food Cake.
-
Handle with Care: Avoid overbeating egg whites; stop whipping as soon as stiff peaks form. Overbeating can cause the mixture to break down, leading to a denser cake.
-
Gentle Folding: When incorporating dry ingredients, fold gently to maintain the airy quality of the batter. This helps keep your Pink Angel Food Cake light and fluffy, so don’t rush!
-
Skip the Grease: Do not grease your cake pan! The batter relies on the sides of the pan to climb and rise properly. Greasing it will prevent that magical ascent.
-
Cool Upside Down: Invert the cake pan while cooling to maintain its structure. This is a crucial step to ensure your finished cake stays airy and does not collapse.
-
Variations and Toppings: Feel free to experiment! Use different extracts or top with fresh fruit to customize flavors and add a personal touch to your Pink Angel Food Cake.
Pink Angel Food Cake Variations
Get ready to personalize your Pink Angel Food Cake and elevate it to new heights of deliciousness with these fun twists!
-
Citrus Burst: Swap almond extract for orange extract to infuse a refreshing zing. It pairs perfectly with berries!
-
Berry Bliss: Top with fresh raspberries or blueberries for a burst of juicy flavor that complements the cake’s sweetness beautifully. Fresh fruit adds a delightful pop!
-
Layered Delight: Create a stunning layered cake by slicing the cake in half and adding a layer of lemon curd or strawberry preserves between the layers for an extra flavor dimension. This twist makes every slice a surprise!
-
Chocolate Drizzle: Add a rich chocolate ganache on top for a decadent surprise that will utterly delight chocolate lovers. The contrast of flavors creates a harmonious balance.
-
Minty Fresh: Infuse the frosting with a drop of peppermint extract or pile fresh mint leaves on top for a refreshing touch. It’s a delightful way to elevate your dessert!
-
Nutty Flavor: Incorporate finely chopped nuts into your frosting for a delightful crunch in every bite. Almonds or hazelnuts will add texture and flavor.
-
Coconut Cream: Fold shredded coconut into the batter for a tropical twist that pairs beautifully with the lightness of the cake. It’s like a mini-vacation on a plate!
-
Spicy Spin: For those who love a hint of warmth, a pinch of cinnamon or nutmeg in the batter can deepen flavors and create a cozy vibe. It’s an unexpected yet welcome twist!
Feeling adventurous? Why not pair this delightful cake with a savory dish, like Seafood Stuffed Shells, for a well-rounded meal that impresses?
What to Serve with Pink Angel Food Cake
There’s nothing quite like the airy bliss of a Pink Angel Food Cake; enhance its charm by pairing it with delightful accompaniments.
-
Whipped Cream:
A dollop adds creamy richness, beautifully contrasting the cake’s airy texture, making each bite irresistible. -
Fresh Berries:
Strawberries, raspberries, or blueberries brighten the plate and offer a tartness that balances the cake’s sweetness. -
Vanilla Ice Cream:
The cold, creamy decadence of vanilla ice cream complements the cake’s soft texture, creating a heavenly experience. -
Citrus Sauce:
A drizzle of lemon or orange sauce gives a bright and refreshing zing, harmonizing beautifully with the cake’s flavor. -
Chocolate Ganache:
A thin layer of chocolate ganache adds luxurious richness, making your dessert even more eye-popping and delectable. -
Sparkling Wine:
Pair with a glass of bubbly for a festive touch. The effervescence cuts through the sweetness, elevating your dessert experience. -
Fruit Salad:
A medley of seasonal fruits not only adds freshness but also presents a colorful, vibrant side that enhances your brunch or dessert spread. -
Mini Fruit Tarts:
Serve alongside mini tarts filled with pastry cream and topped with fresh fruit for a delightful assortment that pleases guests’ palates.
Make Ahead Options
These Pink Angel Food Cake preparations are perfect for busy home cooks looking to save time! You can whip up the batter and store it in the fridge for up to 24 hours before baking—just be sure to cover it tightly to prevent it from drying out. The whipped frosting can also be made ahead and refrigerated for up to 3 days; gently rewhip it before spreading for that perfect texture. When you’re ready to serve, simply bake the cake and let it cool upside down as instructed, then frost it right before enjoying. This way, you’ll have a stunning dessert with minimal effort on the day of your gathering!
How to Store and Freeze Pink Angel Food Cake
Room Temperature: Keep the Pink Angel Food Cake covered at room temperature for up to 3 days to maintain its light texture. A cake dome or plastic wrap works well to prevent drying.
Fridge: If you need to store it longer, the cake can be refrigerated for up to a week. Just make sure it’s covered to protect it from absorbing odors.
Freezer: For extended storage, freeze the cake by wrapping it tightly in plastic wrap followed by aluminum foil. It can last up to 3 months. Thaw in the fridge overnight before serving for the best texture.
Reheating: If you prefer your cake slightly warmed, briefly microwave it in 10-second intervals to avoid drying it out. Enjoy the fluffy goodness of your Pink Angel Food Cake!
Pink Angel Food Cake Recipe FAQs
What type of flour should I use for Pink Angel Food Cake?
Absolutely! Cake flour is the best choice for Pink Angel Food Cake as it provides a delicate structure. If you don’t have cake flour on hand, you can use all-purpose flour, but be aware that it will yield a slightly denser cake. For optimal results, stick with cake flour!
How should I store my Pink Angel Food Cake?
Very easy! You can keep the Pink Angel Food Cake covered at room temperature for up to 3 days. For longer freshness, refrigerate it for up to a week, ensuring it’s well-covered to prevent it from absorbing any odors. A cake dome works wonders for this!
Can I freeze Pink Angel Food Cake, and how?
Absolutely! To freeze, wrap the cake tightly in plastic wrap followed by aluminum foil. This double wrapping helps keep your cake fresh for up to 3 months. When you’re ready to enjoy it again, simply thaw it in the fridge overnight before serving for the best texture.
What should I do if my egg whites aren’t whipping up properly?
Don’t panic! Ensure that no egg yolks mix in with your egg whites, as this can prevent them from whipping up correctly. Also, using room-temperature egg whites significantly aids in achieving that fluffy texture. If your egg whites are grainy or not holding their shape, you might have overbeat them, so it’s vital to stop whipping once you hit stiff peaks.
Is this Pink Angel Food Cake suitable for gluten-free diets?
While this recipe is not gluten-free as it uses cake flour, you can easily modify it! Substitute cake flour for a gluten-free baking blend designed for cakes. Be sure to check that all other ingredients are gluten-free, especially additives like extracts. It’s a delicious twist that everyone can enjoy!
Can I use colored food gel instead of liquid food coloring for this recipe?
Certainly! Gel food coloring can be an excellent alternative to liquid colorings. It typically requires a smaller amount to achieve vibrant colors, so start with a drop or two and mix until you reach the desired shade. Just remember, every little drop counts, so add it slowly for perfect pastel pink!
Fluffy Pink Angel Food Cake That Dances on Your Taste Buds
Ingredients
Equipment
Method
- Preheat your oven to 350°F (180°C) and position the rack in the lower third.
- Sift together cake flour, powdered sugar, and salt four times. Set aside.
- Clean the mixing bowl and beaters with lemon juice to ensure they are grease-free.
- In a mixing bowl, add egg whites and beat on low until frothy. Gradually add cream of tartar and continue beating until soft peaks form.
- Slowly add superfine sugar, one tablespoon at a time, and beat until glossy, stiff peaks form.
- Gently mix in vanilla bean paste and food coloring, if desired.
- Fold the sifted dry ingredients into the egg whites in four additions carefully.
- Pour the batter into an ungreased angel food cake pan and smooth the top.
- Bake in the oven for 35 minutes, until the top springs back and a toothpick comes out clean.
- Invert the cake pan to cool on a wire rack for about 1 hour.
- Prepare the frosting by whisking egg whites, granulated sugar, light corn syrup, cream of tartar, and salt over simmering water until it reaches 130°F (54°C).
- Beat the mixture until thick and glossy, then gently fold in vanilla and food coloring, if desired.
- Once the cake has cooled completely, frost the top and sides with the frosting, creating swirls and peaks.
Leave a Reply