
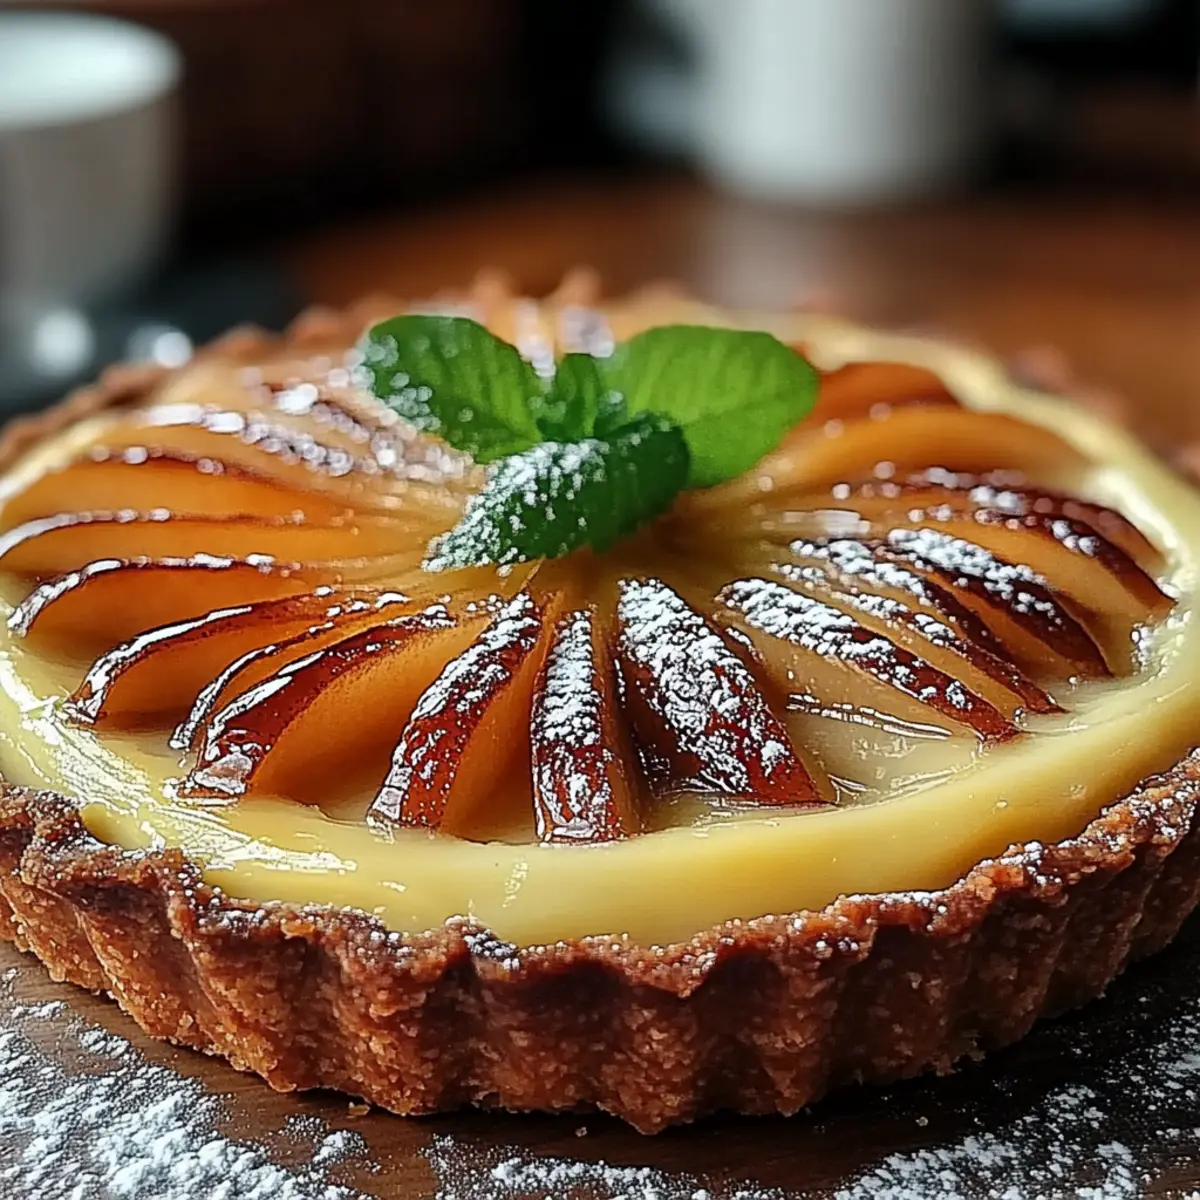
As I whisked together the creamy custard, the aroma of real vanilla bean wafted through my kitchen, whisking me away to a quaint French patisserie. Today, I’m excited to share my recipe for a Pear & Vanilla Bean Bliss Tart that elegantly marries sweet, caramelized pear slices with a luscious custard, all nestled in a flaky, buttery crust. Not only does this delightful tart come together quickly, but it also impresses as a showstopper for gatherings or a simple, indulgent treat during a quiet evening at home. Packed with warmth and comfort while still being versatile for gluten-free or low-sugar diets, this dessert will be an instant favorite. What twist on this classic tart will you try first?
Why is this tart a must-try?
Delightful Elegance: This Pear & Vanilla Bean Bliss Tart blends sophistication with simplicity, making it a perfect centerpiece for any gathering. Versatile Options: With variations for gluten-free and dairy-free diets, everyone can enjoy this treat. Irresistible Aroma: The rich scent of vanilla and caramelized pears will fill your home, creating an inviting atmosphere. Quick Preparation: Who doesn’t love an elegant dessert that comes together quickly? For more easy yet impressive recipes, try my Vanilla Cinnamon Buttermilk Pancakes or the comforting Hamburger Green Bean. Crowd-Pleasing Flavor: The balance of sweet and creamy keeps guests coming back for more—a true showstopper everyone will adore!
Pear & Vanilla Bean Bliss Tart Ingredients
• Gather these essential ingredients to create your delightful Pear & Vanilla Bean Bliss Tart.
For the Crust
- All-Purpose Flour – Provides structure and crispiness; substitute with a gluten-free flour blend for a gluten-free option.
- Almond Flour – Adds nuttiness and moisture; can be omitted if allergic to nuts.
- Unsalted Butter – Contributes richness and flakiness to the crust; use cold and cubed for best results and substitute with dairy-free butter if needed.
- Ice-Cold Water – Helps bind the crust without warming the butter; ensure it’s chilled to maintain flakiness.
For the Custard
- Heavy Cream – Forms the base of the custard for a rich texture; replace with full-fat coconut milk for a dairy-free option.
- Egg Yolks – Provide richness and act as a thickening agent; important for structure—do not substitute with whole eggs.
- Granulated Sugar – Sweetens the custard; half the quantity and add stevia for a low-sugar option.
- Vanilla Bean – Adds aromatic depth; use pure vanilla extract as a substitution if unavailable.
For the Pear Glaze
- Ripe Pears (Bartlett or Bosc) – Offer natural sweetness and texture; substitute with apples or quince for a different flavor profile.
- Honey – Sweetens and glazes the pears; can substitute with maple syrup for a vegan option.
- Lemon Juice – Brightens flavors and balances sweetness; important for the glaze; can replace with lime juice.
- Flaky Sea Salt – Enhances overall flavor; use kosher salt if unavailable.
Step‑by‑Step Instructions for Pear & Vanilla Bean Bliss Tart
Step 1: Prepare the Crust
In a food processor, combine all-purpose flour, almond flour, and a pinch of flaky sea salt. Pulse until blended, then add cold, cubed unsalted butter. Pulse until the mixture is crumbly and resembles coarse sand. Gradually add ice-cold water, pulsing until the dough just comes together. Form it into a disk, wrap it in plastic, and chill in the refrigerator for 30 minutes.
Step 2: Make the Custard
In a medium bowl, whisk together the egg yolks and granulated sugar until thick and pale. In a saucepan, heat the heavy cream over medium-low heat until it simmers, then gradually whisk it into the yolk mixture to temper the eggs. Return the custard mixture to the saucepan and cook on low heat, stirring gently until it coats the back of a spoon, approximately 6-8 minutes.
Step 3: Blind-Bake the Crust
Preheat your oven to 375°F (190°C). Roll out the chilled dough on a lightly floured surface into a 12-inch circle, then transfer it to a tart pan. Prick the bottom with a fork, line with parchment, and fill with pie weights or dried beans. Bake for 15-20 minutes, or until the edges are lightly golden. Remove the weights and parchment, then return to the oven for an additional 5 minutes to ensure a crisp base.
Step 4: Assemble and Bake the Tart
Arrange the sliced ripe pears evenly over the cooled tart crust. Pour the homemade custard over the pears, making sure they are fully submerged. Bake the Pear & Vanilla Bean Bliss Tart in the preheated oven for 40-45 minutes, or until the custard is set and the top is lightly golden. You can gently shake the pan; the center should have a slight jiggle.
Step 5: Glaze the Pears
Once baked, remove the tart from the oven and allow it to cool slightly for about 10 minutes. In a small bowl, whisk together honey and lemon juice, then brush the mixture generously over the warm pears to create a beautiful glaze. This adds a lovely sheen and enhances the sweetness of the fruit, making your tart even more irresistible.
Step 6: Slice and Serve
Let the Pear & Vanilla Bean Bliss Tart cool completely to room temperature before slicing. For a delicious serving suggestion, pair with a dollop of whipped cream or a scoop of vanilla ice cream. This elegant dessert is perfect for celebrating special occasions or simply indulging in a sweet treat at home!
Make Ahead Options
Preparing the Pear & Vanilla Bean Bliss Tart in advance is a fantastic way to save time, especially for busy weeknights or special occasions! You can make the tart crust up to 24 hours in advance and store it wrapped tightly in plastic wrap in the refrigerator. The custard can also be prepared ahead and refrigerated for up to 3 days; just give it a gentle re-whisk before pouring it over the pears. To maintain the tart’s freshness, slice and glaze the pears just before serving. When you’re ready to enjoy, simply assemble, bake, and you’ll have a stunning dessert that tastes just as delicious as if made fresh that day!
Pear & Vanilla Bean Bliss Tart Variations
Feel free to personalize your Pear & Vanilla Bean Bliss Tart with these exciting variations that will elevate your dessert experience!
-
Gluten-Free: Use a gluten-free flour blend in the crust for a delightful alternative that everyone can enjoy.
-
Dairy-Free: Swap heavy cream with full-fat coconut milk for a luscious custard that’s completely dairy-free, allowing all to indulge.
-
Low-Sugar: Halve the granulated sugar and replace it with stevia for a lighter, low-sugar option that still satisfies your sweet tooth.
-
Apple Twist: Substitute the pears with thinly sliced apples to create a tart with a different, yet equally delicious flavor profile.
-
Savory Crust: Experiment by incorporating grated Parmesan into the crust for a delightful savory twist that brings an unexpected charm to each slice.
-
Almond Flavor: Replace the vanilla bean with almond extract to introduce a new layer of flavor that beautifully complements the fruit.
-
Spice It Up: Add a dash of cinnamon or nutmeg to the custard for a warm, spicy note that pairs perfectly with the sweet pears.
-
Caramel Drizzle: Once baked and cooled, drizzle melted caramel sauce over the tart for an extra sweet kick that will leave everyone wanting more.
For more easy yet impressive recipes, like the comforting Hamburger Green Bean or the fluffy Vanilla Cinnamon Buttermilk Pancakes, check them out and elevate your dessert game today!
Expert Tips for Pear & Vanilla Bean Bliss Tart
-
Perfect Pears: Choose ripe Bartlett or Bosc pears for optimal sweetness and texture. Underripe pears can be too firm and won’t caramelize well.
-
Customize the Crust: Feel free to experiment! You can use gluten-free flour blends to suit dietary needs or swap in almond flour for a nutty flavor.
-
Gentle Custard Mixing: Mix your custard gently to avoid incorporating too much air. This ensures a smooth, silky texture for your Pear & Vanilla Bean Bliss Tart.
-
Monitor Baking Time: Watch the tart closely during the last few minutes of baking. The custard should set but retain a slight jiggle in the center for a perfect texture.
-
Glazing Tips: Brush the glaze over the warm pears immediately after removing the tart from the oven for the best shine and flavor enhancement.
How to Store and Freeze Pear & Vanilla Bean Bliss Tart
Fridge: Store your tart in an airtight container in the refrigerator for up to 3 days. This keeps the custard creamy and the crust fresh.
Freezer: Wrap individual slices tightly in plastic wrap, then aluminum foil, and freeze for up to 2 months. This preserves the flavor and makes portions easy to enjoy later.
Reheating: Reheat slices in an oven preheated to 350°F (175°C) for about 10-15 minutes, allowing the custard to warm through while keeping the crust crispy.
Serving Tip: Enjoy your Pear & Vanilla Bean Bliss Tart warm, topped with a dollop of whipped cream or a scoop of ice cream for an indulgent treat!
What to Serve with Pear & Vanilla Bean Bliss Tart
As you savor each delightful bite of your tart, consider these scrumptious companions that will elevate your dining experience to new heights.
- Creamy Whipped Cream: A light dollop of freshly whipped cream adds a cloud-like texture that contrasts beautifully with the tart’s richness.
- Vanilla Ice Cream: The classic pairing of vanilla ice cream creates a delicious temperature contrast and a sweet, creamy complement to the warm tart.
- Roasted Nuts: A sprinkle of lightly roasted almonds or hazelnuts brings a satisfying crunch, enhancing the tart’s smooth custard and tender pear slices.
- Fruity Compote: A homemade berry or citrus compote provides a tangy brightness, balancing the sweetness of the tart while adding a pop of color.
- Sparkling Wine: A chilled glass of sparkling wine, like Prosecco, pairs wonderfully by enhancing the tart’s elegant presentation and flavor profile.
- Herbal Tea: A warm cup of chamomile or mint tea cleanses the palate and adds an aromatic touch, making each bite feel all the more special.
- Chocolate Sauce: Drizzling a thin line of rich chocolate sauce over each slice offers a decadent twist that little ones (and the young at heart) will love.
- Caramel Sauce: For those who can’t resist the extra sweetness, a light drizzle of homemade caramel sauce brings an inviting depth that’s simply irresistible.
- Seasonal Fruit Salad: A side of fresh fruit salad, bursting with seasonal flavors, adds brightness and freshness to your dessert spread.
Pear & Vanilla Bean Bliss Tart Recipe FAQs
What type of pears are best for this tart?
Absolutely! Ripe Bartlett or Bosc pears are ideal for the Pear & Vanilla Bean Bliss Tart. They provide the perfect balance of sweetness and tenderness. Avoid underripe pears, as they can be too firm and won’t caramelize as beautifully.
How should I store the tart after it’s made?
You can store your tart in an airtight container in the refrigerator for up to 3 days to maintain its creamy custard and fresh crust. Just make sure it’s well-sealed to keep out any fridge odors!
Can I freeze the Pear & Vanilla Bean Bliss Tart? What’s the best way?
Yes, you can! For optimal results, wrap individual slices tightly in plastic wrap, then in aluminum foil. They can be frozen for up to 2 months. When you’re ready to enjoy, thaw them in the fridge overnight, and reheat in a preheated oven at 350°F (175°C) for about 10-15 minutes to keep the crust crispy.
What can I do if my custard isn’t thickening properly?
Very! If your custard isn’t thickening, make sure you’re cooking it on low heat and stirring gently. It should coat the back of a spoon after about 6-8 minutes. If it still seems too thin, you can return it to the heat for a few more minutes, stirring constantly until you achieve the desired consistency.
Are there any common allergies I should think about with this recipe?
Absolutely! This recipe contains eggs, dairy, and gluten. For those with allergies, you can use dairy-free butter and full-fat coconut milk, swap the all-purpose flour with a gluten-free flour blend, and ensure the egg yolks are safe for your needs. If your guests have nut allergies, simply omit the almond flour!
Can I use other fruits in this tart?
Very! Feel free to get creative! You can substitute the pears with thinly sliced apples or even quince for a different twist. Imagine the delicious variations waiting for you!
Pear & Vanilla Bean Bliss Tart for a Decadent Treat
Ingredients
Equipment
Method
- In a food processor, combine all-purpose flour, almond flour, and a pinch of flaky sea salt. Pulse until blended, then add cold, cubed unsalted butter. Pulse until the mixture is crumbly. Gradually add ice-cold water, pulsing until the dough just comes together. Form it into a disk, wrap it in plastic, and chill in the refrigerator for 30 minutes.
- In a medium bowl, whisk together the egg yolks and granulated sugar until thick and pale. In a saucepan, heat the heavy cream over medium-low heat until it simmers, then gradually whisk it into the yolk mixture to temper the eggs. Return the custard mixture to the saucepan and cook on low heat until it coats the back of a spoon, approximately 6-8 minutes.
- Preheat your oven to 375°F (190°C). Roll out the chilled dough into a 12-inch circle, then transfer it to a tart pan. Prick the bottom with a fork, line with parchment, and fill with pie weights. Bake for 15-20 minutes, or until the edges are golden. Remove the weights and parchment, bake for an additional 5 minutes.
- Arrange sliced pears over the cooled tart crust. Pour the custard over the pears, ensuring they are submerged. Bake for 40-45 minutes, or until the custard is set and slightly golden.
- Once baked, let the tart cool for about 10 minutes. In a bowl, whisk together honey and lemon juice, then brush it over the warm pears to create a glaze.
- Allow the tart to cool completely before slicing. Serve with whipped cream or vanilla ice cream.
Leave a Reply