
Can you hear that delightful squish? It’s the sound of our two favorite worlds colliding in this incredible Oreo Mochi recipe! This treat marries the chewy, loving embrace of traditional Japanese mochi with the decadent crunch of Oreos, creating a unique dessert experience that will leave you craving more. With just a handful of simple ingredients, this easy preparation allows anyone—even novice bakers—to whip up a dessert that’s perfect for sharing or keeping all to yourself. Plus, it’s a wonderful way to elevate your snack game and impress friends with its whimsical twist on classic flavors. So, are you ready to dive into this delicious adventure and bring a little fun into your kitchen?
Why Is This Oreo Mochi Recipe a Must-Try?
Irresistible Combination: The blend of soft, chewy mochi and the rich, chocolatey crunch of Oreos creates an unforgettable taste experience that pleases both mochi purists and cookie enthusiasts.
Quick and Easy: With a simple preparation process, you can create this delightful treat in under an hour—perfect for those busy days when you need a sweet escape!
Crowd-Pleaser: Whether you’re hosting a gathering or treating yourself, this dessert will dazzle your friends and family and bring fun to any occasion—just like my Jack Skellington Oreo pops!
Customizable: Feeling adventurous? Try adding other cookie flavors or even fillings like chocolate ganache for a personal touch.
Unique Dessert Choice: This isn’t your standard sweet treat; it’s a playful take on traditional flavors that’s bound to become a favorite!
Oreo Mochi Recipe Ingredients
For the Mochi
• Glutinous Rice Flour – Essential for authentic mochi, providing the primary chewy texture; do not substitute with regular rice flour.
• Cornstarch – Enhances smoothness; can be replaced with tapioca starch for a different texture.
• Cocoa Powder – Adds a rich chocolate flavor; unsweetened cocoa is recommended for balanced sweetness.
• White Sugar – Sweetens the mochi; can substitute with granulated sweeteners as desired.
• Corn Oil – Contributes moisture and prevents sticking; can be substituted with vegetable oil if needed.
• Milk – Adds creaminess and helps blend ingredients; dairy-free alternatives like almond or oat milk can be used.
For the Coating
• Oreo Cookies – Provides flavor and a crunchy coating; any crushed cookies can be used for variety, but ensure they are finely ground for coating.
Step‑by‑Step Instructions for Oreo Mochi Recipe
Step 1: Mix Ingredients
In a large mixing bowl, combine 1 cup of glutinous rice flour, 1 tablespoon of cornstarch, 2 tablespoons of cocoa powder, and 1/4 cup of white sugar. Gradually stir in 3/4 cup of milk and 1 tablespoon of corn oil until the mixture is smooth and lump-free—this should take about 3-4 minutes of mixing.
Step 2: Sift Batter
To ensure a velvety texture, strain the batter through a fine sieve into a medium-sized pot. This step helps eliminate any remaining lumps, resulting in a delightful dough for your Oreo mochi recipe. Make sure the pot has good non-stick properties to simplify the next step.
Step 3: Cook Mixture
Place the pot over low to medium heat and stir continuously with a spatula. Cook for about 8-10 minutes, or until the mixture thickens to a dough-like consistency and starts to pull away from the sides. The color should turn a darker brown, signaling that it’s ready for the next step.
Step 4: Pull Dough
Once thickened, transfer the warm mochi dough onto a clean, lightly cornstarch-dusted surface. Allow it to cool for 5-10 minutes until it’s safe to handle. Begin stretching and pulling the dough repeatedly until it becomes smooth and elastic, which typically takes another 5 minutes of kneading.
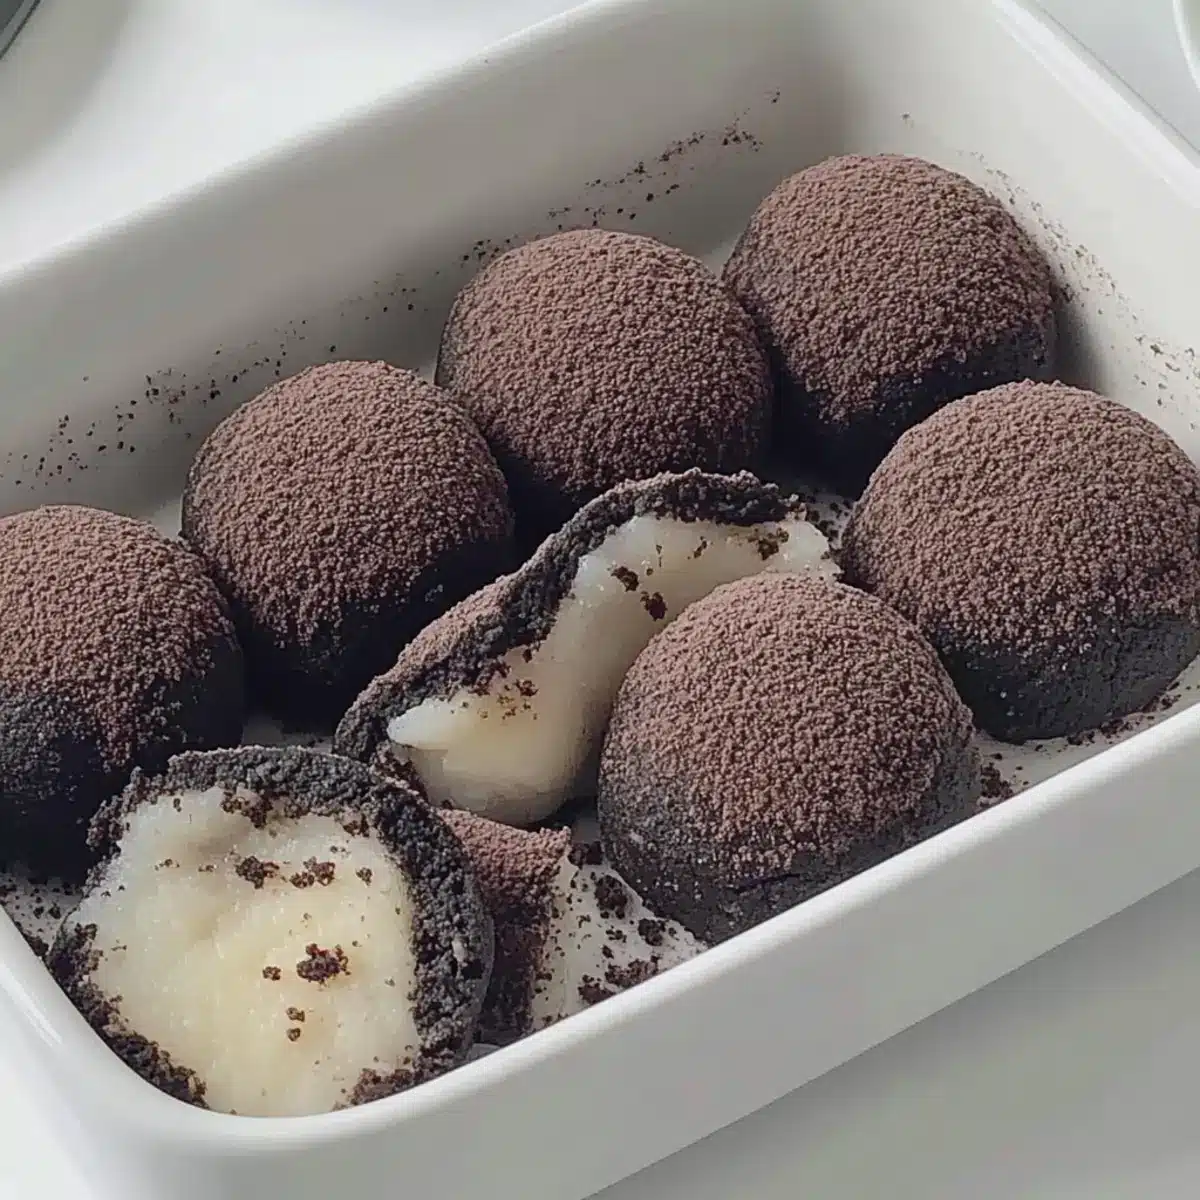
Step 5: Shape Mochi Balls
Divide the soft mochi dough into equal pieces, about 1 to 2 inches in diameter, and roll each piece into a smooth ball with the palms of your hands. The dough should be slightly sticky but manageable. Place the mochi balls onto a tray lined with parchment paper.
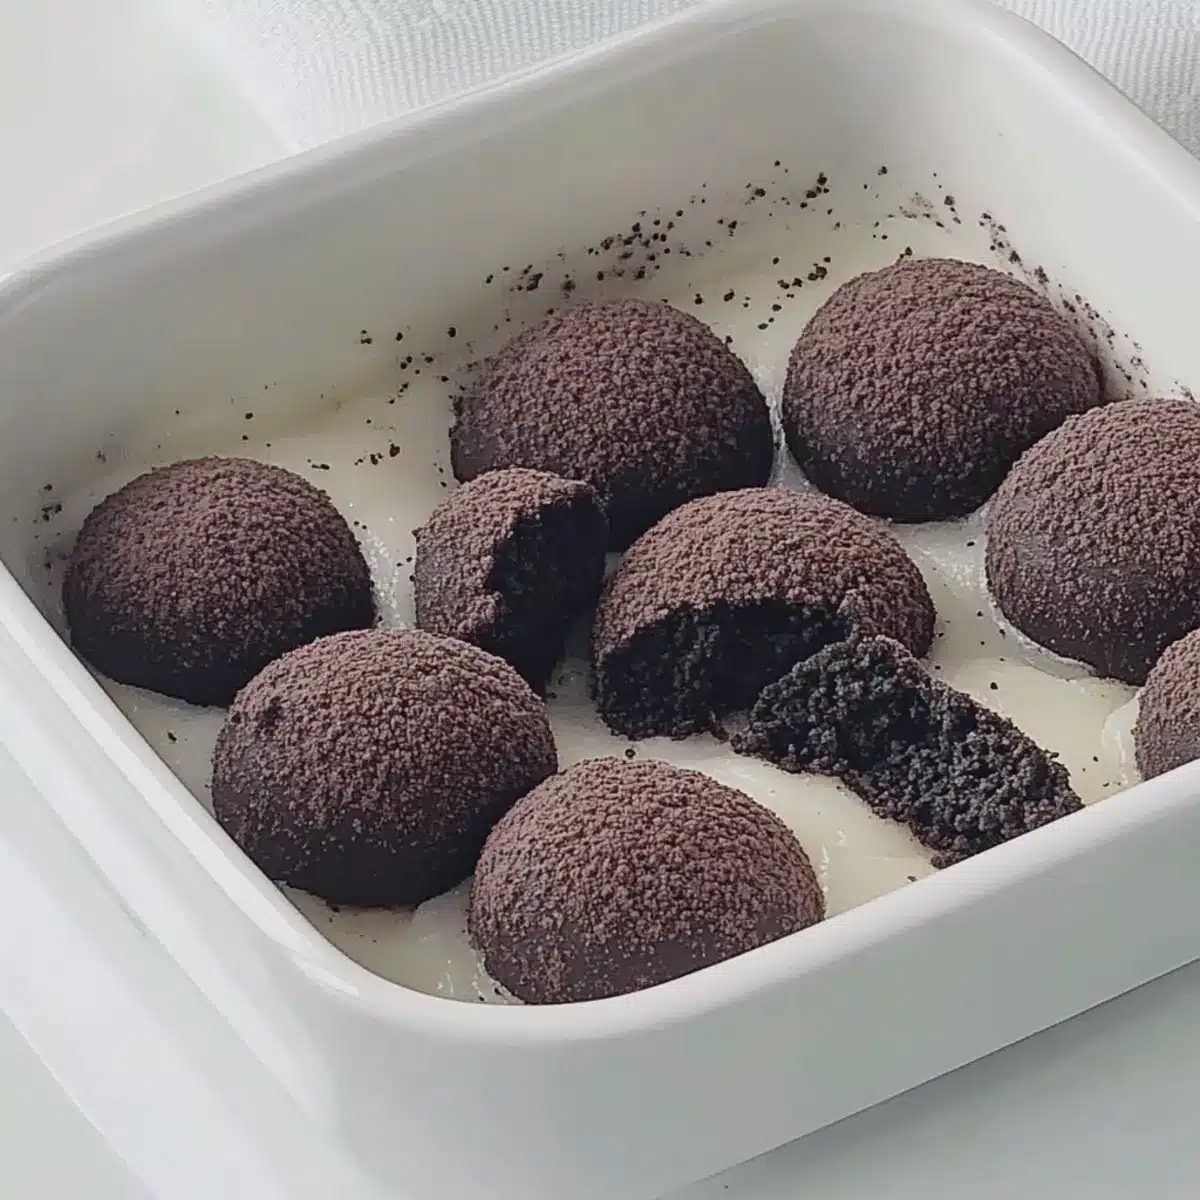
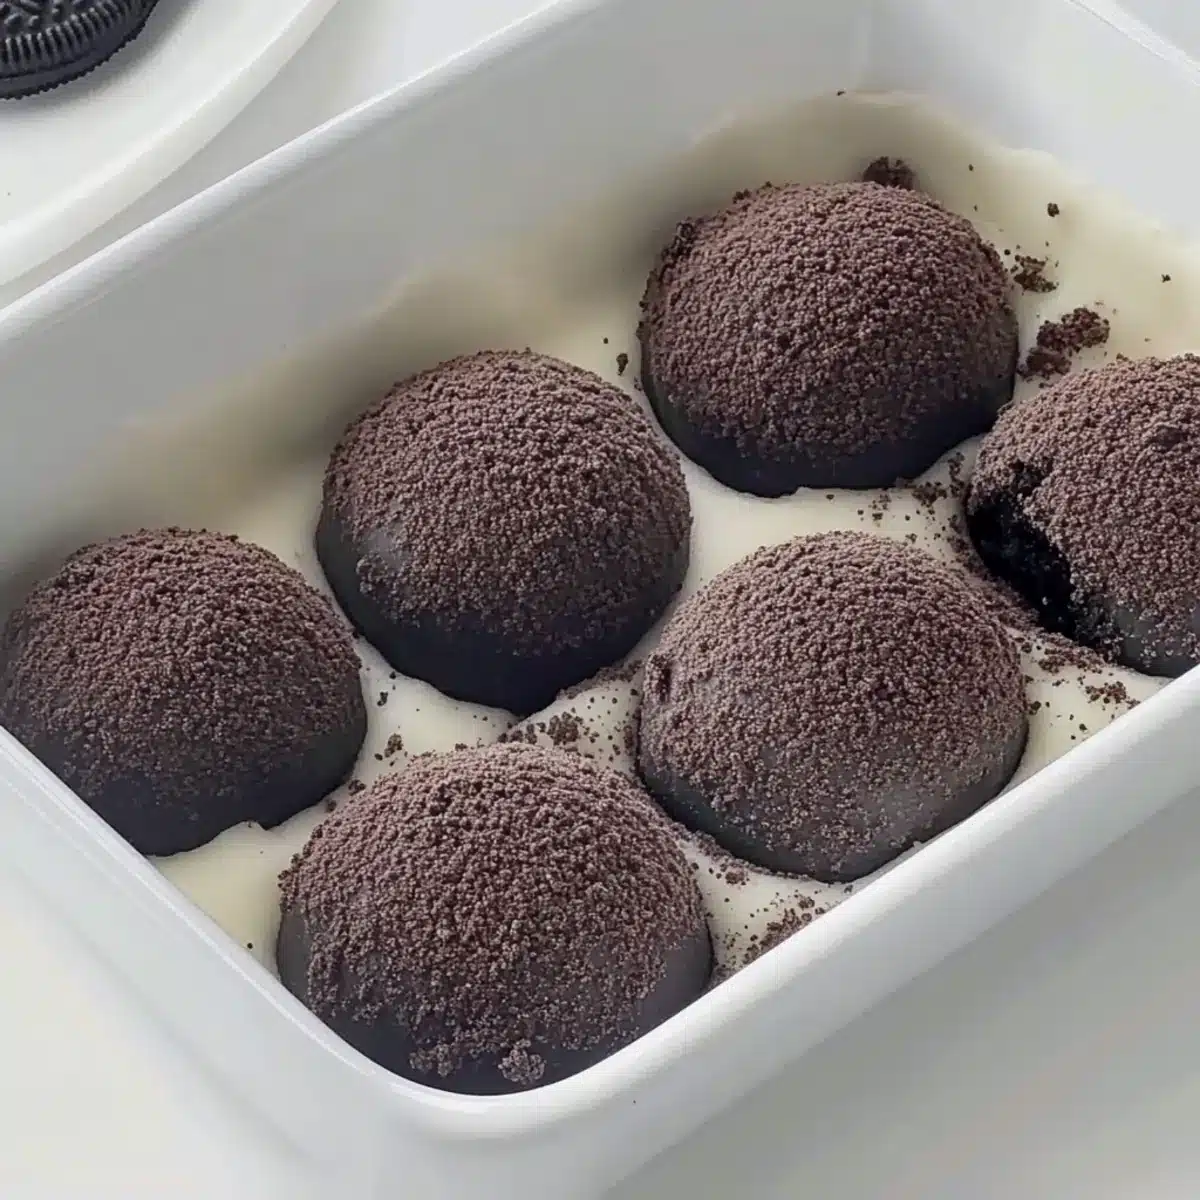
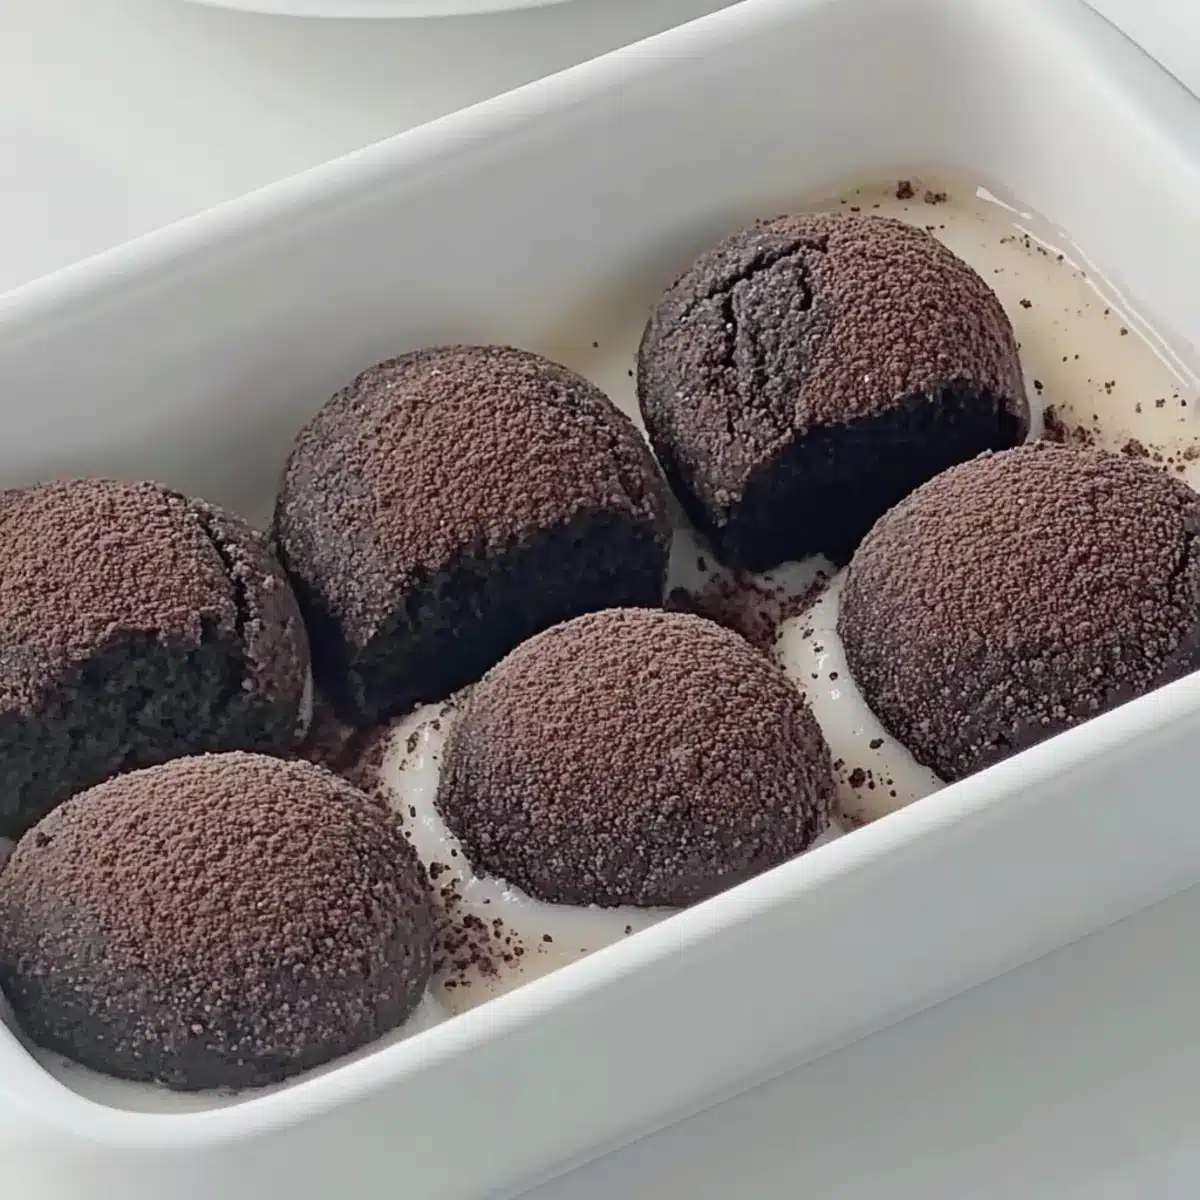
Step 6: Coat with Oreo Crumbs
Crush a few Oreo cookies into fine crumbs in a bowl. Roll each mochi ball in the Oreo crumbs until fully coated, creating a delightful contrast of textures. This not only enhances the flavor but also makes your Oreo mochi recipe visually appealing—perfect for sharing or personal enjoyment!
What to Serve with Oreo Mochi
The perfect dishes can elevate your Oreo mochi experience from delightful to extraordinary, creating a well-rounded dessert spread.
-
Matcha Green Tea: This slightly bitter, earthy drink balances the sweetness of the mochi, making each bite even more enjoyable. A warm cup of matcha will warm the heart and complement the dessert’s textures beautifully.
-
Vanilla Ice Cream: A scoop of creamy vanilla ice cream paired with the chewy mochi creates a delightful contrast. The creamy richness of the ice cream enhances the chocolate flavors of the Oreos and brings a refreshing element.
-
Fresh Strawberries: Juicy, ripe strawberries add a pop of freshness that cuts through the richness of the mochi. Their vibrant color and sweetness make for a visually appealing and delicious addition.
-
Coconut Sorbet: The tropical flavor and creaminess of coconut sorbet pair wonderfully with the chocolatey mochi. It’s a refreshing way to cleanse the palate and add an exotic touch to your dessert spread.
-
Chocolate Drizzle: A simple drizzle of warm chocolate sauce over the mochi can elevate the experience. It adds an extra layer of indulgence and richness that is hard to resist.
-
Mint Tea: The refreshing notes of mint tea cleanse the palate and enhance the chocolatey flavors of the Oreo mochi. Its aromatic qualities create a soothing finish to a sweet treat.
-
Sparkling Water: A bubbly drink like sparkling water or flavored seltzer acts as a refreshing counterpoint to the chewy mochi, making the dessert feel light and enjoyable. Add a slice of lemon for a zingy twist!
How to Store and Freeze Oreo Mochi
Room Temperature: Store your freshly made Oreo mochi in an airtight container at room temperature for up to 2-3 days. This keeps it soft and chewy, perfect for snacking.
Fridge: If you want to prolong freshness, refrigerate the mochi in an airtight container for up to a week. This helps maintain its texture and flavor.
Freezer: For longer storage, freeze the mochi by placing it in a freezer-safe container. It can last for up to a month—just be sure to wrap each piece individually if you prefer!
Reheating: When ready to enjoy, let the frozen Oreo mochi thaw in the fridge overnight or give it a quick 15-second interval in the microwave for a delightful chewy texture again.
Make Ahead Options
These Oreo Mochi are perfect for busy home cooks looking to save time on dessert preparations! You can prepare the mochi dough up to 24 hours in advance by following the mixing and cooking instructions, then store it in an airtight container in the refrigerator. Just remember to coat them with Oreo crumbs only before serving to maintain their delightful crunch. Additionally, the shaped mochi balls can be stored for up to 3 days at room temperature, checking that they are covered to prevent drying. When you’re ready to enjoy these treats, simply roll them in crushed Oreos and serve for a delightful, chewy dessert that’s just as delicious as when freshly made!
Expert Tips for the Best Oreo Mochi
-
Stick-free Cooking: Use a non-stick pot to prevent the batter from sticking and ensure an easier cooking process for your Oreo mochi recipe.
-
Stretching Technique: Be patient while kneading the dough; it should be elastic. If it’s too hot, wait a bit before stretching to avoid burns.
-
Oreo Crushing: Crush the Oreos finely to achieve a desirable coating texture. Larger pieces may not adhere well, making the mochi less appealing.
-
Keep It Fresh: Store your Oreo mochi in an airtight container at room temperature for 2-3 days or freeze for up to a month to maintain freshness.
-
Ingredient Quality: For the best flavor and texture, use high-quality glutinous rice flour and unsweetened cocoa. These ingredients are crucial for a successful Oreo mochi recipe!
Oreo Mochi Recipe Variations
Get ready to make this delightful treat your own with these fun variations that will tantalize your taste buds.
-
Different Cookies: Try using chocolate chip or biscuits instead of Oreos for a unique flavor twist—feel free to experiment with whatever you fancy!
-
Fruit-Filled Mochi: Add a surprise filling of fruit puree like strawberry or mango for a refreshing burst of flavor inside your mochi. This way, each bite becomes an adventure!
-
Nutty Delight: Fold in chopped nuts like almonds or walnuts into the mochi dough before shaping. They’ll add an exciting crunch that perfectly complements the chewy texture.
-
Flavor Boost: Elevate the cocoa flavor by adding a splash of coffee extract. It will enhance the chocolatey goodness and create a delightful mocha experience!
-
Spicy Kick: Incorporate a pinch of cinnamon or chili powder into the mochi dough for a warm twist. Another way to shake things up is by dipping the finished mochi in a spicy chocolate sauce!
-
Dairy-Free Option: Use coconut milk instead of regular milk for a luscious tropical twist. The hint of coconut will wonderfully mesh with the flavors of your original recipe!
-
Fun Coatings: Experiment with coatings like matcha powder or crushed pistachios for an unconventional yet delicious crunch! Each alternative introduces a whole new world of flavor and color.
-
Mini Mochi: Form bite-sized pieces instead of larger balls for snackable fun. Perfect for gatherings or simply indulging your cravings throughout the day; they’re bound to disappear quickly!
Feel free to pair your Oreo mochi with a refreshing side of Greek Lemon Rice or enjoy it alongside some delightful Lemon Truffles Zesty for an extra special dessert experience!
Oreo Mochi Recipe FAQs
What type of glutinous rice flour should I use?
Absolutely! For the best results, use good quality glutinous rice flour, which is essential for achieving that authentic chewy texture. Do not substitute it with regular rice flour, as it won’t yield the same delightful results.
How should I store leftover Oreo mochi?
To keep your Oreo mochi fresh, store it in an airtight container at room temperature for up to 2-3 days. If you want to extend its shelf life, pop it into the refrigerator, where it can last up to a week without compromising its tasty goodness.
Can I freeze Oreo mochi for later?
Very! You can indeed freeze your Oreo mochi. Just place the mochi in a freezer-safe container or wrap each piece individually in plastic wrap. It will maintain its delightful texture for up to a month. When you’re ready to enjoy, thaw overnight in the fridge or microwave for about 15 seconds.
What should I do if my mochi dough is too sticky?
No worries! If your mochi dough is sticky during the shaping process, try lightly dusting your hands and the work surface with cornstarch. The extra cornstarch will help manage the stickiness and make it easier to handle. Remember, a little patience goes a long way!
Are there any dietary considerations for this Oreo mochi recipe?
Certainly! If you have allergies, be mindful of the ingredients, particularly the Oreos, which contain gluten and dairy. For a dairy-free version, substitute dairy milk with almond milk or oat milk. Always check labels for potential allergens if you’re serving to others.
Can I use different cookies for the coating?
Absolutely! Feel free to experiment with other cookie varieties like chocolate chip or even graham crackers for a unique twist. Just make sure they’re crushed finely so they adhere well to the mochi. Happy experimenting!
Oreo Mochi Recipe: A Chewy Delight for Cookie Lovers
Ingredients
Equipment
Method
- In a large mixing bowl, combine glutinous rice flour, cornstarch, cocoa powder, and white sugar. Gradually stir in milk and corn oil until smooth.
- Strain the batter through a fine sieve into a non-stick pot.
- Cook over low to medium heat, stirring continuously for 8-10 minutes until thickened.
- Transfer the warm mochi dough onto a cornstarch-dusted surface and knead for 5 minutes.
- Divide the dough into pieces and roll them into balls.
- Crush Oreo cookies into fine crumbs, then roll mochi balls in the crumbs to coat.
Leave a Reply