
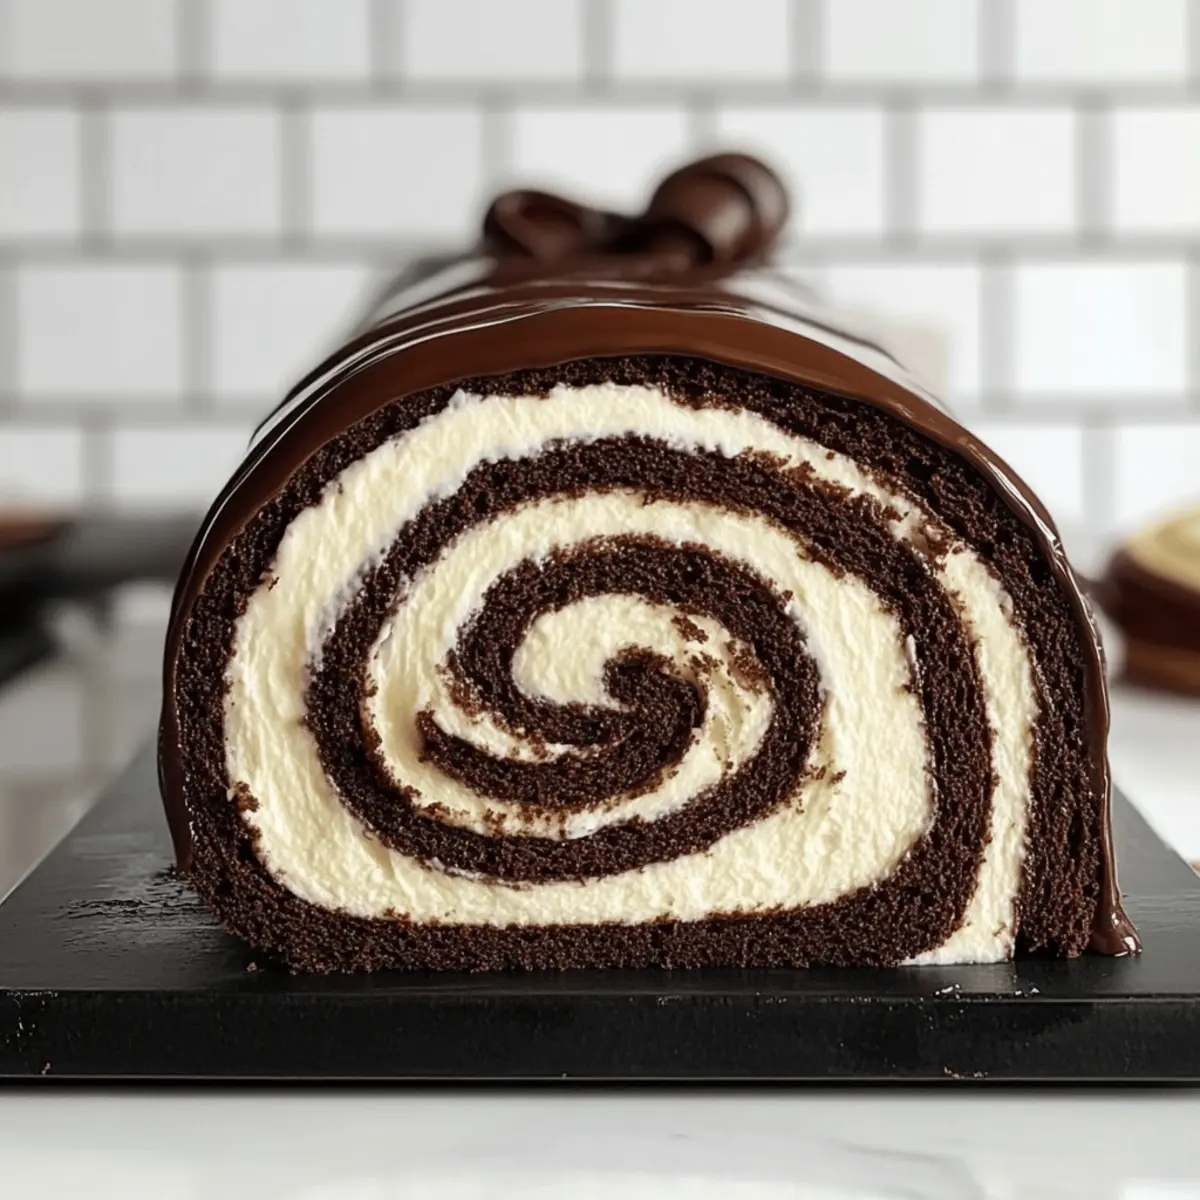
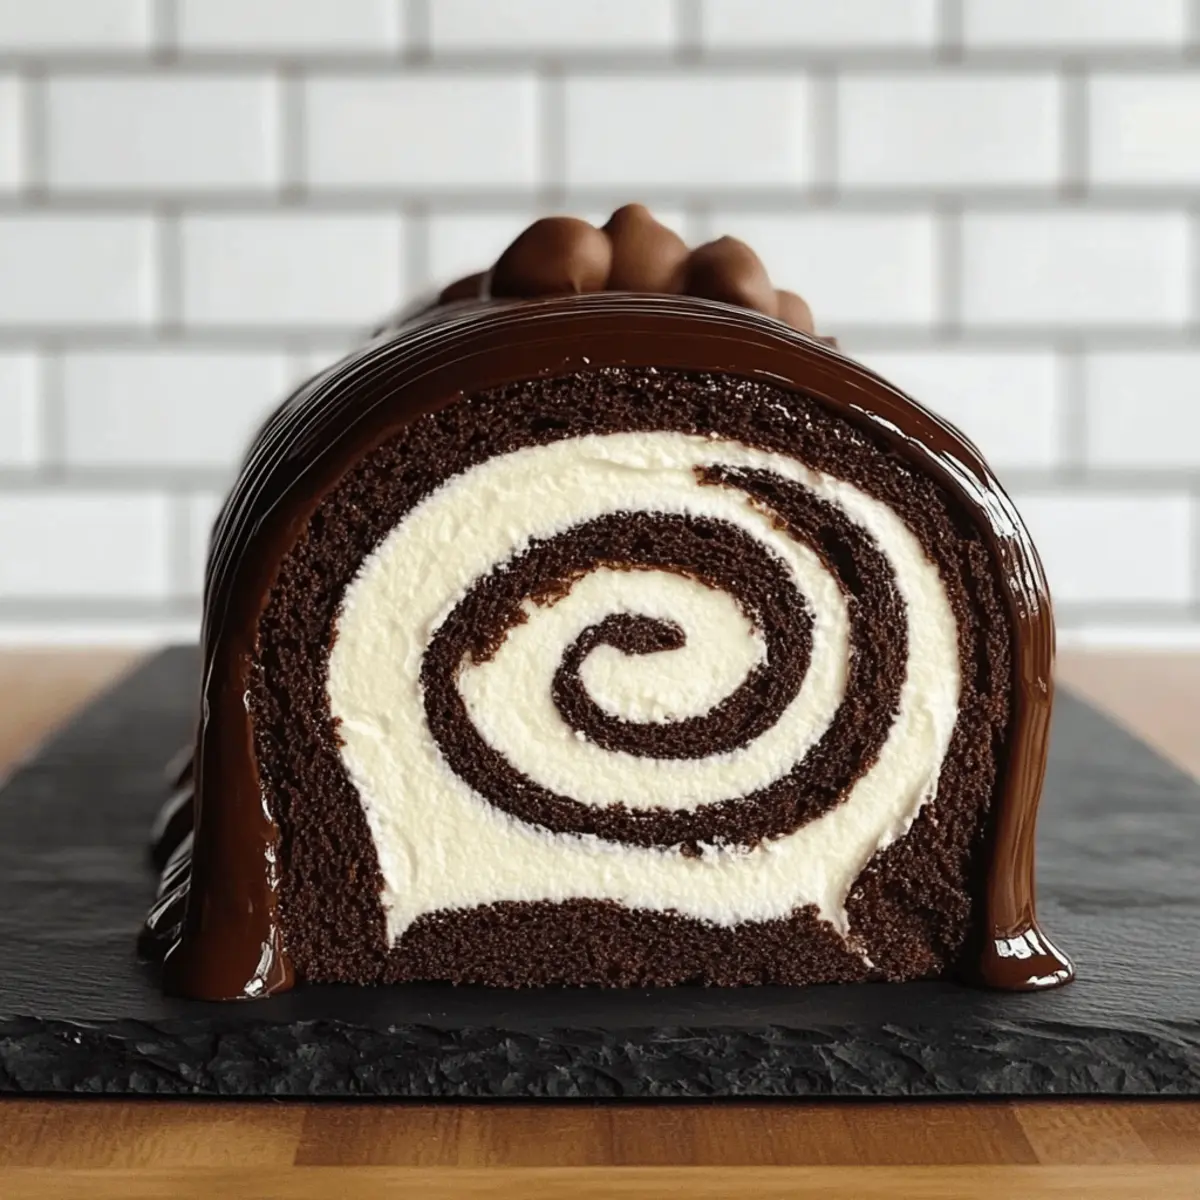
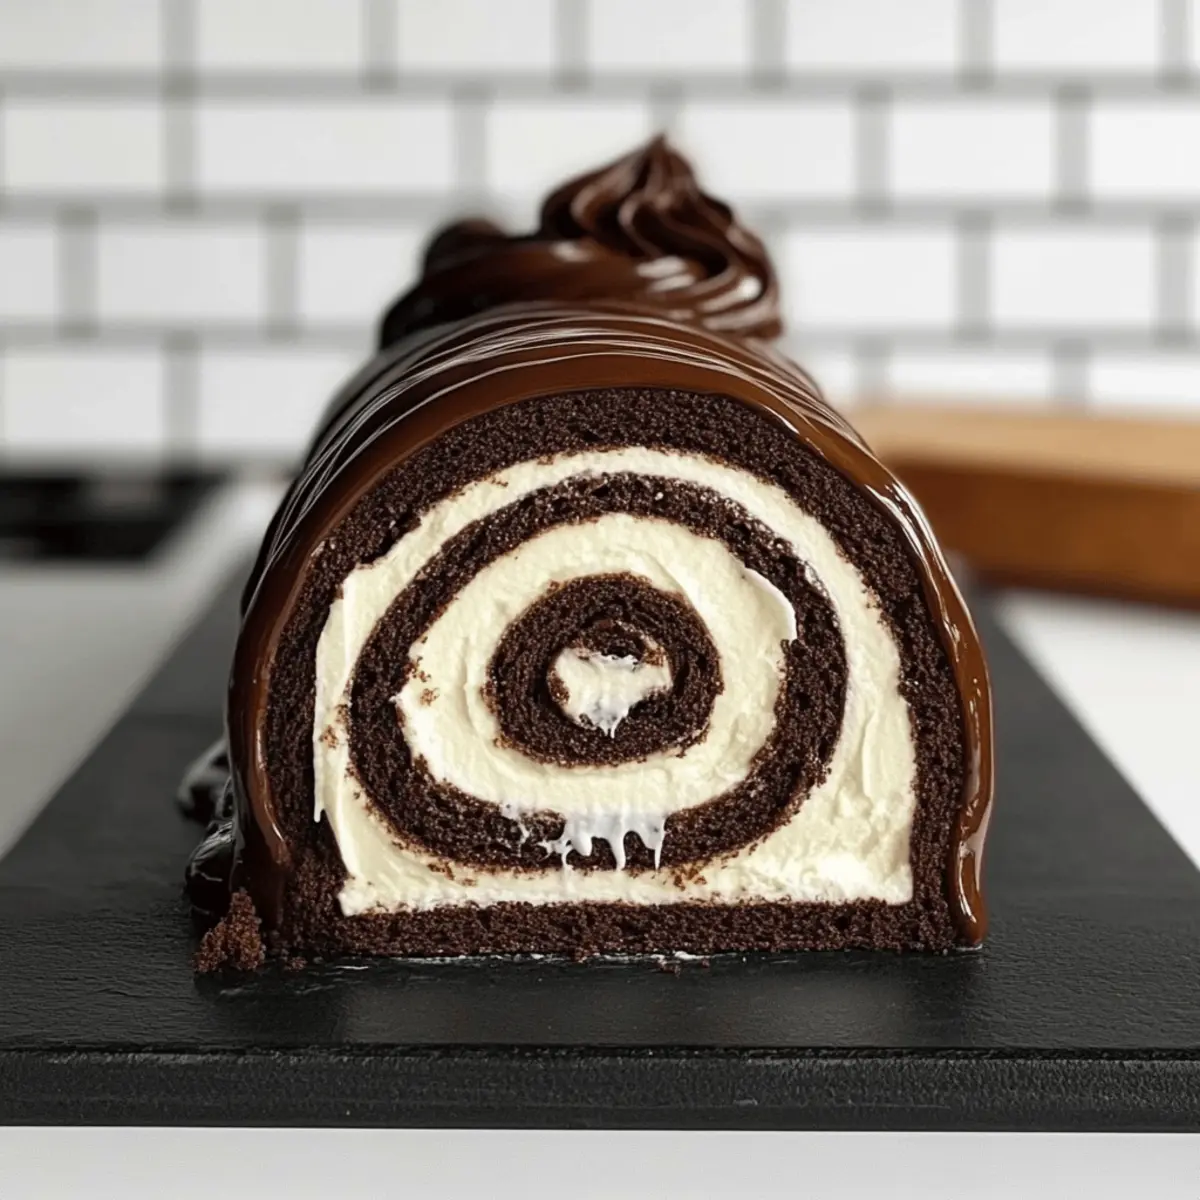
When I first unrolled my very first chocolate Swiss roll, I felt as though I had stepped into a chic patisserie, right in the comfort of my home kitchen. The No-Fail Chocolate Swiss Roll is one of those extraordinary desserts that takes surprisingly little effort yet results in a showstopper worthy of any celebration. The sponge is remarkably soft and pliable, wrapping around a luscious Chantilly cream filling, all finished off with a drizzle of rich chocolate sauce. This classic baking technique simplifies a seemingly complex dessert, allowing both novice and seasoned bakers to indulge without the stress. Plus, it’s a crowd-pleaser that’s perfect for gatherings or a delightful treat to enjoy at home—who wouldn’t want a slice of this elegant delight? Are you ready to dive into the world of Swiss roll magic? Let’s get started!
Why is This Swiss Roll a Must-Try?
Ease of Preparation: This No-Fail chocolate Swiss roll is designed for every baker, whether you’re a beginner or a pro. With straightforward steps and simple ingredients, you’ll impress yourself and others with your culinary skills!
Divine Flavors: The delightful combination of soft chocolate sponge and airy Chantilly cream filling creates a rich, mouthwatering experience, sure to satisfy your sweet tooth.
Endless Variations: Feel free to elevate your dessert by experimenting with different fillings like peanut butter cream or fruit preserves that keep things exciting every time you make it.
Impressive Presentation: Perfect for special occasions, this visually stunning dessert lets you serve a beautiful treat that will wow your guests, making it ideal for parties! Enjoy it with fresh berries on the side for an extra pop!
Quick & Convenient: With a preparation time that won’t consume your day, you can whip up this indulgence while still managing your busy schedule.
For more delightful ideas, don’t forget to check out Tortilla Pizza Rolls or explore the comforting flavors of Alfredo Lasagna Rolls to complement your dessert!
No-Fail Chocolate Swiss Roll Ingredients
• Get ready to bake this delightful dessert!
For the Sponge
- Dutch-Processed Cocoa Powder – Provides rich chocolate flavor and color; natural cocoa powder can be used but may affect taste and texture.
- Caster Sugar – Sweetens and helps create a light texture; granulated sugar is a possible substitute, but it may not dissolve as easily.
- Eggs (Yolks & Whites) – Essential for structure and leavening; ensure to beat egg whites to stiff peaks for aeration.
- Butter – Adds richness and moisture to the sponge; oil can be used instead, though it alters the texture slightly.
- Vanilla Bean Paste – Contributes depth of flavor; pure vanilla extract is a great alternative.
For the Filling
- Heavy Cream – Creates a creamy filling that is stable and rich; light cream can be used, but may not whip as well.
- Mascarpone Cheese – Stabilizes the whipped cream filling; cream cheese can be a substitute for a different flavor, with slight texture changes.
For the Sauce
- Dark Chocolate – Adds a rich finish for the sauce; semi-sweet chocolate can also work but will change the sweetness of the sauce.
- Butter – Ensures a smooth and luscious sauce; using a lighter butter variety is also an option.
- Brown Sugar – Enhances the sauce’s caramel notes; regular granulated sugar can be used, but it will lack that depth.
Dive into this No-Fail Chocolate Swiss Roll and indulge in every delectable layer!
Step‑by‑Step Instructions for No-Fail Chocolate Swiss Roll
Step 1: Preheat the Oven
Preheat your oven to 350°F (180°C) and prepare a 10×15 inch jelly roll pan by greasing it and lining it with parchment paper. This ensures that your No-Fail Chocolate Swiss Roll releases smoothly after baking. Make sure your oven is fully preheated for even baking before you proceed to the next step.
Step 2: Sift the Dry Ingredients
In a mixing bowl, sift together flour, Dutch-processed cocoa powder, baking powder, salt, and instant coffee. Sifting not only removes lumps but also aerates the dry ingredients, ensuring your sponge cake will be light and fluffy. Set this bowl aside as you prepare the wet ingredients.
Step 3: Mix Egg Yolks
In a separate bowl, whisk the egg yolks with half of the caster sugar until the mixture becomes thick and pale in color, about 3-4 minutes. Gradually stir in the melted butter and vanilla bean paste, mixing until combined. This creates a rich base for your No-Fail Chocolate Swiss Roll batter, enhancing its flavor.
Step 4: Whip the Egg Whites
Using a clean mixing bowl, beat the egg whites until they become frothy. Gradually add in the remaining sugar and continue to whip until stiff peaks form, which should take about 4-5 minutes. This step is crucial for providing lift and lightness to the sponge, so ensure your egg whites are properly whipped.
Step 5: Fold the Mixtures
Gently fold one-third of the whipped egg whites into the yolk mixture to lighten it. Then, carefully add the remaining meringue and sifted dry ingredients in two parts, folding gently, being cautious not to deflate the batter. This folding technique is essential for the airy texture of the No-Fail Chocolate Swiss Roll.
Step 6: Bake the Cake
Pour the batter into your prepared jelly roll pan, spreading it evenly to the corners. Bake in the preheated oven for 12-15 minutes or until the cake springs back when lightly touched. The cake should have a slight sheen and a soft, spongy texture, making it ready for rolling.
Step 7: Cool with Shape
Once baked, immediately turn the cake out onto a clean, cocoa-dusted kitchen towel. Peel off the parchment paper and, while the cake is still warm, roll it up tightly with the towel to shape it. Allow it to cool completely while rolled, ensuring it retains its shape for the filling.
Step 8: Prepare the Filling
In a cold mixing bowl, whip the heavy cream, powdered sugar, and vanilla until soft peaks form. Then, gently fold in the mascarpone cheese and beat until the mixture thickens. This creamy filling is vital for your No-Fail Chocolate Swiss Roll, adding richness and flavor amidst the light sponge.
Step 9: Assemble the Swiss Roll
Carefully unroll the cooled cake and spread the whipped filling evenly over the surface. Roll it back up without the towel, ensuring it’s tight but not overly so. Wrap the rolled cake in plastic wrap and refrigerate for about 30 minutes to allow it to set and hold its shape.
Step 10: Make the Sauce
In a saucepan over low heat, melt the dark chocolate, butter, brown sugar, and heavy cream together. Stir continuously until the mixture is smooth and glossy, then remove it from the heat. Let the sauce cool slightly before using it to drizzle over your No-Fail Chocolate Swiss Roll.
Step 11: Serve the Swiss Roll
Once chilled and set, unwrap the Swiss roll and carefully place it on a serving platter. Drizzle the cooled chocolate sauce generously over the top and cut into slices. Each piece should reveal the beautiful swirls of chocolate cake and creamy filling, perfect for impressing your guests!
What to Serve with No-Fail Chocolate Swiss Roll
Imagine a delightful celebration or gathering where your chocolate Swiss roll is only the beginning of a remarkable feast.
-
Fresh Berries: The tartness of raspberries or strawberries balances the sweetness of the roll beautifully, adding freshness and color to your dessert table.
-
Vanilla Ice Cream: A scoop of creamy vanilla ice cream melts against the rich chocolate, enhancing the whole experience with a smooth contrast that can’t be resisted.
-
Dust of Powdered Sugar: A light dusting of powdered sugar not only elevates the visual appeal but adds a sweet touch that complements the chocolate sponge perfectly.
-
Brewed Coffee: Pair your Swiss roll with a cup of freshly brewed coffee; the warm, rich flavors enhance the chocolate while providing a comforting accompaniment.
-
Chocolate Covered Almonds: These crunchy morsels offer a delightful textural contrast, deepening the chocolate experience and making every bite an indulgent treat.
-
Whipped Cream: Serve an extra dollop of whipped cream on the side for those who crave a creamy touch with their cake slices, adding charm and richness.
-
Mint Infused Tea: As a refreshing drink, mint tea cleanses the palate beautifully, leaving you ready for another slice of your delicious chocolate Swiss roll.
-
Caramel Sauce Drizzle: A drizzle of warm caramel sauce can take your dessert to the next level, with its inviting sweetness harmonizing with the chocolate and cream.
How to Store and Freeze No-Fail Chocolate Swiss Roll
Fridge: Keep your No-Fail Chocolate Swiss Roll tightly wrapped in plastic wrap or an airtight container. It will stay fresh for up to 3 days, preserving its delightful flavors and textures.
Freezer: For longer storage, wrap the Swiss roll tightly in plastic wrap and then aluminum foil before freezing. It can be frozen for up to 3 months. Thaw in the fridge overnight before serving.
Reheating: If desired, you can serve it chilled or at room temperature. No need for reheating; simply slice and enjoy the lusciousness right away!
Cutting: When ready to serve, slice with a sharp knife to maintain the beautiful swirls without squishing the delicate cake or filling.
No-Fail Chocolate Swiss Roll Variations
Customize your no-fail chocolate Swiss roll with these delectable twists that will keep your taste buds dancing!
-
Filling Swaps: Experiment with different flavors like peanut butter cream or strawberry preserves for a delightful surprise.
-
Chocolate Sauce Alternatives: Switch things up with white chocolate or a rich caramel sauce for a different flavor profile.
-
Flavored Extracts: Add a few drops of mint or almond extract to the sponge for an unexpected flavor boost.
-
Fruit Additions: Layer in fresh raspberries or sliced bananas with the filling for added fruity freshness that complements the chocolate beautifully.
-
Nutty Crunch: Fold in chopped nuts like hazelnuts or walnuts into the filling for a delightful crunch in every bite.
-
Vegan Option: Use aquafaba in place of egg whites and coconut cream for a deliciously dairy-free dessert that’ll please everyone.
-
Spice it Up: Add a pinch of cinnamon or espresso powder to enhance the chocolate flavor for a deeper taste experience.
-
Cake Base Variations: Try a vanilla sponge instead of chocolate for a traditional take, allowing the filling and sauce to shine.
If you crave more culinary inspiration, try the mouthwatering Indulge Raspberry Chocolate for a sweet treat, or explore the savory goodness of Alfredo Lasagna Rolls for a roll that’s perfect for dinner!
Expert Tips for No-Fail Chocolate Swiss Roll
-
Room Temperature Eggs: Ensure your eggs are at room temperature for better volume when beating the whites, allowing your No-Fail Chocolate Swiss Roll to rise beautifully.
-
Avoid Overbaking: Keep an eye on your sponge—overbaking can lead to a dry roll, making it more susceptible to cracking. Bake until just set!
-
Gentle Folding: When combining the egg yolk and meringue mixtures, be gentle. Over-mixing can deflate the batter, resulting in a less airy texture.
-
Cooling Trick: Cool the sponge rolled in the towel; this trains it to maintain its shape. Unroll it only when it’s completely cool for best results.
-
Chill the Filling: For a firmer filling, chill your heavy cream and mixing bowl before whipping. It helps achieve that light, fluffy texture needed for your filling!
Make Ahead Options
These No-Fail Chocolate Swiss Rolls are fantastic for meal prep and can save you precious time on busy days! You can bake the sponge up to 24 hours in advance; simply let it cool completely before rolling it up and wrapping it tightly in plastic wrap to prevent drying. The Chantilly cream filling can be prepared and refrigerated for up to 3 days before assembly, just be sure to whip it fresh if it softens. When you’re ready to serve, gently unroll the sponge, spread the filling, roll it back up, and chill for just 30 minutes to set before drizzling with chocolate sauce. This method ensures your Swiss roll stays just as delicious and visually stunning as if made fresh!

No-Fail Chocolate Swiss Roll Recipe FAQs
What type of cocoa powder should I use for the sponge?
For the best flavor and color, I highly recommend using Dutch-processed cocoa powder. It offers a richer taste compared to natural cocoa powder, which can alter the taste and texture. If you only have natural cocoa, you can still use it—but your Swiss roll may have a different flavor profile.
How should I store my Chocolate Swiss Roll?
To maintain its freshness, tightly wrap your No-Fail Chocolate Swiss Roll in plastic wrap or place it in an airtight container. It will stay fresh for up to 3 days in the refrigerator. To enjoy optimal flavors, I suggest consuming it within this timeframe.
Can I freeze the Swiss roll?
Absolutely! Wrapping your No-Fail Chocolate Swiss Roll tightly in plastic wrap followed by aluminum foil is the best way to prevent freezer burn. It can be stored in the freezer for up to 3 months. When you’re ready to enjoy it, simply thaw it overnight in the fridge and serve.
What should I do if my Swiss roll cracks when rolling?
If your Swiss roll cracks, don’t worry! This can occasionally happen; it might be due to overbaking or not rolling it while hot. To prevent this in the future, keep a close eye on your bake time—aim for just 12-15 minutes—or use the towel-rolling technique immediately after baking while it’s still warm for better shape retention.
Is this recipe safe for those with egg allergies?
For individuals with egg allergies, this particular recipe wouldn’t be suitable, as eggs play a crucial role in the structure and aeration of the cake. However, you can explore egg replacement options like aquafaba (chickpea brine) or commercial egg replacers, but be prepared for slight alterations in texture and taste.
What’s the best way to slice the Swiss roll for serving?
To cut the No-Fail Chocolate Swiss Roll without squishing the delicate layers, use a sharp serrated knife. Start at one end and gently saw through, creating clean slices that beautifully showcase the rolled filling without any mess. Enjoy!
Master the Art of No-Fail Chocolate Swiss Roll at Home
Ingredients
Equipment
Method
- Preheat your oven to 350°F (180°C) and prepare a 10x15 inch jelly roll pan by greasing it and lining it with parchment paper.
- In a mixing bowl, sift together flour, Dutch-processed cocoa powder, baking powder, salt, and instant coffee.
- In a separate bowl, whisk the egg yolks with half of the caster sugar until the mixture becomes thick and pale in color, about 3-4 minutes.
- Using a clean mixing bowl, beat the egg whites until they become frothy. Gradually add in the remaining sugar and continue to whip until stiff peaks form, which should take about 4-5 minutes.
- Gently fold one-third of the whipped egg whites into the yolk mixture to lighten it. Then, carefully add the remaining meringue and sifted dry ingredients in two parts, folding gently.
- Pour the batter into your prepared jelly roll pan, spreading it evenly to the corners. Bake for 12-15 minutes or until the cake springs back when lightly touched.
- Once baked, immediately turn the cake out onto a Cocoa dusted kitchen towel. Peel off the parchment paper and roll it up tightly with the towel to shape it.
- In a cold mixing bowl, whip the heavy cream, powdered sugar, and vanilla until soft peaks form. Then, gently fold in the mascarpone cheese and beat until the mixture thickens.
- Carefully unroll the cooled cake and spread the whipped filling evenly over the surface. Roll it back up without the towel.
- In a saucepan over low heat, melt the dark chocolate, butter, brown sugar, and heavy cream together.
- Once chilled and set, unwrap the Swiss roll and carefully place it on a serving platter. Drizzle the cooled chocolate sauce generously over the top and cut into slices.
Leave a Reply