
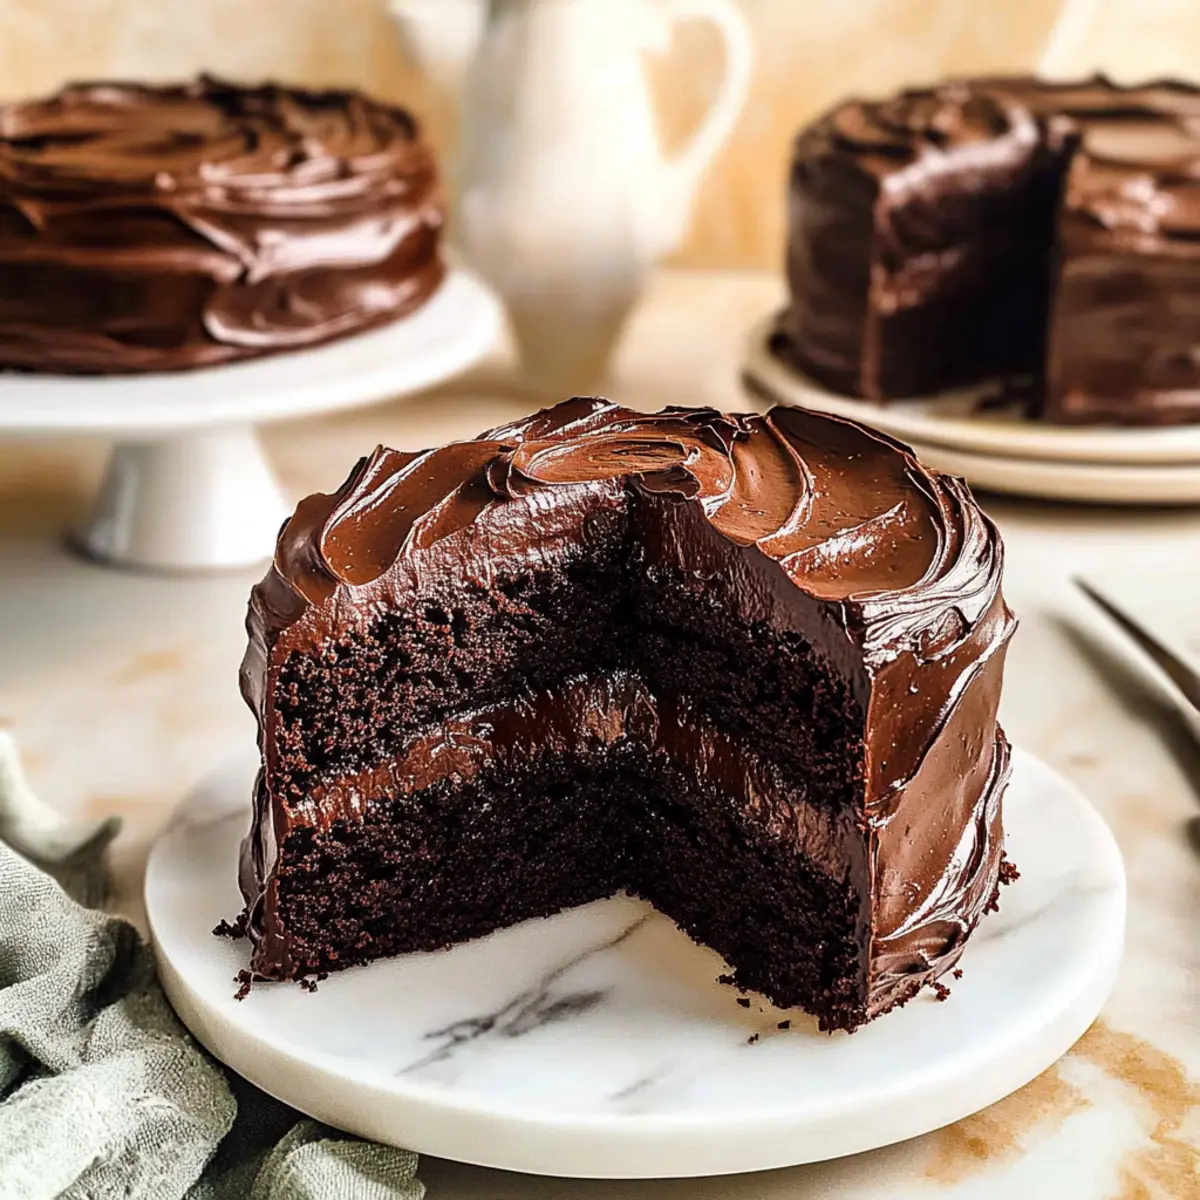
As I flipped through the pages of my favorite cookbook, a sudden wave of nostalgia washed over me—reminiscent of childhood movie nights, laughter, and the sweet scent of baking chocolate cake filling the air. Enter Matilda’s Chocolate Cake, a true celebration of rich, indulgent flavors inspired by that beloved film. This cake is not just dessert; it’s an experience, featuring moist and fluffy layers slathered in a glossy chocolate fudge frosting that melts in your mouth. Beyond being visually stunning, this recipe boasts quick prep time, making it perfect for unexpected gatherings or a cozy night in. Who can resist a slice of chocolate bliss that is both a crowd-pleaser and a go-to comfort food? Are you ready to dive into this delightful world of chocolate?
Why is Matilda’s Chocolate Cake a Must-Try?
Irresistible Flavor: Matilda’s Chocolate Cake is a rich, chocolatey delight that promises to satisfy any sweet tooth.
Moist and Fluffy: Each layer is not only beautifully moist but also incredibly fluffy, making every bite a heavenly experience.
Quick and Simple: With straightforward instructions, you won’t need a culinary degree to bake a show-stopping dessert.
Perfect for Celebrations: This cake serves as the star of any event, leaving your guests begging for seconds—pair it with a scoop of vanilla ice cream for an extra treat!
Versatile Options: Looking for adaptations? Check out ideas for making it dairy-free or gluten-free, ensuring everyone can join in on the fun.
You won’t regret indulging in this dessert, perfect for a cozy evening or a special occasion. Dive further into chocolate bliss and try serving it with some fresh berries for an elegant touch!
Matilda’s Chocolate Cake Ingredients
For the Cake
- All-purpose Flour – Provides structure; for a lighter cake, consider using cake flour for a tender crumb.
- Granulated Sugar – Adds sweetness; if you prefer a finer texture, caster sugar is a perfect alternative.
- Baking Powder – Acts as a leavening agent to help the cake rise for a light and fluffy finish.
- Baking Soda – Works alongside baking powder for optimal leavening effects.
- Kosher Salt – Enhances the chocolate flavor without introducing a salty note.
- Dutch Cocoa Powder – Imparts a rich chocolate flavor; if unavailable, natural cocoa can work as a substitute.
- Vegetable Oil – Contributes moisture; can be replaced with canola oil to suit your pantry.
- Eggs – Provide structure and stability; always use room temperature eggs for best results.
- Buttermilk – Adds moisture; you can make your own with milk and vinegar or lemon juice if you’re low on supplies.
- Hot Coffee – Intensifies the chocolate flavor without leaving a coffee taste; use hot water if you prefer to skip the coffee.
- Vanilla Extract – Infuses depth and complexity to the cake’s flavor.
For the Frosting
- Dark Chocolate (60-70%) – Essential for a luscious frosting; invest in high-quality chocolate for the best results.
- Unsalted Butter – Forms the base for the frosting; if you only have salted butter, skip additional salt in the recipe.
- Heavy Cream – Ensures a rich, creamy frosting; make sure to use full-fat cream for the best texture.
- Powdered Sugar – Sweetens and thickens the frosting; you can create your own by blending granulated sugar if needed.
Indulge in making this Matilda’s Chocolate Cake and turn any moment into a special celebration!
Step‑by‑Step Instructions for Matilda’s Chocolate Cake
Step 1: Preheat and Prepare Pans
Begin by preheating your oven to 350°F (180°C). While the oven warms up, prepare two 8-inch round baking pans by greasing them with butter or non-stick spray. Next, line the bottoms with parchment paper to ensure your Matilda’s Chocolate Cake layers release easily after baking.
Step 2: Combine Dry Ingredients
In a large mixing bowl, whisk together 2 cups of all-purpose flour, 2 cups of granulated sugar, 1 ½ teaspoons of baking powder, 1 ½ teaspoons of baking soda, 1 teaspoon of kosher salt, and ¾ cup of sifted Dutch cocoa powder. This mixture forms the base for your cake, so make sure the dry ingredients are evenly blended for a consistent texture.
Step 3: Mix Wet Ingredients
Add 1 ½ cups of buttermilk, ½ cup of vegetable oil, 2 large room temperature eggs, and 2 teaspoons of vanilla extract into the dry mixture. Using a hand mixer, blend these ingredients until just combined. Take care not to overmix, as this may affect the cake’s fluffiness.
Step 4: Add Coffee
Slowly stir in 1 cup of hot coffee, ensuring it blends well with the batter. The batter will become smooth and runny, which is exactly what you want. This hot coffee enhances the rich chocolate flavor of your Matilda’s Chocolate Cake without imparting any coffee taste.
Step 5: Pour Batter into Pans
Divide the chocolate cake batter evenly between the two prepared baking pans. To ensure even baking, you may opt to wrap the pans in cake strips. These strips help maintain consistent temperature around the sides of the pans, giving you perfectly even layers.
Step 6: Bake The Cake
Place the pans in the preheated oven and bake for 25 to 30 minutes. To check for doneness, insert a toothpick into the center of each cake; it should come out clean or with a few moist crumbs. Once done, remove the pans from the oven and let the layers cool in the pans for about 10 minutes.
Step 7: Cool and Remove Layers
After the initial cooling, carefully turn out each layer of the Matilda’s Chocolate Cake onto a wire rack to cool completely. This step is essential to ensure the layers are firm enough for frosting and assembling later, leading to a beautifully structured cake.
Step 8: Make the Frosting
In a saucepan, melt together 1 cup of unsalted butter, 8 ounces of dark chocolate (60-70%), 1 cup of heavy cream, ½ cup of cocoa powder, 3 cups of powdered sugar, and a pinch of salt. Stir continuously over low heat until smooth and the chocolate is fully melted, creating a rich, glossy frosting.
Step 9: Cool the Frosting
Allow the frosting to cool at room temperature for about 30 minutes, then refrigerate it for 1 to 2 hours until thickened. This resting period is crucial as it will help create a spreadable yet thick consistency perfect for layering and decorating your Matilda’s Chocolate Cake.
Step 10: Assemble the Cake
Once the cake layers have completely cooled, place one layer on a serving plate. Generously spread a layer of the thickened chocolate frosting on top, then gently place the second layer on top. Finish by frosting the top and sides of the cake with the remaining chocolate frosting, creating beautiful patterns as desired.
What to Serve with Matilda’s Chocolate Cake?
Indulging in rich cocoa layers and creamy frosting is just the beginning; let’s elevate your chocolate experience even further!
-
Fresh Berries:
Bright and tart, berries like raspberries or strawberries contrast beautifully with the sweet chocolate, giving a refreshing burst of flavor. -
Vanilla Ice Cream:
A scoop of vanilla ice cream adds a creamy, cold element that balances the warmth of the cake. Perfect for an extra indulgent treat! -
Coffee:
A steaming cup of coffee enhances the chocolatey notes, creating a comforting pairing that brings out the richness of the cake. -
Chocolate Ganache:
Drizzling additional chocolate ganache over your cake makes it even more decadent. A true delight for any chocolate lover! -
Whipped Cream:
Light and airy whipped cream provides a delightful contrast, adding a fluffy texture that complements the dense layers of chocolate cake. -
Chocolate-Covered Strawberries:
An elegant touch, these sweet bites echo the cake’s flavor while introducing a fun, interactive component to your dessert spread.
Treat your loved ones to an extraordinary dessert experience by pairing Matilda’s Chocolate Cake with these complementary treats that enhance the joy of every slice.
Matilda’s Chocolate Cake Variations
Feel free to personalize this dessert with delightful twists that suit your taste buds!
-
Dairy-Free: Substitute almond milk for buttermilk and use vegan butter in the frosting for an inclusive treat.
-
Egg-Free: Replace the eggs with ⅔ cup of applesauce, lending natural sweetness and moisture without the eggs.
-
Gluten-Free: Opt for a gluten-free flour blend instead of all-purpose flour to ensure everyone can enjoy a slice.
-
Flavor Infusion: Stir in 1 tablespoon of orange zest for a citrusy kick that beautifully complements the chocolate.
-
Nutty Twist: Incorporate ½ cup of finely chopped walnuts or pecans into the batter for a delightful crunch.
-
Decadent Additions: Drizzle melted peanut butter or caramel over the frosting for an extra indulgent layer of flavor.
-
Frosting Varieties: Switch up the frosting by using white chocolate or adding a hint of espresso powder for a coffee-infused twist.
The variations allow for creativity; each adaptation gives you a fresh excuse to bake! You’ll also love pairing this cake with a scoop of vanilla ice cream or serving it alongside a rich raspberry sauce, a perfect complement to that indulgent chocolate goodness. Don’t forget to check out related recipes like the scrumptious Indulge Raspberry Chocolate cake!
Make Ahead Options
These decadent Matilda’s Chocolate Cake layers are ideal for make ahead meal prepping! You can bake the cake itself up to 3 days in advance. Simply allow the layers to cool completely, then wrap each layer tightly in plastic wrap and refrigerate them to maintain their moisture. For the frosting, you can prepare it the day before and refrigerate it for up to 24 hours; just make sure to cover it directly with plastic wrap to avoid a skin forming. When ready to serve, allow both the cake and frosting to come to room temperature. Then, simply frost and assemble your cake, and enjoy a deliciously rich indulgence with minimal effort!
How to Store and Freeze Matilda’s Chocolate Cake
Fridge: Store the cake in an airtight container or tightly covered with plastic wrap for up to 4 days. This keeps it fresh and moist for your indulgent cravings.
Freezer: If you’d like to enjoy the cake later, wrap individual slices or the whole cake in plastic wrap, then in aluminum foil. It can be frozen for up to 3 months. Thaw in the fridge overnight before serving.
Reheating: For a warm treat, pop a slice in the microwave for 10-15 seconds. This refreshes the cake without compromising its rich flavor and texture.
Frosting Storage: If you have leftover frosting, store it in an airtight container in the fridge for up to 1 week. Rewhip before use to restore its creamy texture!
Expert Tips for Matilda’s Chocolate Cake
- Room Temperature Ingredients: Always use room temperature ingredients such as eggs and buttermilk for even mixing and a fluffier cake texture.
- Weigh Your Batter: To achieve perfectly even layers, consider weighing the divided cake batter before pouring it into the pans.
- Avoid Overmixing: Be cautious not to overmix the batter, as this can lead to a dense cake instead of the light and fluffy layers you desire.
- Smooth Frosting: If your chocolate frosting appears too soft, refrigerate it briefly until it thickens for easier spreading.
- Prevent Skin Formation: Cover the cooling frosting with plastic wrap, pressing it directly onto the surface to avoid a skin from forming while it cools.
Indulge in the decadent joy of baking Matilda’s Chocolate Cake, and let every slice become a sweet memory to cherish!
Matilda’s Chocolate Cake Recipe FAQs
How do I choose the best chocolate for Matilda’s Chocolate Cake?
Absolutely! When selecting chocolate for your frosting, opt for a high-quality dark chocolate with 60-70% cocoa content. This range provides a rich, deep chocolate flavor without being overwhelmingly bitter. Always choose chocolate bars over chips, as bars melt more smoothly and give a creamier consistency to your frosting.
How long can I store Matilda’s Chocolate Cake in the fridge?
You can store Matilda’s Chocolate Cake in an airtight container or wrapped tightly with plastic wrap for up to 4 days. This method helps keep the cake fresh and moist, ready for delightful indulgence anytime you’re craving a chocolate fix!
Can I freeze Matilda’s Chocolate Cake?
Yes, you can freeze Matilda’s Chocolate Cake! Wrap individual slices or the entire cake tightly with plastic wrap, then cover with aluminum foil to prevent freezer burn. It can be frozen for up to 3 months. To enjoy, simply thaw the cake in the refrigerator overnight before serving, and it will taste just as delicious as when freshly baked!
What should I do if my cake layers are uneven?
No worries! If your cake layers end up uneven, simply level them with a serrated knife once they’re completely cooled. Place the knife parallel to the table, cutting any domed tops to create flat layers. This step is crucial for perfect layer stacking and frosting, ensuring a beautifully assembled Matilda’s Chocolate Cake.
Can I make Matilda’s Chocolate Cake egg-free or gluten-free?
Very much so! To make it egg-free, replace each egg with ⅓ cup of applesauce or ¼ cup of yogurt for similar moisture and binding. For a gluten-free version, substitute all-purpose flour with a gluten-free flour blend, ensuring you’re also using a certified gluten-free baking powder and other contacts. This way, everyone can revel in the chocolatey goodness!
Matilda's Chocolate Cake
Ingredients
Equipment
Method
- Preheat the oven to 350°F (180°C) and prepare two 8-inch round baking pans by greasing and lining them with parchment paper.
- In a large mixing bowl, whisk together the flour, sugar, baking powder, baking soda, salt, and cocoa powder until evenly blended.
- Add the buttermilk, vegetable oil, eggs, and vanilla, mixing until just combined to avoid overmixing.
- Stir in the hot coffee until the batter is smooth and runny.
- Pour the batter evenly into the prepared pans, using cake strips if desired for even baking.
- Bake for 25 to 30 minutes, checking doneness with a toothpick.
- Cool the cakes in the pans for 10 minutes before transferring them to a wire rack to cool completely.
- To make frosting, melt the butter, chocolate, heavy cream, cocoa powder, and powdered sugar in a saucepan over low heat until smooth.
- Allow the frosting to cool at room temperature for about 30 minutes, then refrigerate until thickened.
- Assemble the cake by frosting between layers and on top and sides, creating decorative patterns as desired.
Leave a Reply