
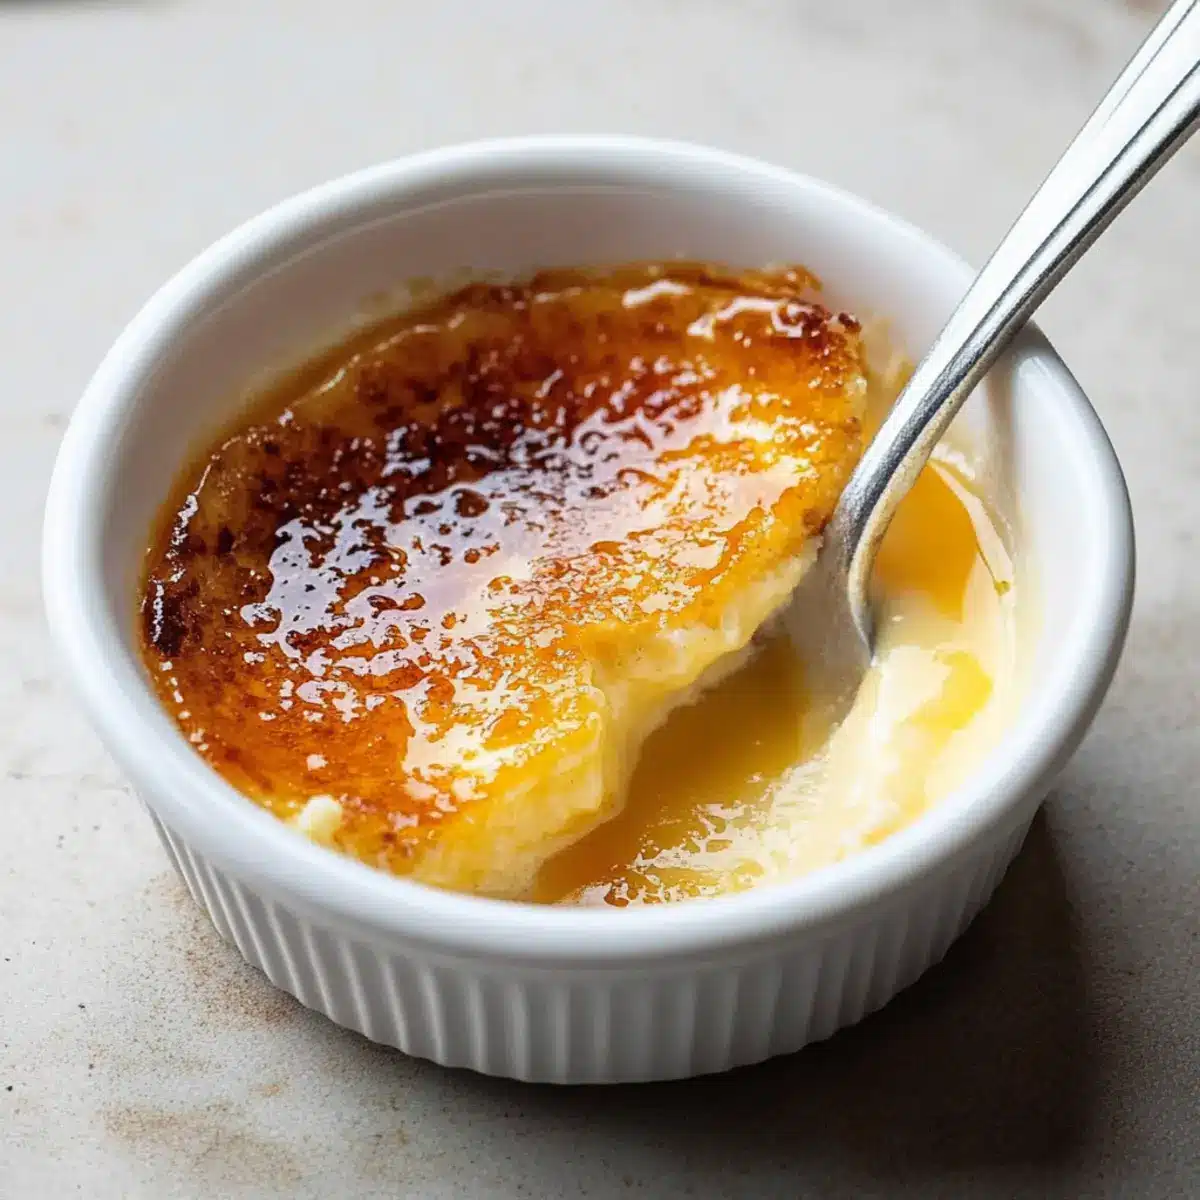
The sweet sound of caramel crackling under the pressure of my spoon always brings a smile. This gluten-free crème brûlée elevates any gathering or special occasion into something memorable. With its rich, creamy vanilla custard and that perfectly crisp sugar crust, you’ll create a dessert that looks as stunning as it tastes. Best of all, this recipe is surprisingly simple! You don’t need to be a pastry chef to impress your guests; in just a few steps, you can whip up this divine treat. The delightful contrast of the silky custard and crunchy topping is pure bliss, while being gluten-free means everyone can join in the indulgence. Ready to indulge your inner chef and take your dessert game to the next level? Let’s dive into this ultimate gluten-free crème brûlée recipe!
Why is Crème Brûlée so Special?
Decadent Simplicity: This luxurious treat balances rich ingredients in a straightforward method, so you can focus on enjoying the process.
Flavor Explosion: The deep infusion of vanilla bean brings an aromatic essence that dances on your palate, elevating this classic dish.
Impressive Presentation: With just a sprinkle of sugar and a quick caramelization, you can wow your guests with a restaurant-quality finish.
Everyone Can Enjoy It: Designed to be gluten-free, this crème brûlée allows all dessert lovers to indulge without worry!
Customizable: Feel free to experiment with flavor twists by adding lemon zest or coffee for personal touches that suit your taste.
Unlock the magic of this irresistible crème brûlée recipe and become the star of your next gathering!
Crème Brûlée Ingredients
For the Custard
• Heavy Whipping Cream – Adds richness and creamy texture; consider half-and-half for a lighter version.
• Vanilla Bean – Provides deep flavor and aromatic qualities; can substitute with 1.5-2 teaspoons of pure vanilla extract.
• Egg Yolks – Essential for creating a custard-like consistency; using large eggs is recommended.
• Granulated Sugar – Sweetens the custard base; coconut sugar can offer a different flavor profile.
For the Topping
• Demerara or Granulated Sugar – Used for caramelizing the top; Demerara sugar gives a delicious crunchy texture when brûléed.
Unlock the key to making exquisite crème brûlée that’s gluten-free and delicious!
Step‑by‑Step Instructions for Ultimate Gluten-Free Crème Brûlée
Step 1: Preheat the Oven
Begin by preheating your oven to 300°F (150°C). While the oven warms up, prepare a large roasting pan and arrange empty ramekins inside it. This setup is essential for the water bath that will help bake your crème brûlée evenly, creating that luxurious custard texture you desire.
Step 2: Heat the Cream
In a medium saucepan, pour in the heavy whipping cream and add the split vanilla bean to infuse rich flavors. Gently heat the mixture over medium-low heat until it starts to steam, but be careful not to let it boil. Stir occasionally, and watch for tiny bubbles forming as the aroma fills your kitchen, indicating it’s ready for the next step.
Step 3: Whisk Egg Yolks and Sugar
While the cream is heating, take a heatproof bowl and whisk together egg yolks and granulated sugar until the mixture is well blended and slightly pale. This process will take about 2-3 minutes. The sugar should dissolve well, creating a smooth, creamy base that will complement the rich flavor of your crème brûlée.
Step 4: Temper the Eggs
Once the cream reaches the steaming point, slowly pour half of it into the egg mixture while whisking continuously. This gradual addition prevents the eggs from curdling. You’re creating a silky custard base here, so keep whisking until everything is combined. The mixture will transform into a velvety texture that’s perfect for crème brûlée.
Step 5: Combine Mixtures
Pour the tempered egg mixture back into the saucepan with the remaining hot cream. Stir gently over low heat, ensuring the sugar dissolves completely and the mixture thickens slightly, which should take about 5 minutes. You’ll know it’s ready when it coats the back of a spoon, creating that smooth custard you’re after for your crème brûlée.
Step 6: Strain Custard
To ensure your crème brûlée has that perfect smoothness, pour the mixture through a fine mesh strainer into a clean bowl. This process filters out any curdled bits, leaving you with a beautiful, silky custard that is free of lumps. It’s a little extra step that makes a big difference in achieving that luxurious texture.
Step 7: Fill Ramekins
Carefully portion the strained custard into each ramekin, filling them to about three-quarters full. Take your time to avoid spills, as these will be your little desserts. Your ultimate gluten-free crème brûlée is now almost ready for baking, so ensure they’re all even for the best results.
Step 8: Bake in Water Bath
Place the filled ramekins in the prepared roasting pan and add boiling water until it reaches halfway up the sides of the ramekins. Bake the crème brûlée for 25-30 minutes until the centers are just set but still slightly wobbly. Keep an eye on them; they should not be firm. This gentle cooking method yields that creamy custard you’ll love.
Step 9: Cool Ramekins
After baking, carefully remove the ramekins from the water bath and transfer them to a wire rack. Allow the crème brûlée to cool to room temperature before refrigerating them for at least 4 hours or overnight. This chilling time is crucial for the texture, letting the flavors meld and making each bite utterly decadent.
Step 10: Brûlée Sugar
When you’re ready to serve your masterpiece, sprinkle an even layer of demerara sugar over the top of each chilled custard. Use a kitchen torch to caramelize the sugar until it bubbles and turns golden brown. Move the flame in a circular motion and watch closely, as this crispy topping is what makes your crème brûlée truly irresistible.
Expert Tips for the Best Crème Brûlée
-
Chill Completely: Ensure that your custard is fully chilled before caramelizing the sugar. This keeps the topping crispy and prevents sogginess.
-
Heat Wisely: Avoid boiling the heavy cream; it should only reach a steaming point to maintain the integrity of the flavors in your crème brûlée.
-
Watch the Torch: If using a kitchen torch, move it in a circular motion to caramelize evenly and avoid burning. This helps achieve that perfect golden crust.
-
Don’t Overbake: Your custard should be just set in the center—slightly wobbly is ideal. Overbaking can lead to a rubbery texture.
-
Strain for Smoothness: Straining the custard mixture is key to eliminating any bits and ensuring a silky texture for your crème brûlée.
-
Experiment with Flavors: Feel free to infuse the cream with flavorings like citrus zest or espresso for a creative twist on the traditional crème brûlée!
Make Ahead Options
These irresistible crème brûlées are perfect for busy home cooks looking to save time without sacrificing flavor! You can prepare the custard base up to 24 hours in advance, cooling it in the ramekins before refrigerating. To maintain that silky texture, ensure they’re tightly covered with plastic wrap to prevent any unwanted flavors from seeping in. When it’s time to impress your guests, simply remove the custards from the fridge, sprinkle with demerara sugar, and caramelize with a kitchen torch just before serving. This way, you’ll have a stunning dessert ready to go with minimal effort, allowing you to focus on enjoying the moment!
Crème Brûlée Variations & Substitutions
Unleash your creativity and customize this gluten-free crème brûlée with delightful twists and alternatives!
-
Dairy-Free: Substitute heavy whipping cream with coconut cream for a luscious coconut flavor. The velvety texture remains while giving a tropical hint.
-
Reduced Sugar: Opt for monk fruit sweetener or stevia as a sugar alternative for a healthier dessert without sacrificing taste. The balance of sweetness will still shine through perfectly.
-
Flavor Infusions: Add zest of citrus fruits like lemon or orange to the cream while heating for a refreshing burst of flavor. It lifts the custard, making it light and vibrant.
-
Nutty Twist: Incorporate almond or hazelnut extract instead of vanilla bean to create a nutty variation. Garnish with crushed nuts for an exquisite texture contrast!
-
Rich Variation: For an indulgent twist, mix in a shot of espresso or coffee extract to the custard base. This variation adds a delightful bitterness that perfectly compliments the sweetness.
-
Chocolate Lovers: Melt dark chocolate into the warm cream for an unforgettable chocolatey indulgence. This will transform your dessert into a luscious chocolate crème brûlée.
-
Herbal Notes: Infuse some fresh rosemary or basil into the cream for an aromatic twist. Strain after infusing to keep those delightful herbal notes!
-
Spicy Heat: Add a pinch of cayenne pepper or a dash of cinnamon for a subtle kick. It adds depth and a warm, surprising element to the classic recipe.
For additional flavor-enhanced variations, consider exploring these delightful ideas to elevate your culinary creations! Together, let’s make something amazing with your ultimate gluten-free creme brulee!
How to Store and Freeze Crème Brûlée
-
Fridge: Store your crème brûlée in the refrigerator for up to 2 days. Make sure to cover the ramekins with plastic wrap or a lid to keep them fresh.
-
Freezer: While it’s not recommended to freeze crème brûlée as the texture may change, if necessary, you can freeze for up to 1 month in airtight containers. Thaw in the fridge and re-chill before serving.
-
Reheating: Always brûlée the sugar just before serving. A kitchen torch works best for a perfect crisp top; this ensures your crème brûlée maintains its delicious contrast between creamy custard and crunchy sugar.
-
Avoid Moisture: If storing in the fridge, prevent moisture from collecting by placing a paper towel under the cover, as excess moisture can make the sugar topping soggy if done too early.
What to Serve with Ultimate Gluten-Free Crème Brûlée
The perfect sweet conclusion to any meal deserves equally delightful companions that enhance the experience.
- Fresh Berries: A burst of vibrant berries like strawberries or raspberries brings a refreshing contrast to the creamy dessert, balancing sweetness with natural tartness.
- Chocolate Mousse: Rich and airy, chocolate mousse adds a decadent layer to your dessert spread, making it a heavenly pairing for the luxurious crème brûlée.
- Shortbread Cookies: Buttery, crunchy shortbread creates a delightful textural contrast, inviting guests to dip and savor each bite alongside the velvety custard.
- Coffee or Espresso: The bold flavors of coffee serve as a perfect foil to the sweetness of the crème brûlée, elevating the after-dinner experience with an inviting warmth.
- Mint Sprig Garnish: Just a simple sprig of mint adds a pop of color and a refreshing aroma, enhancing the visual appeal and providing a light finish to the dessert.
- Honey Drizzle: A light drizzle of honey over the top contributes an extra layer of sweetness and floral notes, complementing the vanilla custard beautifully.
- Pistachio Crumble: Crushed pistachios add a nutty crunch, providing a lovely contrast while introducing a touch of elegance to your dessert presentation.
- Lemon Sorbet: If you’re after a palate cleanser, lemon sorbet is an invigorating choice, offering a zesty kick that cleanses the taste buds beautifully between sips of coffee.
Gluten-free Crème Brûlée Recipe FAQs
What is the best way to select ripe ingredients for crème brûlée?
Absolutely! For the best flavor, opt for fresh, high-quality ingredients. Choose heavy whipping cream that is fresh and has no off smells. If using a vanilla bean, look for plump, moist pods without any dark spots, which indicate spoilage. Large, vibrant egg yolks will add a rich color and depth of flavor to your custard.
How should I store leftover crème brûlée?
To keep your crème brûlée fresh, store it in the refrigerator for up to 2 days. Cover each ramekin with plastic wrap or a lid to prevent it from absorbing any fridge odors. Remember to brûlée the sugar topping only right before you serve to maintain that delightful crunch!
Can I freeze crème brûlée for later use?
While I generally recommend against freezing crème brûlée because the texture can suffer, you can do it if necessary. Place the custard in airtight containers and freeze for up to 1 month. To thaw, just move it to the fridge and allow it to re-chill overnight before adding the sugar topping.
What should I do if my custard turns out too runny?
If your crème brûlée doesn’t set properly and remains runny after baking, it’s possible that it was undercooked or not chilled long enough. Make sure to bake the custard until it’s just slightly wobbly in the center, then cool it completely in the fridge for at least 4 hours. If it’s still runny after chilling, you can try reheating it gently in the oven in a water bath to allow it to set better.
Can I make this dessert for someone with allergies?
Certainly! Since this is a gluten-free recipe, it’s already suitable for those avoiding gluten. However, if you’re catering to other allergens, just check your ingredients; for instance, ensure your vanilla extract is pure and free from other additives. If there’s a concern with dairy, consider using lactose-free cream, though the outcome may vary. Always inform your guests about any potential allergens in the dish!
How can I prevent the sugar topping from becoming soggy?
A great way to keep that beautiful crunch in your crème brûlée is to avoid covering it too early after brulée-ing the sugar. Store the custard in the fridge, and sprinkle the sugar topping on just before serving. Additionally, placing a paper towel under the lid can help absorb excess moisture, keeping that crispy topping intact.
Irresistible Crème Brûlée: Your Ultimate Sweet Indulgence
Ingredients
Equipment
Method
- Preheat your oven to 300°F (150°C). Prepare a large roasting pan and arrange empty ramekins inside for the water bath.
- In a medium saucepan, pour the heavy whipping cream and add the split vanilla bean. Gently heat until steaming, but do not boil. Stir occasionally.
- In a heatproof bowl, whisk together egg yolks and granulated sugar until blended and pale, about 2-3 minutes.
- Slowly pour half of the hot cream into the egg mixture while whisking continuously to temper the eggs.
- Pour the tempered mixture back into the saucepan with the remaining hot cream. Stir gently over low heat until thickened, about 5 minutes.
- Strain the custard mixture through a fine mesh strainer into a clean bowl to eliminate lumps.
- Carefully fill each ramekin with the custard, about three-quarters full.
- Place the filled ramekins in the roasting pan and add boiling water halfway up the sides. Bake for 25-30 minutes until just set.
- Remove ramekins from the water bath and cool to room temperature before refrigerating for at least 4 hours or overnight.
- Sprinkle a layer of demerara sugar over each chilled custard and use a kitchen torch to caramelize until golden brown.
Leave a Reply