
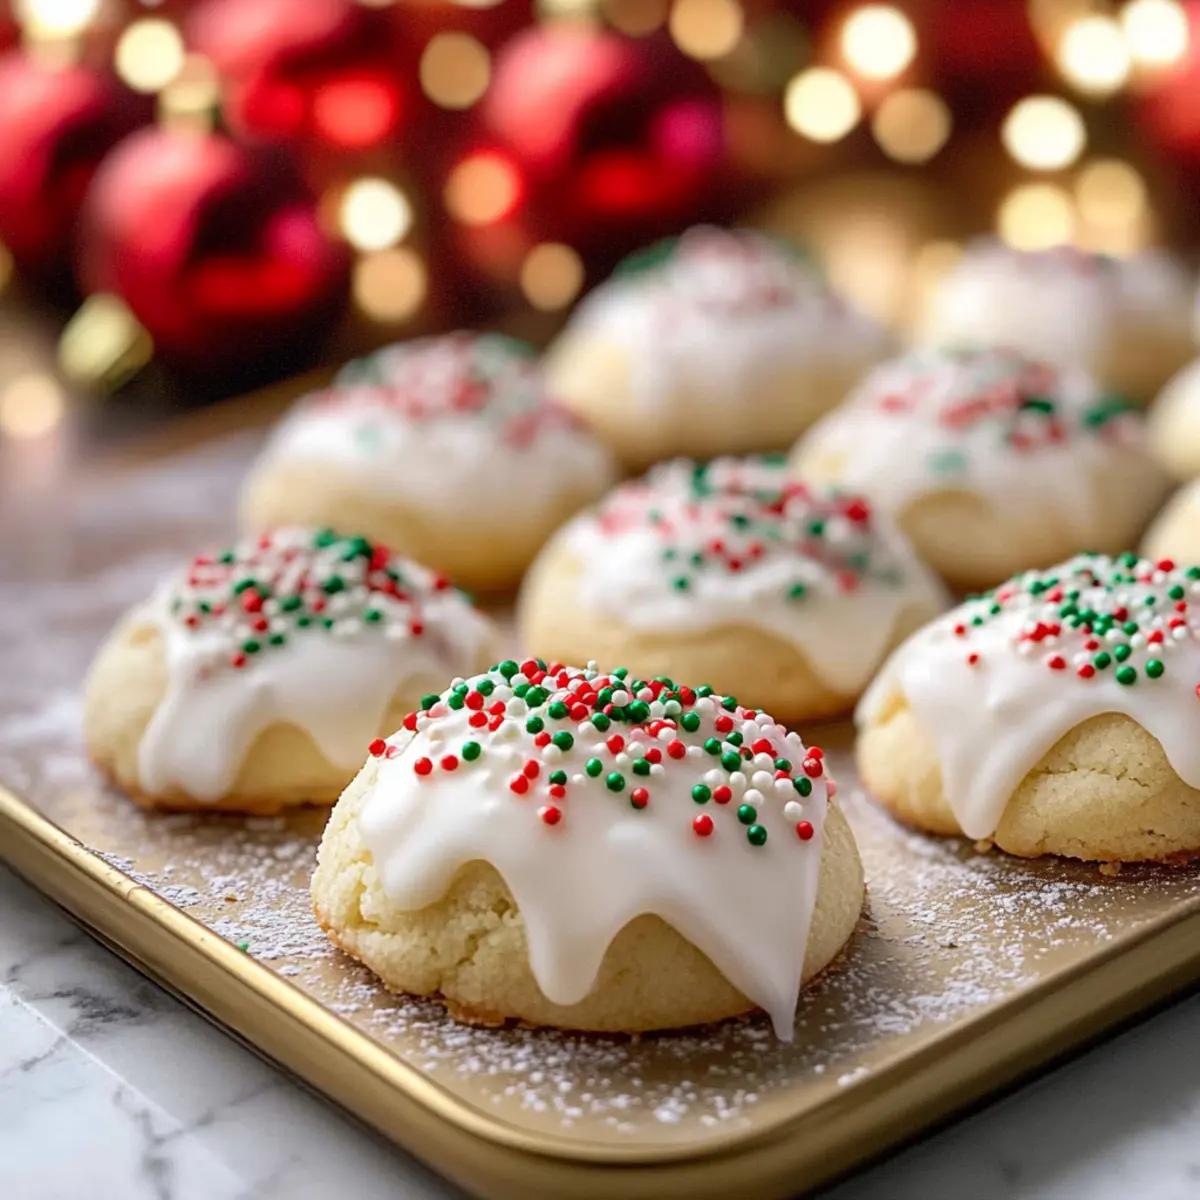
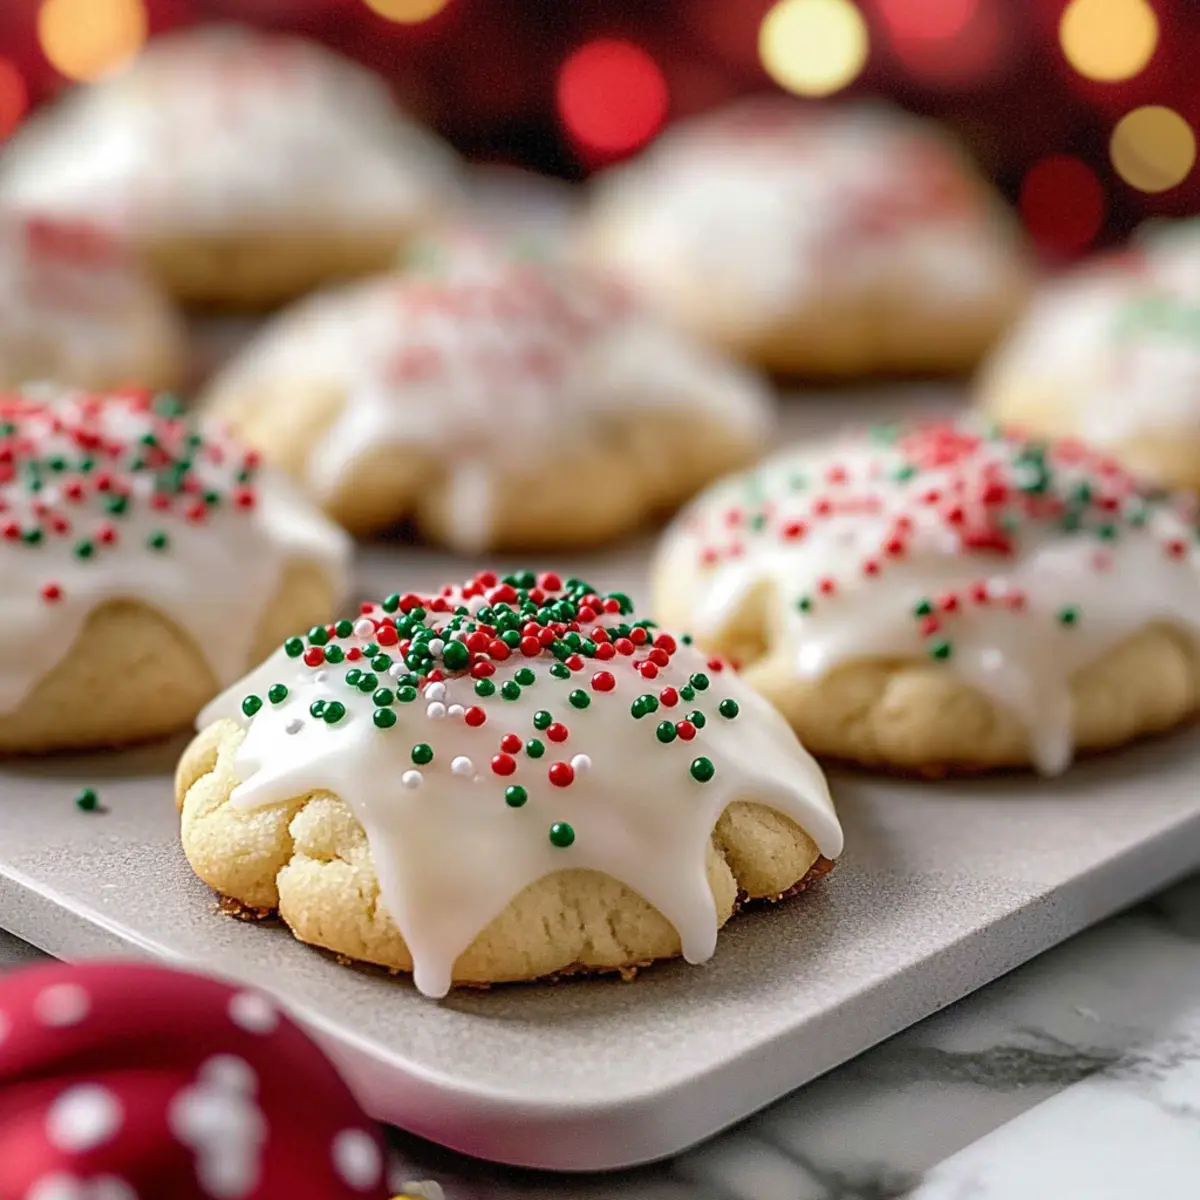
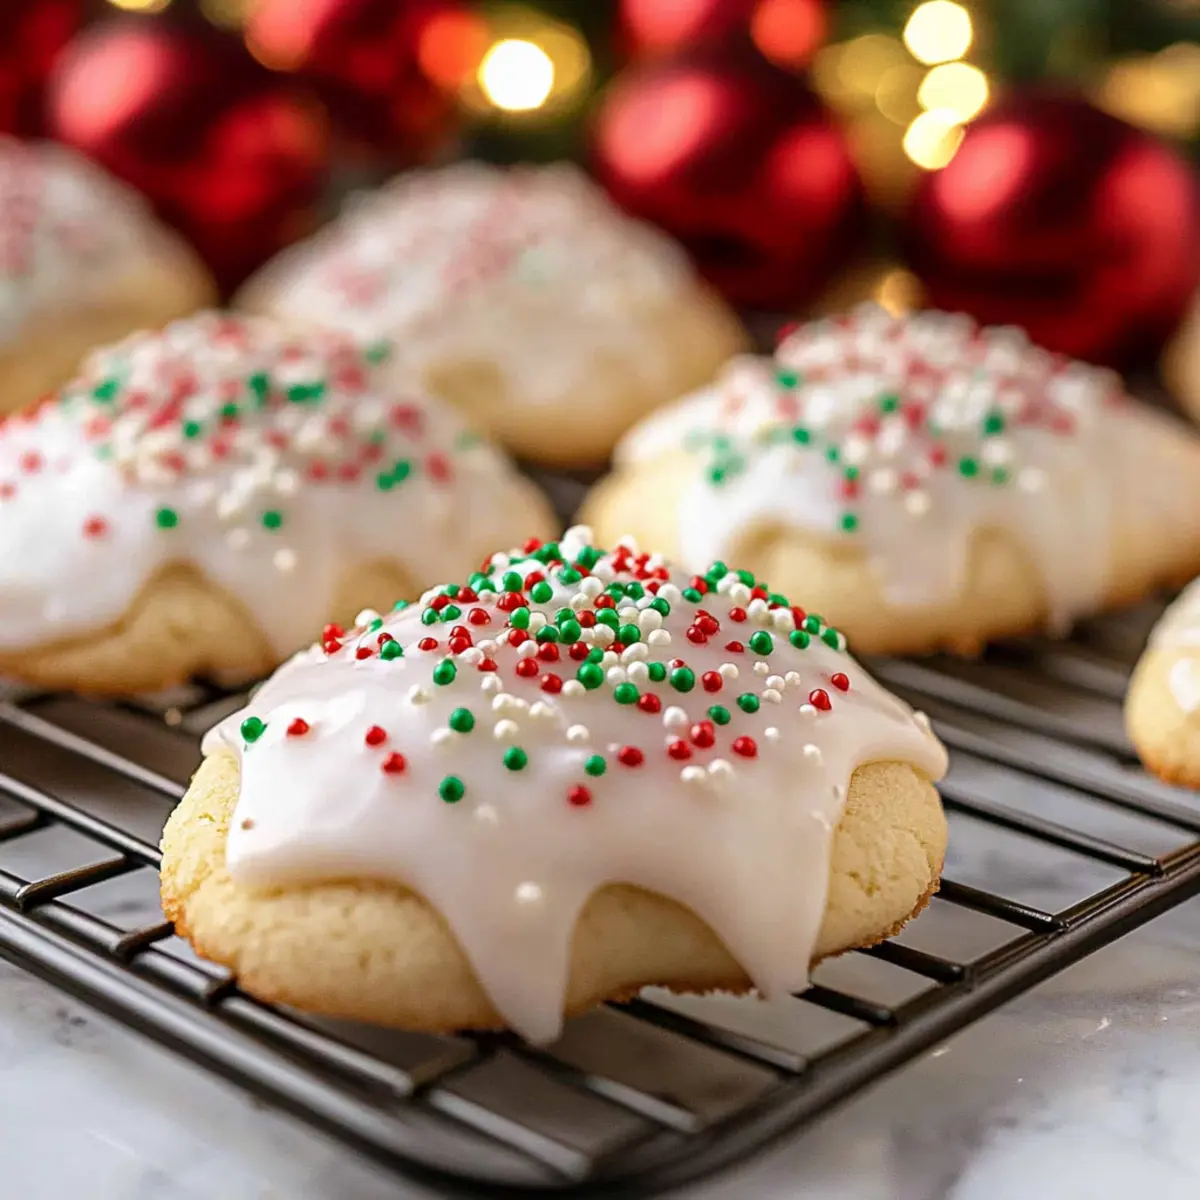
The sweet aroma of baked goods has drifted through homes for centuries, especially during the holiday season. As I prepare my kitchen for festive treats, I can’t help but think of these charming Italian Christmas Cookies. With their delightful customization options, whether you prefer a hint of almond, vanilla, or anise, they promise to light up your holiday gatherings. Not only are they quick to whip up, but their make-ahead nature ensures you can savor the joy of baking without the last-minute rush. Imagine a tray filled with these colorful, sprinkle-topped delights, ready to steal the spotlight at any festive gathering! So, what flavor twist will you choose for your batch?
Why Are These Christmas Cookies So Special?
Customizable Flavors: Whether you crave almond, vanilla, or anise, these cookies can be tailored to your taste preferences.
Make-Ahead Convenience: Prepare the dough days in advance, making your holiday baking hassle-free and enjoyable.
Festive Appearance: Their vibrant sprinkles make these cookies stand out, perfect for holiday cookie platters or gift-giving.
Easy to Make: With minimal prep time and straightforward steps, even novice bakers can impress their guests.
Irresistible Aroma: The smell of buttery, baked dough will fill your kitchen, creating a cozy holiday atmosphere as you bake!
Don’t forget to explore more fun baking adventures with other delightful holiday treats.
Christmas Cookie Ingredients
• You’ll need a delightful mix of ingredients for these festive creations!
For the Cookies
- Salted Butter – Provides richness and moisture; using unsalted butter allows you to control the saltiness.
- All-Purpose Flour – This is the main structure component; for a gluten-free version, consider a suitable gluten-free flour blend.
- Almond Extract – Adds that essential holiday flavor; vanilla or anise extract can offer a different twist if you prefer.
- Baking Powder – The leavening agent that helps your cookies rise; make sure it’s fresh for the best results.
- Granulated Sugar – Sweetens the cookies and contributes to their texture; you can use brown sugar for a deeper flavor.
- Eggs – These bind the ingredients and add moisture; using room temperature eggs helps them mix better.
For the Glaze
- Powdered Sugar – Essential for the glaze, ensuring a sweet finish; sifting prevents lumps and ensures a smooth texture.
- Milk – Helps achieve the right consistency for the icing; adjust the quantity for your desired glaze thickness.
- Nonpareil Sprinkles – Adds a festive touch; feel free to swap in different sprinkles to personalize your cookies.
These Christmas cookies are not only delightful to taste but also a cheerful addition to your holiday traditions!
Step‑by‑Step Instructions for Quick & Festive Italian Christmas Cookies
Step 1: Prepare the Dry Ingredients
In a mixing bowl, whisk together 2 cups of all-purpose flour and 1 teaspoon of baking powder until well combined. This mixture will provide structure to your Italian Christmas Cookies. Set the bowl aside while you work on the wet ingredients, ensuring everything is ready for swift mixing.
Step 2: Cream the Butter and Sugar
In a large mixing bowl, beat 1 cup of softened salted butter using a hand mixer or stand mixer on medium speed for about 2–3 minutes until it’s light and fluffy. Gradually add in 1 cup of granulated sugar, mixing until fully incorporated, which will create a sweet, creamy base for your cookies.
Step 3: Add Eggs and Extracts
Add 2 large room-temperature eggs, one at a time, mixing after each addition until fully combined. Then, pour in 1 teaspoon of almond extract, blending this vibrant flavor into the mixture for about 30 seconds. The combination will yield a rich base that brings warmth to your Italian Christmas Cookies.
Step 4: Combine Wet and Dry Ingredients
Gradually fold the flour mixture into the wet ingredients, mixing on low speed until just combined. This step is crucial to prevent overmixing, which can lead to tougher cookies. You’ll achieve a smooth, soft dough that will be the foundation of your delicious festive treats.
Step 5: Chill the Dough
Cover the mixing bowl with plastic wrap and refrigerate the dough for at least 1 hour, ensuring it firms up for easier handling. This chilling time is essential for achieving the right texture in your Italian Christmas Cookies, resulting in a tender and chewy bite.
Step 6: Preheat the Oven
While the dough chills, preheat your oven to 350°F (175°C). Line a baking sheet with parchment paper to prevent sticking and prepare your workspace for shaping the cookies. The warm environment will help the cookies bake evenly, creating a delightful golden finish.
Step 7: Shape the Cookies
After chilling, roll the dough into 1-inch balls and place them about 2 inches apart on the prepared baking sheet. Aim for about 12 cookies per sheet to allow for spreading. You’ll want a smooth surface to catch the lovely glaze later, so shape them neatly.
Step 8: Bake the Cookies
Bake the cookies in your preheated oven for 8–10 minutes or until the edges are set and the tops are slightly golden. Keep an eye on them to avoid overbaking, which can lead to dry cookies. Your kitchen will be filled with a delightful aroma as they bake!
Step 9: Cool the Cookies
Once baked, remove the cookies from the oven and let them cool on the baking sheet for a few minutes. Then, carefully transfer them to a wire rack to cool completely. This cooling phase is essential before icing to prevent melting your glaze.
Step 10: Prepare the Glaze
In a mixing bowl, combine 2 cups of sifted powdered sugar with about 2–4 tablespoons of milk, stirring until you achieve a smooth, thick glaze. Add 1 teaspoon of almond extract for extra flavor. Adjust the milk for your preferred consistency, aiming for a coating that clings to the back of a spoon.
Step 11: Glaze the Cookies
Once the cookies are completely cooled, dip the tops into the glaze, making sure to cover them generously. Immediately sprinkle with colorful nonpareil sprinkles to add a festive touch. Allow the glaze to set at room temperature for about 30 minutes, creating a stunning finish to your Italian Christmas Cookies.

What to Serve with Quick & Festive Italian Christmas Cookies
As the holiday spirit fills your home, complement these delightful cookies with dishes and drinks that elevate your festive gatherings.
-
Festive Hot Cocoa: This rich, creamy drink warms the soul and pairs beautifully with the cookie’s almond glaze, creating a cozy vibe.
-
Peppermint Bark: A crunchy, chocolatey treat that contrasts the soft cookies, making for a delightful balance of flavors and textures on your dessert table.
-
Classic Eggnog: The creamy, spiced profile enhances the cookies’ sweetness, inviting you to savor every festive bite in the merriest way possible.
-
Fruit Salad: A light, refreshing touch! Fresh fruits brighten the table and cleanse the palate between the rich cookies, adding a festive flair to your spread.
-
Cheese Platter: Offer a variety of cheeses to contrast with the sugary cookies. A sharp cheddar or creamy brie creates an exciting play of flavors that enhances each nibble.
-
Homemade Fudge: Rich and chocolatey, this treat adds a decadent touch that complements the sweetness of the cookies while ensuring your dessert table has an indulgent variety.
-
Spiced White Wine: A warm glass of mulled white wine brings festive cheer and spices that echo the flavors of holiday baking, perfectly pairing with the cookies.
-
Marzipan Fruits: These sweet and nutty treats carry an almond essence that harmonizes with the cookies, making them a charming addition to the holiday spread.
-
Gingerbread Cookies: For an extra festive touch, include these traditional favorites. Their warm spices complement the almond essence beautifully, creating a holiday feast of flavors.
Christmas Cookies Variations & Substitutions
Feel free to get creative and make these Christmas cookies your own with these delicious ideas!
-
Flavor Swap: Substitute almond extract with vanilla or anise for entirely different flavor notes that can cater to everyone’s palate. The essence of these alternatives can transform your cookies beautifully.
-
Citrus Zest: Add a teaspoon of lemon or orange zest to the dough for a refreshing burst of flavor, brightening up each bite! Your guests will love this citrusy twist.
-
Gluten-Free Option: Swap all-purpose flour for a gluten-free blend to accommodate dietary needs, ensuring everyone can enjoy these festive treats. Make sure the blend includes xanthan gum for perfect texture!
-
Brown Sugar: Use brown sugar instead of granulated for a hint of molasses flavor that deepens the sweetness of your cookies. It adds a lovely touch when paired with the glaze.
-
Dairy-Free Delight: Opt for coconut oil or a dairy-free butter substitute to make your cookies dairy-free without sacrificing flavor or texture. You won’t even miss the dairy!
-
Unfrosted Version: Serve the cookies plain or dusted with powdered sugar to highlight their lovely taste and texture. This can be a great option for a simpler presentation.
-
Heat It Up: Add a pinch of cayenne pepper or chili powder in the dough for a surprising kick! This daring variation can balance the sweetness beautifully and impress adventurous eaters.
-
Nutty Crunch: Mix in chopped nuts like pistachios or walnuts for an added crunch and depth of flavor. They also bring a festive green color to your cookies!
For even more creative baking, explore delightful holiday treats that you can make alongside these festive cookies. The joys of baking are limitless!
Storage Tips for Christmas Cookies
Room Temperature: Store cookies in an airtight container at room temperature for up to 5 days; this keeps them soft and fresh.
Fridge: If you live in a warm climate, consider refrigerating your cookies for added freshness. They’ll last for about 7 days when stored in an airtight container.
Freezer: Freeze your Christmas cookies for up to 3 months. Layer them between parchment paper in an airtight container to prevent sticking and preserve flavor.
Reheating: For the best taste, warm cookies in the microwave for 10-15 seconds before serving. This will revive their chewy texture and enhance their delicious flavor!
Expert Tips for Perfect Christmas Cookies
-
Don’t Overmix: Mixing the dough too much can result in tough cookies. Be gentle and mix until just combined to keep them tender.
-
Measure Flour Correctly: Spoon the flour into your measuring cup and level it off with a knife. This prevents packing it down, which can lead to dry cookies.
-
Chill the Dough: Always chill your dough for at least 1 hour before baking. This step is crucial to achieving that soft, chewy texture in your Christmas cookies.
-
Watch Your Baking Time: Keep a close eye on your cookies while they bake. Remove them once they’re slightly golden around the edges to avoid overbaking.
-
Cool Completely: Allow cookies to fully cool before glazing to prevent the icing from melting and losing its shine.
-
Experiment with Flavors: Don’t be afraid to explore variations! Adding vanilla or anise extract can give your Christmas cookies a delightful twist.
Make Ahead Options
These delightful Italian Christmas cookies are perfect for busy bakers who want to simplify their holiday preparations! You can make the cookie dough up to 24 hours in advance; simply wrap it tightly in plastic wrap and refrigerate to prevent drying out. When you’re ready to bake, roll the chilled dough into balls and bake as directed for just as delicious results. Additionally, you can prepare the glaze up to 3 days in advance. Store it in an airtight container in the fridge and stir well before using. This way, you can enjoy the joyful process of decorating your Italian Christmas cookies without any last-minute stress!
Christmas Cookies Recipe FAQs
How do I select the best ingredients for my Christmas cookies?
Absolutely! Using fresh, high-quality ingredients can make all the difference in your cookies. Look for salted butter that is creamy and smooth. Check your flour for any clumps and avoid those with dark spots, as they can indicate age. When it comes to extracts, opt for pure almond extract for the best flavor; artificial ones may not deliver the same delightful taste.
What is the best way to store baked Christmas cookies?
You can store your Christmas cookies in an airtight container at room temperature for up to 5 days. If you live in a warm climate, consider refrigerating them in an airtight container, where they’ll remain fresh for about 7 days. To keep your cookies soft, place a slice of bread in the container—this helps maintain moisture and tenderness.
Can I freeze my Christmas cookies?
Yes, you can freeze your Christmas cookies for up to 3 months! To do this, lay cookies in a single layer on a baking sheet and freeze for 1-2 hours until firm. Then, transfer them to an airtight container, layering parchment paper between the cookies to prevent sticking. When you’re ready to enjoy them, simply thaw at room temperature or pop in the microwave for 10-15 seconds for that fresh-baked taste!
What should I do if my cookie dough is too sticky or dry?
Very! If your dough feels too sticky, it might need a little more flour. Gradually add a tablespoon of flour until it’s manageable. If your dough is too dry, incorporate a small amount of milk or softened butter until the desired consistency is reached. Remember, be gentle while mixing; you want a tender cookie!
Are these Christmas cookies safe for dietary restrictions?
Definitely! These delicious Christmas cookies can be customized for various dietary needs. For a gluten-free version, substitute all-purpose flour with a gluten-free flour blend. If you have nut allergies, you can easily swap the almond extract for vanilla or anise extract. Just be sure to check the ingredient labels on all your products to ensure they are allergy-friendly!
Can I make and chill the dough in advance?
Yes! I often prepare the cookie dough ahead of time and chill it for up to 24 hours before baking. This not only saves time but also enhances the flavors as the dough sits. Simply wrap it tightly in plastic wrap and store it in the refrigerator. When you’re ready to bake, let it sit at room temperature for a few minutes for easier shaping!
Now that you’re equipped with these FAQs, you’re all set to create your festive Italian Christmas cookies! Enjoy the baking adventure!
Deliciously Customizable Christmas Cookies for Holiday Fun
Ingredients
Equipment
Method
- Whisk together 2 cups of all-purpose flour and 1 teaspoon of baking powder in a mixing bowl. Set aside.
- Beat 1 cup of softened salted butter for 2-3 minutes until light and fluffy. Gradually add in 1 cup of granulated sugar.
- Add 2 large room-temperature eggs one at a time, mixing after each. Pour in 1 teaspoon of almond extract.
- Fold the dry mixture into the wet ingredients until just combined.
- Cover and refrigerate the dough for at least 1 hour.
- Preheat oven to 350°F (175°C) and line a baking sheet with parchment paper.
- Shape dough into 1-inch balls and space them 2 inches apart on the sheet.
- Bake for 8-10 minutes until edges are set and tops are slightly golden.
- Cool cookies on the baking sheet for a few minutes before transferring to wire racks to cool completely.
- Mix 2 cups of sifted powdered sugar with 2-4 tablespoons of milk and 1 teaspoon of almond extract until smooth.
- Dip cooled cookie tops into the glaze and sprinkle with nonpareil sprinkles. Let set for 30 minutes.
Leave a Reply