
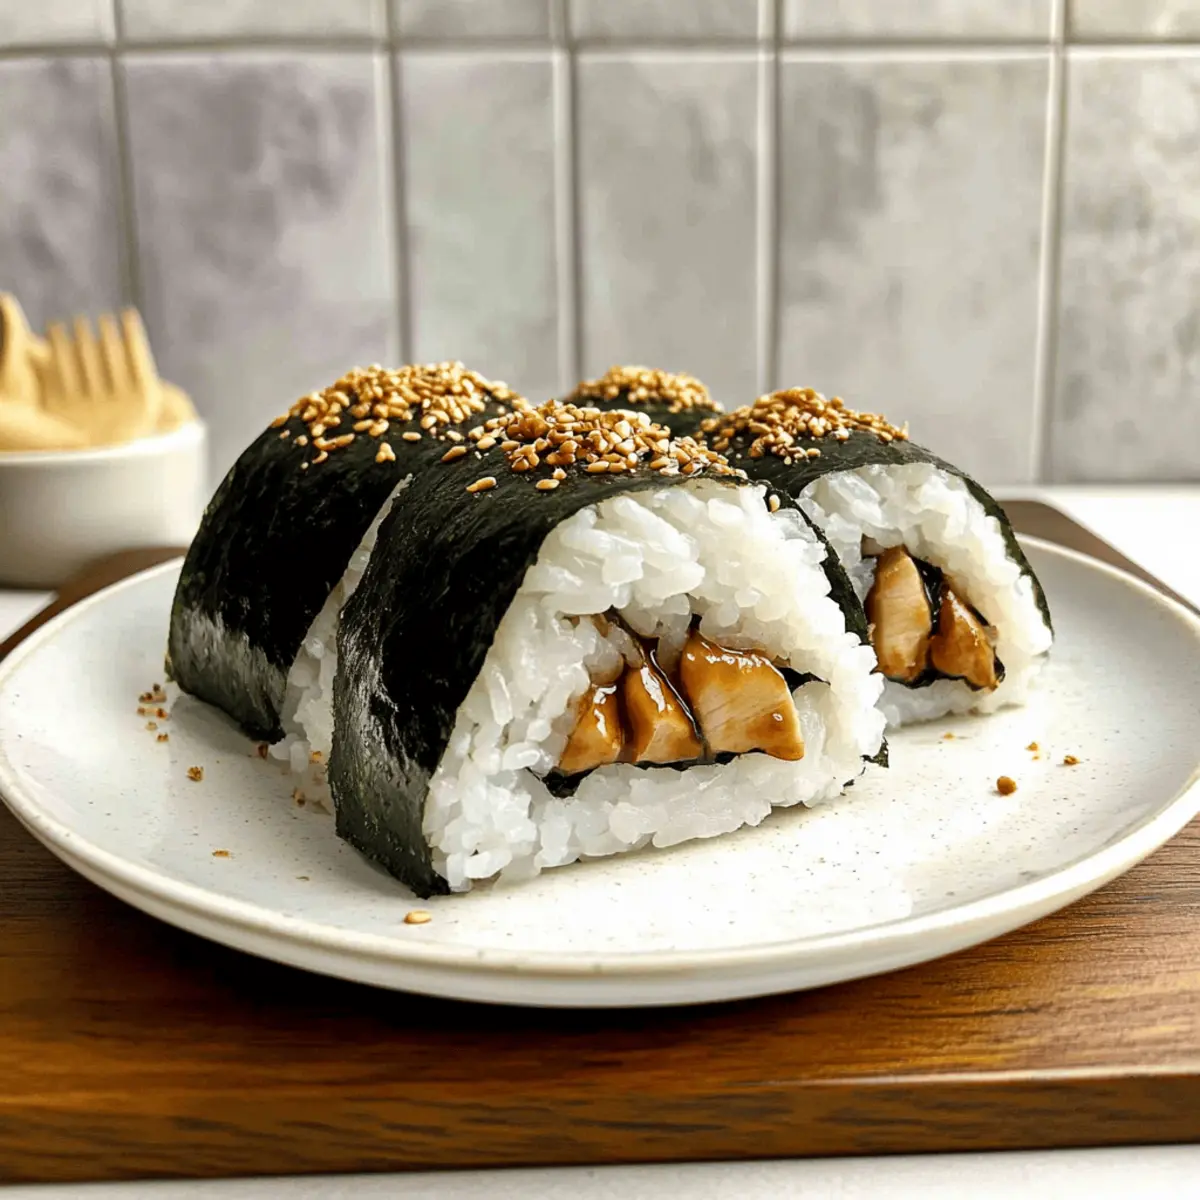
As I twirled the sun-drenched nori sheets around perfectly shaped rice triangles, I couldn’t help but think about how comfort food can take many forms. These Teriyaki Chicken Onigiri beautifully blend savory chicken with the chewy delight of sushi rice, making them an alluring snack that transports your tastebuds straight to Japan. This recipe for chicken onigiri is not only a quick and satisfying option for busy days, but it also offers endless possibilities for customization—use chicken drumsticks, thighs, or even ground chicken. Perfect for meal prep or packing in picnic lunches, these tasty morsels will surprise you with their versatility and ease. Are you ready to bring a bit of Japan into your kitchen? Let’s dig in!
Why Love This Chicken Onigiri?
Deliciously Flavorful: The combination of teriyaki chicken and perfectly sticky sushi rice results in every bite bursting with flavor, captivating even the pickiest eaters.
Easy to Make: This recipe is straightforward and perfect for those new to Japanese cuisine. With just a few ingredients, you’ll have a delicious dish ready in no time!
Customizable Options: Feel free to get creative! Switch out chicken drumsticks with thighs or ground chicken, or try different fillings like pickled veggies for a vegetarian twist.
Perfect for Meal Prep: These onigiri are excellent for quick lunches or snacks; you can easily pack them in bento boxes or enjoy them during picnics.
Nostalgic Experience: Each bite offers a comforting taste of Japan, reminiscent of the onigiri found in traditional convenience stores—bringing a delightful cultural touch to your dining experience.
Chicken Onigiri Ingredients
• Dive into the world of homemade chicken onigiri with these essential ingredients.
For the Sushi Rice
- Sushi Rice – This sticky rice is crucial for shaping onigiri; remember to use slightly more water than usual.
- Salt – Enhances the flavor of the rice; opt for fine salt for better mixing.
- Furikake (optional) – Sprinkling this Japanese seasoning adds a delightful umami kick and texture.
For the Chicken Filling
- Boneless Skinless Chicken Meat – The heart of this recipe; drumsticks are recommended for their rich flavor.
- Soy Sauce – Provides a savory umami layer to both the marinade and the teriyaki sauce for your chicken onigiri.
- Sake (or Water) – Helps tenderize the chicken while marinating.
- Baking Soda – A secret trick for tenderizing the meat, ensuring juicy bites.
- Cornstarch – This creates a beautiful glaze when cooked with the chicken.
- Mirin – Adds a touch of sweetness to balance the umami in the sauce.
- Brown Sugar – Sweetens the teriyaki sauce; be sure to pack it firmly.
- Oil – Opt for non-stick oil when frying the chicken for the best results.
- Minced Garlic – This aromatic ingredient enhances the overall flavor of the chicken.
For Assembly
- Nori Sheet – Wrap your onigiri for convenience; cut into rectangles for easy handling.
Step‑by‑Step Instructions for Teriyaki Chicken Onigiri
Step 1: Cook the Sushi Rice
Begin by rinsing 2 cups of sushi rice under cold water until the water runs clear, then drain. Transfer the rice to a rice cooker, adding 2.5 cups of water and a pinch of salt. Cook according to the rice cooker instructions, usually around 25 minutes. Once cooked, let the rice sit for 10 minutes to steam before fluffing it with a rice paddle and mixing in optional furikake for extra flavor.
Step 2: Marinate the Chicken
While the rice is cooking, dice 1 pound of boneless skinless chicken into small pieces. In a bowl, combine soy sauce, sake, baking soda, and cornstarch, then add the chicken, ensuring all pieces are coated. Cover the bowl and refrigerate the marinated chicken for about 30 minutes to let the flavors meld and the meat tenderize, ensuring a delicious filling for your chicken onigiri.
Step 3: Prepare the Teriyaki Sauce
In a small bowl, mix together ¼ cup of soy sauce, 2 tablespoons of mirin, and 2 tablespoons of brown sugar, stirring until the sugar dissolves. This mixture will serve as your teriyaki sauce, providing a sweet and savory flavor to drizzle over the chicken later. Set the sauce aside to allow the flavors to combine while you cook the chicken.
Step 4: Cook the Chicken
Heat 1 tablespoon of oil in a non-stick pan over medium-high heat. Once the oil is shimmering, add the marinated chicken. Sauté for 2-3 minutes until the chicken is cooked through and no longer pink, stirring occasionally to ensure even cooking. You want the chicken pieces to turn golden-brown and slightly crispy, adding a delightful texture to your chicken onigiri.
Step 5: Add Garlic and Teriyaki Sauce
Lower the heat to medium and add 2 cloves of minced garlic to the cooked chicken, stirring well for about 30 seconds to release the aroma. Pour the prepared teriyaki sauce over the chicken, allowing it to coat the pieces evenly. Continue cooking for another 2-3 minutes until the sauce thickens slightly and glazes the chicken, creating a flavorful filling for your onigiri.
Step 6: Shape the Onigiri
Prepare a small bowl of water to keep your hands wet while shaping the onigiri. Take a handful of sushi rice (about ⅓ cup) and gently mold it into a triangle shape, creating a small well in the center. Spoon a portion of the teriyaki chicken filling into the well, then cover it with another ⅓ cup of rice. Press gently but firmly to shape the rice around the filling, ensuring it holds together nicely.
Step 7: Wrap with Nori
Cut nori sheets into rectangles that can be wrapped around the formed onigiri. With damp hands, carefully wrap a piece of nori around the bottom of each onigiri triangle, leaving the top open for easy handling. This step adds flavor and helps keep the onigiri portable. Repeat the shaping and wrapping process for the remaining rice and chicken until all onigiri are prepared.
Chicken Onigiri Variations & Substitutions
Feel free to explore delightful twists on this recipe that suit your family’s tastes and dietary needs!
-
Dairy-Free: For a completely dairy-free option, simply skip any cheese or dairy-based sauces in your fillings.
-
Vegetarian: Swap the chicken for firm tofu or sautéed vegetables like bell peppers and mushrooms for a hearty, meat-free delight. These swaps make your onigiri just as satisfying.
-
Spicy Kick: Add a drizzle of sriracha or mix in some chopped jalapeños to the chicken filling for a fiery flavor that will elevate each bite. Spice lovers will absolutely adore this twist!
-
Gluten-Free: Use tamari instead of soy sauce to ensure the recipe fits gluten-free diets while maintaining that umami flavor we all love.
-
Crispy Texture: Fry the onigiri in a little oil after shaping to create a crispy exterior. This adds a delightful crunch and a new dimension of flavor to your snack.
-
Flavorful Fillings: Try incorporating flavored rice vinegar into the sushi rice or experiment with different marinades for the chicken, like teriyaki or garlic soy for a unique taste experience.
-
Herbed Rice: Mix in fresh herbs like cilantro or green onions to the sushi rice for an aromatic boost that makes this dish even more exciting.
-
Fusion Fun: Explore fusion variations by adding ingredients like spicy mayo or kimchi for a fun, contemporary twist on traditional onigiri that connects cultures in your kitchen.
If you’re looking for even more inspiration, consider trying Chopped Chicken Caesar or Sticky Garlic Chicken. Each offers unique flavors that might spark more delicious ideas for your next meal!
Make Ahead Options
These Teriyaki Chicken Onigiri are perfect for busy home cooks looking to save time! You can prepare the sushi rice and marinate the chicken up to 24 hours in advance. Simply let the cooked rice cool, then store it in an airtight container in the refrigerator. The chicken, once coated in the marinade, also keeps well in the fridge for the same duration. When you’re ready to assemble, just sauté the marinated chicken as instructed and shape the onigiri. To maintain the onigiri’s freshness, wrap them tightly in plastic wrap after shaping and consume them within 2 days. Enjoy restaurant-quality snacks with minimal effort and maximum flavor!
What to Serve With Teriyaki Chicken Onigiri
Enhance your dining experience with delightful accompaniments that make for a complete Japanese-inspired meal.
-
Miso Soup: A warm, comforting bowl of miso soup is the perfect tonic for your taste buds, balancing the savory onigiri beautifully.
-
Pickled Vegetables: A refreshing side of pickled vegetables adds a burst of tangy flavor, enhancing the richness of the chicken.
-
Seaweed Salad: Light, crisp, and subtly flavored, a seaweed salad provides an excellent contrast in texture alongside the onigiri’s chewiness.
-
Edamame: Steamed edamame sprinkled with sea salt offers a nutritious and satisfying bite, adding a hint of sweetness to the meal.
-
Chilled Green Tea: Serve this lightly sweetened beverage for a refreshing sip that cleanses the palate between bites.
-
Japanese Potato Salad: Creamy and slightly sweet, this dish combines well with the savory notes of the onigiri, creating a delightful harmony.
-
Sesame Broccoli: A side of steamed broccoli lightly dressed in sesame oil complements the umami flavors while adding a nutritious green element.
-
Mochi for Dessert: End your meal on a sweet note with silky, chewy mochi, providing a lovely contrast to the savory chicken onigiri.
Enjoy creating a feast that not only fills your stomach but also warms your heart!
How to Store and Freeze Chicken Onigiri
Fridge: Keep your chicken onigiri wrapped tightly in plastic wrap or in an airtight container for up to 2 days. They are best enjoyed fresh but can be stored for a quick snack later.
Freezer: If you want to freeze your onigiri, place them in a single layer on a baking sheet until solid, then transfer to a freezer bag. They can be stored for up to 1 month.
Reheating: When ready to enjoy, thaw in the fridge overnight, then reheat in the microwave for about 30 seconds. Alternatively, warm them in a non-stick pan over low heat until heated through, ensuring they remain moist.
Serving Tip: To maintain the delightful texture of onigiri, it’s best to wrap them in nori just before serving for that perfect crunch in every bite.
Expert Tips for Chicken Onigiri
-
Right Rice Choice: Use short-grain sushi rice for the best texture; it’s sticky and easy to shape into perfect onigiri.
-
Water Adjustment: Remember to add 15% more water than usual for sushi rice. This ensures it cooks properly and achieves the right stickiness for your chicken onigiri.
-
Avoid Sticky Hands: Use water on your hands while shaping the onigiri. It helps prevent the rice from sticking, making the shaping process a breeze.
-
Easy Wrapping: For a simpler wrapping method, use plastic wrap around the rice before wrapping with nori. This keeps onigiri neat and enhances presentation.
-
Flavor Additions: Don’t hesitate to get creative! Integrate additional spices or sauces into the chicken filling for a personalized kick to your onigiri.
-
Storage Guidelines: Enjoy your chicken onigiri fresh, but if storing, wrap them tightly in plastic wrap and refrigerate for up to two days to maintain quality.
Chicken Onigiri Recipe FAQs
How do I select the right chicken for onigiri?
Absolutely! For the best flavor, I recommend using boneless skinless chicken drumsticks, as they remain juicy and tender when cooked. However, boneless thighs or ground chicken can also provide a delightful variation. Just be mindful of cooking times, as ground chicken may cook faster.
What’s the best way to store leftover chicken onigiri?
Very! To keep your chicken onigiri fresh, wrap them tightly in plastic wrap or place them in an airtight container. They can be stored in the refrigerator for up to 2 days. Enjoy them cold or gently reheat for a warm snack that tastes almost like fresh!
Can I freeze chicken onigiri for later?
Absolutely! Freeze your onigiri by placing them in a single layer on a baking sheet until they are solid. Transfer them to a freezer bag and store for up to 1 month. When you’re ready to eat, simply thaw them in the fridge overnight. To reheat, microwave them for about 30 seconds, or warm them in a non-stick pan until heated through.
What if my sushi rice ends up too mushy or dry?
Common issue! If your rice is too mushy, ensure you are using the right sushi rice type and the correct water measurement. For dry rice, it could be due to insufficient water during cooking or not rinsing properly. Aim for a slightly sticky texture that holds together when shaped. If you find it too difficult to mold, try adding a little more water during the cooking process.
Are there any dietary considerations I should be aware of?
Very! If you’re preparing these delicious chicken onigiri for someone with allergies, be cautious with soy sauce, which contains gluten. You can opt for a gluten-free soy sauce or tamari. If making it for children or pets, be sure to avoid ingredients that may be too spicy or high in sodium.
How long will the chicken filling last in the fridge?
For safety, your cooked chicken filling can be stored in the refrigerator for about 3 to 4 days. If you’re meal prepping, I often cook the chicken ahead of time and refrigerate. Just be sure to reheat thoroughly before assembling your onigiri and keep an eye out for any off-smells or visual cues, like dark spots, which indicate spoilage.
Savory Chicken Onigiri for a Taste of Japan at Home
Ingredients
Equipment
Method
- Rinse sushi rice under cold water until clear, drain, and cook with water and salt for 25 minutes.
- Marinate diced chicken in soy sauce, sake, baking soda, and cornstarch for 30 minutes.
- Mix soy sauce, mirin, and brown sugar to make teriyaki sauce.
- Cook marinated chicken in oil until golden-brown.
- Add minced garlic and teriyaki sauce, cook until sauce thickens.
- Shape sushi rice around chicken filling into triangles.
- Wrap onigiri with nori, leaving the top open.
Leave a Reply