
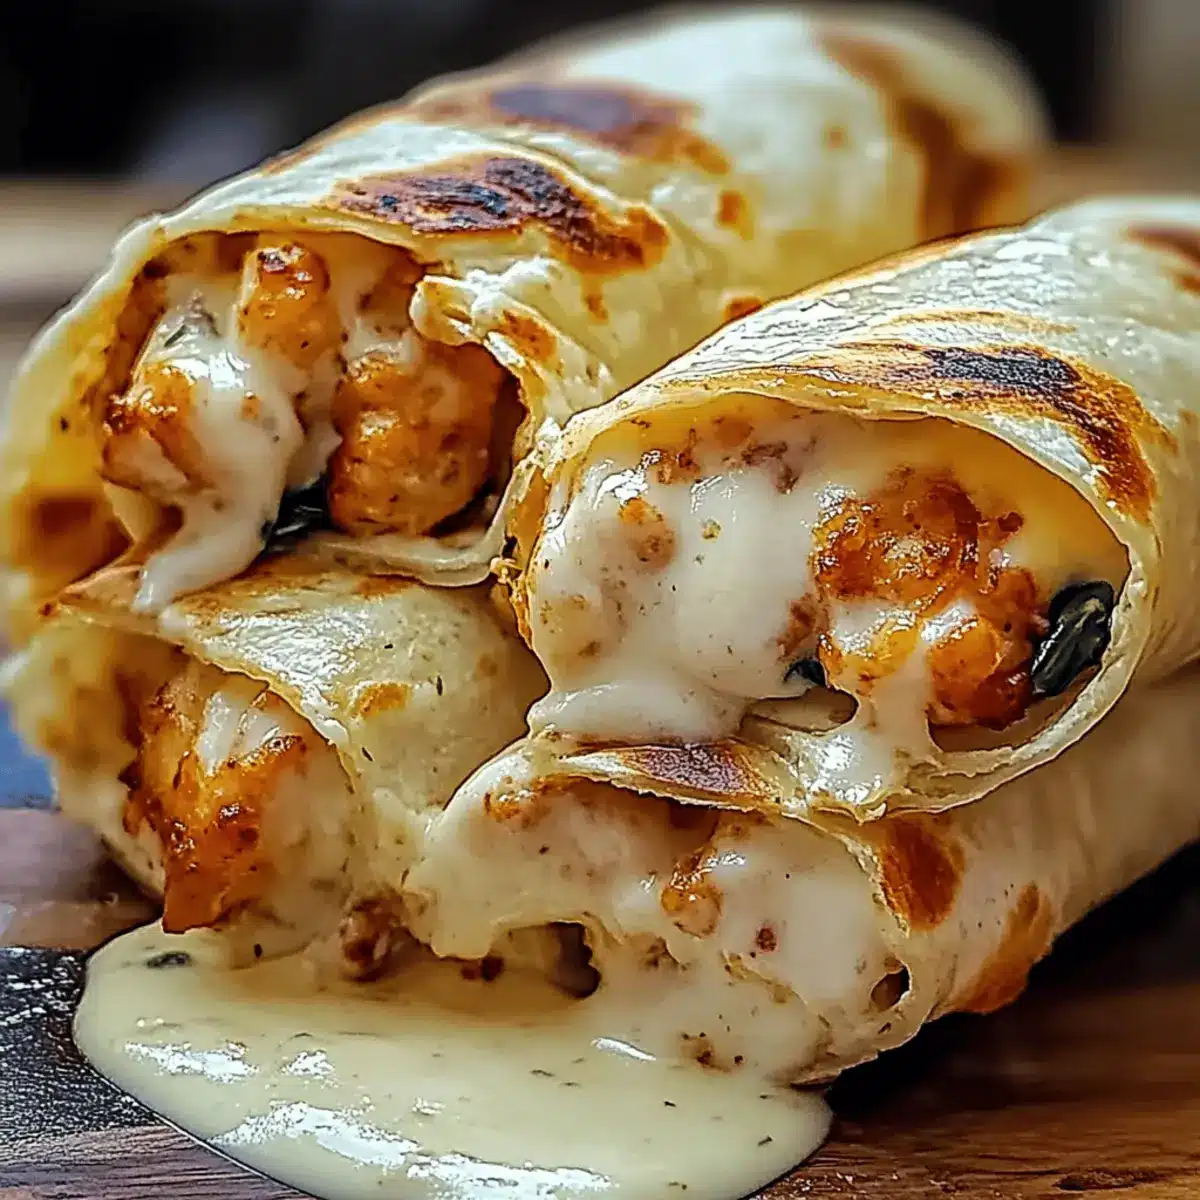
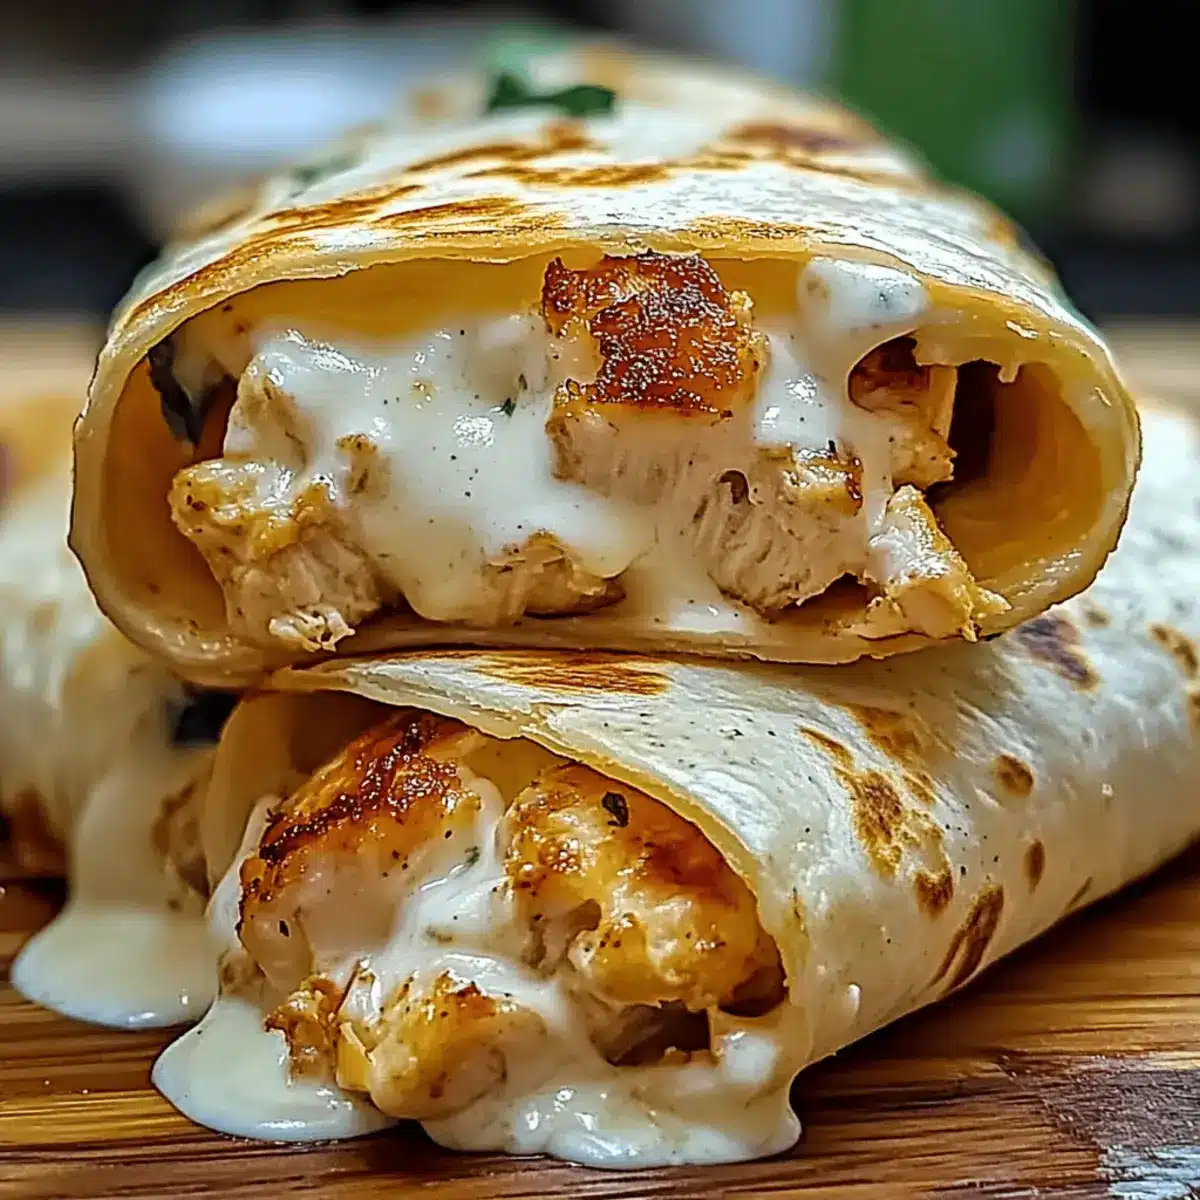
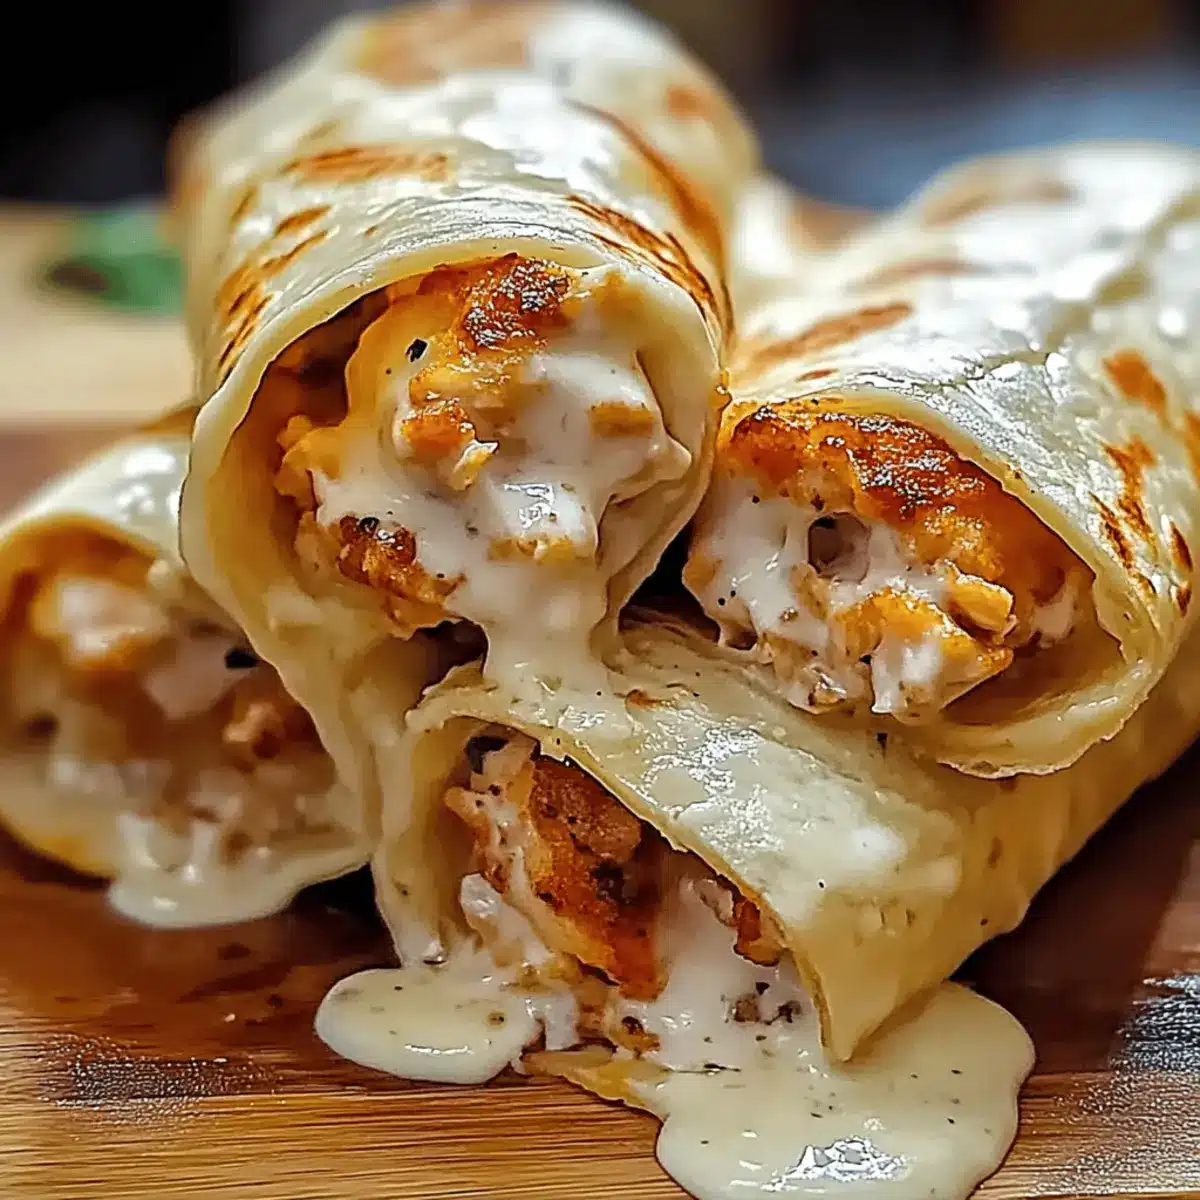
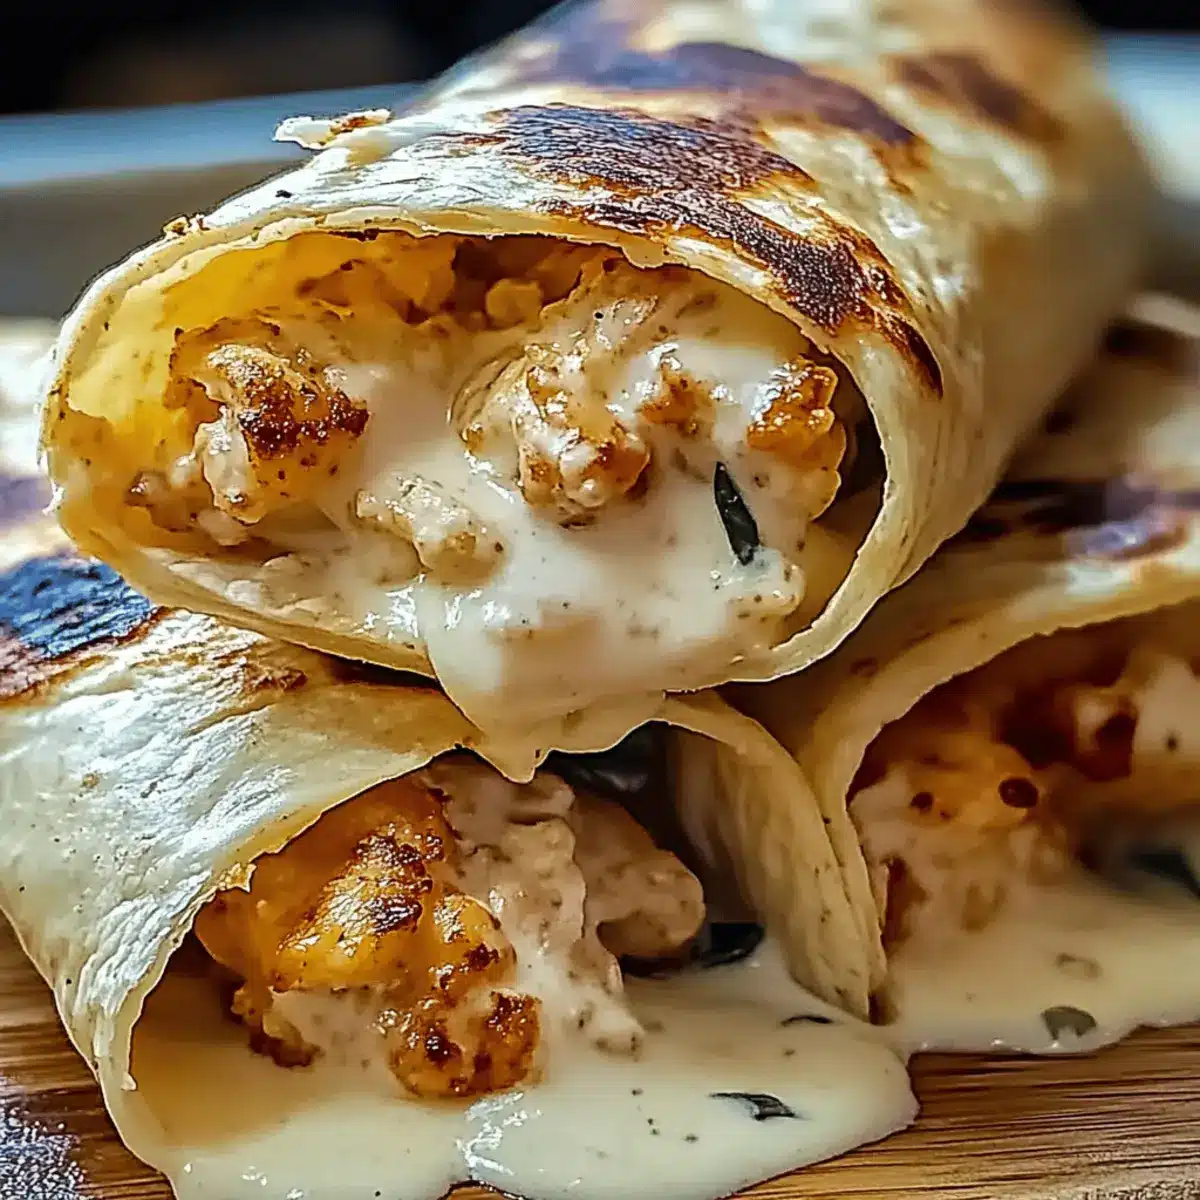
“What’s for dinner?” I can almost hear the chorus of voices already! If you’re looking for a swift answer that brings smiles and satisfied tummies, let me share my go-to: Cheesy Garlic Chicken Wraps. These beauties offer a delightful blend of tender chicken, gooey cheese, and garlic-infused goodness, all wrapped in warm tortillas. Not only are they a breeze to whip up, but they’re also incredibly customizable—swap in shrimp or turkey and pile on your favorite veggies for a personal twist. Whether you’re busy impressing the family or craving a comforting lunch, these wraps deliver on flavor and ease. Ready to wrap up dinner in style? Let’s dive into the recipe!
Why Are These Cheesy Garlic Chicken Wraps a Must-Try?
Simplicity makes these wraps your new kitchen favorite; they’re incredibly easy to prepare, making dinner time a breeze. Customization is key—swap out the chicken for shrimp or turkey, and add your preferred veggies for an extra kick of flavor. Crowd-pleasing appeal ensures that everyone at the table will be begging for seconds! Time-saving convenience means you can whip them up in just 30 minutes, perfect for busy weeknights. Deliciously satisfying, each bite combines creamy cheese, savory chicken, and vibrant veggies for a truly delightful meal. If you’re looking for more ways to enjoy chicken, check out my recipes for Garlic Parmesan Chicken or Sticky Garlic Chicken.
Cheesy Garlic Chicken Wraps Ingredients
For the Filling
- Cooked Chicken – 2 cups, shredded; this forms the savory base that brims with flavor.
- Mozzarella Cheese – 1 cup, shredded; melts beautifully for that gooey, cheesy pull.
- Cream Cheese – 1/2 cup, softened; enhances creaminess, giving the wraps a rich texture.
- Mayonnaise – 1/4 cup; adds moisture, creating a luscious filling.
- Garlic – 2 cloves, minced; infuses the mix with aromatic, garlicky goodness.
- Italian Seasoning – 1 teaspoon; brings a delightful blend of herbs to elevate flavors.
- Salt – 1/2 teaspoon; enhances the overall taste.
- Black Pepper – 1/4 teaspoon; adds a hint of warmth and spice.
For the Wraps
- Flour Tortillas – 4 large; the soft base that holds all the scrumptious fillings together.
- Fresh Spinach Leaves – 1 cup; lends a crisp, fresh crunch to each bite.
- Diced Tomatoes – 1/2 cup; brings juiciness and complements the savory elements.
- Sliced Green Onions – 1/4 cup; adds brightness and a satisfying crunch.
Feel free to adjust the ingredients to your taste, and don’t forget, the keyword Cheesy Garlic Chicken Wraps shines through in this delightful dish!
Step‑by‑Step Instructions for Cheesy Garlic Chicken Wraps
Step 1: Prepare the Filling
In a large mixing bowl, combine 2 cups of shredded cooked chicken, 1 cup of shredded mozzarella cheese, ½ cup of softened cream cheese, and ¼ cup of mayonnaise. Add in 2 minced garlic cloves, 1 teaspoon of Italian seasoning, ½ teaspoon of salt, and ¼ teaspoon of black pepper. Mix until everything is creamy and well combined, creating a delicious filling for your Cheesy Garlic Chicken Wraps.
Step 2: Assemble the Wraps
Lay out 4 large flour tortillas on a clean surface. Spoon a generous portion of the chicken mixture onto the center of each tortilla, ensuring it’s evenly distributed. This rich, creamy filling will be the star of your wraps. Don’t be shy—allow the filling to take center stage as you prepare to add fresh and vibrant veggies next.
Step 3: Add Fresh Ingredients
Top each tortilla with 1 cup of fresh spinach leaves, ½ cup of diced tomatoes, and ¼ cup of sliced green onions. These crunchy and juicy additions contrast beautifully with the creamy filling, enhancing the flavor profile of the Cheesy Garlic Chicken Wraps. Arrange the toppings evenly to make every bite equally satisfying.
Step 4: Roll the Tortillas
Carefully fold the sides of each tortilla inward to encase the filling, then roll tightly from the bottom up to form a wrap. Make sure to roll securely to keep all the delicious contents intact. The wraps should have a firm shape, ready to be cooked and enjoyed as crispy, gooey delights.
Step 5: Cook the Wraps
Heat a skillet over medium heat and add a touch of oil if desired for a crispier texture. Place the wraps seam-side down in the skillet, cooking for about 2-3 minutes until golden brown. Then, gently flip them over and cook the other side for an additional 2-3 minutes. You’ll know they’re ready when both sides are beautifully crisp and golden.
Step 6: Serve and Enjoy
Once cooked, remove the Cheesy Garlic Chicken Wraps from the skillet and let them cool slightly before slicing them in half. This allows the gooey cheese to settle just a bit. Serve warm, showcasing the crispy exterior and the savory, flavor-packed interior, and enjoy these wraps as a comforting and satisfying meal!
Cheesy Garlic Chicken Wraps: Customize Your Way
Feel free to make these wraps uniquely yours by exploring various swaps and additions for an even tastier experience!
-
Seafood Substitute: Swap the shredded chicken with cooked shrimp for a delightful seafood twist that pairs beautifully with garlic.
-
Turkey Delight: Use shredded turkey instead of chicken for a leaner yet equally satisfying version of these tasty wraps.
-
Vegetarian Option: Replace the chicken with black beans or chickpeas, adding a hearty plant-based protein to keep the wraps delicious and filling.
-
Spicy Kick: Add diced jalapeños or a few dashes of your favorite hot sauce to the filling for a fiery explosion of flavor!
-
Flavorful Veggies: Incorporate bell peppers, zucchini, or cucumbers for a refreshing crunch that brightens up the wraps and boosts nutrients.
-
Cheese Variety: Experiment with different cheeses such as pepper jack or gouda to add distinct flavors and a fun melty texture to the filling.
-
Herb Swap: Try fresh herbs like cilantro or parsley instead of Italian seasoning to infuse a fresh zest that complements the rich chicken and garlic.
-
Saucy Addition: Drizzle some ranch or blue cheese dressing on the wraps before rolling them up to introduce an extra layer of flavor.
These variations invite you to personalize your Cheesy Garlic Chicken Wraps, allowing you to create a dish that suits your taste. After you’ve enjoyed these delightful wraps, you may also love my recipes for Southern Cheesy Chicken and Creamy Garlic Parmesan Chicken!
Make Ahead Options
These Cheesy Garlic Chicken Wraps are a fantastic option for meal prep! You can prepare the chicken filling up to 24 hours in advance, storing it in an airtight container in the refrigerator to keep it fresh and flavorful. Simply mix your cooked chicken, cheeses, mayonnaise, garlic, and seasonings, then chill. When you’re ready to enjoy your wraps, assemble them by laying out the tortillas, adding the chicken mixture, and topping with fresh veggies. For the best texture, cook the wraps immediately after assembly to maintain that crispy exterior and melty interior, ensuring they are just as delicious as when freshly made!
What to Serve with Cheesy Garlic Chicken Wraps?
Elevate your meal with delightful accompaniments that harmonize beautifully with each wrap’s creamy, savory goodness.
-
Crispy French Fries: The golden exterior and soft inside provide a perfect crunch to balance the wraps’ richness. Serve with a side of garlic aioli for extra flavor.
-
Fresh Side Salad: A mix of greens topped with cherry tomatoes and a tangy vinaigrette brings brightness and a refreshing contrast to the savory wraps.
-
Vegetable Soup: A warm, hearty soup complements the cheesy wraps and makes for a comforting and satisfying meal on a chilly evening.
-
Garlic Breadsticks: These salty, buttery treats echo the garlic flavor while adding a crunchy texture. Perfect for dipping in marinara sauce!
-
Coleslaw: A crunchy, tangy slaw adds a burst of freshness and a crunchy texture, balancing the creamy filling in the wraps.
-
Sweet Potato Wedges: Crispy on the outside and soft within, they offer a hint of sweetness that pairs beautifully with the savory chicken.
-
Sparkling Lemonade: A refreshing and zesty drink that cuts through the richness, making each bite and sip incredibly satisfying.
Indulge in these pairings for a wonderfully complete meal that everyone will adore!
How to Store and Freeze Cheesy Garlic Chicken Wraps
Fridge: Store leftover wraps in an airtight container for up to 3 days. For best flavor and texture, reheat in a skillet to maintain their crispiness.
Freezer: For longer storage, tightly wrap individual Cheesy Garlic Chicken Wraps in plastic wrap, then place them in a freezer-safe bag. They can be frozen for up to 2 months.
Reheating: To reheat, thaw wraps overnight in the fridge, then warm them in a skillet over medium heat for 3–4 minutes on each side until heated through.
Serving Suggestion: If desired, add fresh toppings like diced tomatoes or green onions after reheating to restore freshness and flavor.
Helpful Tricks for Cheesy Garlic Chicken Wraps
-
Ingredient Quality: Use fresh, high-quality ingredients for the best flavor. Fresh spinach and ripe tomatoes elevate the overall taste of your Cheesy Garlic Chicken Wraps.
-
Don’t Overstuff: While it’s tempting to add more filling, avoid overstuffing your wraps. This ensures they hold together and are easier to eat.
-
Adjust Cook Time: Cooking time may vary based on your stovetop heat level. Keep an eye on the wraps to ensure they don’t burn, checking for that golden-brown color.
-
Make Ahead: For busy nights, prepare the filling in advance and store it in the fridge. Assemble your wraps right before cooking for maximum freshness and flavor.
-
Reheat Strategically: When reheating leftovers, use a skillet to maintain crispness rather than a microwave, which can make them soggy. Enjoy your Cheesy Garlic Chicken Wraps with that perfect crunch!
Cheesy Garlic Chicken Wraps Recipe FAQs
What type of chicken should I use in my Cheesy Garlic Chicken Wraps?
Absolutely! Cooked, shredded chicken is the star of these wraps, bringing a savory and tender base. You can easily substitute it with cooked shrimp or turkey for a delightful variation—it’s all about your personal preference!
How should I store leftover Cheesy Garlic Chicken Wraps?
For maximum freshness, place your leftover wraps in an airtight container and keep them in the fridge. They’ll stay good for up to 3 days. Just remember to reheat them in a skillet to maintain that delicious crispiness we all love!
Can I freeze Cheesy Garlic Chicken Wraps?
Yes, you can! To freeze, individually wrap each Cheesy Garlic Chicken Wrap tightly in plastic wrap and then place them in a freezer-safe bag. They’ll keep well for up to 2 months. When you’re ready to enjoy them, just thaw overnight in the fridge and reheat on medium heat in a skillet for about 3 to 4 minutes on each side.
What if my wraps are falling apart during cooking?
Very understandable! If your wraps are falling apart, it could be due to overstuffing them. Be sure to keep a balanced amount of filling when assembling. Also, ensure to roll them tightly and securely, folding the sides in before rolling up from the bottom. This will help keep everything intact while cooking!
Are Cheesy Garlic Chicken Wraps suitable for kids?
Absolutely! These wraps are family-friendly and a wonderful way to get kids involved in the kitchen. They can help with the assembling process and choose their favorite toppings. Plus, introducing veggies like spinach and tomatoes makes them not just tasty but healthy!
Can I make these wraps vegetarian?
Very much so! You can easily create a tasty vegetarian version by swapping out the chicken for black beans or chickpeas. Mix in other veggies such as bell peppers or zucchini for extra flavor and nutrition to your Cheesy Garlic Chicken Wraps!
Melt-in-Your-Mouth Cheesy Garlic Chicken Wraps Recipe
Ingredients
Equipment
Method
- In a large mixing bowl, combine cooked chicken, mozzarella cheese, cream cheese, and mayonnaise. Add minced garlic, Italian seasoning, salt, and black pepper. Mix until creamy and well combined.
- Lay out flour tortillas. Spoon a generous portion of the chicken mixture onto the center of each tortilla.
- Top each tortilla with fresh spinach leaves, diced tomatoes, and sliced green onions. Arrange toppings evenly.
- Fold the sides of each tortilla inward and roll tightly from the bottom up to form a wrap.
- Heat a skillet over medium heat. Add wraps seam-side down and cook for about 2-3 minutes until golden brown. Flip and cook the other side for 2-3 minutes.
- Remove wraps from the skillet and let cool slightly before slicing in half. Serve warm.
Leave a Reply