
Amidst the holiday hustle, there’s something about the scent of fresh-baked cookies that instantly transports me back to my childhood kitchen. These Festive Candy Cane Cookies are the quintessential holiday treat, offering a delightful marriage of buttery vanilla and a pop of peppermint. Not only do they make the perfect festive addition to your cookie platter, but they’re also a joy to craft with little hands eager to help. Flexible enough to accommodate various dietary preferences, this easy recipe can be made gluten-free or with natural coloring—because the holidays should be inclusive! Whether you’re planning a cozy night in or gearing up for a big family gathering, these cookies promise to bring cheer to your festivities. Curious how to bring these joyful morsels to your table? Let’s dive into the magic of Candy Cane Cookies!
Why Are Candy Cane Cookies So Special?
Irresistible Flavor: These cookies feature a creamy vanilla base, highlighted by a zesty hint of peppermint, making every bite a sweet holiday delight.
Kid-Friendly Fun: Perfect for family baking sessions, kids love twisting the dough to create swirly shapes.
Flexible Options: Whether you need gluten-free, vegan, or natural food coloring, this recipe has you covered for any dietary needs!
Quick & Easy: With simple steps and minimal prep time, you’ll have delicious treats ready in no time.
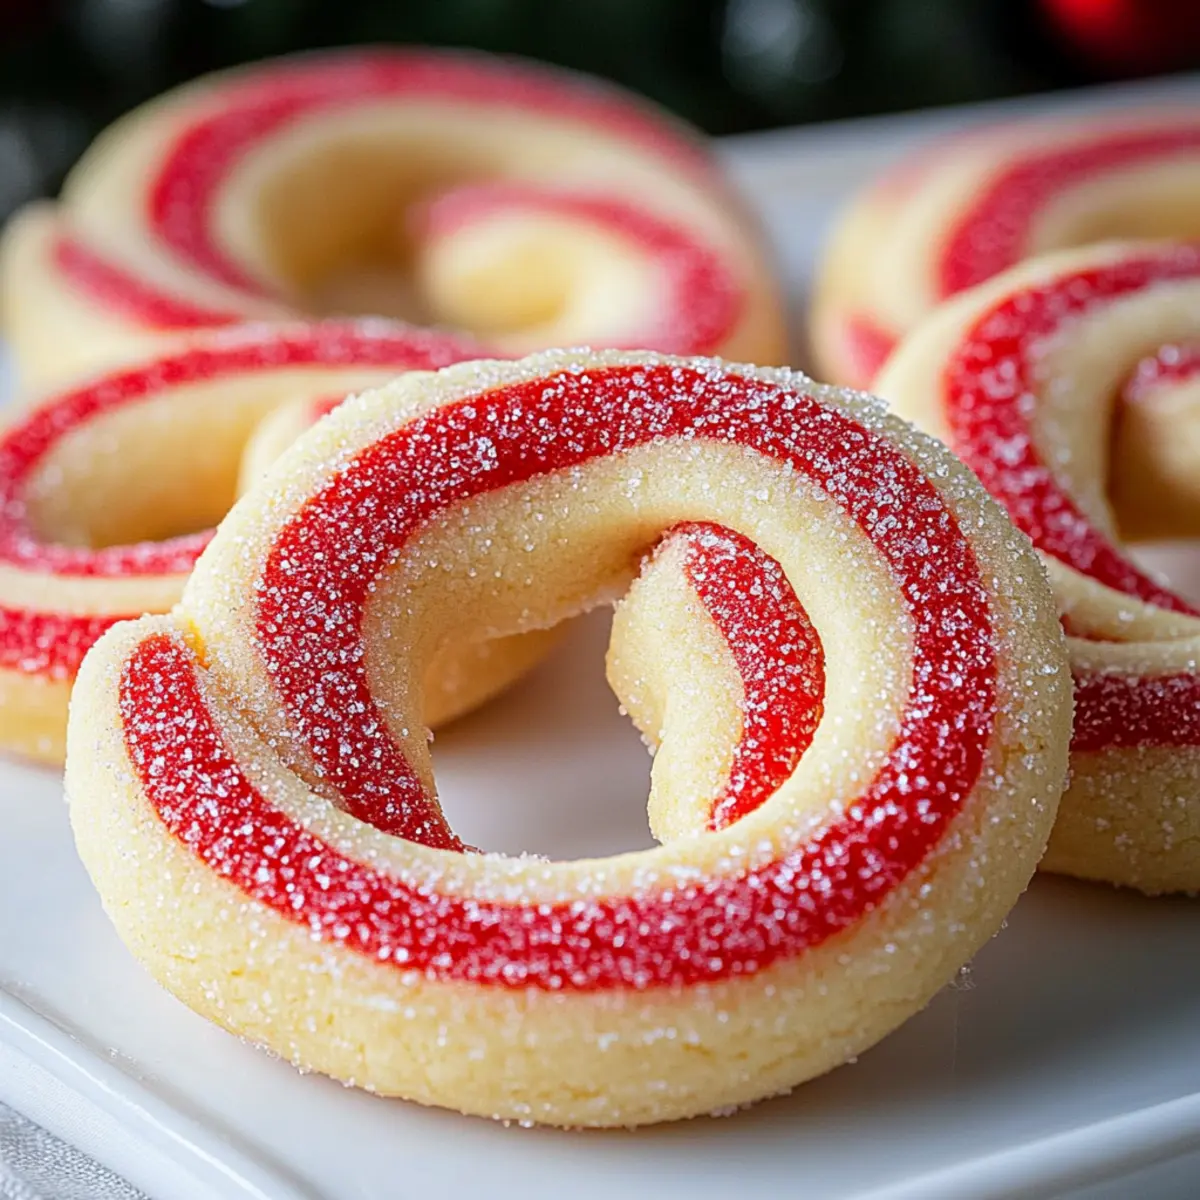
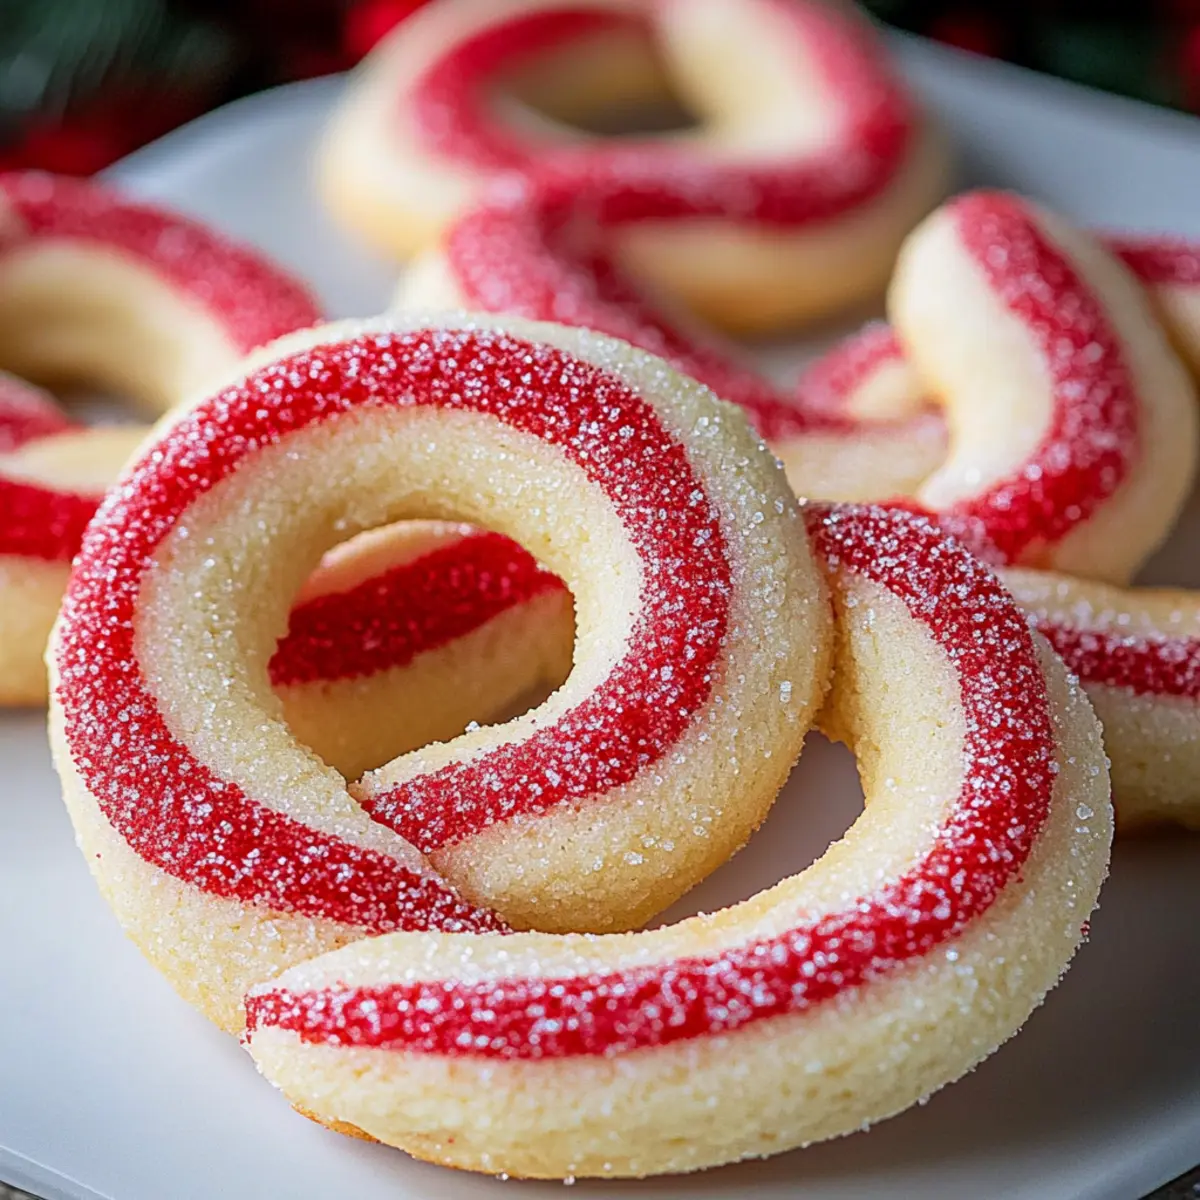
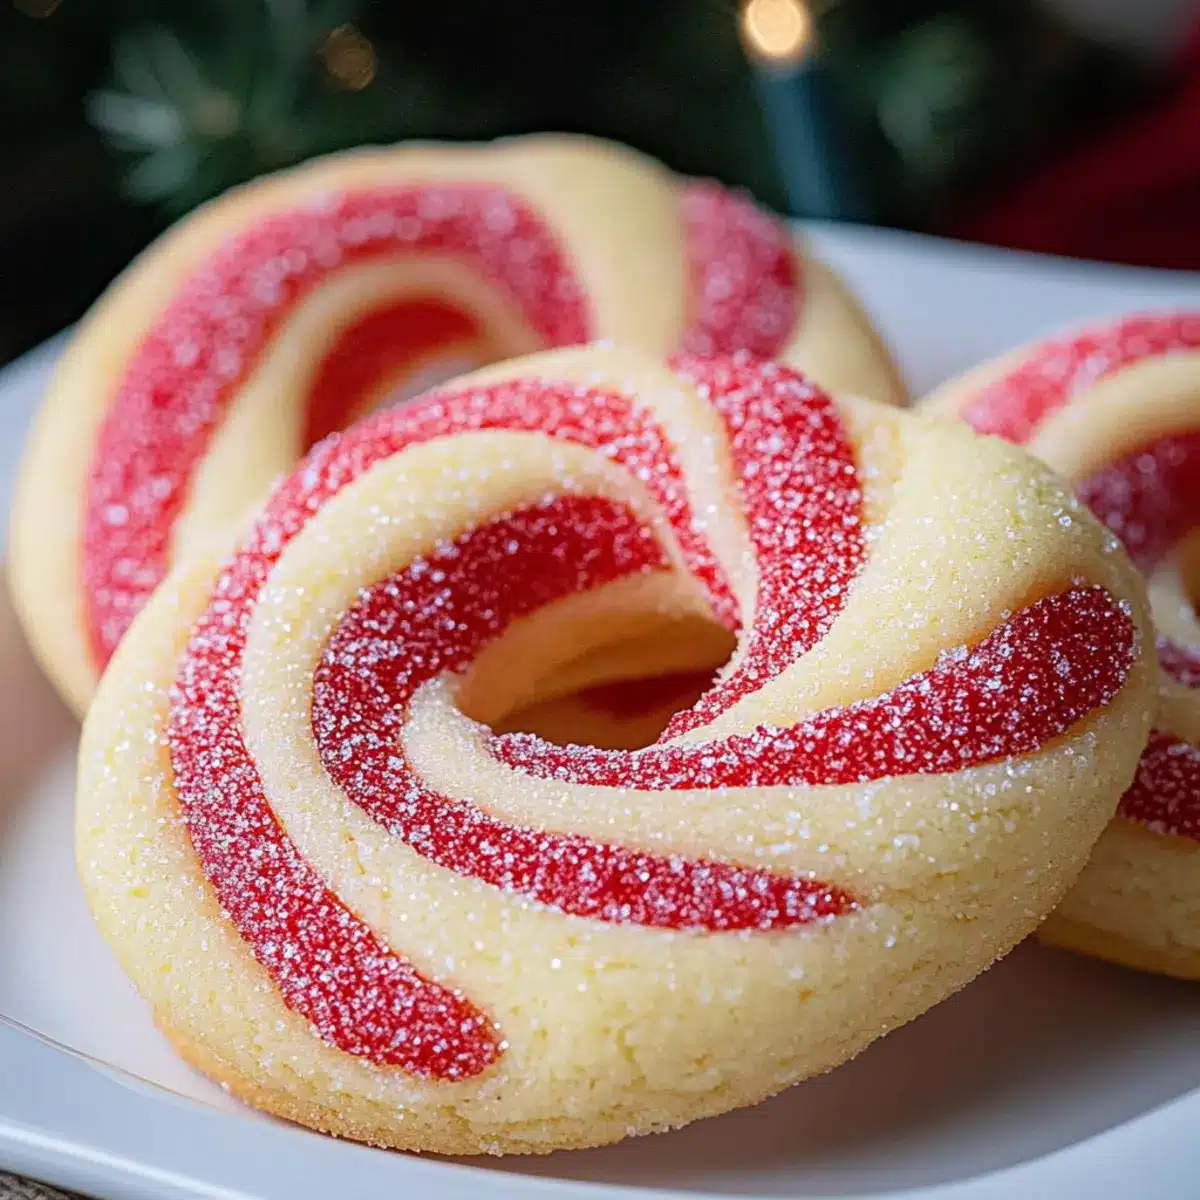
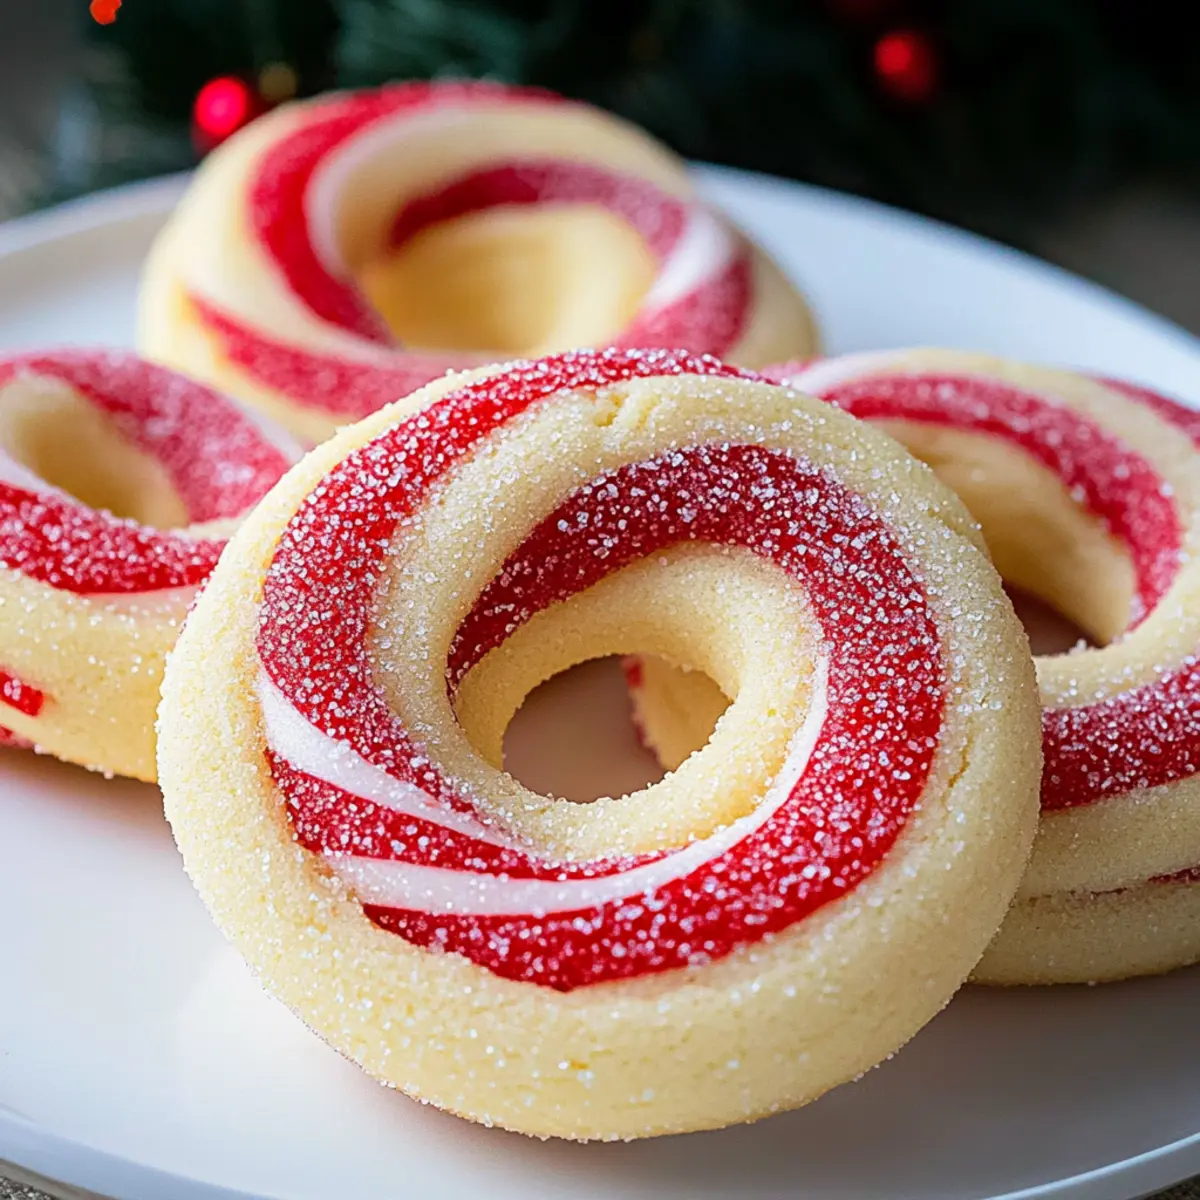
Festive Vibes: Their charming red-and-white swirls not only look great on a cookie platter but embody the joy of the season!
Great for Sharing: Ideal for holiday gatherings, these cookies are sure to delight friends and family alike. If you’re in the mood for more delightful treats, don’t forget to check out our Gluten-Free Sugar Cookies.
Candy Cane Cookies Ingredients
For the Dough
- Unsalted Butter – Provides richness and tenderness; substitute with vegetable shortening for a dairy-free option.
- Granulated Sugar – Adds sweetness and aids in browning; no substitutes recommended for best results.
- Large Egg – Binds the ingredients and adds moisture; use a flax egg as a vegan alternative.
- Vanilla Extract – Enhances the flavor profile; substitute with almond extract for a different flavor twist.
- Peppermint Extract – Gives the signature holiday taste; omit if preferred or reduce for less minty flavor.
- All-Purpose Flour – The main structure component for cookies; you can use a gluten-free blend.
- Salt – Balances sweetness and enhances flavors; can be omitted for low-sodium diets.
For Color and Coating
- Red Gel Food Coloring – Creates festive color without altering dough texture; avoid liquid food coloring due to moisture content.
- Granulated Sugar (for rolling) – Adds sparkle; optional for extra sweetness.
Embrace the holiday spirit with these delightful Candy Cane Cookies, perfect for sharing with loved ones!
Step‑by‑Step Instructions for Candy Cane Cookies
Step 1: Cream the Butter and Sugar
In a large mixing bowl, beat ¾ cup of softened unsalted butter with 1 cup of granulated sugar until the mixture is light and fluffy, approximately 2-3 minutes. You’ll know it’s ready when it turns pale and airy. This creates a delicious base full of buttery flavor for your Candy Cane Cookies.
Step 2: Add the Egg and Extracts
Next, incorporate 1 large egg, along with 1 teaspoon of vanilla extract and ½ teaspoon of peppermint extract. Beat these into the butter-sugar mixture until fully combined. The addition of these extracts adds that signature holiday taste that will make your Candy Cane Cookies truly festive and aromatic!
Step 3: Mix in the Dry Ingredients
Gradually add 2 ¼ cups of all-purpose flour and ¼ teaspoon of salt to the wet ingredients. Mix until a smooth dough forms, making sure no flour streaks remain. This dough is the starting point for creating your colorful Candy Cane Cookies, so aim for a soft consistency that holds together well.
Step 4: Divide and Color the Dough
Once your dough is ready, divide it in half. Transfer one half to a separate bowl and add a few drops of red gel food coloring. Mix until the color is evenly distributed throughout the dough, creating a vibrant red hue. The two colors together will make your Candy Cane Cookies visually stunning!
Step 5: Chill the Dough
Wrap both sections of dough in plastic wrap and let them chill in the refrigerator for at least 30 minutes. This chilling step is crucial; it firms up the dough, making it easier to handle while shaping your festive Candy Cane Cookies and helps prevent spreading in the oven.
Step 6: Preheat the Oven and Prepare the Baking Sheets
While the dough chills, preheat your oven to 350°F (175°C) and line two baking sheets with parchment paper. This ensures an easy release for your baked cookies. Getting your oven hot and ready sets the stage for those beautifully baked Candy Cane Cookies with a perfect texture!
Step 7: Shape the Cookies
Once chilled, take about a teaspoon of each dough color and roll them into 4-inch ropes. Twist the two ropes together to form a candy cane shape. Alternatively, you can create ring shapes if you prefer! Make sure to press the ends together gently to seal, maintaining the festive look.
Step 8: Coat and Arrange on Baking Sheets
For a little sparkle, roll the shaped cookies in granulated sugar. Place them on the prepared baking sheets, keeping about 2 inches apart. This spacing is essential for proper baking, allowing the cookies to expand without merging into one another while baking their festive shapes.
Step 9: Bake to Perfection
Slide the baking sheets into the preheated oven and bake your Candy Cane Cookies for 8-10 minutes. Look for a slight golden color at the bottoms. The edges should look set while the centers remain soft; this ensures the delightful melt-in-your-mouth texture that candy canes are known for!
Step 10: Cool Before Serving
After baking, let the cookies rest on the baking sheet for 5 minutes. This cooling time allows them to firm up a bit before you transfer them to a wire rack to cool completely. Once cooled, your Candy Cane Cookies are ready to bring joy to your holiday festivities!
Candy Cane Cookies Variations & Substitutions
Feel free to mix things up and make these Candy Cane Cookies your own with these delightful variations!
-
Dairy-Free: Replace unsalted butter with a plant-based butter or vegetable shortening to keep them creamy and delicious without dairy.
-
Vegan: For a vegan twist, substitute the egg with a flax egg by mixing 1 tablespoon of flaxseed meal with 2.5 tablespoons of water. Let it sit for a few minutes until gel-like.
-
Gluten-Free: Use a high-quality gluten-free flour blend in place of all-purpose flour. Make sure it contains xanthan gum for better structure!
-
Natural Coloring: Try using beet juice or spirulina powder as an alternative for red gel food coloring to achieve vibrant shades naturally.
-
Mint-Free Version: Swap the peppermint extract with vanilla and add a hint of lemon zest for a fresh and zesty flavor.
-
Shape Variations: Instead of traditional candy canes, create festive shapes such as stars or wreaths. This adds a unique touch to your holiday cookie platters!
-
Salted Caramel Drizzle: Drizzle some melted salted caramel over the cooled cookies for a decadent finish that pairs perfectly with the peppermint.
-
Sprinkles: Add festive nonpareils or colorful holiday sprinkles on top before baking for an even more cheerful presentation.
These variations can inspire you to try new flavors and textures, making every batch uniquely yours. If you’re looking for more baking inspirations, don’t miss our delightful Gluten-Free Sugar Cookies or explore new cookie ideas!
Expert Tips for Perfect Candy Cane Cookies
- Chill the Dough: Chilling the dough is vital; it improves handling and prevents spreading, ensuring your Candy Cane Cookies maintain their adorable shapes.
- Use Gel Coloring: Opt for gel food coloring instead of liquid to achieve vibrant hues without adding extra moisture that can alter cookie texture.
- Watch the Bake Time: Keep an eye on the oven; overbaking can lead to hard cookies. You want them soft and slightly golden on the bottoms.
- Seal the Ends: When shaping the cookies, make sure to press the ends tightly together to prevent them from unraveling during baking.
- Experiment with Shapes: Don’t hesitate to create different shapes, like rings or braids, for a unique twist on traditional Candy Cane Cookies!
- Storage Smart: Store cooled cookies in an airtight container for up to 5 days; they also freeze beautifully for future gatherings!
What to Serve with Festive Candy Cane Cookies
Imagine cozying up by the fire with a plate of these delightful treats, perfect for sharing during the holiday season.
- Hot Cocoa: A warm cup complements the buttery sweetness and minty freshness of the cookies, creating a cozy treat.
- Peppermint Ice Cream: This offers a creamy contrast to the chewy cookies, enhancing that festive peppermint flavor in a delightful way.
- Coffee or Espresso: The rich bitterness of coffee perfectly balances the sweetness of the cookies, making for a wonderful snack any time of day.
- Chocolate Dip: A quick dip in melted chocolate adds indulgence; it harmonizes beautifully with the fresh mint flavor of the cookies.
- Fruit Salad: A refreshing fruit salad offers brightness and acidity, cutting through the richness of the cookies for a balanced dessert spread.
- Milk: The classic pairing of cold milk highlights the nostalgic charm of these holiday cookies, bringing back memories of childhood cookies and milk.
- Holiday Fruit Punch: A fruity punch will add a burst of festive flavor and fun, creating a vibrant and refreshing complement to the candy cane sweetness.
- Cheese Platter: Pairing these cookies with a mild cheese like brie can bring out the cookie’s creamy undertones while adding an unexpected twist.
- Spiced Tea: A warm spiced tea with hints of cinnamon and clove elevates the flavors of the cookies while enveloping you in holiday spirit.
Make Ahead Options
These Candy Cane Cookies are fantastic for meal prep, allowing you to spread the joy of baking across several days! You can prepare the dough up to 24 hours in advance; simply wrap it tightly in plastic wrap and refrigerate. If you want to prep ahead even further, shape the cookies and freeze them for up to 3 months. When you’re ready to enjoy these festive treats, bake from frozen, adding an extra minute to the baking time. By prepping in advance, you’ll save precious time during the busy holiday season, ensuring your Candy Cane Cookies are just as delicious when the moment arrives!
How to Store and Freeze Candy Cane Cookies
Room Temperature: Store cooled Candy Cane Cookies in an airtight container at room temperature for up to 5 days to maintain their delightful softness and freshness.
Freezer: For longer storage, freeze baked cookies in a single layer on a baking sheet. Once frozen solid, transfer them to a freezer-safe bag for up to 3 months.
Unbaked Dough: You can also freeze unbaked dough wrapped in plastic wrap and placed in a freezer bag. Thaw in the fridge before rolling and baking as usual.
Reheating: When ready to enjoy frozen cookies, simply thaw them at room temperature or warm them briefly in the oven to restore their soft texture.
Candy Cane Cookies Recipe FAQs
How can I select the perfect ingredients for my Candy Cane Cookies?
Absolutely! For the best results, ensure the butter is softened but not melted—this helps create that desired fluffy texture when creamed with sugar. As for the peppermint extract, go for pure extracts if possible; they offer a natural flavor that’s simply delightful. And when choosing gel food coloring, opt for high-quality brands to achieve those vibrant, festive hues without altering the dough’s texture.
What are the best ways to store my Candy Cane Cookies?
You can keep your delicious Candy Cane Cookies in an airtight container at room temperature for up to 5 days. If you want them to last longer, consider freezing them! Just place the cooled cookies in a single layer on a baking sheet, freeze until solid, and then transfer them to freezer-safe bags. They can stay fresh in the freezer for up to 3 months.
Can I freeze the unbaked Candy Cane Cookie dough?
Yes, of course! Freezing unbaked dough is a fantastic option for those holiday baking marathons. Simply wrap the dough in plastic wrap and place it in a freezer-safe bag. When you’re ready to bake, just thaw the dough in the refrigerator overnight, then roll and shape as normal before baking. This way, you can easily whip up fresh cookies whenever you’re in the mood!
What if my Candy Cane Cookies spread too much while baking?
Very good question! If your cookies spread excessively, it’s likely because the dough was too warm when baked. Make sure to chill the dough properly for at least 30 minutes before shaping. Also, check your oven temperature—baking at a lower temperature can cause spreading, so always preheat your oven and use an oven thermometer if possible to ensure accuracy!
Are there any dietary considerations I need to keep in mind with Candy Cane Cookies?
Definitely! This recipe is quite versatile. For gluten-free options, substitute regular flour with a gluten-free blend that includes xanthan gum for structure. For dairy-free needs, butter can be replaced with vegetable shortening. If making these festive treats for little ones or friends with allergies, always double-check that your extracts and food coloring are free from allergens and suitable for their dietary needs.
Can I use natural food coloring instead of gel for my Candy Cane Cookies?
While gel food coloring gives you vibrant results without affecting the dough’s moisture, if you’d like to opt for natural food coloring, you can certainly do so! For instance, beet juice can create a lovely muted red color. However, the color might not be as bright as with gel, so keep that in mind when planning for your festive cookie display.
Joyful Candy Cane Cookies for a Festive Holiday Treat
Ingredients
Equipment
Method
- In a large mixing bowl, beat the softened butter with granulated sugar until light and fluffy.
- Add the egg, vanilla extract, and peppermint extract, and beat until fully combined.
- Gradually mix in all-purpose flour and salt until a smooth dough forms.
- Divide the dough in half; add red gel food coloring to one half and mix until evenly distributed.
- Wrap both sections of dough in plastic wrap and chill in the refrigerator for at least 30 minutes.
- Preheat oven to 350°F (175°C) and line baking sheets with parchment paper.
- Roll teaspoons of each dough color into 4-inch ropes; twist together to form a candy cane shape.
- Roll shaped cookies in granulated sugar and place on baking sheets, keeping 2 inches apart.
- Bake for 8-10 minutes until edges are set and bottoms are slightly golden.
- Let cookies rest on the baking sheet for 5 minutes before transferring to a wire rack to cool completely.
Leave a Reply