
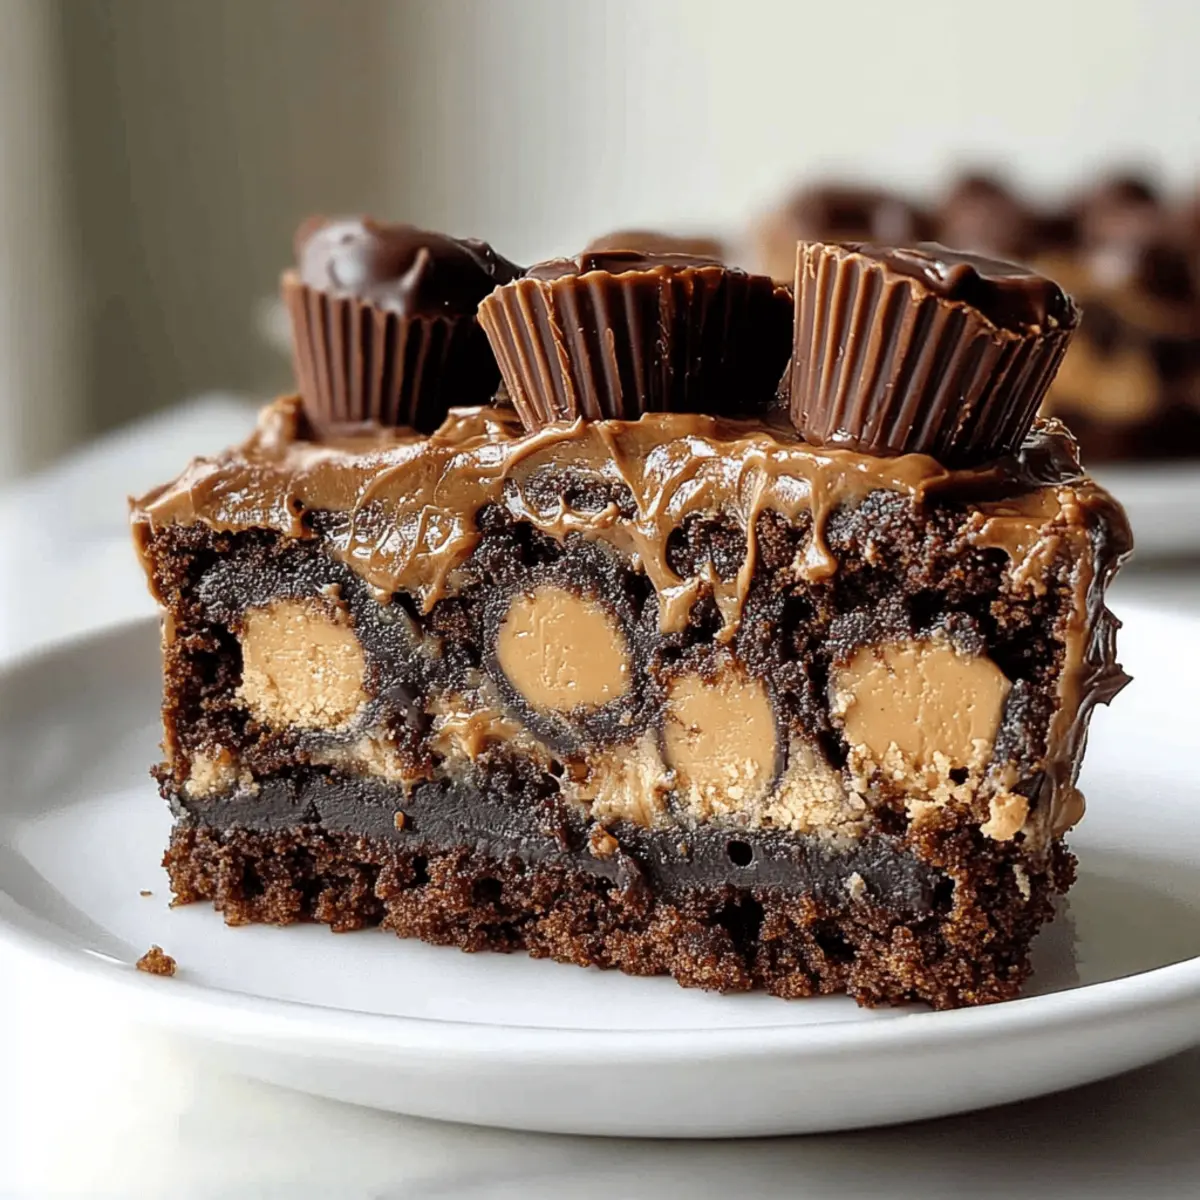
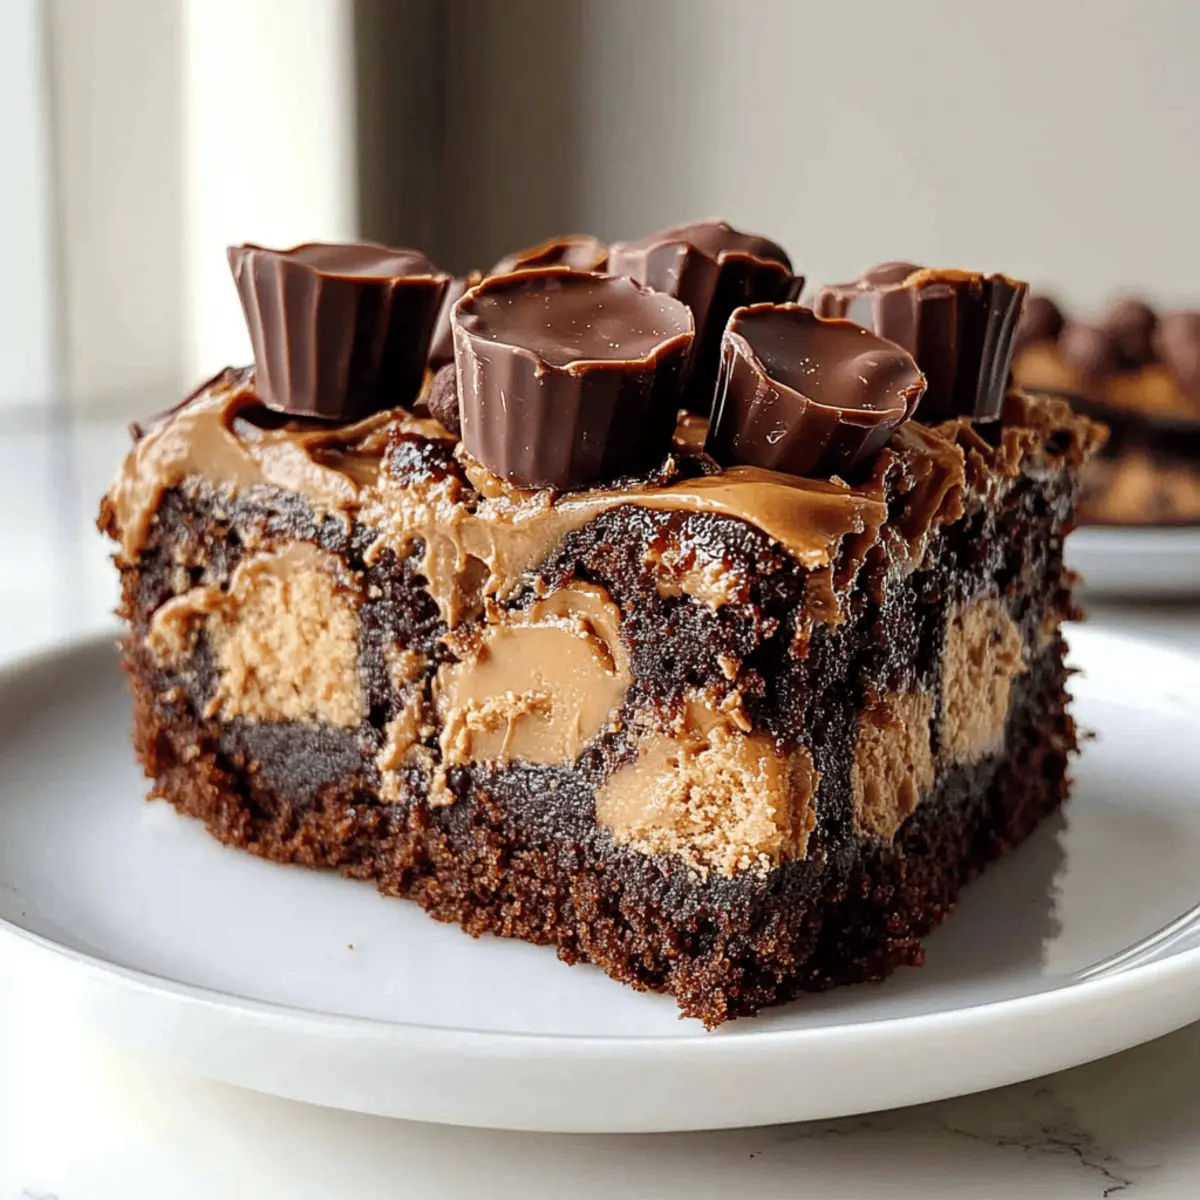
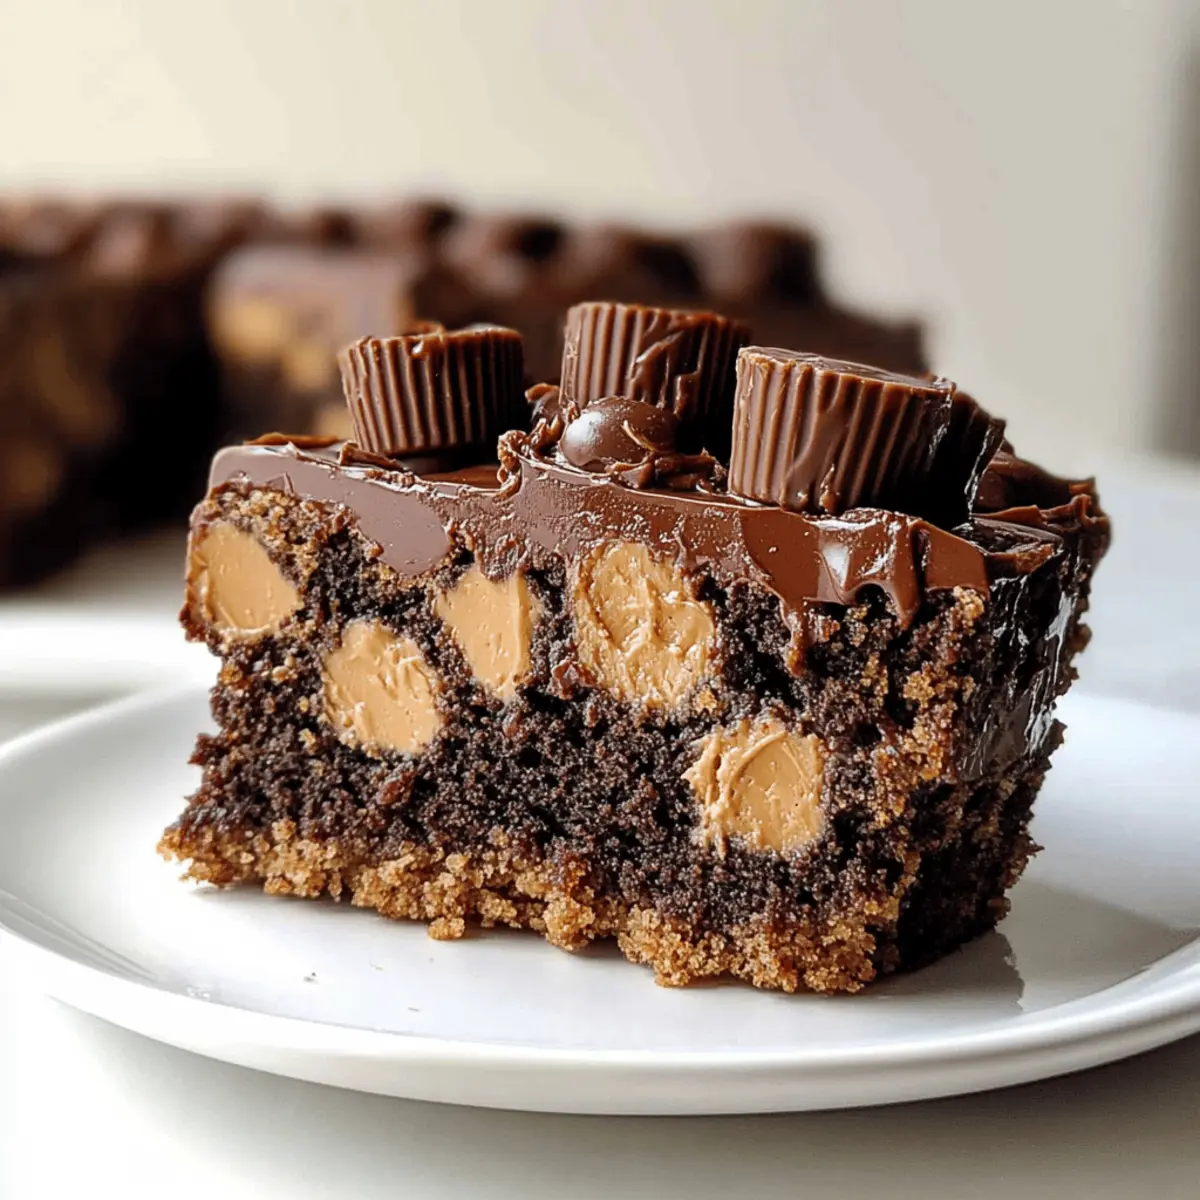
If you’ve ever stared into your pantry, wishing for something sweet to magically appear, let me introduce you to a baking dream come true: the bowl peanut butter cup dump cake! With just five simple ingredients, this delightful dessert comes together in a flash, making it perfect for busy weeknights or impromptu gatherings. The creamy peanut butter layer, sandwiched beneath a soft, chocolatey cake, transforms into pure fudgy bliss as it bakes. It’s a guaranteed crowd-pleaser that’s not only super easy to whip up, but it also offers the flexibility to substitute ingredients for gluten-free options. Soon enough, this cake will become your go-to for birthdays, picnics, or whenever your sweet tooth needs a hug. Ready to dive in and see how simple joy can be?

Why is this Peanut Butter Cup Dump Cake special?
Simplicity is key! This bowl peanut butter cup dump cake requires just five ingredients, making it the ultimate easy dessert to whip up anytime. Rich, fudgy layers combine creamy peanut butter with chocolatey goodness for a taste explosion. Customization is a breeze—swap in gluten-free cake mix for a versatile option that everyone can enjoy. Perfect for family gatherings or last-minute celebrations, this cake guarantees smiles all around. Plus, it’s a delightful treat to enjoy warm with vanilla ice cream or whipped cream on top!
Bowl Peanut Butter Cup Dump Cake Ingredients
For the Cake Base
• Chocolate Cake Mix – This forms the sweet, chocolatey foundation that makes the dish irresistible; feel free to swap it with yellow or vanilla cake mix for a different flavor twist.
• Melted Butter – Adds rich moisture and ensures that your cake is tender and delicious; don’t let it cool too much before mixing.
• Milk – Helps achieve the perfect pourable consistency for the batter; adjust the amount to reach your desired thickness.
For the Peanut Butter Layer
• Peanut Butter – This creamy delight creates a luscious layer at the bottom; ensure it’s at room temperature for easy spreading.
For Toppings
• Mini Peanut Butter Cups – These bite-sized candies melt beautifully during baking, creating pockets of gooey chocolate and peanut butter; you can add extra chocolate chips for additional decadence.
With just these simple ingredients, you’ll be well on your way to creating a bowl peanut butter cup dump cake that’s sure to be a family favorite!
Step‑by‑Step Instructions for bowl peanut butter cup dump cake
Step 1: Preheat the Oven
Begin by preheating your oven to 350°F (175°C). While the oven is warming up, grab a 9×13-inch baking dish and generously coat it with cooking spray or butter to prevent sticking. This is essential for ensuring that the bowl peanut butter cup dump cake releases easily once it’s baked and cooled.
Step 2: Prepare the Peanut Butter Layer
Next, take your room-temperature peanut butter and spread it evenly across the bottom of the prepared baking dish. Make sure it’s a nice, smooth layer to create a rich base for your cake. This creamy goodness will melt and infuse the cake with a delicious peanut butter flavor as it bakes.
Step 3: Mix the Batter
In a large mixing bowl, combine the chocolate cake mix, melted butter, and milk. Stir with a whisk or spatula until the mixture is smooth and well-combined, ensuring there are no dry pockets left. The batter should be thick but pourable—perfect for topping the peanut butter layer. Pour the batter carefully over the prepared peanut butter base.
Step 4: Add Toppings
Evenly distribute the mini peanut butter cups over the top of the batter, pressing them lightly into the mixture. If you’re feeling indulgent, sprinkle some chocolate chips on top as well. This layer will create delightful pockets of melted chocolate and peanut butter flavor throughout your bowl peanut butter cup dump cake.
Step 5: Bake the Cake
Slide the baking dish into the preheated oven and bake for 35-40 minutes. Keep an eye on it during the last few minutes; the edges should be pulling away from the sides and a toothpick inserted into the center should come out with moist crumbs—not wet batter. This ensures your cake has that perfectly fudgy texture.
Step 6: Cool Before Serving
Once baked, remove the cake from the oven and let it cool for at least 15 minutes before serving. This waiting period allows the layers to set and makes it easier to slice. Enjoy the bowl peanut butter cup dump cake warm, perhaps with a scoop of vanilla ice cream for a delightful treat!
How to Store and Freeze Bowl Peanut Butter Cup Dump Cake
Room Temperature: Keep leftovers in an airtight container for up to 3 days. Ensure it’s kept away from direct sunlight or heat to maintain moisture.
Fridge: If you prefer a colder dessert, store in the fridge for up to 5 days. Let it sit at room temperature for 10-15 minutes before serving for better texture.
Freezer: For longer storage, slice the bowl peanut butter cup dump cake and wrap pieces tightly in plastic wrap, then foil. Freeze for up to 1 month.
Reheating: Reheat individual slices in the microwave for about 15-20 seconds or until warmed through. Enjoy the gooey goodness by adding a scoop of ice cream on top!
What to Serve with Bowl Peanut Butter Cup Dump Cake
Indulging in this warm, fudgy delight opens a world of pairing possibilities that will elevate your dessert experience.
-
Vanilla Ice Cream: A scoop of creamy vanilla ice cream on top adds a cool contrast to the warm cake, enhancing its rich flavors beautifully.
-
Whipped Cream: Light and airy, whipped cream balances the dense chocolate cake while making each bite luscious and decadent.
-
Chocolate Sauce: Drizzle warm chocolate sauce over the cake for an extra touch of indulgence; it ties in the chocolate flavor while creating an eye-catching presentation.
-
Fresh Berries: Strawberries or raspberries introduce a fresh, tangy brightness that cuts through the sweetness, perfect for a well-rounded dessert plate.
-
Nutty Snack Mix: Serve a side of crunchy nut mix for some texture. The contrasting crunch offers a satisfying contrast to the soft, fudgy cake.
-
Milk or Almond Milk: Pair with a glass of cold milk or almond milk for a classic combination that brings out the cake’s sweet notes and peanut butter creaminess.
-
Coffee: A warm cup of coffee can enhance the dessert experience, grounding the sweetness with its robust flavors.
-
Nut Butter Drizzle: For nut lovers, a drizzle of heated almond or cashew butter on top deepens the nutty flavors in the cake, making it even more indulgent.
Bowl Peanut Butter Cup Dump Cake Variations
Feel free to embrace your culinary creativity with these fun twists and substitutions. Each variation adds a new layer of flavor to your delightful cake!
-
Gluten-Free: Use a gluten-free chocolate cake mix to easily cater to those with dietary needs without sacrificing taste.
-
Nutty Delight: Toss in chopped walnuts or pecans for a crunchy textural contrast that complements the creamy peanut butter beautifully.
-
Flavor Twist: Swap chocolate cake mix for vanilla or yellow cake mix to create a unique vanilla-peanut butter fusion; feel free to explore funfetti cake mix for a colorful celebration!
-
Extra Chocolate: Add a handful of chocolate chips to the batter for a double chocolate experience that cake lovers will adore.
-
Spice It Up: Sprinkle a little cinnamon or nutmeg into the batter for a warm, aromatic twist that will elevate the flavor profile.
-
Candy Lovers’ Dream: Mix in other candies like crushed Oreos, M&Ms, or caramel bits for bursts of flavor and additional candy goodness.
-
Dairy-Free Option: Replace melted butter with coconut oil and use almond or oat milk for a delicious dairy-free treat that everyone can enjoy.
These variations not only keep your bowl peanut butter cup dump cake fresh but also ensure that it suits every gathering and celebration. Pair it with a scoop of vanilla ice cream from your favorite recipes like Sticky Chicken Bowls or for a special dessert, try the Velvet Strawberry Cheesecake. Happy baking!
Make Ahead Options
This bowl peanut butter cup dump cake is absolutely perfect for meal prep! You can prepare the peanut butter layer and pour it into the baking dish up to 24 hours in advance, covering it tightly with plastic wrap to prevent drying out. Additionally, you can mix the cake batter (cake mix, melted butter, and milk) up to 3 days ahead and store it in the fridge to keep it fresh. When you’re ready to bake, simply let the batter sit at room temperature for about 30 minutes, then pour it over the peanut butter layer, sprinkle with mini peanut butter cups, and bake as directed. This way, you’ll enjoy a delicious dessert with minimal effort on busy weeknights!
Expert Tips for Bowl Peanut Butter Cup Dump Cake
-
Room Temperature Peanut Butter: Ensure your peanut butter is at room temperature for easy spreading; this prevents messy layers and enhances flavor.
-
Prevent Overbaking: Keep an eye on the cake during the last few minutes of baking. Check with a toothpick to avoid a dry texture—you’re aiming for moist crumbs.
-
Mix Well: Thoroughly combine the cake mix, melted butter, and milk in the batter. Uneven mixing can lead to dry pockets in your bowl peanut butter cup dump cake.
-
Layer Toppings Carefully: Press mini peanut butter cups gently into the batter. This ensures they melt beautifully and distribute evenly throughout the cake.
-
Serve Warm: For the ultimate experience, serve this cake warm with a scoop of vanilla ice cream or a dollop of whipped cream. It elevates the dish and creates a comforting dessert!
Bowl Peanut Butter Cup Dump Cake Recipe FAQs
What kind of peanut butter should I use?
Absolutely! I recommend using creamy peanut butter for this recipe as it spreads easily and creates a smooth layer at the bottom. If you prefer a crunchy texture, feel free to use crunchy peanut butter, but keep in mind it may alter the cake’s consistency slightly.
How do I store leftovers?
To keep your bowl peanut butter cup dump cake fresh, store any leftovers in an airtight container at room temperature for up to 3 days. If you want to enjoy it longer, you can refrigerate it for up to 5 days. Just remember to let it sit at room temperature for about 10-15 minutes before serving to restore its moist texture.
Can I freeze this cake?
Definitely! You can freeze your bowl peanut butter cup dump cake for up to 1 month. To freeze, slice the cake into individual portions and wrap them tightly in plastic wrap, then in aluminum foil. When you’re ready to enjoy, simply reheat a slice in the microwave for about 15-20 seconds or until warmed through. This will help keep the gooeyness intact!
What if my cake is too dry?
If you find that your bowl peanut butter cup dump cake has turned out dry, it might be due to overbaking. I suggest checking for doneness a few minutes before the suggested baking time by inserting a toothpick; it should come out with moist crumbs. If you do end up with a dry cake, try serving it warm with a scoop of vanilla ice cream or a drizzle of chocolate sauce to moisten it up!
Can I make this recipe gluten-free?
Very much so! To make the bowl peanut butter cup dump cake gluten-free, simply substitute the regular chocolate cake mix with a gluten-free cake mix. Most brands offer great options that will work just as seamlessly, allowing everyone at your table to enjoy this delightful treat!
Are the mini peanut butter cups necessary?
Although they add a wonderful flavor, you can omit the mini peanut butter cups if you prefer. However, I often recommend sticking with them or substituting with chocolate chips, as they melt beautifully and provide that delicious gooeyness that makes this cake so special.
Bowl Peanut Butter Cup Dump Cake That's a Family Favorite
Ingredients
Equipment
Method
- Preheat your oven to 350°F (175°C). Coat a 9x13-inch baking dish with cooking spray or butter.
- Spread room-temperature peanut butter evenly across the bottom of the baking dish.
- In a mixing bowl, combine chocolate cake mix, melted butter, and milk. Mix until smooth and pour over the peanut butter layer.
- Distribute mini peanut butter cups over the batter, pressing them lightly into the mixture.
- Bake for 35-40 minutes until edges pull away and a toothpick comes out with moist crumbs.
- Let the cake cool for at least 15 minutes before serving warm, optionally with vanilla ice cream.
Leave a Reply