
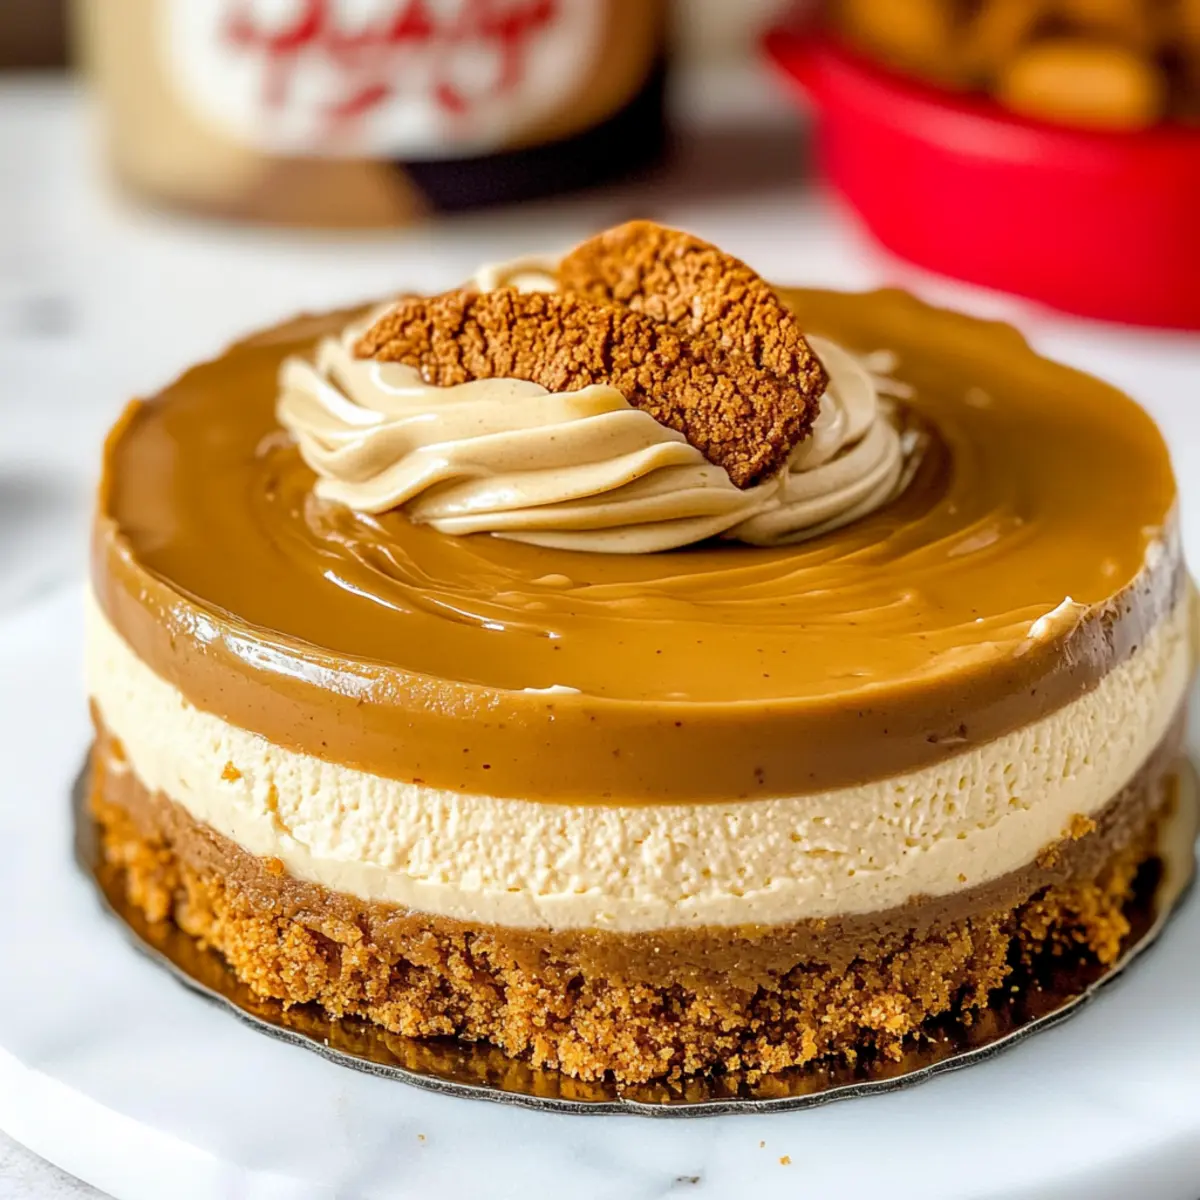
The moment I unwrapped that warm Biscoff cookie, memories of cozy afternoons flooded my mind. This Creamy Biscoff Cheesecake has an irresistible charm that pulls at the heartstrings, blending nostalgia with modern indulgence. With a luscious Biscoff cookie crust and a filling that whispers of velvety sweetness, it’s the perfect companion for that much-deserved evening unwind. Not only is this recipe a delightful escape from ordinary desserts, but it also comes together with ease—perfect for both novice bakers and seasoned chefs alike. Imagine serving this at your next gathering and watching your friends’ faces light up with every bite! Ready to create something utterly scrumptious? Let’s dive into the world of Biscoff Cheesecake, where each slice is a little slice of heaven!
Why is Biscoff Cheesecake irresistible?
Decadent Indulgence: Each slice of this cheesecake embodies richness that’s hard to resist, thanks to the unique flavor of Biscoff cookies.
Effortless Appeal: The straightforward preparation makes it a go-to dessert, perfect for home cooks and busy chefs alike.
Signature Cookie Crust: The buttery cookie crust not only adds a delightful crunch but also enhances the cheesecake’s flavor profile.
Versatile Occasions: Whether it’s a birthday, holiday gathering, or just a simple weeknight treat, this cheesecake is bound to impress.
Memory Lane: The nostalgic taste of Biscoff cookies brings warmth to every bite, offering a sweet escape in dessert form.
And if you love cheesecakes with unique flavors, don’t forget to check out my Velvet Strawberry Cheesecake for another delightful dessert option!
Biscoff Cheesecake Ingredients
For the Crust
• Biscoff Cookies – Gives a distinct flavor and forms the base crust; essential for that signature taste.
• Unsalted Butter – Provides fat and structure; be sure to melt it beforehand for easier mixing.
For the Filling
• Cream Cheese – The main component for a rich, creamy texture; use full-fat cream cheese and soften it for best results.
• Brown Sugar – Sweetens the filling with depth; both light and dark brown sugar work interchangeably.
• Granulated Sugar – Balances the creaminess with added sweetness.
• Sour Cream – Adds moisture and a hint of tang; Greek yogurt can be used as a substitute if desired.
• Biscoff Cookie Butter – Intensifies the luxurious flavor of the cheesecake; don’t skip this!
• Vanilla Extract – Enhances the overall elegant taste.
• Salt – Helps to balance the sweetness and brighten flavors.
• Eggs – Provide necessary structure for setting the cheesecake; remember to use room temperature eggs for better incorporation.
For the Topping
• Melted Biscoff Spread – A delightful drizzle on top adds extra flavor and visual appeal.
• Crushed Biscoff Cookies – Sprinkle them around the edges for a beautiful finishing touch.
With these Biscoff cheesecake ingredients, you’ll be one step closer to creating a dessert that’s not just tasty, but memorably special!
Step‑by‑Step Instructions for Biscoff Cheesecake
Step 1: Prepare the Crust
Preheat your oven to 325°F (163°C). In a food processor, crush about 20 Biscoff cookies into fine crumbs. Combine these crumbs with 5 tablespoons of melted unsalted butter until evenly mixed. Press this mixture firmly into the bottom of a greased springform pan to create a compact crust. Bake it for 10 minutes or until slightly golden, then let it cool while you prepare the filling.
Step 2: Make the Filling
In a large mixing bowl, beat 24 ounces of softened cream cheese using an electric mixer until creamy and smooth. Gradually add in ½ cup of brown sugar and ¼ cup of granulated sugar, mixing until fully combined. Next, blend in ½ cup of Biscoff cookie butter, ½ cup of sour cream, 1 teaspoon of vanilla extract, and a pinch of salt until you achieve a silky batter.
Step 3: Add Eggs
With the filling mixture ready, crack in 3 large room temperature eggs one at a time. Mix gently after each addition, just until combined to maintain a smooth texture. Be cautious not to overmix, as this can lead to cracking while baking. The filling should remain creamy without any lumps, making your Biscoff Cheesecake light and airy.
Step 4: Bake the Cheesecake
Pour the cheesecake filling over your cooled crust, using a spatula to smooth the surface. Wrap the outer bottom of the springform pan tightly with aluminum foil to prevent water from seeping in. Place the pan in a larger baking dish filled with hot water, creating a water bath. Bake in the preheated oven for 60-70 minutes, until the edges are set, but the center retains a slight jiggle.
Step 5: Cool
Once baked, turn off the oven and crack the door open slightly. Allow the Biscoff Cheesecake to sit in the oven for 1 hour, helping it cool gradually. Afterward, transfer it to the refrigerator to chill for at least 6 hours or overnight. This step is crucial to ensure your cheesecake firms up perfectly and develops its rich flavors.
Step 6: Decorate
To finish, melt an additional ½ cup of Biscoff spread in the microwave until pourable. Drizzle this delicious spread over the chilled cheesecake for a glossy finish. Finally, sprinkle crushed Biscoff cookies around the edges for an added crunch and delightful presentation. Your Biscoff Cheesecake is now ready to impress!
How to Store and Freeze Biscoff Cheesecake
- Fridge: Store your Biscoff Cheesecake in an airtight container for up to 5 days to maintain its creamy texture and flavor.
- Freezer: Freeze slices wrapped tightly in plastic wrap, then place in a container for up to 2 months. This preserves the cheesecake’s delightful taste.
- Thawing: When ready to enjoy, thaw in the fridge overnight and allow to come to room temperature before serving for best texture.
- Reheating: While typically served chilled, if you prefer a warm slice, gently warm it in the microwave for about 10-15 seconds. Enjoy!
Expert Tips for Biscoff Cheesecake
- Water Bath Magic: Always place your cheesecake in a water bath; this keeps it from cracking and ensures a creamy, luscious texture.
- Room Temperature Eggs: For a smooth batter, make sure your eggs are at room temperature before adding them to the cream cheese mixture.
- Gentle Mixing: When incorporating eggs, mix until just combined to avoid overmixing, which can cause cracks in your Biscoff cheesecake.
- Cooling is Key: Let the cheesecake cool slowly in the oven after baking—this step prevents sudden temperature changes that lead to a collapsed cake.
- Flavor Variations: To enhance the flavor, try adding a hint of cinnamon or nutmeg to the filling, elevating your Biscoff cheesecake experience.
What to Serve with Creamy Biscoff Cheesecake?
Serving up the ultimate dessert experience goes beyond just the cheesecake itself, as perfectly paired accompaniments can transform any gathering into a memorable feast.
-
Whipped Cream: This light and airy topping adds a delightful contrast to the rich creaminess of the cheesecake, enhancing each decadent bite.
-
Fresh Berries: Juicy strawberries, raspberries, or blueberries introduce a burst of freshness that balances the sweetness, offering a pop of color on your dessert plate.
-
Chocolate Sauce: Drizzling a bit of warm chocolate sauce creates a luxurious experience, amplifying the flavors and making every slice feel even more indulgent.
-
Espresso or Coffee: A cup of rich, aromatic espresso or freshly brewed coffee beautifully complements the sweet, spiced flavors of the cheesecake, making for a delightful ending to your meal.
-
Mint Leaves Garnish: A sprinkle of fresh mint leaves adds a refreshing note that brightens up the overall dish, visually appealing and enhancing the dessert’s flavor profile.
-
Ice Cream: A scoop of vanilla or caramel ice cream alongside the cheesecake introduces a satisfying creamy texture, perfect for those who love a mix of temperatures in dessert.
-
Lemon Zest: A light sprinkle of lemon zest on top can add a surprising zing that cuts through the richness, refreshing the palate with each bite.
Creating a symphony of flavors and textures alongside your Biscoff Cheesecake will make your dessert offering truly special!
Biscoff Cheesecake Variations & Substitutions
Feel free to personalize your Biscoff Cheesecake to match your taste buds and dietary needs!
-
Dairy-Free: Use coconut cream in place of cream cheese and plant-based butter for a luscious dairy-free version.
-
Gluten-Free: Swap Biscoff cookies for gluten-free graham crackers or homemade almond flour crust to enjoy without worries.
-
Chocolate Lovers: Mix in melted dark chocolate into the cheesecake batter for a rich, chocolate-hazelnut twist.
With a glossy top and a blend of flavors, this variation turns each slice into a gourmet dessert.
- Mini Cheesecakes: Bake individual portions in cupcake tins for smaller, easier-to-serve desserts, perfect for gatherings or meal prep.
Little bites of happiness make serving a breeze!
- Nutty Crunch: Add crushed walnuts or pecans to the crust for extra texture and flavor, elevating the overall experience.
Imagine that delightful crunch adding a new dimension to every bite!
- Spiced Delight: Incorporate a sprinkle of cinnamon or nutmeg into the filling for a cozy, warming flavor twist that pairs beautifully with Biscoff.
It’s like a sweet hug in dessert form.
- Tropical Touch: Try incorporating coconut cream instead of sour cream for a hint of tropical sweetness throughout the cheesecake.
The creamy texture and exotic flavor will transport you to a sunny paradise!
- Seasonal Swaps: Depending on the season, adding fresh berries or a fruit compote on top creates a vibrant, colorful dessert, as beautifully illustrated in my Velvet Strawberry Cheesecake.
These variations ensure everyone can enjoy a slice (or two) of Biscoff Cheesecake bliss!
Make Ahead Options
These Biscoff Cheesecakes are perfect for meal prep enthusiasts looking to save time on busy weeknights! You can prepare the crust up to 24 hours in advance by pressing it into the pan and storing it covered in the fridge. The cheesecake filling can also be made ahead; simply mix the ingredients and refrigerate for up to 3 days before baking. Keeping the ingredients separate helps maintain the crust’s crunch and the filling’s creamy texture. When you’re ready to finish, pour the filling over the crust and bake as directed. You’ll delight in serving a rich, homemade Biscoff Cheesecake with minimal last-minute effort!
Biscoff Cheesecake Recipe FAQs
How do I select the best Biscoff cookies for this recipe?
Absolutely! Look for Biscoff cookies that are fresh and free of dark spots or significant breakage. The fresher the cookies, the better flavor you’ll have in your cheesecake crust. If they’re overly hard or have been open for a while, they might not yield the best texture.
How should I store Biscoff Cheesecake leftovers?
I recommend placing your Biscoff Cheesecake in an airtight container in the fridge where it will keep for up to 5 days. Make sure it’s well-sealed to prevent it from absorbing any odors. If you plan to enjoy it later, simply refrigerate!
Can I freeze Biscoff Cheesecake, and how should I do it?
Very much! To freeze your Biscoff Cheesecake, wrap it tightly in plastic wrap to avoid freezer burn. Place it in an airtight container, and it can be safely frozen for up to 2 months. When you’re ready to enjoy it, let it thaw overnight in the fridge for optimal texture and flavor.
What should I do if my cheesecake cracks while baking?
No worries! If cracks do appear, they can often be covered with your delicious melted Biscoff spread after cooling. To prevent cracking in the first place, ensure you use a water bath during baking. This gentle method helps maintain moisture and regulates temperature, keeping your cheesecake silky.
Are there any dietary considerations I should be aware of when making Biscoff Cheesecake?
Yes! This Biscoff Cheesecake does contain dairy, including cream cheese and sour cream, which could be an allergy concern for some. If you’re making this for someone with dietary restrictions, consider substituting with dairy-free cream cheese and yogurt alternatives. Always check the labels of your ingredients for allergens.
Indulge in Creamy Biscoff Cheesecake Bliss at Home
Ingredients
Equipment
Method
- Preheat the oven to 325°F (163°C). Crush about 20 Biscoff cookies into fine crumbs.
- Mix the crumbs with 5 tablespoons of melted unsalted butter until combined and press into a greased springform pan.
- Bake for 10 minutes until slightly golden and let it cool.
- In a mixing bowl, beat 24 ounces of softened cream cheese until smooth.
- Gradually add 0.5 cup brown sugar and 0.25 cup granulated sugar, mixing until fully combined.
- Blend in 0.5 cup Biscoff cookie butter, 0.5 cup sour cream, 1 teaspoon vanilla extract, and a pinch of salt until silky.
- Add 3 large room temperature eggs one at a time, mixing gently to avoid overmixing.
- Pour the filling over the cooled crust and smooth the surface.
- Wrap the bottom of the springform pan with aluminum foil and place it in a baking dish filled with hot water.
- Bake for 60-70 minutes until edges are set with a slight jiggle in the center.
- Turn off the oven and crack the door open slightly to cool for 1 hour.
- Chill in the refrigerator for at least 6 hours or overnight.
- Melt an additional 0.5 cup of Biscoff spread and drizzle over the cheesecake.
- Sprinkle crushed Biscoff cookies around the edges for decoration.
Leave a Reply