
As I stood in the kitchen, a bag of mochiko flour in hand, a wave of nostalgia washed over me. These chewy, delightful Japanese treats remind me of joyful celebrations and cherished moments shared with family. Today, I’m excited to share with you my go-to recipe for the Best Mochi Recipe. Not only is this treat gluten-free and vegan, but it also features an easy prep method that makes it perfect for everyone—whether you’re hosting a gathering or just indulging your sweet tooth! With endless flavor variations, like matcha or ube, this versatile dish will keep your taste buds dancing and those cravings satisfied. Ready to embark on a little culinary adventure and create your own delicious mochi? Let’s dive in!

Why Is This Mochi Recipe Perfect?
Unmatched Versatility: This recipe allows you to explore various flavors by simply adding extracts or powdered ingredients like matcha or ube, making it adaptable for any occasion.
Kid-Friendly Fun: Involve your little chefs! Making mochi can be a delightful activity to engage children in the kitchen.
Quick Preparation: Just a few steps and you have delicious mochi ready to bake—no elaborate techniques required.
Gluten-Free & Vegan: This recipe caters to various dietary needs without compromising on taste, ensuring everyone can enjoy a bite.
Perfect Party Treat: Serve mochi at your next gathering, and watch them disappear—everyone will be reaching for just one more piece!
Looking for more delicious options? Try these Lemon Truffles for a sweet complement or flavor your mochi with a twist of Greek Lemon Rice as a savory side!
Best Mochi Ingredients
• Let’s gather everything you need to make the Best Mochi Recipe!
For the Mochi Base
- Mochiko Flour – This essential ingredient gives mochi its signature chewy texture and cannot be substituted with regular rice flour.
- Granulated Sugar – This adds just the right amount of sweetness; feel free to adjust to your taste!
- Baking Powder – Essential for a light, fluffy texture; don’t skip this crucial ingredient!
- Water – This helps to blend everything together and forms the batter.
- Coconut Milk – Adds a creamy richness; alternatives like almond or oat milk can be used, though they may change the flavor slightly.
- Vanilla Extract – Provides a lovely aroma and flavor boost; optional, but can be swapped for any extract you prefer.
- Food Coloring – Use this for a fun visual touch that can elevate any occasion!
For Dusting
- Potato Starch – This key ingredient keeps your mochi from sticking together; cornstarch works as a suitable substitute too.
With these ingredients in hand, you’re ready to create your very own batch of delicious homemade mochi! Enjoy the process and happy cooking!
Step‑by‑Step Instructions for Best Mochi Recipe
Step 1: Preheat the Oven
Start by preheating your oven to 350°F (175°C). This initial step is crucial as it ensures your mochi will bake evenly. While the oven heats up, gather your ingredients and make sure your baking equipment is ready for the next steps.
Step 2: Mix Dry Ingredients
In a medium mixing bowl, combine 1 cup of mochiko flour, 1/2 cup of granulated sugar, and 1 teaspoon of baking powder. Whisk them together until well-blended, ensuring there are no lumps. This mixture is the foundation for your Best Mochi Recipe, contributing to its delightful chewy texture.
Step 3: Combine Wet Ingredients
In a large bowl, whisk together 1 cup of water, 1 cup of coconut milk, and 1 teaspoon of vanilla extract until smooth. If desired, add a few drops of food coloring to give your mochi a fun hue. This step builds the flavorful base of your mochi batter, ready for the dry ingredients.
Step 4: Blend Wet and Dry Ingredients
Gradually add the dry ingredient mixture into the wet ingredients, stirring continuously with a spatula until completely smooth. Be sure to scrape the sides and bottom of the bowl to incorporate everything thoroughly. This batter should be soft and slightly thick, which is what you’re aiming for in this Best Mochi Recipe.
Step 5: Prepare the Baking Pan
Take a 9×13 inch baking pan and spray it generously with non-stick cooking spray. This ensures easy removal of the baked mochi later on. Once prepared, pour your mochi batter into the pan, spreading it evenly across the surface to ensure uniform baking.
Step 6: Cover and Bake
Cover the filled baking pan tightly with aluminum foil to trap steam, which keeps the mochi soft and chewy. Place it in the preheated oven and bake for about 60 minutes. You’ll know it’s ready when the edges start to pull away from the pan and the center looks set.
Step 7: Cool the Mochi
Once baked, remove the pan from the oven and let it cool completely at room temperature. This cooling period is essential as it allows the mochi to firm up and makes it easier to cut. Patience is key for achieving that perfect chewy texture!
Step 8: Dust and Cut
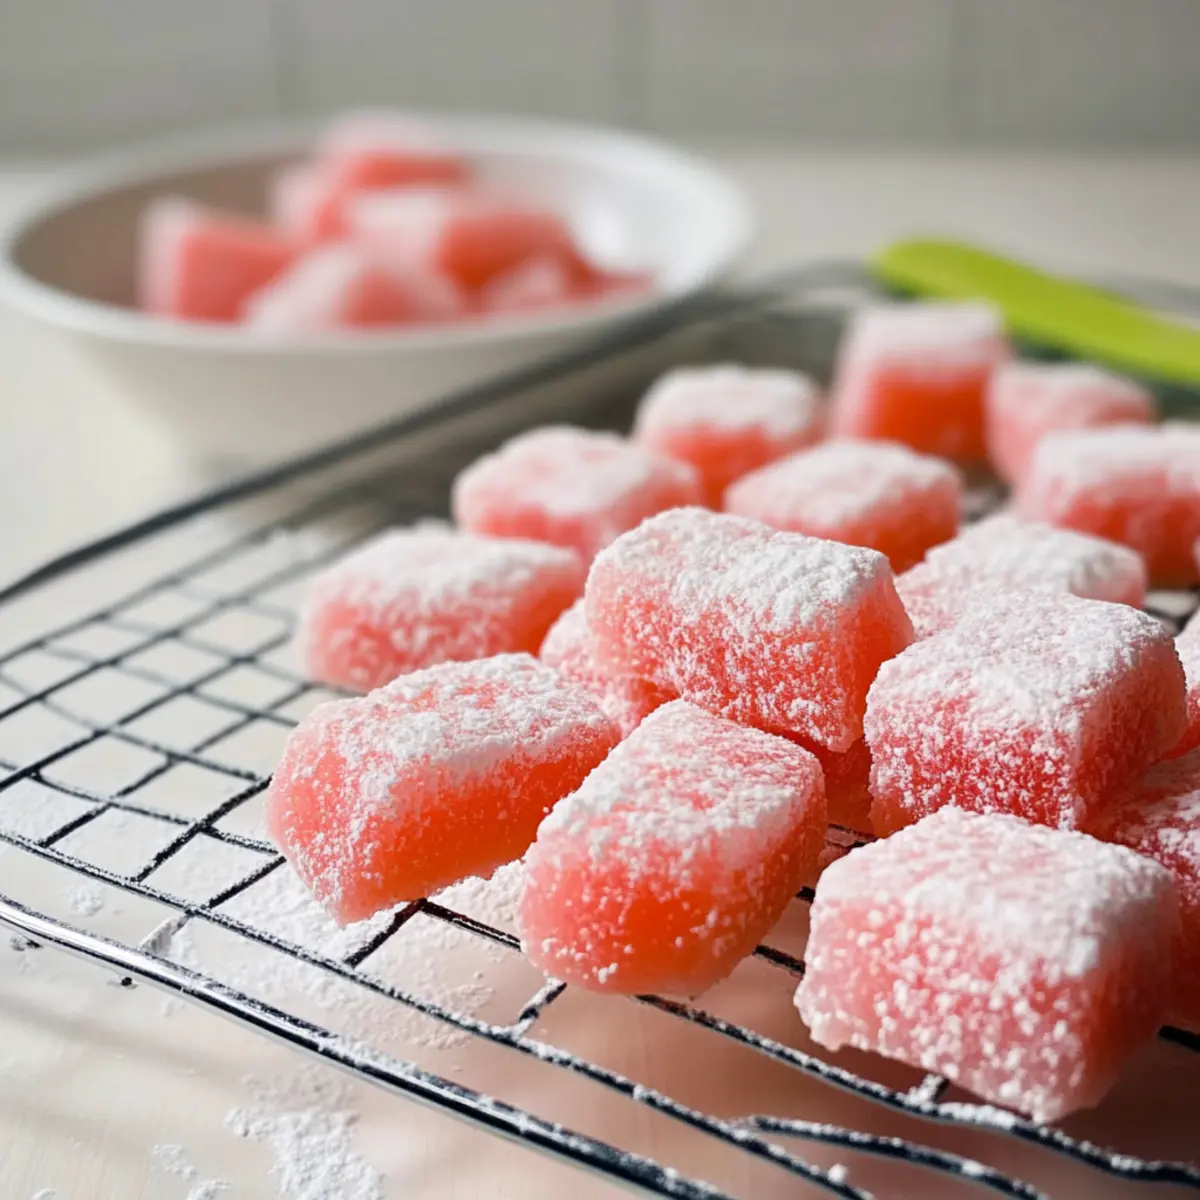
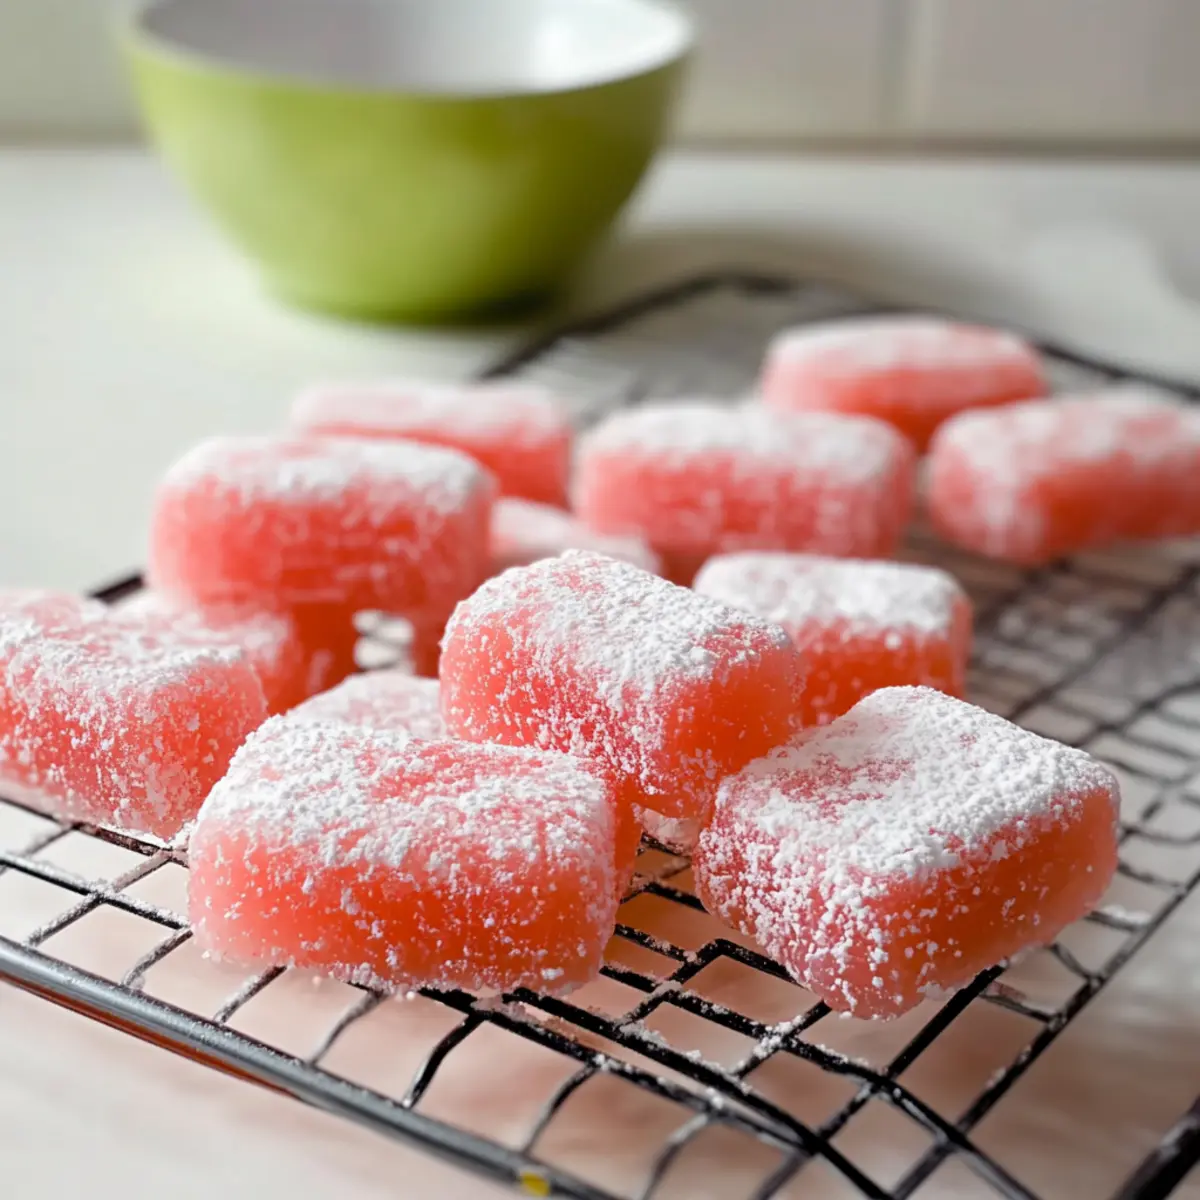
Lightly dust a clean work surface with potato starch to prevent sticking. Invert the cooled mochi onto the surface, allowing it to release from the pan. Slice the mochi into bite-sized rectangles or squares, then coat each piece generously with additional potato starch to keep them from sticking together.
Step 9: Serve and Store
Your delightful batch of Best Mochi Recipe is ready to be enjoyed! Serve it fresh at room temperature as a treat, or store any leftovers in an airtight container at room temperature for up to 2-3 days. Remember, don’t refrigerate, as this can harden the mochi—keep it soft and chewy for the perfect indulgence.

Make Ahead Options
These delightful mochi treats are perfect for meal prep enthusiasts! You can prepare the batter for the Best Mochi Recipe up to 24 hours in advance. Simply mix all your ingredients (mochiko flour, sugar, baking powder, water, coconut milk, and vanilla extract) and store the batter in an airtight container in the refrigerator. This keeps the flavors fresh and saves you precious time on busy days. When you’re ready to bake, simply pour the chilled batter into your prepared pan and bake as directed. Rest assured, your mochi will still turn out just as delicious and chewy—perfect for sharing with family or indulging in a sweet treat at any occasion!
What to Serve With The Best Mochi Recipe
Imagine cozying up with a warm cup of tea and a delightful plate of mochi, creating a perfect blend of flavors and textures.
- Green Tea: This slightly bitter beverage balances the sweetness of mochi, offering a traditional pairing that feels authentically Japanese.
- Fresh Fruit Medley: A vibrant array of strawberries, mangoes, and kiwi brings a refreshing contrast to the chewy mochi for a colorful, satisfying snack.
- Sweet Dipping Sauce: A drizzle of chocolate or caramel sauce adds a decadent touch, creating a delightful burst of flavor with each bite.
- Coconut Sorbet: The smooth and creamy texture complements the mochi’s chewiness while enhancing the coconut flavor in the treat, making it feel like a tropical escape.
- Matcha Latte: This milky, earthy drink complements the mochi perfectly and brings a lovely touch of indulgence to your dessert experience.
- Crushed Nuts: Sprinkle some crushed almonds or walnuts on top for a satisfying crunch that contrasts beautifully with the soft mochi texture.
- Sesame Balls: Keep the Asian theme going with these sweet, chewy treats that share a similar texture profile, inviting delightful comparisons.
- Mochi Ice Cream: Elevate your mochi experience by pairing it with mochi ice cream for an exciting mix of temperatures and textures that’s simply irresistible.
Best Mochi Recipe Variations
Feel free to customize this delightful treat with these fun ideas to make your mochi experience even more special!
-
Matcha Magic: Add 2 tablespoons of matcha powder for a vibrant green tea flavor that pairs beautifully with the sweet mochi base. This subtle bitterness will elevate your dessert with every chewy bite!
-
Fruity Fusions: Incorporate a teaspoon of fruit extracts like strawberry, mango, or banana into the wet ingredients for a burst of fruity goodness. This twist will delight kids and adults alike with its deliciously playful flavors.
-
Ube Vibes: Try substituting around 1/2 cup of the mochiko flour with ube powder to infuse a beautiful purple color and a unique, nutty flavor. This exotic ingredient has a way of turning every mochi into a conversation starter!
-
Chocolate Delight: Stir in 1/4 cup of cocoa powder or melted dark chocolate into your batter for a rich, chocolatey variation. The combination of chocolate and mochi brings a whole new level of indulgence to the table.
-
Coconut Kisses: Use full-fat coconut cream in place of coconut milk to enhance the tropical flavor and creaminess. Each bite will transport you to a sunny paradise, making it a perfect treat for summer gatherings.
-
Spicy Surprise: Add a pinch of cayenne pepper or chili powder to the batter for a sweet and spicy sensation! The warmth from the spice will create a delightful contrast to the chewy sweetness of the mochi, making it an exciting flavor adventure.
-
Themed Colors: Use different food colorings to create mochi in your favorite colors for holidays or special occasions. Imagination is your only limit, and your delightful creations are sure to be a hit at any gathering!
-
Nuts and Seeds: Fold in chopped nuts or seeds like sesame or pistachios for extra crunch and flavor. This texture twist provides a delightful contrast to the chewy softness of the mochi itself.
As you explore these variations, you’ll open the door to exciting flavor possibilities! And if you’re craving something sweet to complement your mochi, don’t forget to check out these delectable Lemon Truffles or add a tangy twist to your meal with some Greek Lemon Rice!
Expert Tips for the Best Mochi Recipe
-
Pan Choice: Choose a light-colored metal baking pan to ensure even cooking, as darker pans can cause over-baking.
-
Cooling Time: Allow the mochi to cool completely before cutting. This helps maintain that signature chewy texture, preventing wastage.
-
Dust Generously: Be generous with potato starch when cutting and storing your mochi to prevent any sticking. A little extra love goes a long way!
-
Flavor Boost: Don’t hesitate to experiment! Incorporate flavored extracts or powdered ingredients like matcha with this Best Mochi Recipe for a unique twist.
-
Storage Tips: Keep leftovers in an airtight container at room temperature to maintain chewiness. Avoid refrigeration as it can lead to hard mochi.
How to Store and Freeze Mochi
Room Temperature: Store the mochi in an airtight container at room temperature for up to 2-3 days to keep its delightful chewiness.
Freezer: For longer storage, freeze the mochi pieces in a single layer on a baking sheet. Once frozen solid, transfer them to a zip-top freezer bag where they can last for up to 1 month.
Thawing: To enjoy your frozen mochi, simply let it thaw at room temperature for about 30 minutes or microwave for a few seconds to soften.
Reheating: If needed, warm the mochi in the microwave for about 10-15 seconds to restore its chewy texture, ensuring it’s perfect for indulging again!
The Best Mochi Recipe FAQs
What type of flour should I use for mochi?
Absolutely! You should use mochiko flour, which is specifically designed for making mochi. It provides the essential chewy texture that makes mochi so delightful. Regular rice flour won’t deliver the same results, so be sure to get the right one!
How should I store leftover mochi?
To maintain the perfect chewy texture of your mochi, store it in an airtight container at room temperature. Enjoy it within 2-3 days for the best experience. Avoid refrigeration, as it may harden the mochi and ruin that beloved softness you’re looking for!
Can I freeze mochi for later?
Yes, you can! To freeze your mochi, first cut it into bite-sized pieces and place them in a single layer on a baking sheet. Freeze until solid, then transfer the pieces to a zip-top freezer bag. They can be stored in the freezer for up to 1 month. When you’re ready to enjoy, simply thaw at room temperature for about 30 minutes or microwave for a few seconds to soften.
What do I do if my mochi is too sticky?
If your mochi is overly sticky, it’s likely that it didn’t have enough potato starch during cutting or storage. Make sure to coat your work surface and the pieces liberally with potato starch. Additionally, if you find that it’s too soft after baking, allow it to cool completely before cutting to achieve the right texture.
Is this mochi suitable for people with allergies?
This mochi recipe is vegan and gluten-free, making it a great option for many dietary needs. However, ensure you’re aware of specific allergies, like coconut for those with tree nut sensitivities. Consider using substitutes like almond milk or oat milk as alternatives to coconut for flavor adjustments.
What flavor variations can I try?
The possibilities are endless! Get creative by adding matcha powder for a green tea twist, fruit extracts for a burst of flavor, or even colored food dyes for themed mochi. I love experimenting with different flavors, and you’ll be surprised how a small change can make your mochi journey even more exciting!
Deliciously Chewy: The Best Mochi Recipe You'll Love
Ingredients
Equipment
Method
- Preheat your oven to 350°F (175°C). Gather your ingredients.
- In a medium mixing bowl, combine mochiko flour, granulated sugar, and baking powder. Whisk until well-blended.
- In a large bowl, whisk together water, coconut milk, and vanilla extract until smooth. Add food coloring if desired.
- Gradually add the dry mixture to the wet ingredients, stirring until smooth.
- Prepare a 9x13 inch baking pan with non-stick cooking spray. Pour the batter into the pan.
- Cover the pan tightly with aluminum foil and bake for about 60 minutes.
- Remove from the oven and let cool completely at room temperature.
- Dust a clean surface with potato starch, invert the mochi onto it, and cut into bite-sized pieces.
- Serve fresh at room temperature or store leftovers in an airtight container.
Leave a Reply