
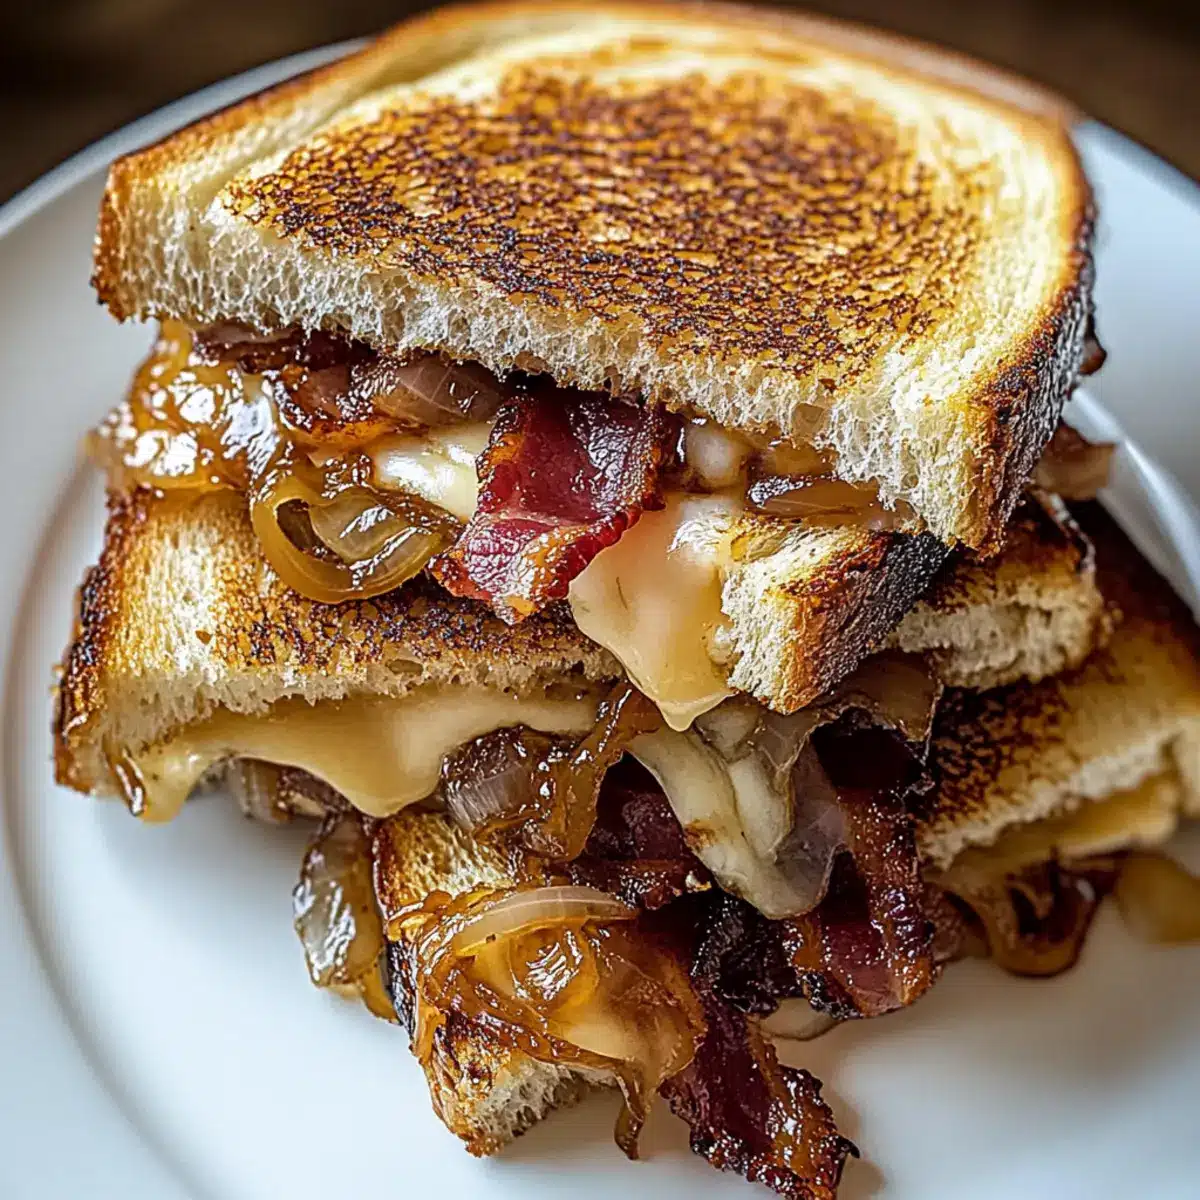
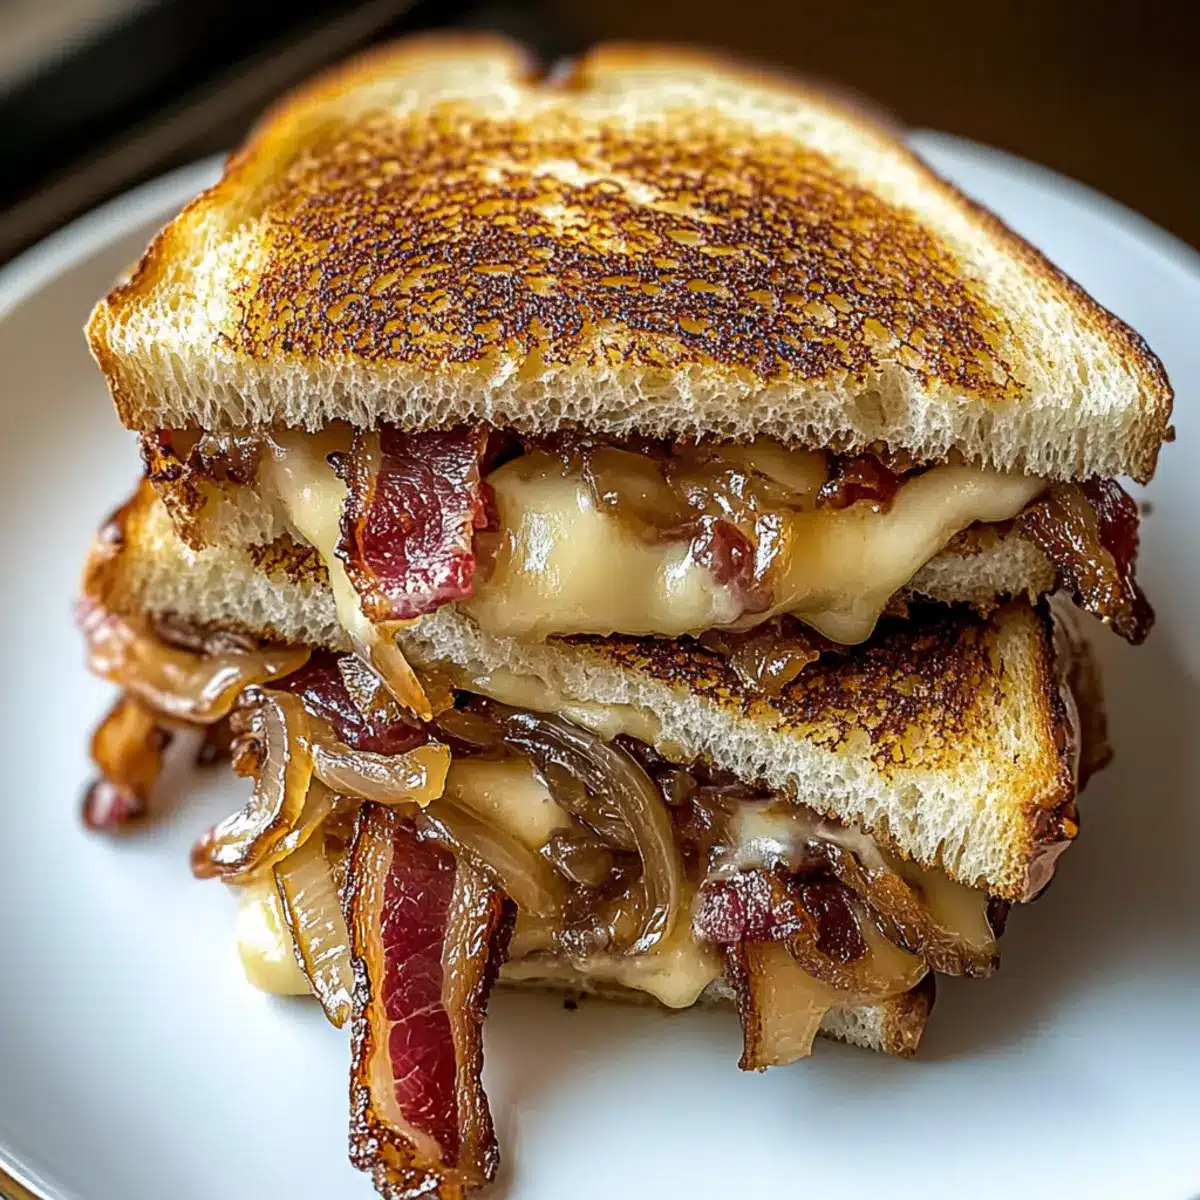
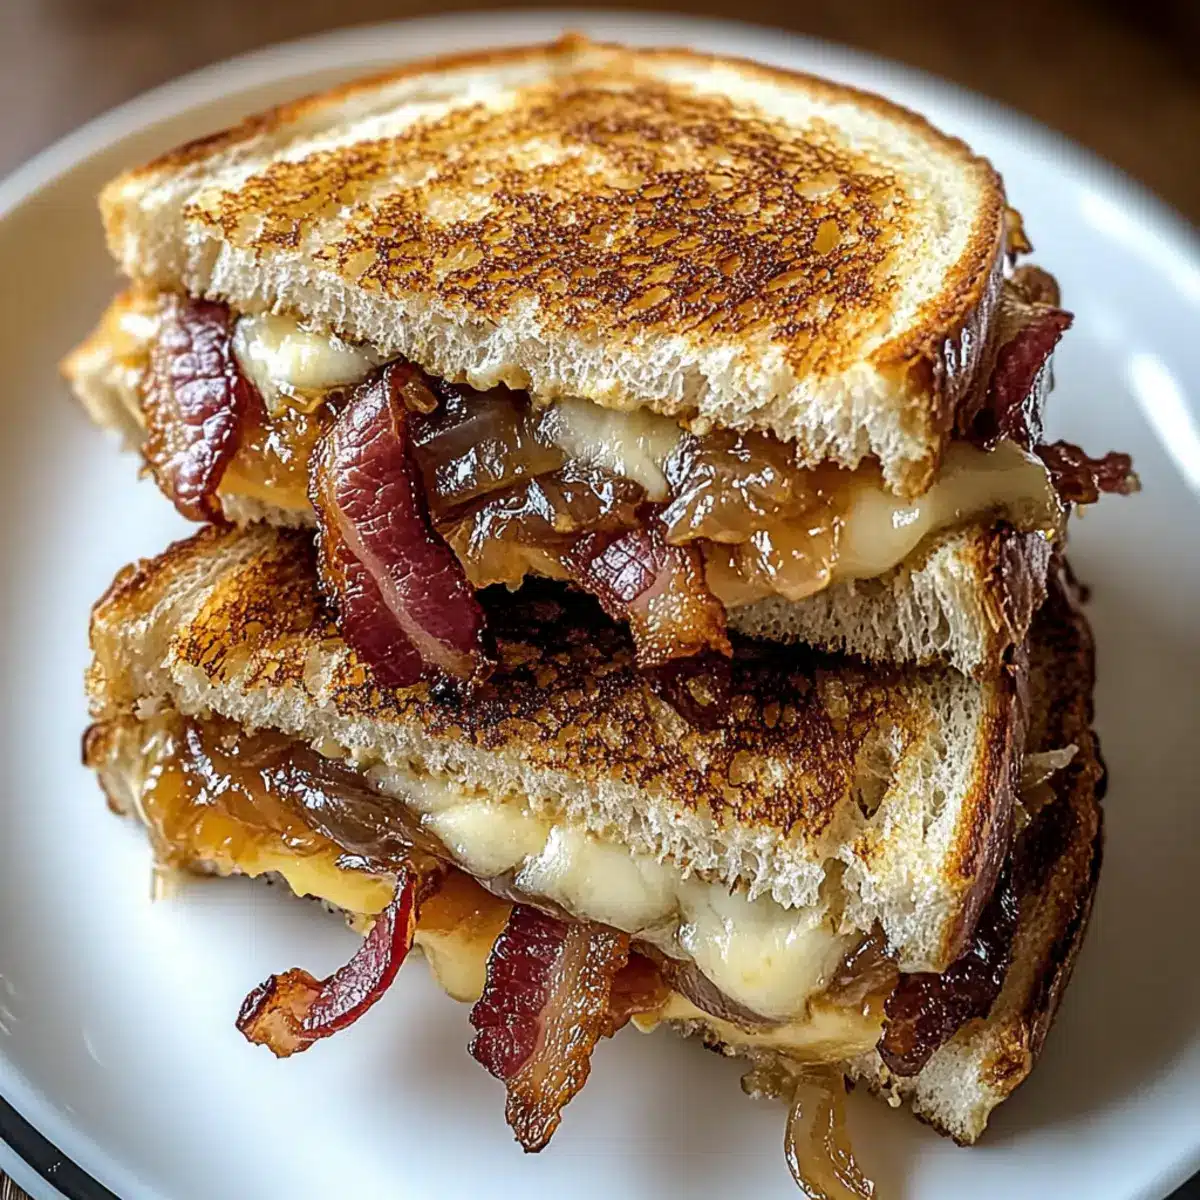
“Grilled cheese makes a quick escape from mundane meals, especially when you elevate it with crispy bacon and savory caramelized onions! My Bacon and Caramelized Onion Grilled Cheese Sandwiches are the epitome of comfort food—perfect for those evenings when you crave something warm and satisfying but don’t want to spend hours in the kitchen. This easy recipe is beginner-friendly, allowing anyone to whip up a delightful sandwich in just over an hour. Each bite reveals a crispy, golden crust cradling the rich melt of gooey cheese, sweet onions, and smoky bacon, making it a guaranteed crowd-pleaser. Plus, it’s ideal for lunch or a cozy dinner—what’s better than that? Ready to dive into this warm, cheesy goodness? Let’s get cooking!”

What makes this grilled cheese unforgettable?
Comfort at its finest: This Bacon and Caramelized Onion Grilled Cheese Sandwich is the perfect remedy for a long day, combining classic flavors that everyone loves.
Beginner-friendly: With simple ingredients and easy steps, even novice cooks can master this delicious dish in no time.
Layered flavors: The sweet caramelized onions beautifully complement the crispy bacon, creating a taste experience that’s both savory and satisfying.
Crispy perfection: Each bite features a golden, crunchy exterior that gives way to a gooey, cheesy interior, making it irresistible.
Versatile: Pair it with classic tomato soup or a fresh salad for a complete meal that will wow family and friends!
Customizable: Feel free to experiment with different cheeses or breads to make this sandwich your own.
Bacon and Caramelized Onion Grilled Cheese Sandwiches Ingredients
For the Sandwich
• Bread – Choose sourdough or a hearty loaf to create a sturdy foundation that won’t get soggy.
• Butter – Softened and slathered on the bread, it ensures a golden, crunchy crust with rich flavor.
• Bacon – Go for crispy, smoky goodness; cook until perfectly crunchy for a delightful texture.
• Onions – Thinly sliced and caramelized; their natural sweetness adds an irresistible depth of flavor.
• Olive Oil – Ideal for sautéing onions, it prevents sticking while enhancing overall taste.
• Brown Sugar – A touch of sweetness during caramelization that beautifully balances the onion’s flavor.
• Balsamic Vinegar – Adds a tangy kick, harmonizing with the sweetness of the onions and enriching the overall profile.
• Cheese – Buddy up with sharp cheddar or Gruyère for that delightful melt; they’re the glue keeping this grilled cheese together.
• Salt and Pepper – Essential seasonings to bring out and elevate the dish’s flavors without overpowering them.
Step‑by‑Step Instructions for Bacon and Caramelized Onion Grilled Cheese Sandwiches
Step 1: Caramelize the Onions
In a skillet, heat 2 tablespoons of olive oil over medium heat. Add 3 thinly sliced onions along with a pinch of salt, and cook for 5–7 minutes until they become translucent. Stir occasionally to ensure even cooking, and watch for the onions to soften and turn a light golden hue, signaling their progression towards sweetness.
Step 2: Deepen the Flavor
To the translucent onions, sprinkle 1 tablespoon of brown sugar and drizzle 1 tablespoon of balsamic vinegar. Stir well and reduce the heat to low. Continue cooking for an additional 15–20 minutes, stirring occasionally. The onions should become deeply caramelized and jam-like, with a rich, golden-brown color that enhances their natural sweetness.
Step 3: Cook the Bacon
In a separate skillet, place 6 slices of bacon and cook over medium heat. Allow the bacon to gently sizzle until it reaches a crispy texture, about 6–8 minutes, flipping midway for even cooking. Once crispy, transfer the bacon to a paper towel-lined plate to drain excess grease and keep it crispy for the Bacon and Caramelized Onion Grilled Cheese Sandwiches.
Step 4: Prepare for Grilling
Preheat a griddle or a nonstick skillet over medium-low heat, allowing it to warm up properly for even grilling. While the griddle heats, gather your ingredients and butter, ensuring that your bread is ready for assembly. The goal is to create a golden, crunchy exterior, so setting the proper temperature is key.
Step 5: Assemble the Sandwiches
Take 4 slices of hearty bread and spread softened butter generously on one side of each slice. Lay the buttered sides down on a clean surface. Begin the layering by placing a slice of gooey cheese on each piece, followed by the caramelized onions and crispy bacon, and topping with another slice of cheese. Complete with remaining bread slices, ensuring all layers are secured.
Step 6: Grill the Sandwiches
Carefully place the assembled sandwiches onto the preheated griddle. Cook for about 3–4 minutes, or until the bottom slice turns a rich golden-brown and the cheese begins to melt. Gently flip each sandwich and grill the opposite side for an additional 3–4 minutes, ensuring both sides are crispy and the cheese is perfectly gooey.
Step 7: Rest and Serve
Once golden brown and toasty, remove the Bacon and Caramelized Onion Grilled Cheese Sandwiches from the griddle. Allow them to rest for 1 minute before slicing, which helps the cheese set slightly and ensures a neat cut. Serve warm, and enjoy the delightful blend of crispy bacon and sweet caramelized onions in every flavorful bite.
How to Store and Freeze Bacon and Caramelized Onion Grilled Cheese Sandwiches
Fridge: Store leftover sandwiches in an airtight container for up to 3 days to maintain their flavor and texture. Make sure they are completely cooled before sealing.
Freezer: For longer storage, wrap the sandwiches tightly in plastic wrap and foil. They can be frozen for up to 2 months.
Reheating: To reheat, place the frozen sandwiches directly on a skillet over medium-low heat. Cook for about 5-7 minutes on each side until heated through and the cheese is gooey again.
Separate Storage: For optimal freshness, consider storing caramelized onions and bacon separately in airtight containers; they too can last up to 3 days in the fridge without losing their exquisite flavors.
Make Ahead Options
These Bacon and Caramelized Onion Grilled Cheese Sandwiches are perfect for meal prep, saving you time on busy weeknights! You can prepare the caramelized onions and bacon up to 3 days in advance. Simply store the onions and bacon in separate airtight containers in the refrigerator to maintain their freshness and prevent sogginess. When you’re ready to enjoy your sandwiches, just reheat the caramelized onions and bacon in a skillet or microwave. Assemble the sandwiches by buttering the bread and layering the cheese, onions, and bacon before grilling, ensuring that each bite is just as delicious as when freshly made!
Bacon and Caramelized Onion Grilled Cheese Variations
Feel free to get creative with this scrumptious sandwich that invites flavor and texture upgrades!
-
Healthier Option: Swap out the bacon for turkey bacon or a plant-based alternative to lighten the sandwich while keeping it delicious.
-
Cheese Variety: Experiment with different melting cheeses like Monterey Jack or mozzarella for a unique taste adventure. Each choice brings its own charm to the gooey profile.
-
Whole Grain Twist: Use whole grain or sprouted bread for added nutrition and a lovely nuttiness, brushing the outside with olive oil instead of butter.
-
Veggie-Focused: Add roasted bell peppers or sautéed mushrooms for extra flavor and fiber. These morsels will enhance both texture and taste.
-
Spicy Kick: Incorporate jalapeños or sriracha for those who love a little heat. The spice combines beautifully with the sweetness of the caramelized onions, creating an exciting balance of flavors.
-
Herb Infusion: Use a sprinkle of fresh herbs like thyme or rosemary mixed in with your cheese for an aromatic lift that elevates the entire sandwich experience.
-
Savory Spread: Spread a layer of pesto on the inner bread slices before assembling for an extra zing of flavor. The herbaceous notes will mingle wonderfully with the bacon and onions.
-
Sweet Surprise: Add a thin layer of fig jam between the layers to introduce a delightful sweetness that complements the savory notes. This unexpected twist will have family and friends asking for seconds!
Ready to dive into your own custom creation? Pair it with classic sides like a fresh salad or even a comforting bowl of classic tomato soup for a delightful meal experience!
Expert Tips for Bacon and Caramelized Onion Grilled Cheese Sandwiches
-
Slow Cook Onions: Patience is key! Cook your onions slowly over low heat for 30 minutes to develop their natural sweetness fully, avoiding any burnt bits.
-
Choose the Right Cheese: Opt for cheeses that melt beautifully, like sharp cheddar or Gruyère, to ensure you achieve that signature gooey texture in your Bacon and Caramelized Onion Grilled Cheese Sandwiches.
-
Perfectly Crispy Bacon: Make sure your bacon is cooked until crispy; this adds texture contrast and keeps it from becoming chewy when assembled in the sandwich.
-
Monitor the Heat: Use medium-low heat when grilling to allow the sandwich to crisp up without burning, ensuring both the exterior and cheese are perfectly melty and golden.
-
Experiment with Bread: Don’t hesitate to try different types of bread! Sourdough and hearty loaves work best, but whole grain variations can lend a delicious twist while adding health benefits.
What to Serve with Bacon and Caramelized Onion Grilled Cheese Sandwiches
Elevate your meal experience by pairing this delicious sandwich with delightful side dishes and beverages that complement its rich flavors.
-
Classic Tomato Soup: The smooth acidity of tomato soup balances the savory elements of the sandwich, creating a comforting and nostalgic pairing. This combination is a timeless classic that brings warmth to each bite.
-
Crispy Sweet Potato Fries: The sweetness and crunch of perfectly roasted sweet potato fries provide a delightful contrast to the gooey cheese. This pairing adds a vibrant pop of color and nutrition to your meal.
-
Mixed Green Salad: A fresh salad with peppery arugula and a tangy dressing lightens the richness of the grilled cheese. The crisp greens offer a refreshing counterpoint, enhancing the overall dining experience.
-
Garlic Parmesan Roasted Broccoli: Earthy roasted broccoli seasoned with garlic and parmesan introduces a lovely crunch while adding a nutritional boost. This side offers a savory depth that complements the sandwich beautifully.
-
Chilled Sparkling Water with Lemon: Refresh with some bubbly sparkling water that cleanses the palate between bites. A splash of lemon brightens the drink, making it a perfect match for this indulgent meal.
-
Warm Apple Crisp: For dessert, try a warm apple crisp with a scoop of vanilla ice cream. The sweet, spiced apples echo the caramelization in the sandwich, closing off the meal on a heartwarming note.
-
Cranberry Juice Spritzer: A sweet and tart cranberry juice spritzer adds a refreshing zing, balancing the rich flavors of the grilled cheese and keeping the mealtime vibrant.
Explore these delightful pairings to create a satisfying meal that’s truly unforgettable!
Bacon and Caramelized Onion Grilled Cheese Sandwiches Recipe FAQs
What kind of bread is best to use for the Bacon and Caramelized Onion Grilled Cheese Sandwiches?
I recommend using sourdough or a hearty loaf of bread. These types help prevent sogginess and provide a sturdy foundation for all those delicious fillings. A slice of slightly crusty bread adds to the overall crunchiness!
How should I store leftover Bacon and Caramelized Onion Grilled Cheese Sandwiches?
Store any leftover sandwiches in an airtight container in the fridge for up to 3 days. Allow them to cool completely before sealing to maintain their delightful texture.
Can I freeze Bacon and Caramelized Onion Grilled Cheese Sandwiches?
Absolutely! Wrap the sandwiches tightly in plastic wrap and then in foil to prevent freezer burn. They can be frozen for up to 2 months. When ready to enjoy, reheat them directly in a skillet over medium-low heat for 5-7 minutes on each side until they are hot and gooey again.
What if my caramelized onions are not turning sweet?
If your onions aren’t sweetening up, it might be due to cooking them too quickly. Make sure to reduce the heat and cook them slowly for about 30 minutes, stirring occasionally. Patience is key to achieving that perfect caramelization and deep flavor!
Are there any dietary concerns I should be aware of with this recipe?
Definitely keep an eye on the bacon if you’re cooking for anyone with dietary restrictions, as it can be high in sodium and fat. You can substitute it with turkey bacon or a plant-based alternative for a healthier option without sacrificing flavor!
Can I use different types of cheese for the sandwich?
The more the merrier! While sharp cheddar and Gruyère are classic choices for their melting qualities, you can experiment with cheeses like Monterey Jack or mozzarella for a different flavor profile. Just ensure that your cheese melts well for that gooey consistency.
Bacon and Caramelized Onion Grilled Cheese Sandwiches To Wow Your Tastebuds
Ingredients
Equipment
Method
- In a skillet, heat 2 tablespoons of olive oil over medium heat. Add 3 thinly sliced onions along with a pinch of salt, and cook for 5–7 minutes until they become translucent. Stir occasionally to ensure even cooking.
- To the translucent onions, sprinkle 1 tablespoon of brown sugar and drizzle 1 tablespoon of balsamic vinegar. Stir well and reduce the heat to low. Continue cooking for an additional 15–20 minutes.
- In a separate skillet, place 6 slices of bacon and cook over medium heat for 6–8 minutes until crispy. Transfer to a paper towel-lined plate to drain excess grease.
- Preheat a griddle or a nonstick skillet over medium-low heat. Gather your ingredients and butter, ensuring the bread is ready for assembly.
- Spread softened butter generously on one side of each of the 4 slices of bread. Lay the buttered sides down, and layer cheese, caramelized onions, and crispy bacon.
- Place the assembled sandwiches onto the preheated griddle. Cook for 3–4 minutes until the bottom slice is golden-brown and cheese begins to melt. Flip and grill for another 3–4 minutes.
- Remove the sandwiches from the griddle and allow them to rest for 1 minute before slicing. Serve warm.
Leave a Reply