
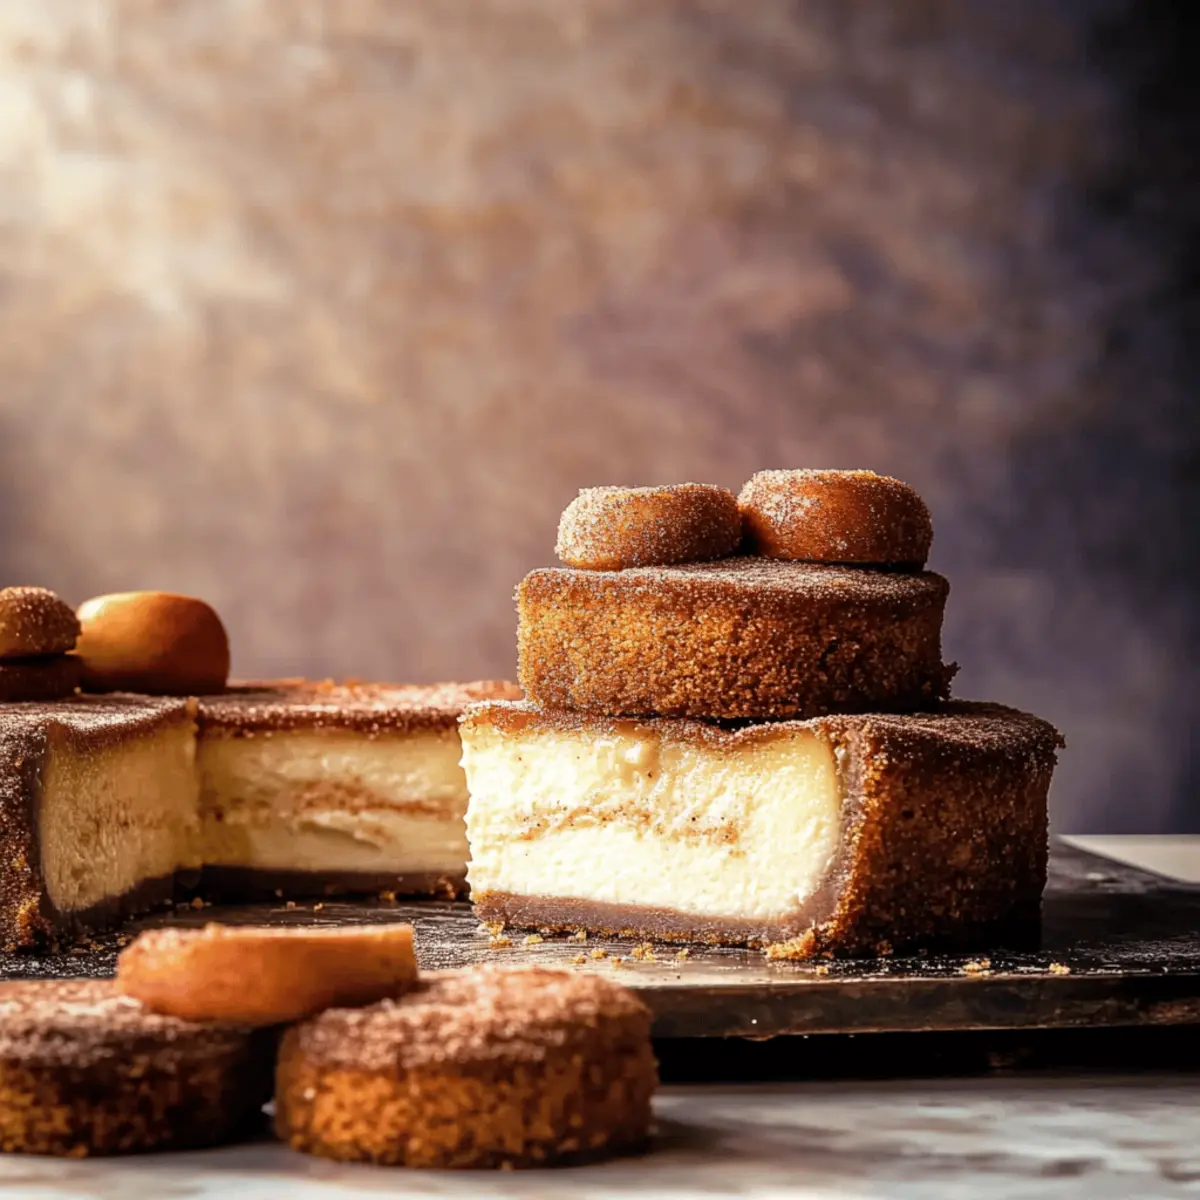
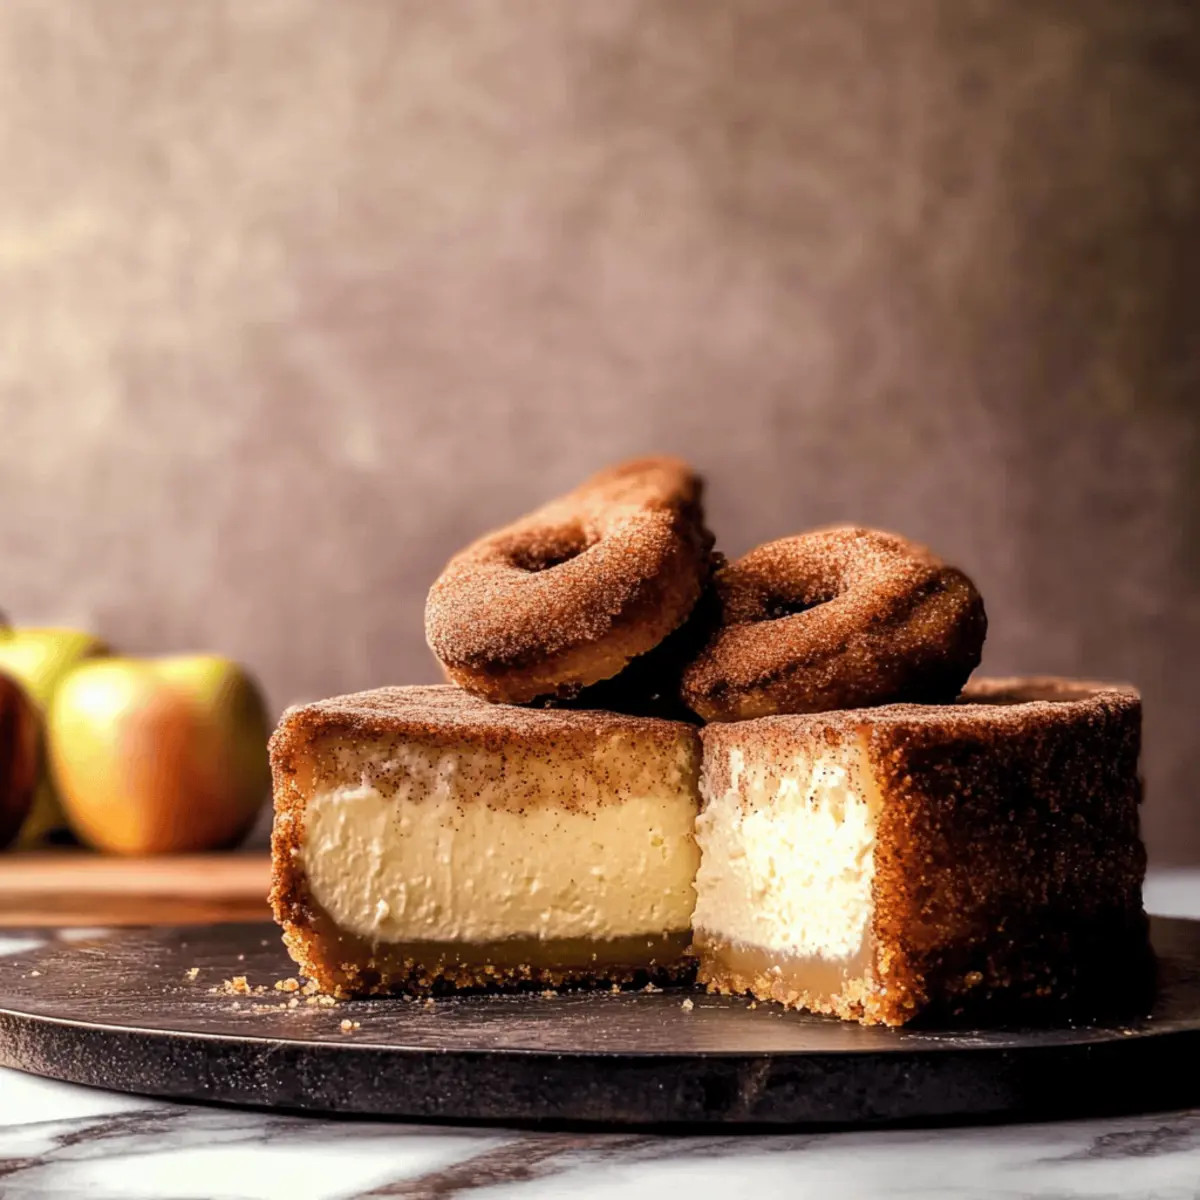
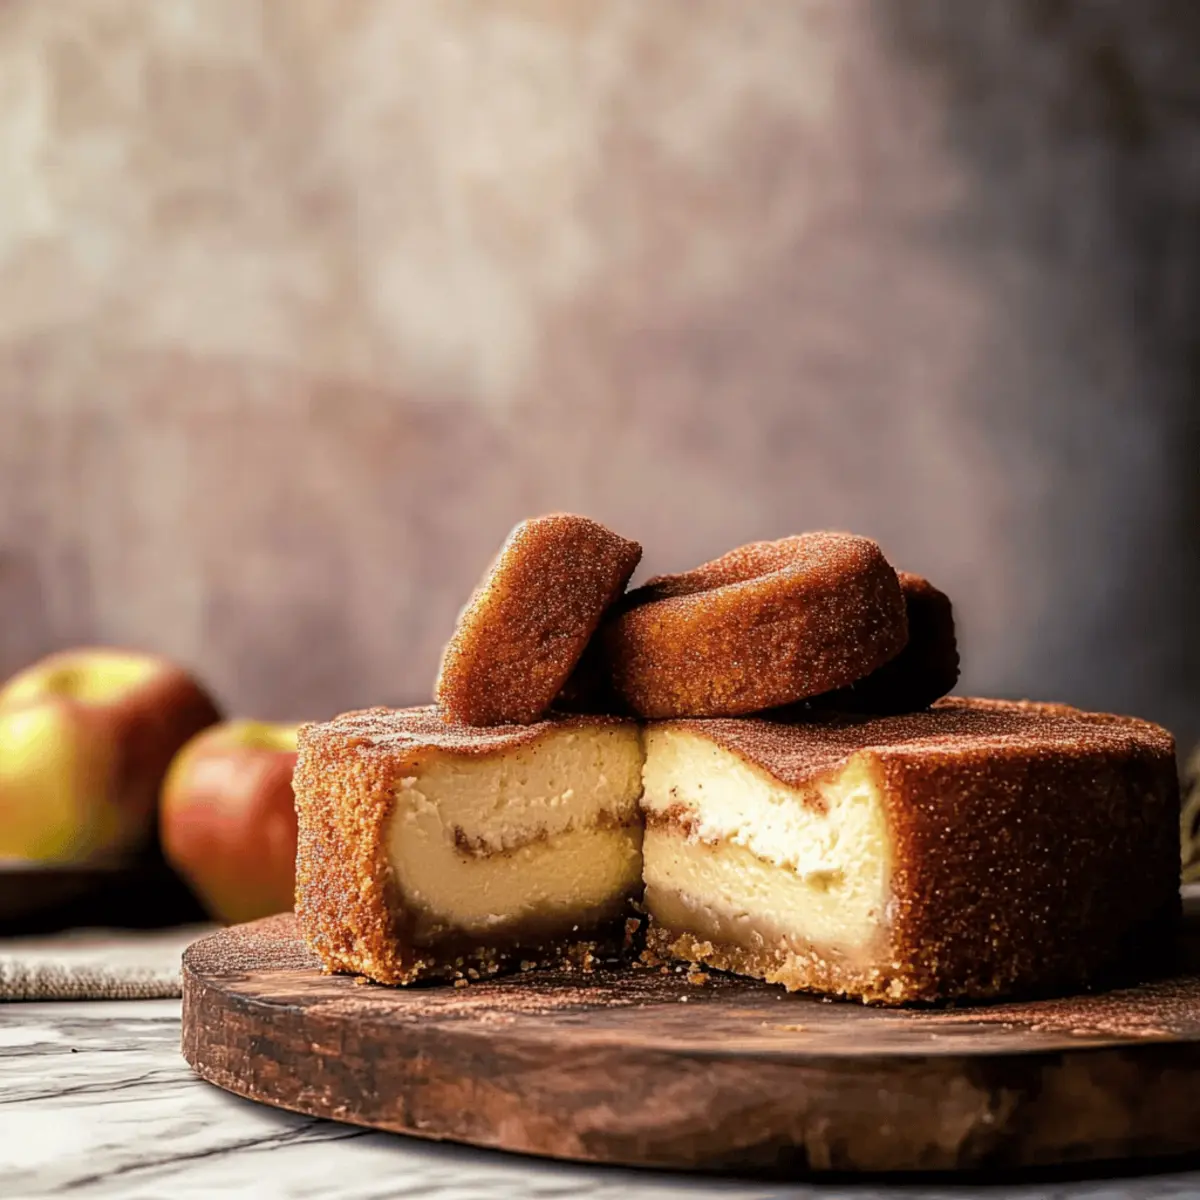
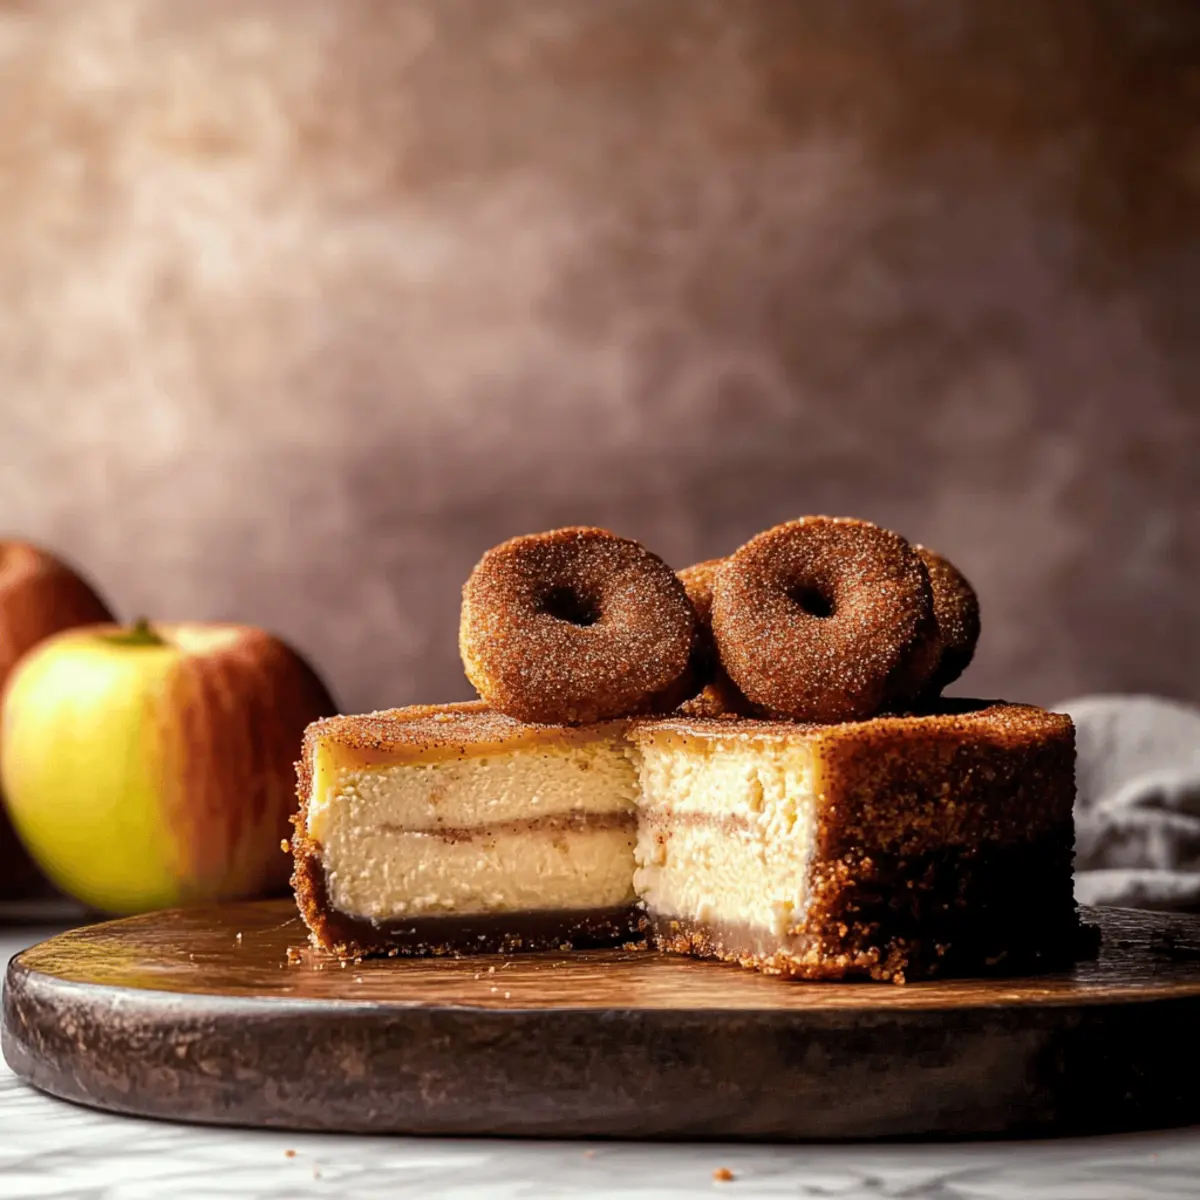
As the leaves begin to blush with autumn colors, I can’t help but feel a pang of excitement for cozy baking afternoons. This Apple Cider Cheesecake perfectly embodies the essence of fall, blending a luscious, creamy texture with the inviting warmth of apple cider and spices. Not only is it an impressive centerpiece for gatherings, but its simplicity allows even novice bakers to create a masterpiece. With a delightful cinnamon sugar crust that brings just the right amount of sweetness, this seasonal dessert is a must-try for anyone looking to elevate their fall baking game. Are you ready to indulge in a slice of creamy comfort that will leave your taste buds dancing? Let’s dive in!
Why is Apple Cider Cheesecake a Must-Try?
Creamy Indulgence: The velvety texture of this cheesecake makes every bite a luxurious experience.
Fall Flavors: Infused with warm spices and apple cider, it captures the essence of the season.
Simplicity: Despite its gourmet look, it’s surprisingly easy to make, perfect for beginners and seasoned bakers alike.
Versatile Options: Whether you prefer mini cheesecakes or bars, this recipe adapts beautifully to your needs.
Impressive Presentation: The sweet cinnamon sugar crust adds an eye-catching finish that’s sure to wow your guests.
Make sure to also check out the Apple Brownies Deliciously for another autumn-inspired treat perfect for gatherings!
Apple Cider Cheesecake Ingredients
• Perfect for fall gatherings or cozy nights in!
For the Crust
- Graham Cracker Crumbs – Provides a buttery and sweet crust; you can substitute with gluten-free crumbs for a gluten-free version.
- Brown Sugar – Adds sweetness and depth; light or dark brown sugar works interchangeably.
- Unsalted Butter – Binds the crust and adds richness; salted butter may be used but will slightly alter the flavor profile.
For the Filling
- Apple Cider – The key flavor ingredient; reduce it down for a concentrated taste, with fresh apple cider being the ideal choice.
- Cream Cheese – Ensures a smooth, creamy texture; be sure it’s at room temperature for easy mixing.
- Granulated Sugar – Sweetens the cheesecake batter to perfection.
- Sour Cream – Contributes creaminess; room temperature helps for the best mixing.
- Vanilla Extract – Enhances the overall flavor; opt for pure vanilla for optimal taste.
- Eggs – Provide structure; they should be at room temperature for even incorporation.
- All-Purpose Flour – Stabilizes the cheesecake filling for a perfect set.
- Ground Cinnamon – Adds warm spice; fresh ground is best for potency.
For the Topping
- Melted Butter – Used for brushing on the cheesecake before adding the sugar topping.
- Cinnamon Sugar Mixture – The finishing touch that adds flavor and a sweet crust.
This Apple Cider Cheesecake is not just a treat; it’s an experience that brings the flavors of fall into your kitchen. Enjoy!
Step‑by‑Step Instructions for Apple Cider Cheesecake
Step 1: Reduce Apple Cider
In a medium saucepan, pour in 1 cup of fresh apple cider. Bring it to a boil over medium heat, then reduce to a simmer, allowing it to cook for about 10-15 minutes or until it thickens and reduces to about ½ cup. Stir occasionally and watch for it to become syrupy. Once reduced, remove it from heat and let it cool completely.
Step 2: Prepare Crust
Preheat your oven to 325°F (165°C). In a mixing bowl, combine 1 ½ cups of graham cracker crumbs, ¼ cup of brown sugar, and ½ cup of melted unsalted butter until well mixed. Press this mixture firmly into the bottom of a springform pan, creating an even layer. Bake in your preheated oven for 12 minutes, then set aside to cool.
Step 3: Mix Filling
Using a stand mixer or electric mixer, beat 24 ounces of softened cream cheese along with 1 cup of granulated sugar for about 2 minutes, or until the mixture is smooth and creamy. Gradually add in the cooled apple cider, 1 cup of sour cream, and 1 teaspoon of vanilla extract, mixing until all ingredients are fully incorporated and smooth without lumps.
Step 4: Add Eggs and Flour
With the mixer on low speed, add 3 large eggs one at a time, mixing just until combined after each addition. Next, sprinkle in 2 tablespoons of all-purpose flour and 1 teaspoon of ground cinnamon. Mix on low just until the flour is incorporated into the cheesecake filling, avoiding over-mixing to maintain a light texture.
Step 5: Water Bath Setup
To prevent cracks in your apple cider cheesecake, prepare a water bath. Wrap the bottom of the springform pan tightly with aluminum foil to prevent water from leaking. Place the pan inside a larger roasting pan and fill the outer pan with hot water until it reaches halfway up the sides of the springform pan.
Step 6: Bake Cheesecake
Carefully pour the cheesecake filling onto the cooled crust, smoothing the top with a spatula. Bake in the preheated oven for 70-80 minutes until the edges are set and the center is slightly jiggly. The cheesecake should be pale and a little puffed; avoid opening the oven during baking for consistent heat.
Step 7: Cool
After baking, turn off the oven and crack the oven door open slightly. Allow the cheesecake to cool in the warm oven for about 30 minutes. Once cooled, remove it from the oven and transfer the cheesecake to a wire rack to cool completely at room temperature. After cooling, refrigerate for at least 6 hours, preferably overnight, to set.
Step 8: Add Topping
Before serving your apple cider cheesecake, brush the top gently with 2 tablespoons of melted butter. Then, evenly sprinkle a cinnamon sugar mixture over the top for an inviting finish. This not only enhances the flavor but adds a delightful crunch that beautifully complements the creamy filling.
Expert Tips for Apple Cider Cheesecake
-
Temperature Matters: Always bring cream cheese and eggs to room temperature for easy blending and a smooth filling.
-
Don’t Skip the Water Bath: This key technique keeps your cheesecake moisture-rich and prevents cracks. Wrap the bottom of the pan tightly in foil before baking.
-
Swirl Wisely: To create beautiful swirls of cinnamon filling, gently swirl with a knife but don’t over-mix; you want distinct layers for that perfect Apple Cider Cheesecake look.
-
Cooling is Crucial: Let the cheesecake cool slowly in the oven with the door cracked for 30 minutes before moving it to a wire rack to prevent sudden temperature changes that can cause cracking.
-
Serve with Care: For a lovely presentation, slice with a warm knife and serve each piece with a dollop of whipped cream and a sprinkle of cinnamon.
-
Storing Leftovers: Keep any leftover cheesecake in an airtight container in the fridge for up to 5 days, or freeze slices for up to 30 days—just thaw before serving!
Storage Tips for Apple Cider Cheesecake
Fridge: Store leftover cheesecake in an airtight container for up to 5 days. Make sure it’s completely cooled before refrigerating to maintain texture.
Freezer: For longer storage, freeze individual slices wrapped tightly in plastic wrap and then foil for up to 30 days. Thaw in the refrigerator before serving.
Reheating: While cheesecake is best enjoyed chilled, if you prefer it warm, reheat individual slices in the microwave for about 15-20 seconds.
Wrapping: To prevent freezer burn, ensure each slice is well-wrapped, keeping that creamy texture of your Apple Cider Cheesecake intact!
What to Serve with Apple Cider Cheesecake
This delightful dessert is perfect for fall gatherings, complemented by warm flavors and comforting textures that invite joy to the table.
-
Creamy Mashed Potatoes: The smoothness of these potatoes pairs beautifully with the sweet spices in the cheesecake, offering a comforting contrast.
-
Honey Roasted Carrots: Their natural sweetness and caramelization enhance the fall flavors, making for an appealing side that compliments the dessert’s richness.
-
Spiced Apple Cider: A warm cup of spiced apple cider echoes the flavors in the cheesecake, creating a cohesive and inviting dining experience.
-
Cranberry Sauce: The tartness of cranberry sauce cuts through the sweetness of the cheesecake, providing a lovely balance to each bite.
-
Pecan Pie Bars: The nutty texture and sweetness of pecan pie bars add another layer of flavor, perfect for those craving variety during dessert time.
-
Vanilla Ice Cream: A scoop of creamy vanilla ice cream adds a silky smooth contrast to the cheesecake’s textures, enticing you with every spoonful.
-
Whipped Cream: A dollop of lightly sweetened whipped cream enhances the cheesecake, offering a light and airy complement to its rich filling.
-
Chai Tea: This spiced tea carries warm notes that resonate with the cinnamon flavors in the cheesecake, rounding out an autumnal meal harmoniously.
-
Caramel Sauce: Drizzling warm caramel over the cheesecake not only enhances its sweetness but adds a sophisticated touch that’s irresistible for any dessert lover.
Make Ahead Options
These Apple Cider Cheesecakes are perfect for meal prep enthusiasts! You can prepare the crust and filling up to 24 hours in advance. Simply follow the first three steps in the recipe, then cover and refrigerate the filling after it’s mixed to maintain its creamy texture. The crust can also be baked, cooled, and stored in an airtight container. When you’re ready to finish, simply pour the filling over the crust and bake as directed. This prep-ahead method not only saves you time on busy days but ensures you have a delicious dessert ready to impress, all while keeping it just as delightful as when freshly made!
Apple Cider Cheesecake Variations
Customize your Apple Cider Cheesecake to suit your taste buds and dietary needs by trying these exciting variations!
-
Mini Cheesecakes:
Divide the batter into muffin cups and bake for 18-20 minutes for delightful individual servings. Perfect for parties, these mini treats maintain all the creamy goodness of the original! -
Cheesecake Bars:
Halve the recipe and bake it in an 8×8 or 9×9 pan for easier serving and sharing. Cut into squares for a fun twist, and you’ll have a crowd-pleaser that’s perfect for picnics! -
Dairy-Free Alternative:
Swap cream cheese with cashew cream and use coconut yogurt instead of sour cream for a creamy, dairy-free dessert. You won’t even miss the dairy with this delicious option! -
Gluten-Free Crust:
Use almond flour or crushed gluten-free cookies to make a fabulous crust without the gluten. This way, everyone can enjoy the flavors of fall! -
Extra Spice:
Increase the ground cinnamon or add a pinch of nutmeg for a bolder, spiced flavor profile. Your guests will love the added warmth with every bite! -
Caramel Drizzle:
Before serving, drizzle some caramel sauce over the top for an indulgent flair. The sweet and rich combination pairs beautifully with the apple cider flavors. -
Pumpkin-Infused:
Mix in half a cup of pumpkin puree for a pumpkin-spice twist to your cheesecake. It’s a delightful way to incorporate another fall favorite into the mix! -
Chocolate Chip Variation:
Stir in some dark chocolate chips for gooey chocolate surprises throughout your cheesecake. The chocolate pairs splendidly with the apple and cinnamon flavors!
Ready to explore these variations? And if you’re looking for another sweet fall delight, don’t forget to check out the Oatmeal Apple Breakfast or the decadent Apple Crumb Cake. Enjoy your culinary adventures!
Apple Cider Cheesecake Recipe FAQs
What type of apple cider should I use?
Absolutely! For the best results, I recommend using fresh apple cider. It has a stronger flavor that complements the cheesecake beautifully. If fresh cider isn’t available, store-bought varieties will work, but opt for 100% pure apple cider instead of diluted or flavored versions.
How should I store leftover cheesecake?
Very good question! Store your leftover Apple Cider Cheesecake in an airtight container in the fridge for up to 5 days. Ensure it’s completely cooled before refrigerating to maintain its creamy texture and flavor.
Can I freeze Apple Cider Cheesecake?
Yes, you can! To freeze individual slices of your cheesecake, wrap them tightly in plastic wrap first, then cover with aluminum foil securely. Properly wrapped, they’ll stay fresh in the freezer for up to 30 days. When you’re ready to indulge, simply thaw them in the refrigerator overnight—easy, right?
What should I do if my cheesecake cracks while baking?
Oh no! If you notice cracks in your cheesecake, don’t fret. This can happen if the cheesecake bakes too quickly due to high heat or if it’s not cooled gradually. To avoid this, always bake in a water bath and turn off the oven with the door slightly ajar right after baking. This allows for a gentle cooldown.
Can I make this cheesecake gluten-free?
Absolutely! To make a gluten-free Apple Cider Cheesecake, simply substitute the graham cracker crumbs with gluten-free cookie crumbs or ground nuts. Double-check that all other ingredients, especially those like vanilla extract, are certified gluten-free to ensure they meet your dietary needs.
Are there any allergy concerns with this recipe?
Yes, you should be cautious! This cheesecake contains dairy (cream cheese, sour cream, and butter) and eggs, which are common allergens. If you have a dairy allergy, you can try using dairy-free cream cheese alternatives and coconut or nut-based milk, but the texture may vary slightly. Always check with your guests about allergies before serving!
Apple Cider Cheesecake: Embrace Fall with Creamy Joy
Ingredients
Equipment
Method
- In a medium saucepan, pour in 1 cup of fresh apple cider and bring it to a boil over medium heat. Reduce to a simmer for 10-15 minutes until it thickens to about ½ cup. Let it cool completely.
- Preheat your oven to 325°F (165°C). Combine 1 ½ cups of graham cracker crumbs, ¼ cup of brown sugar, and ½ cup of melted unsalted butter in a mixing bowl. Press into the bottom of a springform pan and bake for 12 minutes. Set aside to cool.
- Beat 24 ounces of softened cream cheese and 1 cup of granulated sugar for about 2 minutes until smooth. Gradually add cooled apple cider, 1 cup sour cream, and 1 teaspoon vanilla extract, mixing until smooth.
- Add 3 large eggs one at a time, mixing on low speed. Then add 2 tablespoons of all-purpose flour and 1 teaspoon ground cinnamon, mixing just until incorporated.
- Wrap the bottom of the springform pan with aluminum foil. Place it in a larger roasting pan and fill the outer pan with hot water until halfway up the springform pan sides.
- Pour the cheesecake filling onto the cooled crust and smooth the top. Bake for 70-80 minutes until edges are set and center is slightly jiggly. Avoid opening the oven during baking.
- After baking, turn off the oven and crack the door open slightly. Cool in the oven for about 30 minutes. Remove and transfer to a wire rack to cool completely, then refrigerate for at least 6 hours, preferably overnight.
- Brush the top gently with 2 tablespoons of melted butter, then sprinkle cinnamon sugar mixture on top for a delightful finish.
Leave a Reply